For 1990-2009 cars only
Removal Procedure
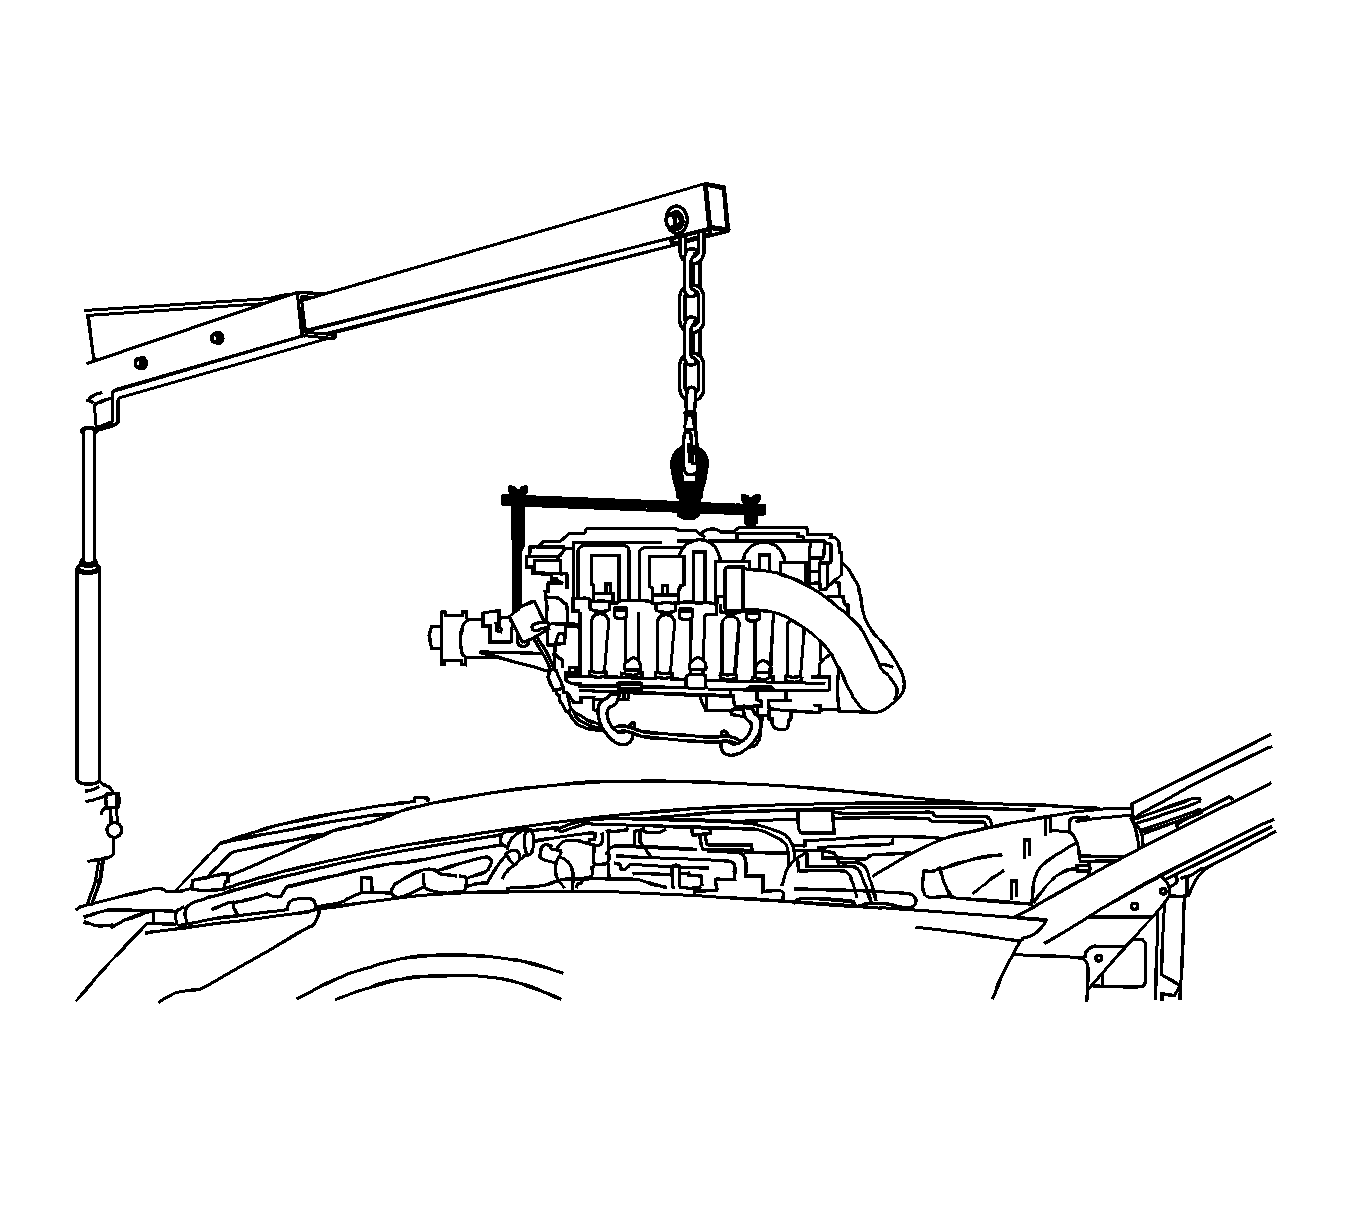
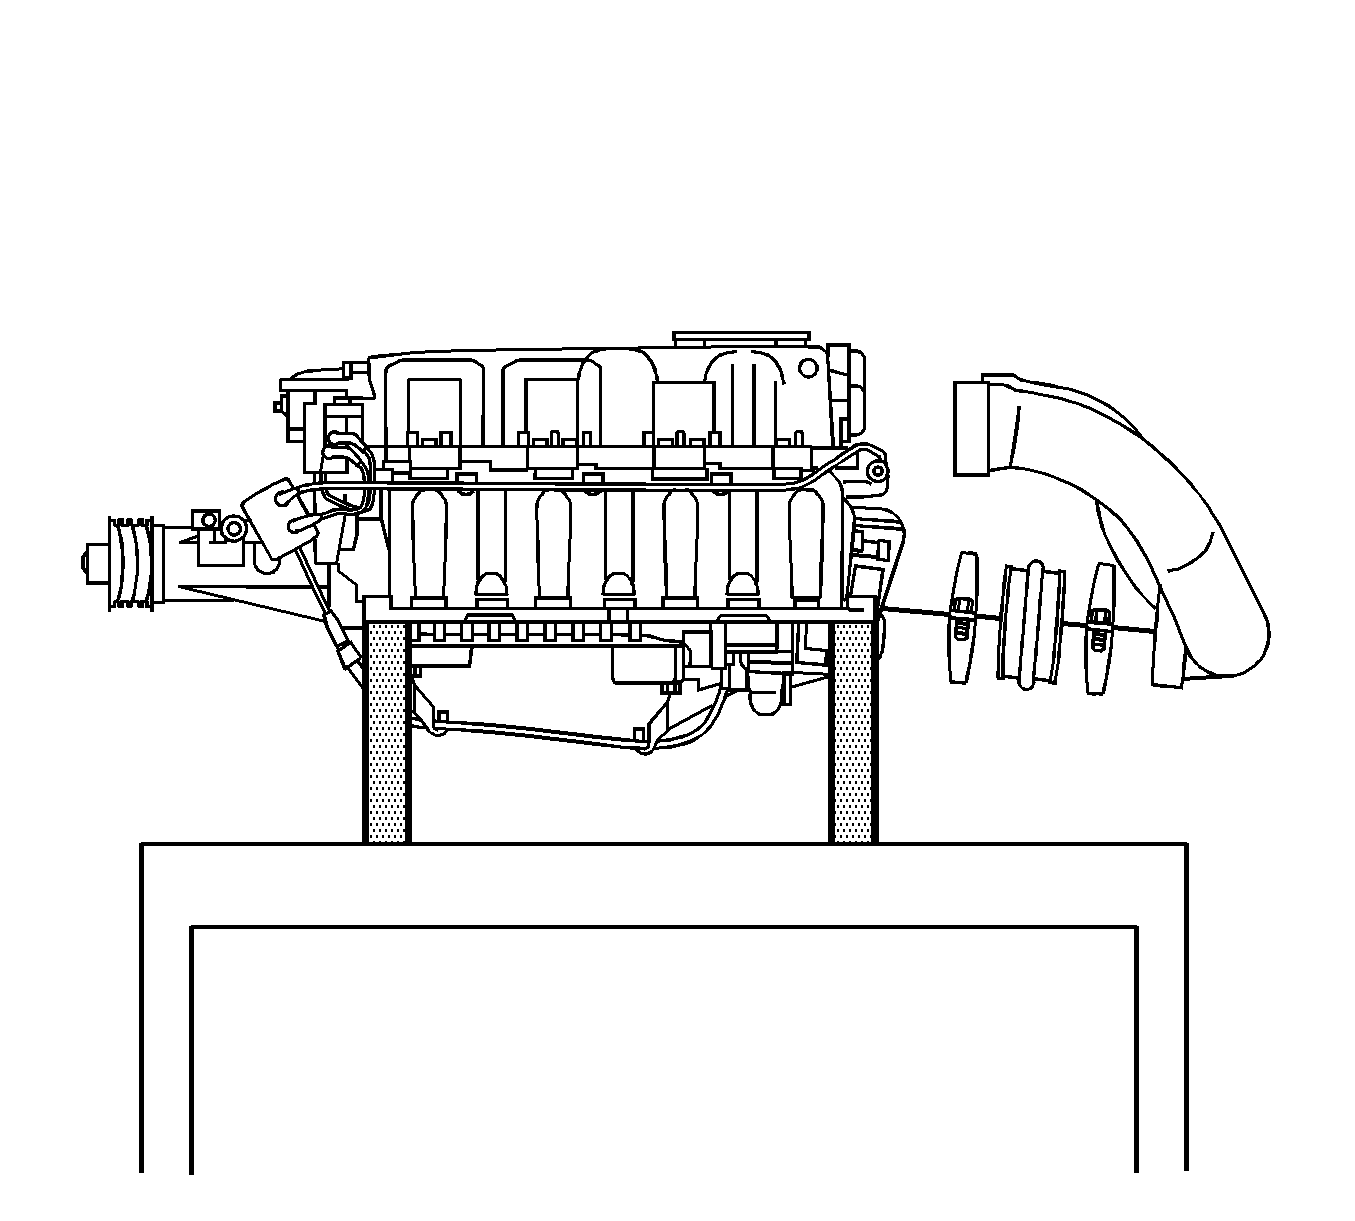
- The supercharger must be removed to remove the rear section of the supercharger inlet duct assembly.
- Remove the engine sight shield. Refer to Intake Manifold Sight Shield Replacement .
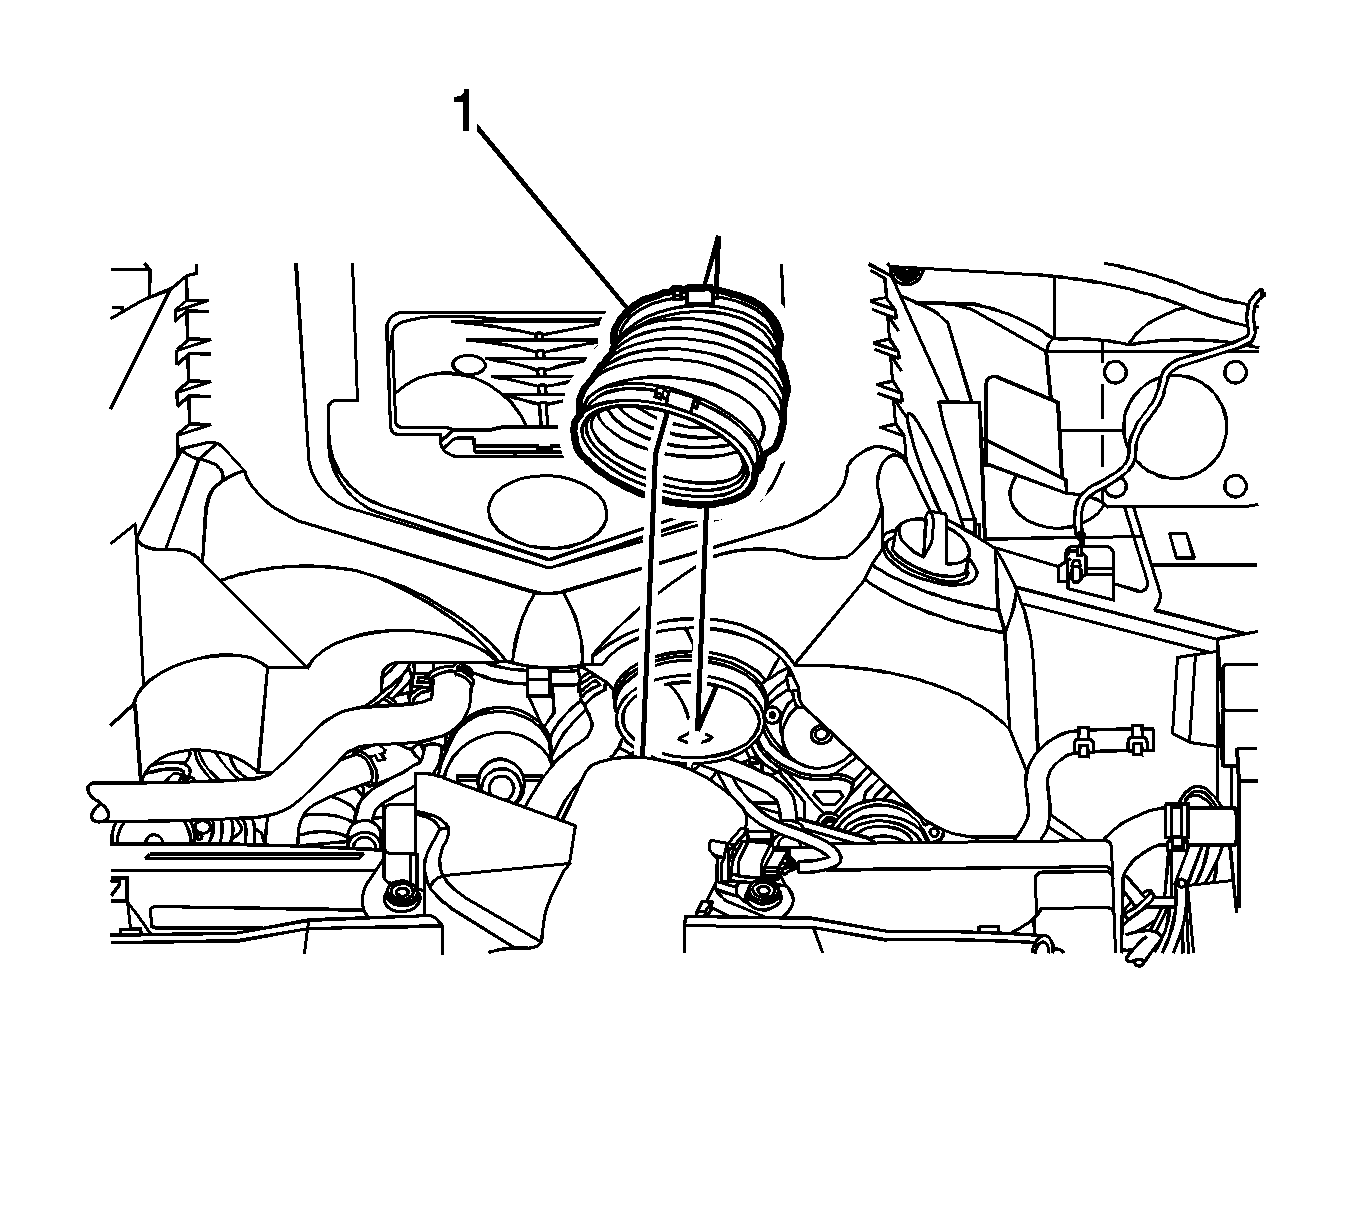
- Remove the air cleaner outlet duct (1). Refer to Air Cleaner Outlet Duct Replacement .
- Disconnect the (PCV) hose fitting (1) from the underside of the inlet duct assembly.
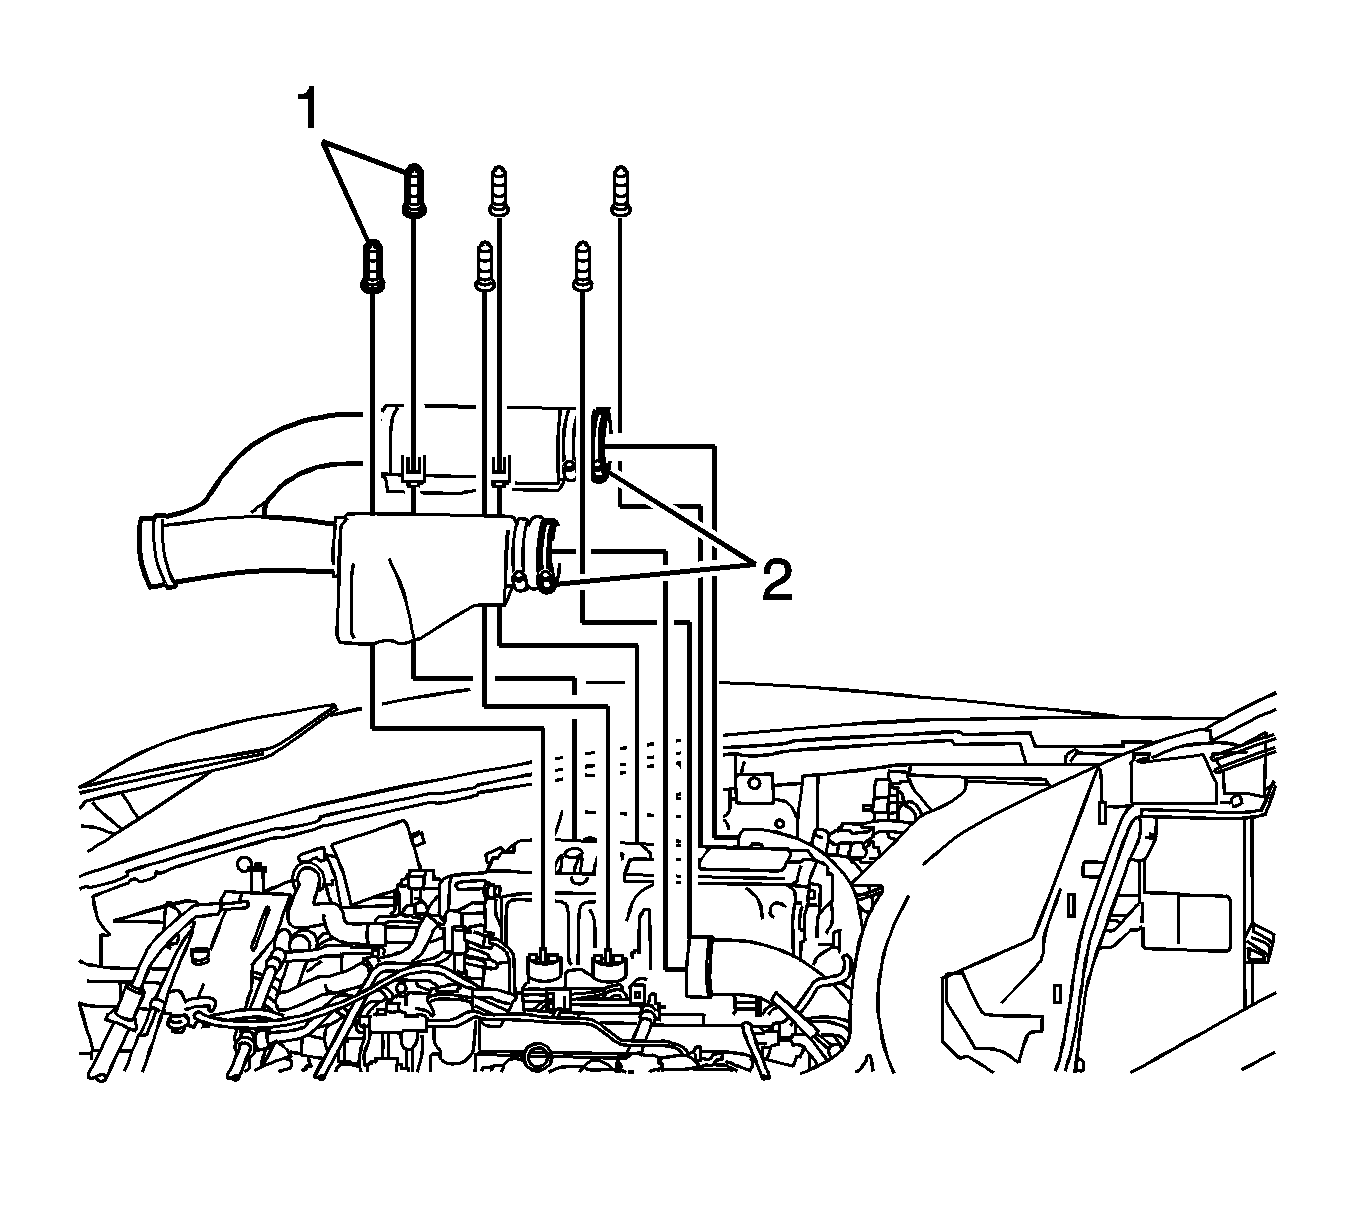
- Loosen the rear screw clamps (2) located between the front and rear section of the inlet duct assembly.
- Remove all the ball studs (1) that retain the inlet duct to the supercharger. There are a total of 6 ball studs.
- Remove the front section of the supercharger inlet duct.
- Remove the hood assembly. Refer to Hood Replacement .
- Remove supercharger assembly. Refer to Supercharger Replacement .
- Loosen the rear screw clamps on the inlet duct seal.
- Remove the rear section of the supercharger inlet duct from the supercharger.
Important: The front section of the supercharger inlet duct assembly can be serviced independently of the rear section.
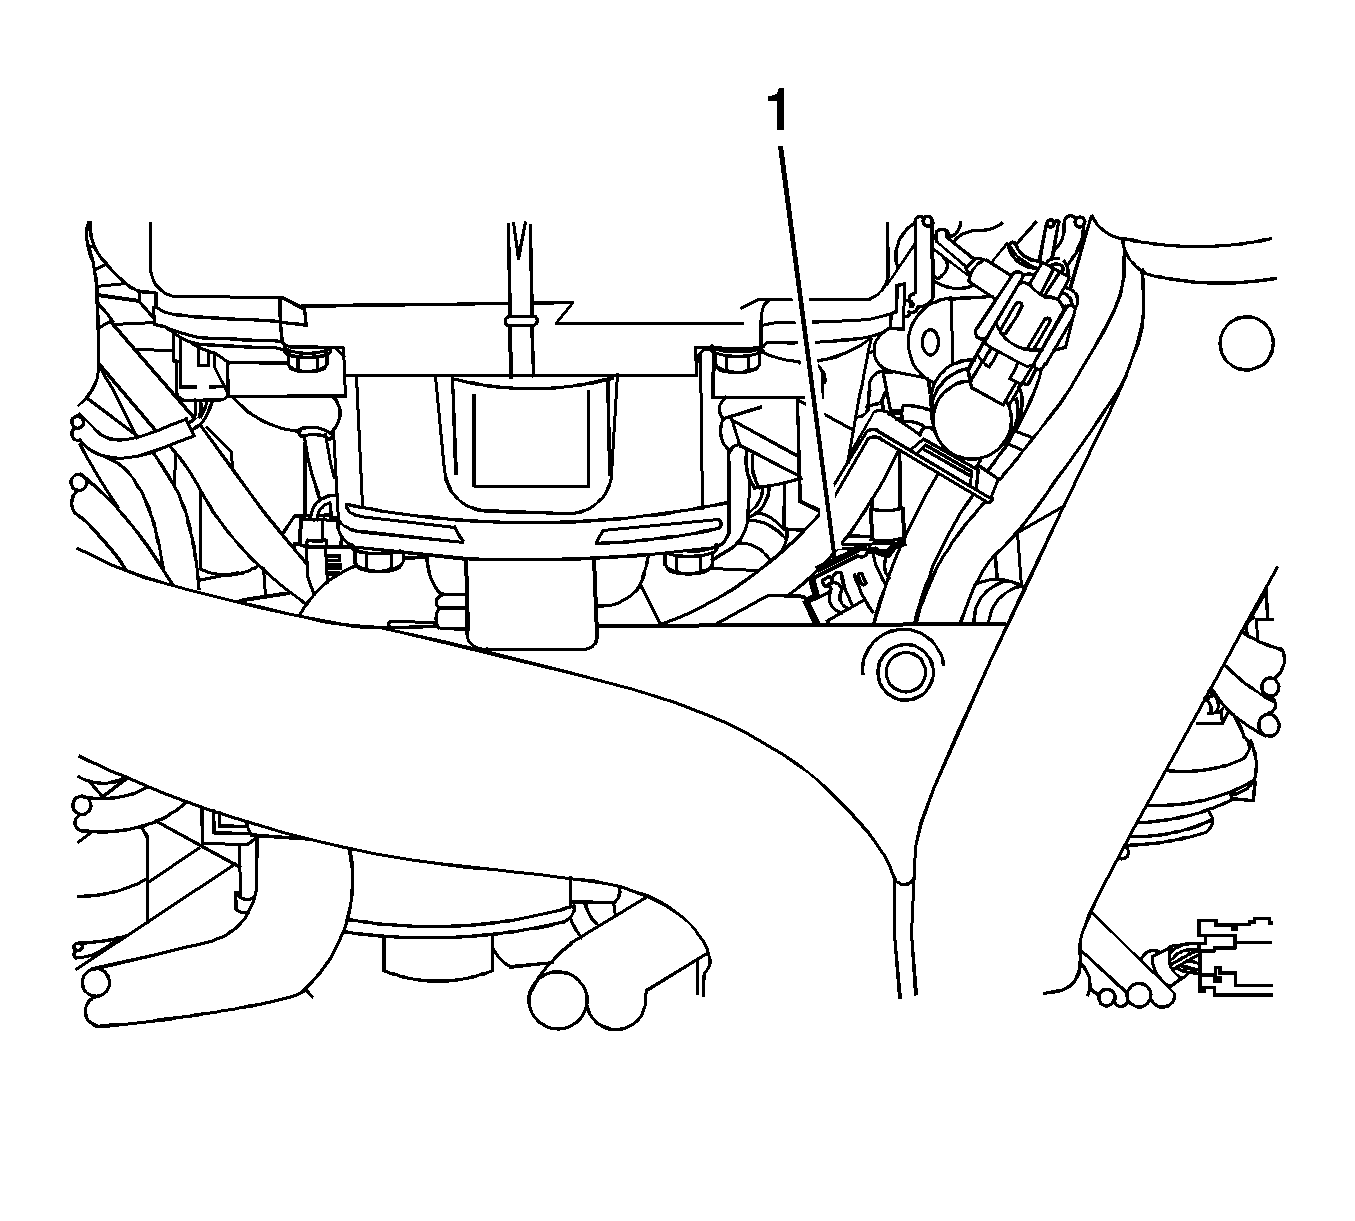
Important: There is a positive crankcase ventilation (PCV) hose fitting on the underside of the supercharger inlet duct.
Installation Procedure
- Install the rear section of the supercharger inlet duct assembly to the supercharger.
- Tighten the rear screw clamps on the inlet duct seal.
- Install the supercharger. Refer to Supercharger Replacement .
- Install the hood assembly. Refer to Hood Replacement .
- Install the front section of the supercharger inlet duct to the vehicle.
- Tighten the inlet duct screw clamps (2).
- Install the ball studs (1) that retain the inlet duct to the supercharger. There are a total of 6 ball studs.
- Connect the (PCV) hose fitting (1) to the underside of the inlet duct assembly.
- Install the air cleaner outlet duct (1). Refer to Air Cleaner Outlet Duct Replacement .
- Install the engine sight shield. Refer to Intake Manifold Sight Shield Replacement .

Notice: Refer to Fastener Notice in the Preface section.
Tighten
Tighten the supercharger inlet seal screw clamps to 2.5 N·m (20 lb in).


Tighten
Tighten the supercharger inlet seal screw clamps to 2.5 N·m (20 lb in).
Tighten
Tighten the supercharger inlet duct ball studs to 10 N·m (89 lb in).


