For 1990-2009 cars only
Removal Procedure
- Raise the vehicle. Refer to Lifting and Jacking the Vehicle .
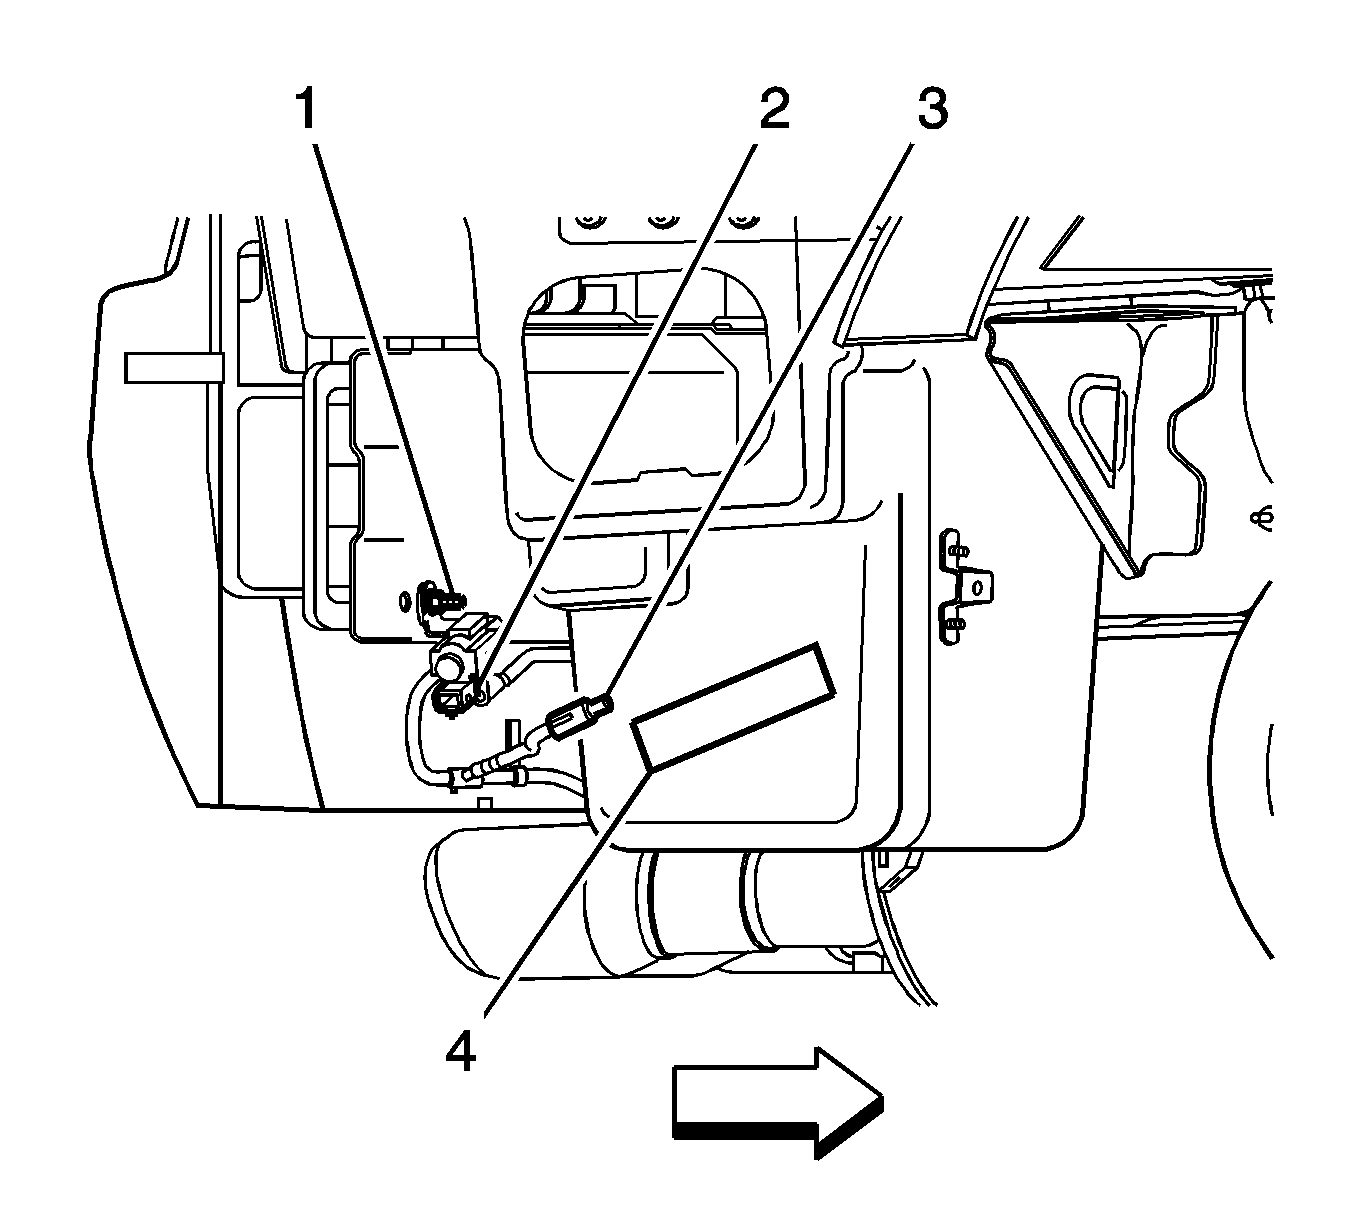
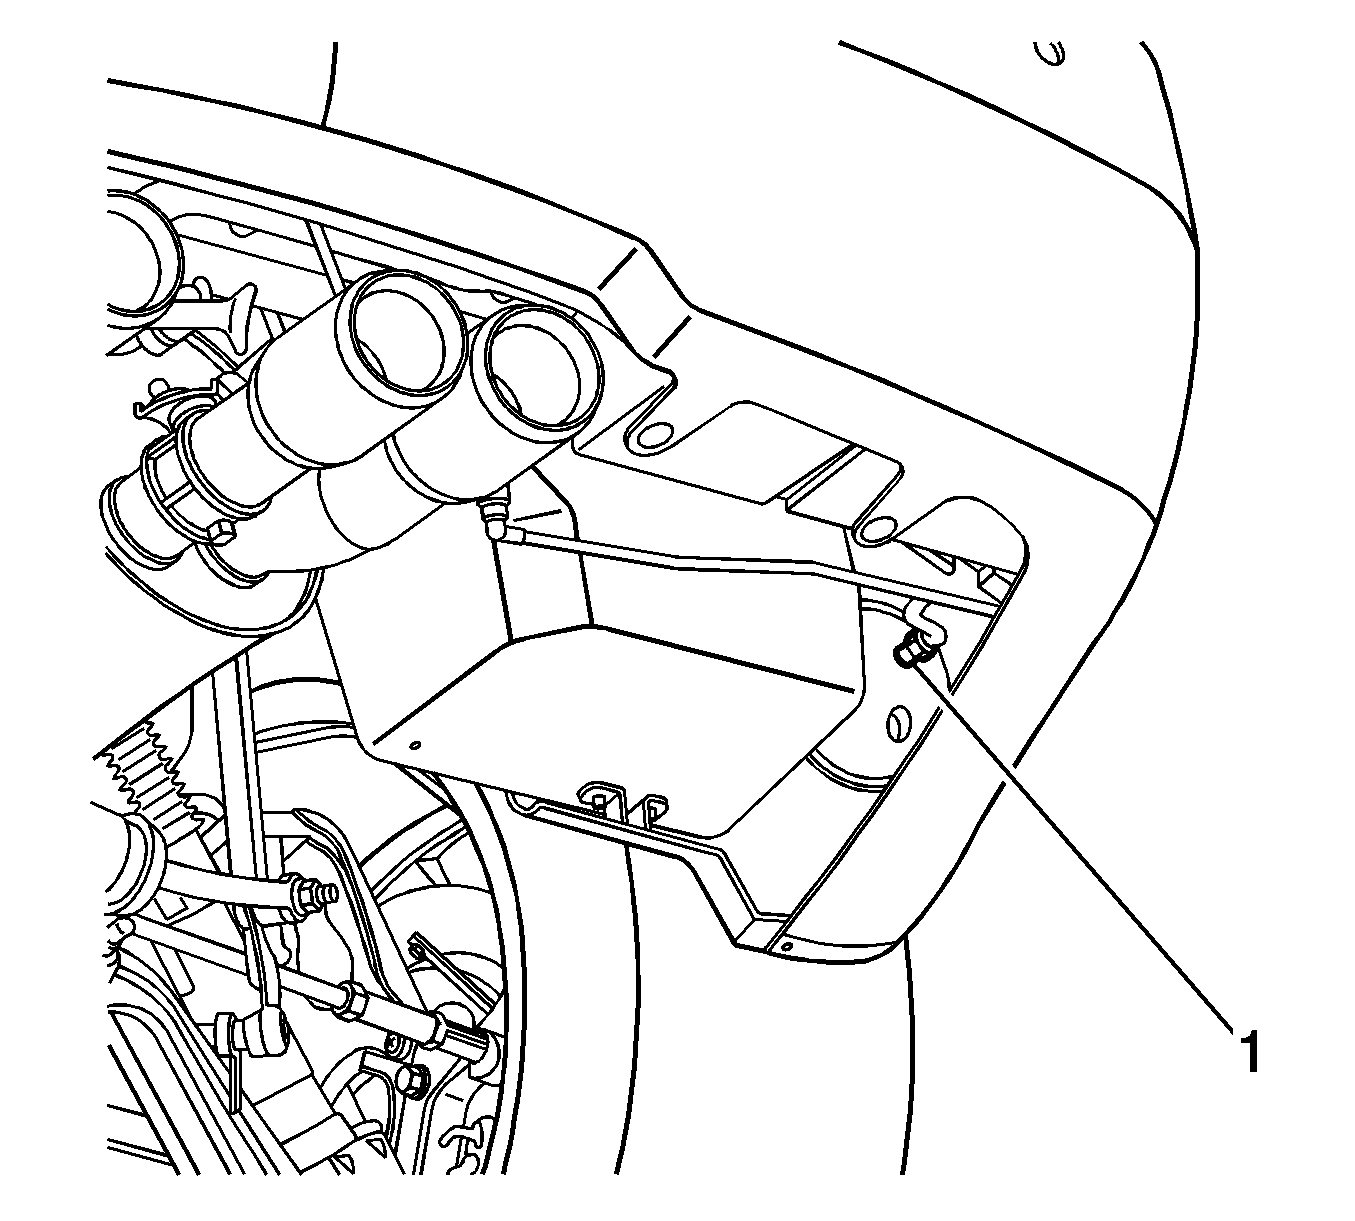
- Disconnect the vacuum line (1) from the vacuum tank located behind the right rear quarter panel.
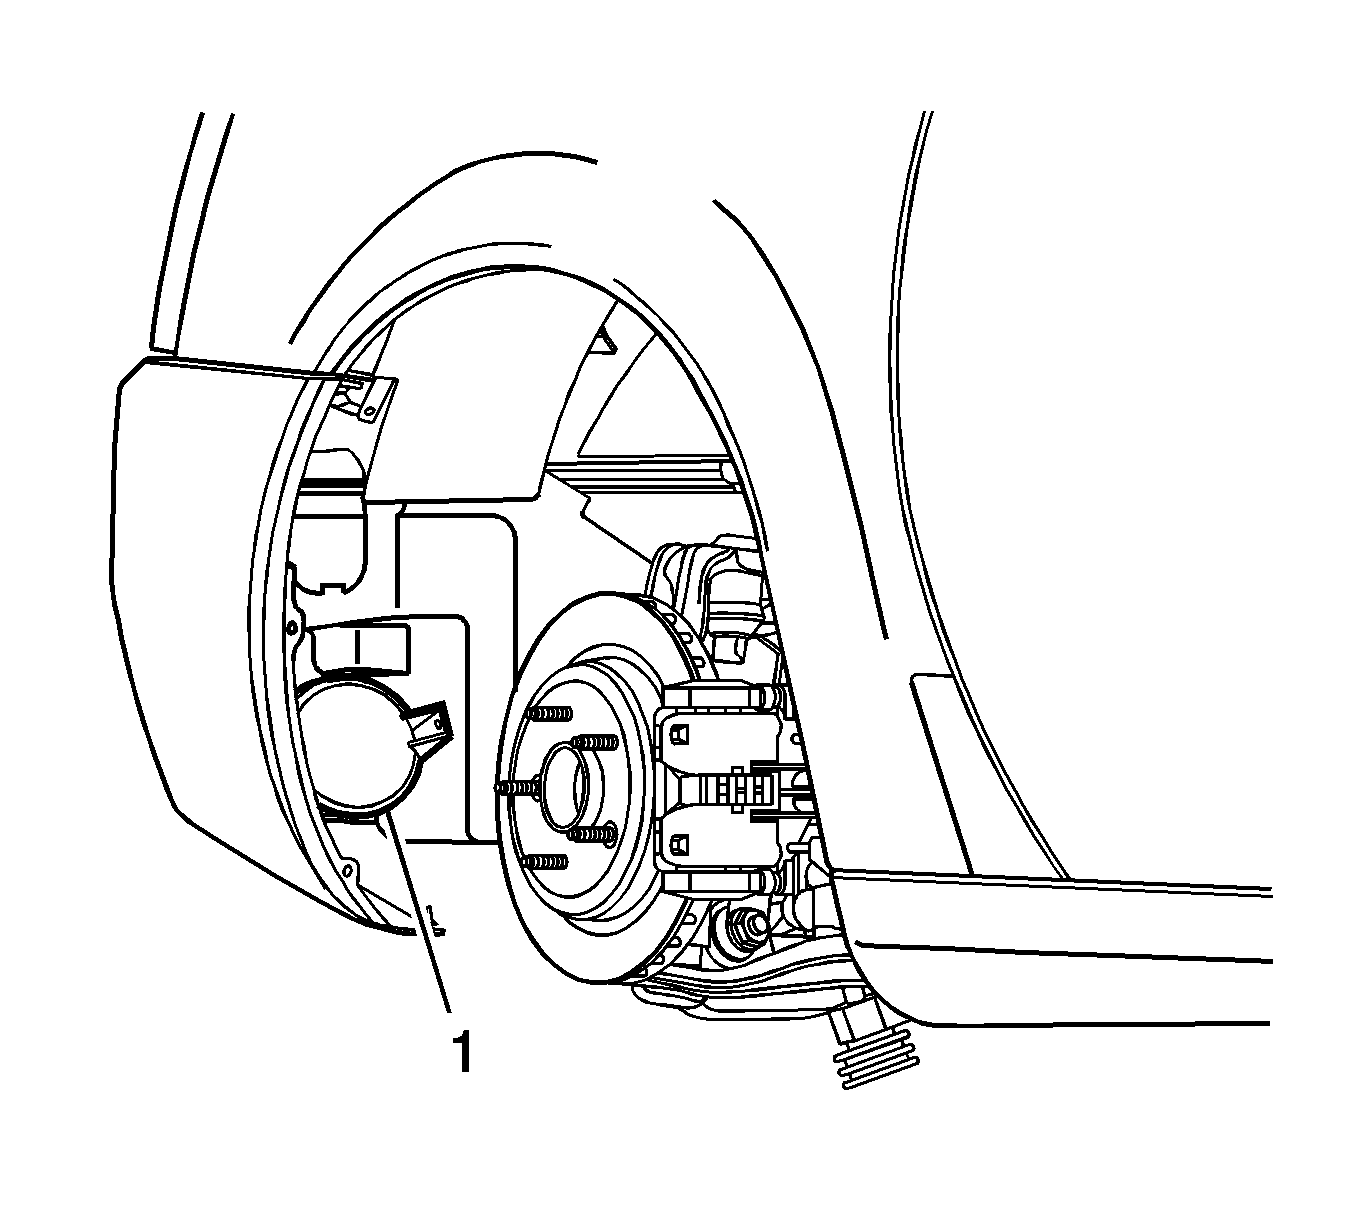
- Remove the right rear tire and wheel assembly. Refer to Tire and Wheel Removal and Installation.
- Remove the right rear wheel house liner. Refer to Rear Wheelhouse Panel Liner Replacement.
- If the vacuum tank is not damaged, grasp the vacuum tank and break it free from the rear compartment panel. If the vacuum tank is broken, use suitable tools for removal.
- Remove the vacuum tank from the rear compartment panel.
Important: Mark the location of the vacuum tank before removal. Wear gloves while removing the vacuum tank.
Installation Procedure
- Clean the area of the rear compartment panel where the vacuum tank mounts (4). Use an abrasive wheel if necessary.
- Clean the rear compartment panel and the vacuum tank mounting surface with an alcohol based cleaner.
- Apply two part epoxy GM P/N 89020330 (Canadian P/N 89020332) or equivalent to the mounting surface of the vacuum tank.
- Install the vacuum tank to the vehicle in the location shown (4). Ensure that the vacuum line will reach the vacuum tank.
- Hold the tank in position with masking tape while the epoxy dries.
- Allow the epoxy to dry for thirty minutes before removing the masking tape.
- Connect the vacuum line (1) to the vacuum tank.
- Install the wheel house liner. Refer to Rear Wheelhouse Panel Liner Replacement.
- Install the tire and wheel assembly. Refer to Tire and Wheel Removal and Installation.
- Lower the vehicle.