For 1990-2009 cars only
Tools Required
EN-47814 Supercharger Bypass Valve Actuator Setting Tool
Removal Procedure
- Remove the engine sight shield. Refer to Intake Manifold Sight Shield Replacement .
- Remove the front section of the supercharger inlet duct. Refer to Supercharger Inlet Duct Assembly Replacement .
- Remove the supercharger bypass regulator solenoid valve (3). Refer to Charge Air Bypass Regulator Solenoid Valve Replacement .
- Drain the charge air cooling system. Refer to Charge Air Cooling System Draining and Filling .
- Remove the front portion of the supercharger front manifold (2) and discard the O-rings. It is not necessary to remove the hoses from the manifold. Position the hoses with manifold aside. Refer to Charge Air Cooler Front Manifold Replacement .
- Disconnect the vacuum lines (3, 4) from the supercharger bypass actuator valve.
- Remove the actuator mounting bolts (1, 2).
- The bypass valve actuator rod is keyed with the bypass valve actuator cable.
- Remove the fuel line from the clip on the front of the supercharger. Position the fuel line aside using mechanics wire.
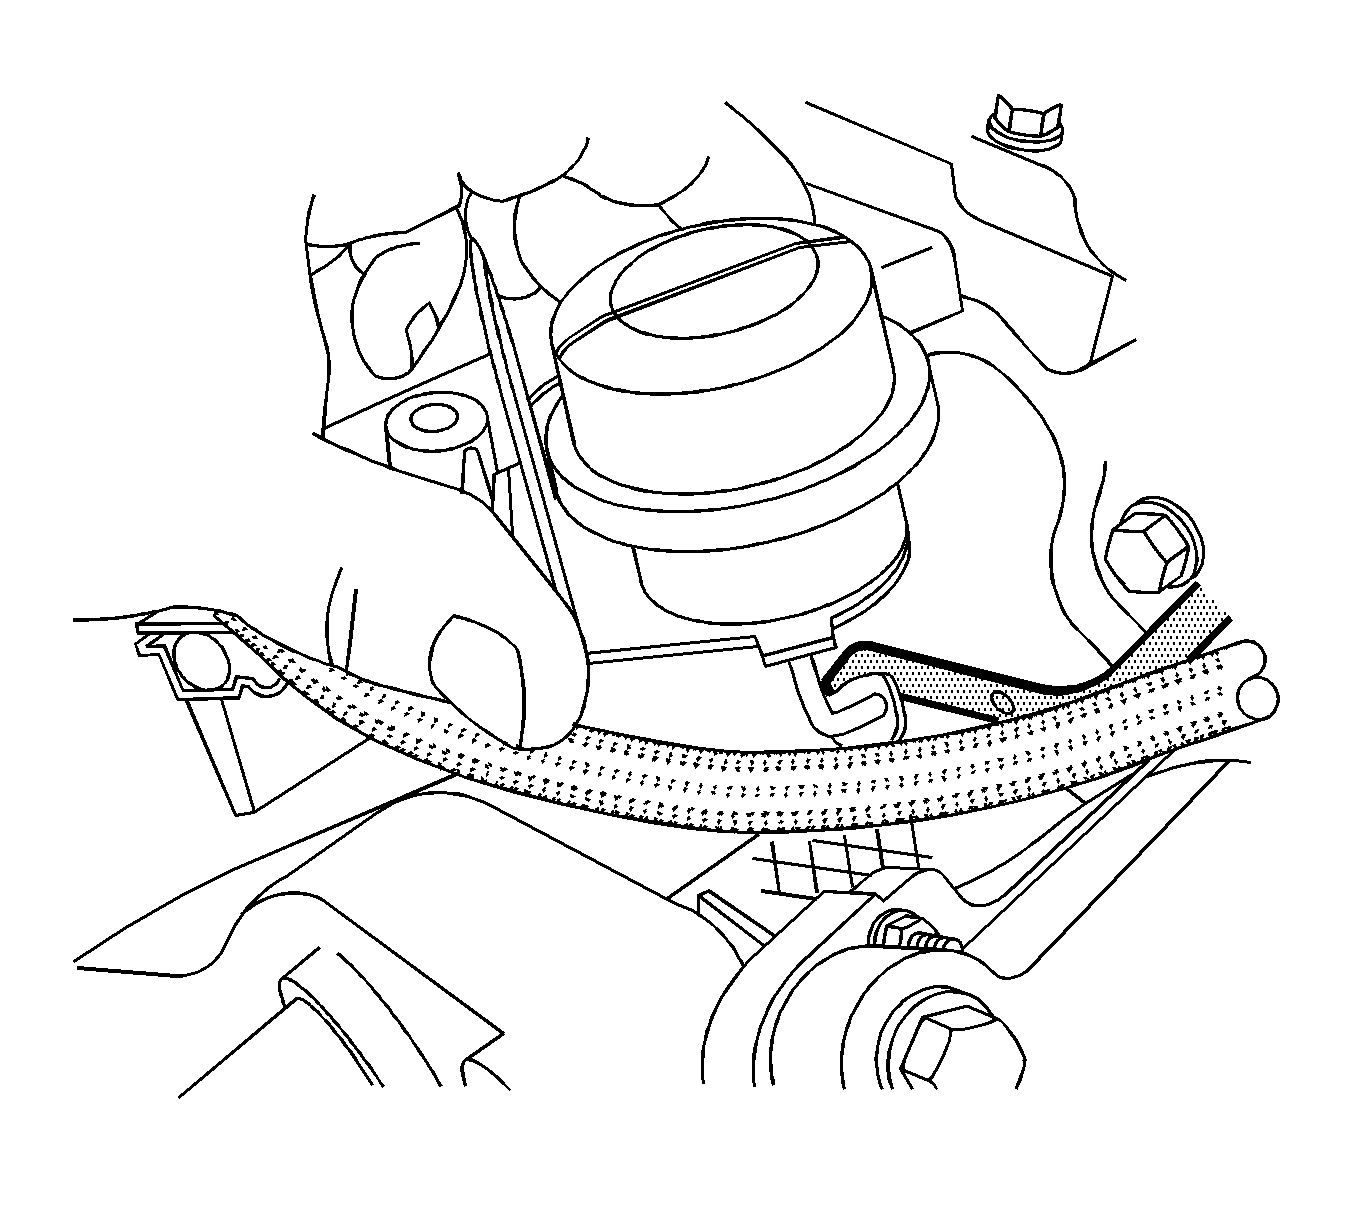
- Push the bypass valve actuator downward in order to remove the bypass valve actuator rod from the bypass valve actuator cable. The downward pressure will rotate the end of the cable into the proper position so that the actuator rod can be removed from the cable end. Use a flat blade screwdriver if necessary, to disengage the rod from the cable end.
- Remove the supercharger bypass valve actuator from the vehicle.
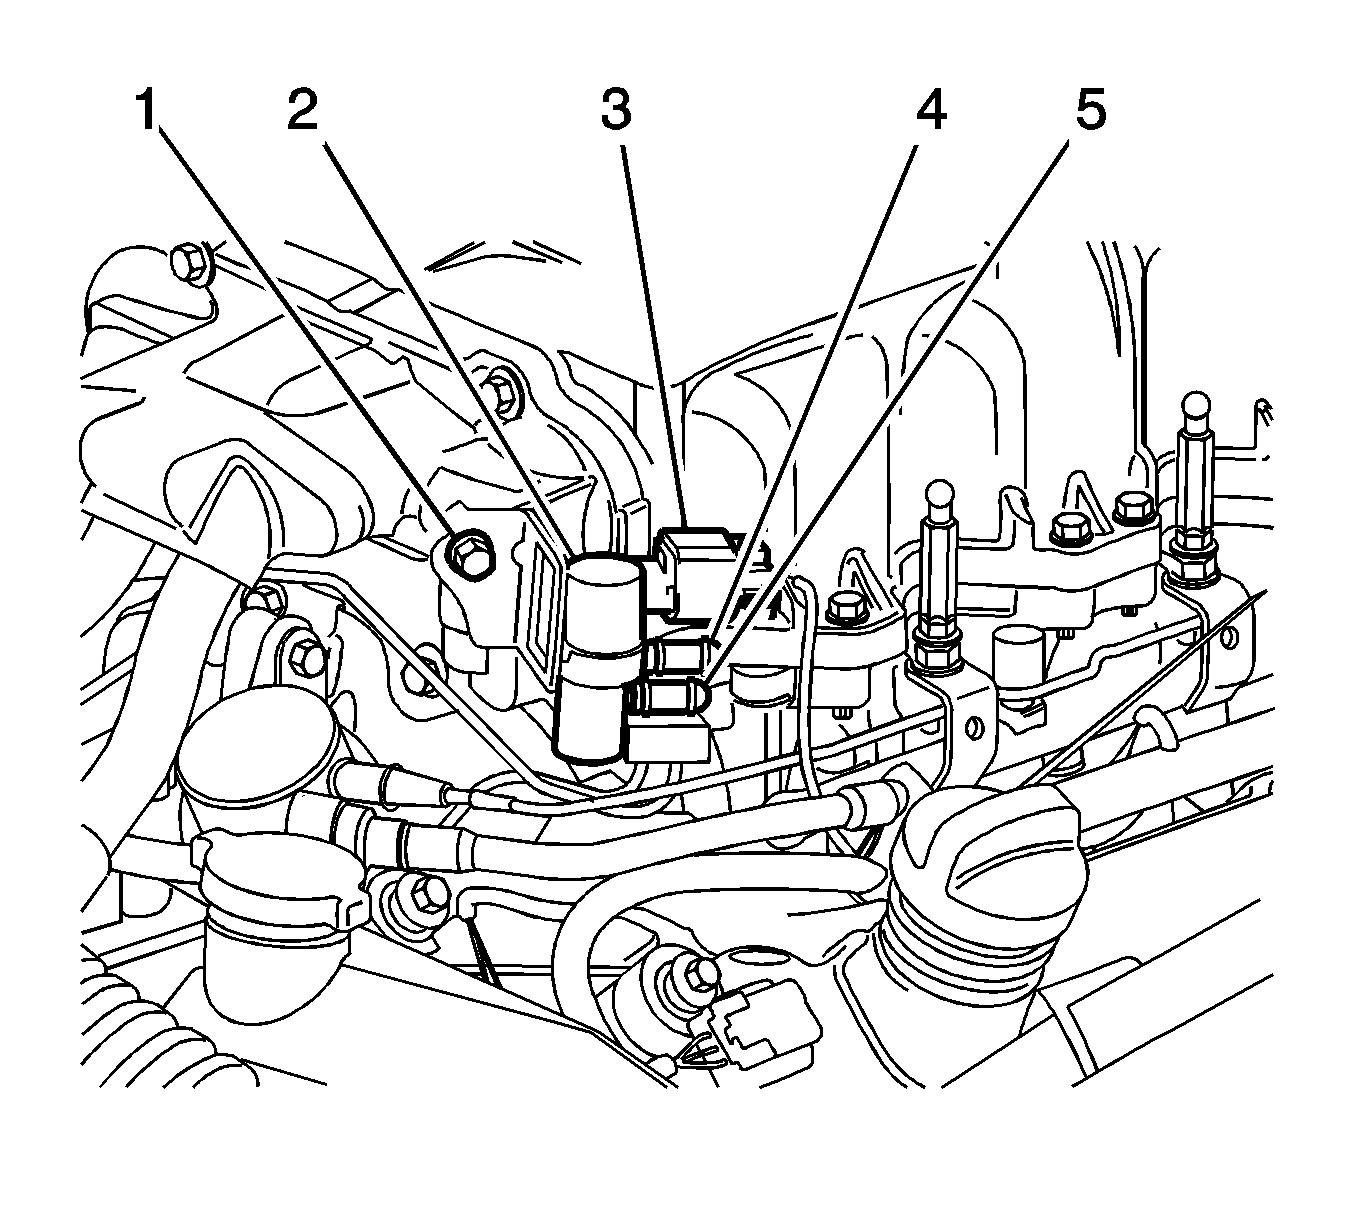
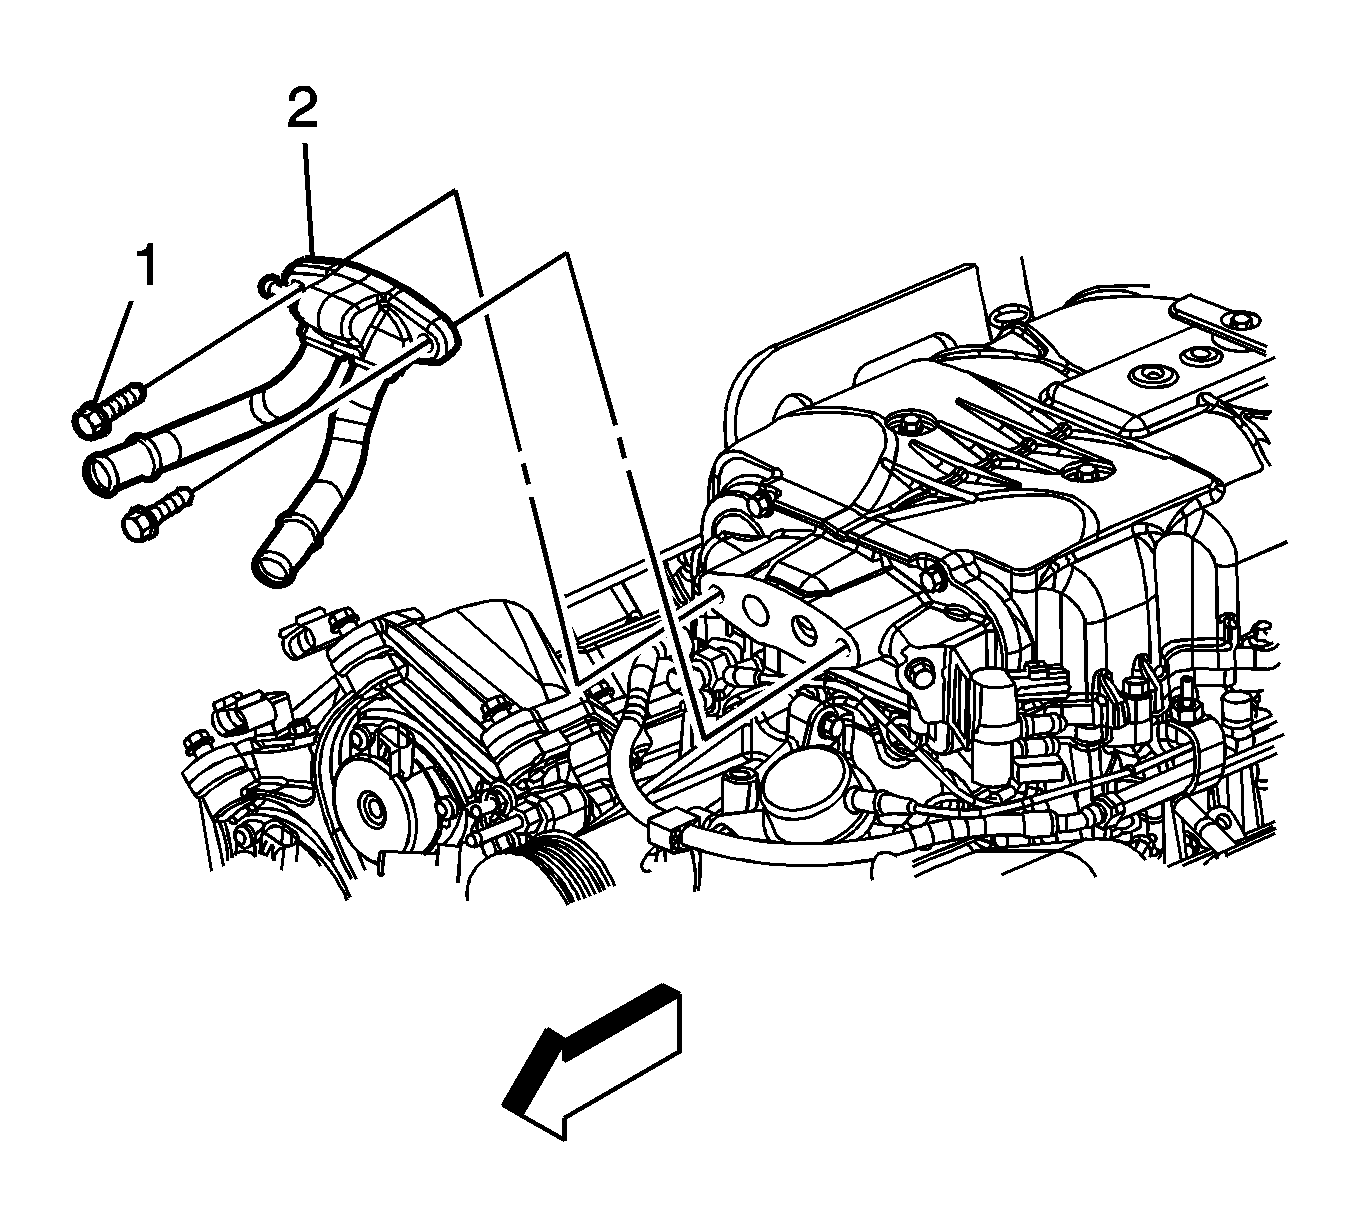
Important: Place shop rags under the front portion of the supercharger to prevent coolant from contacting the supercharger drive belt.
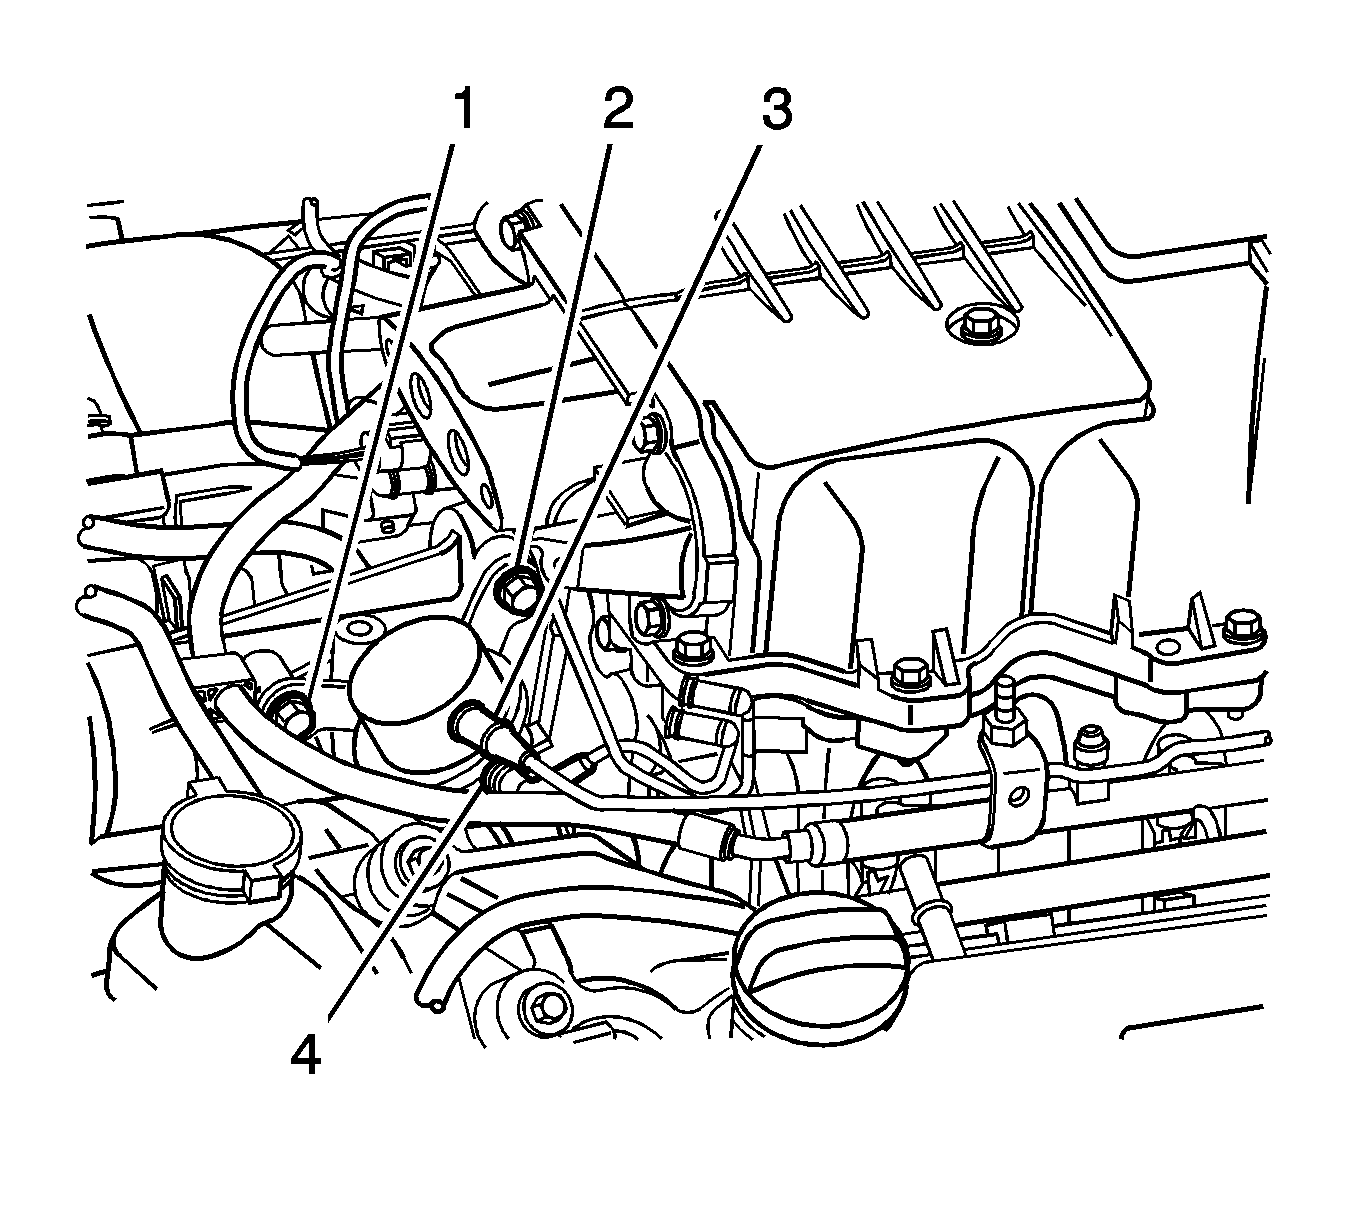
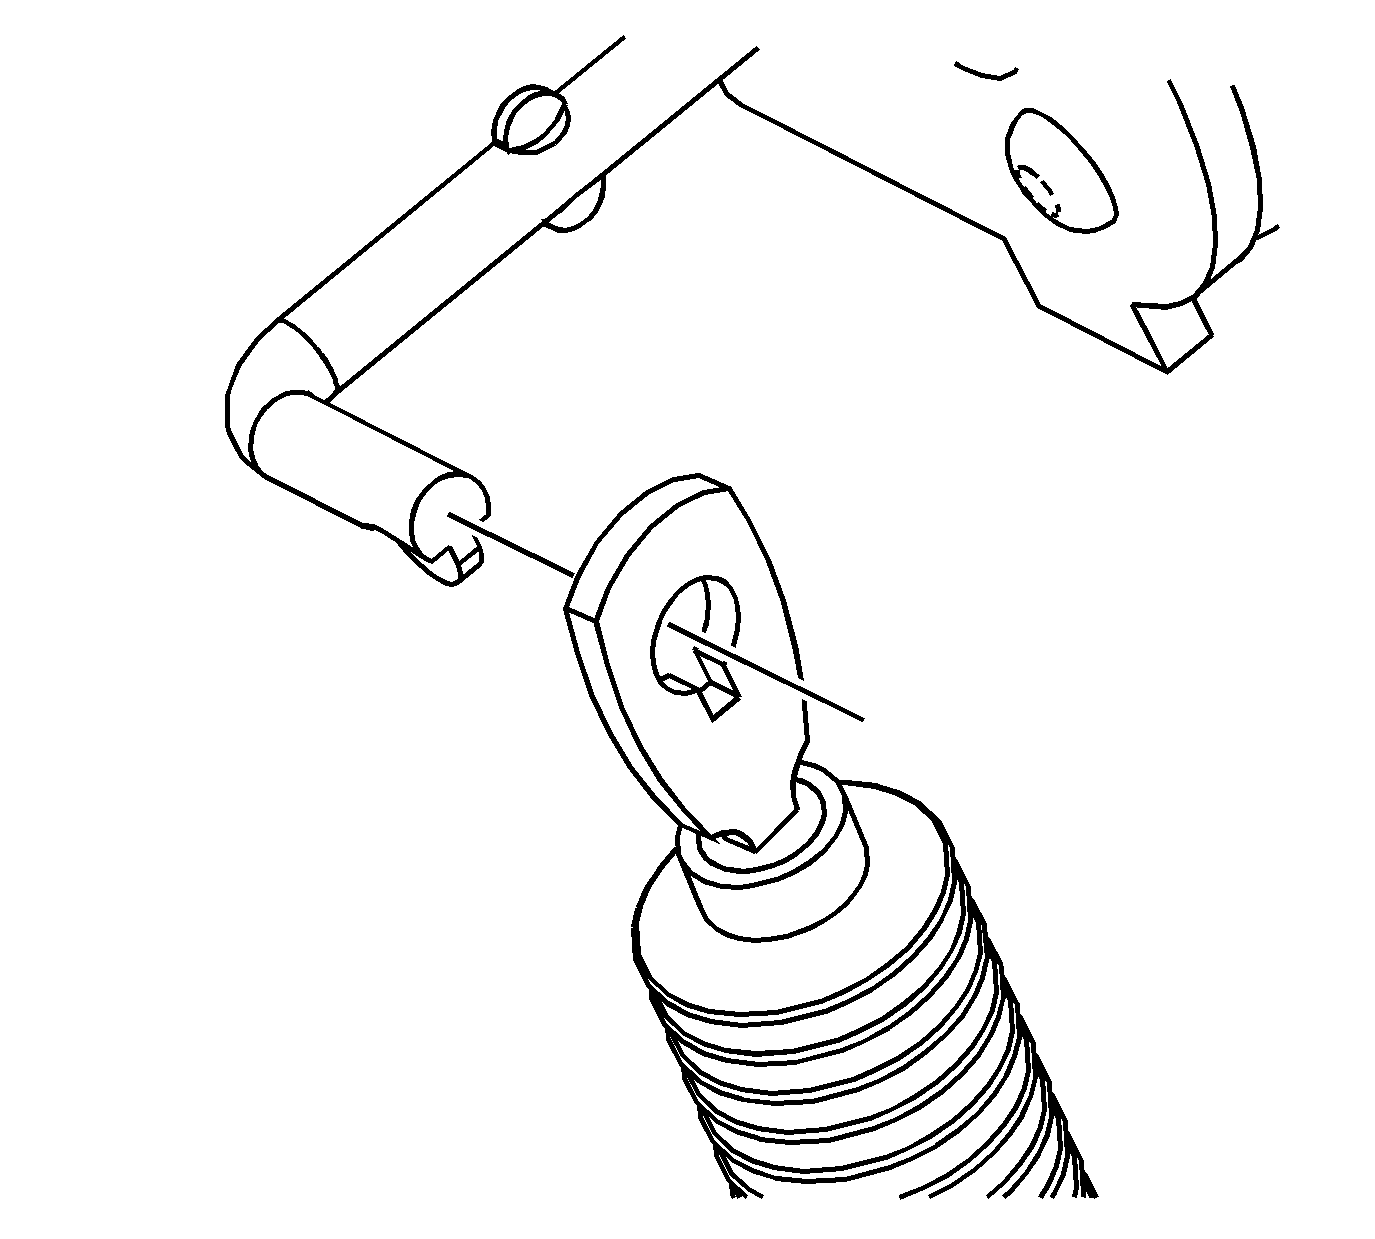
Installation Procedure
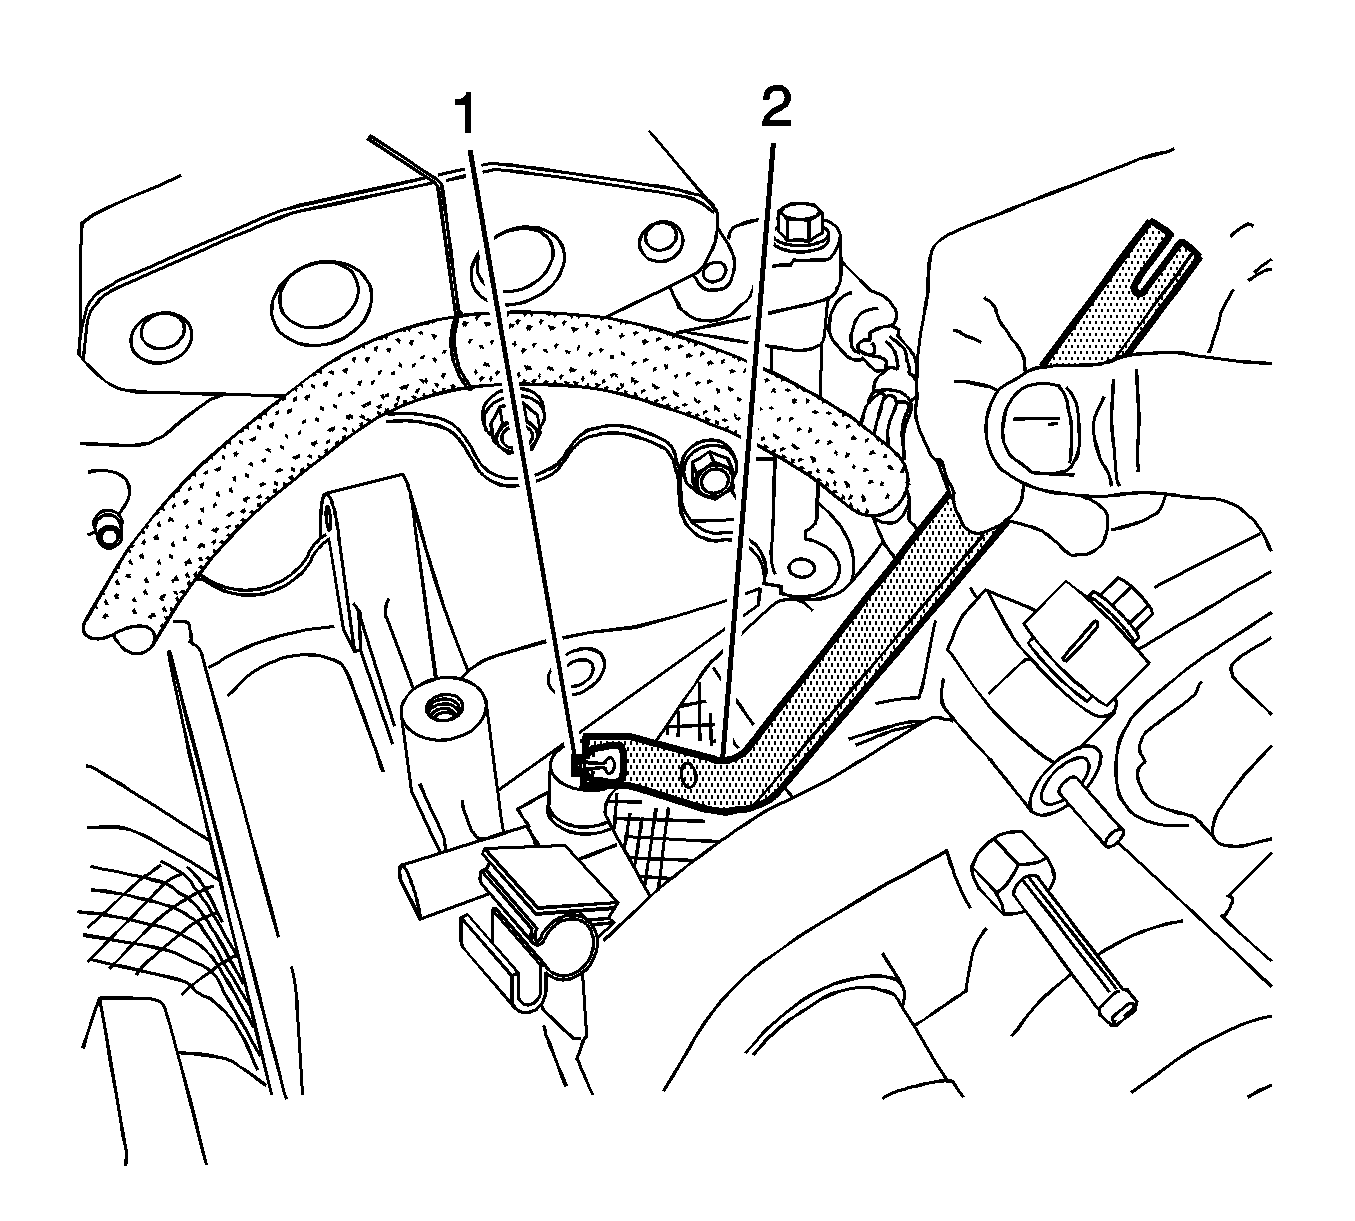
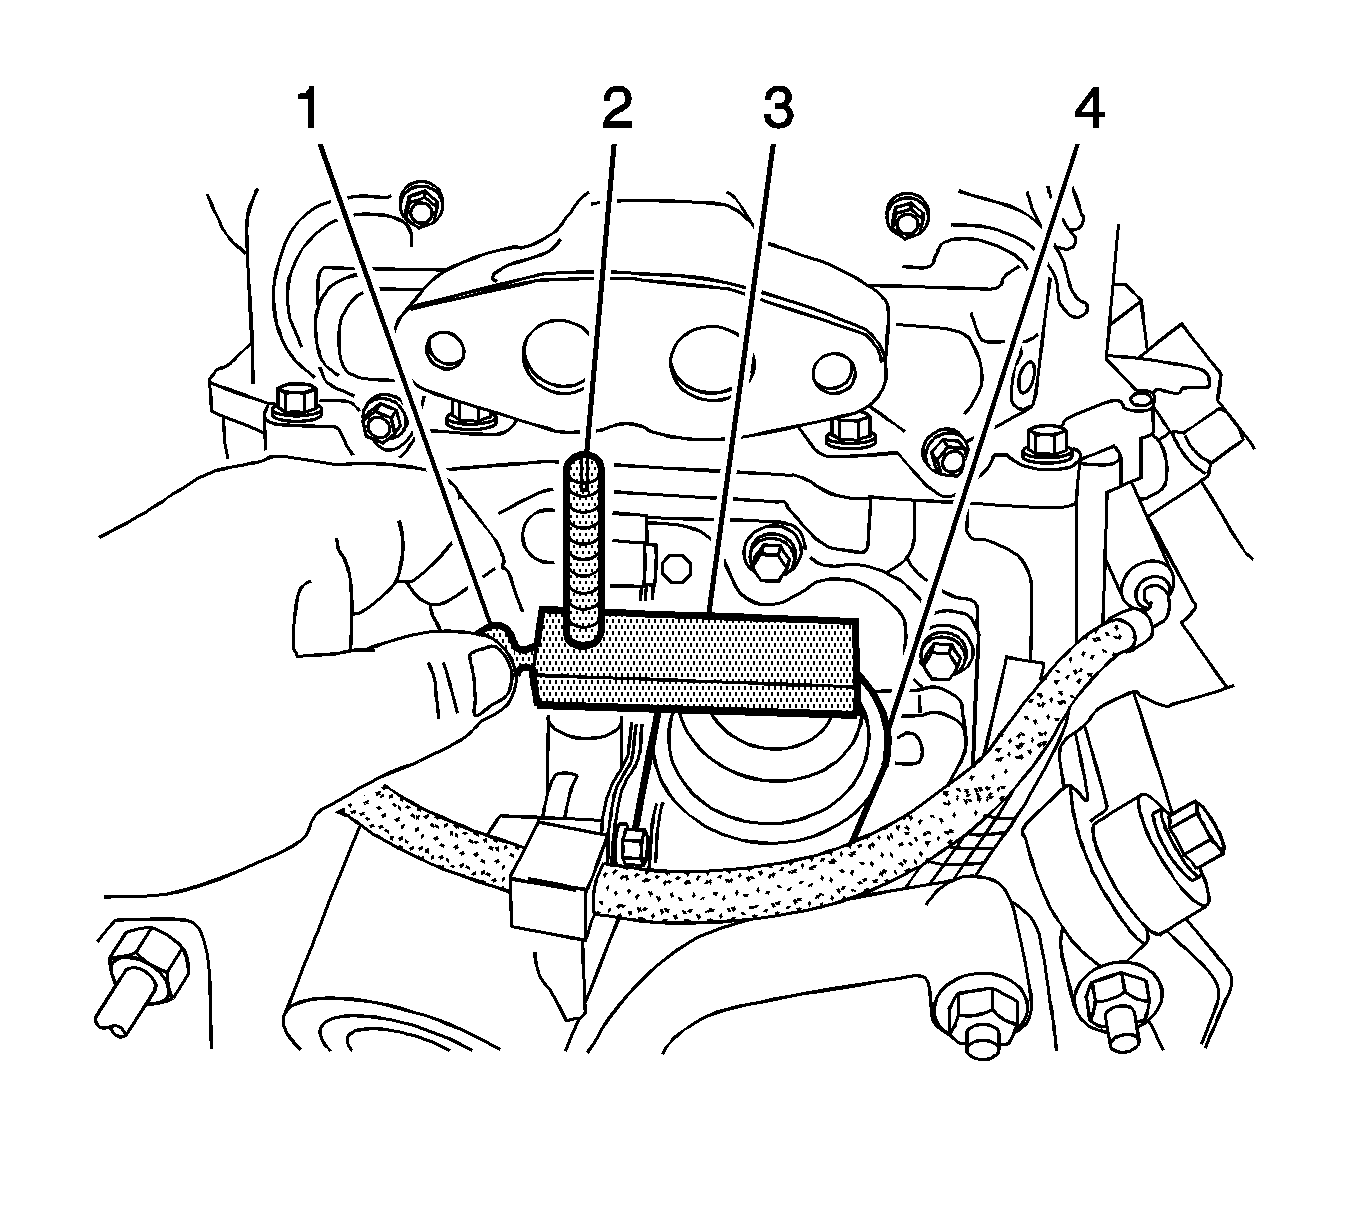
- Grasp the end of the actuator valve cable (1) with the EN-47814 (2) .
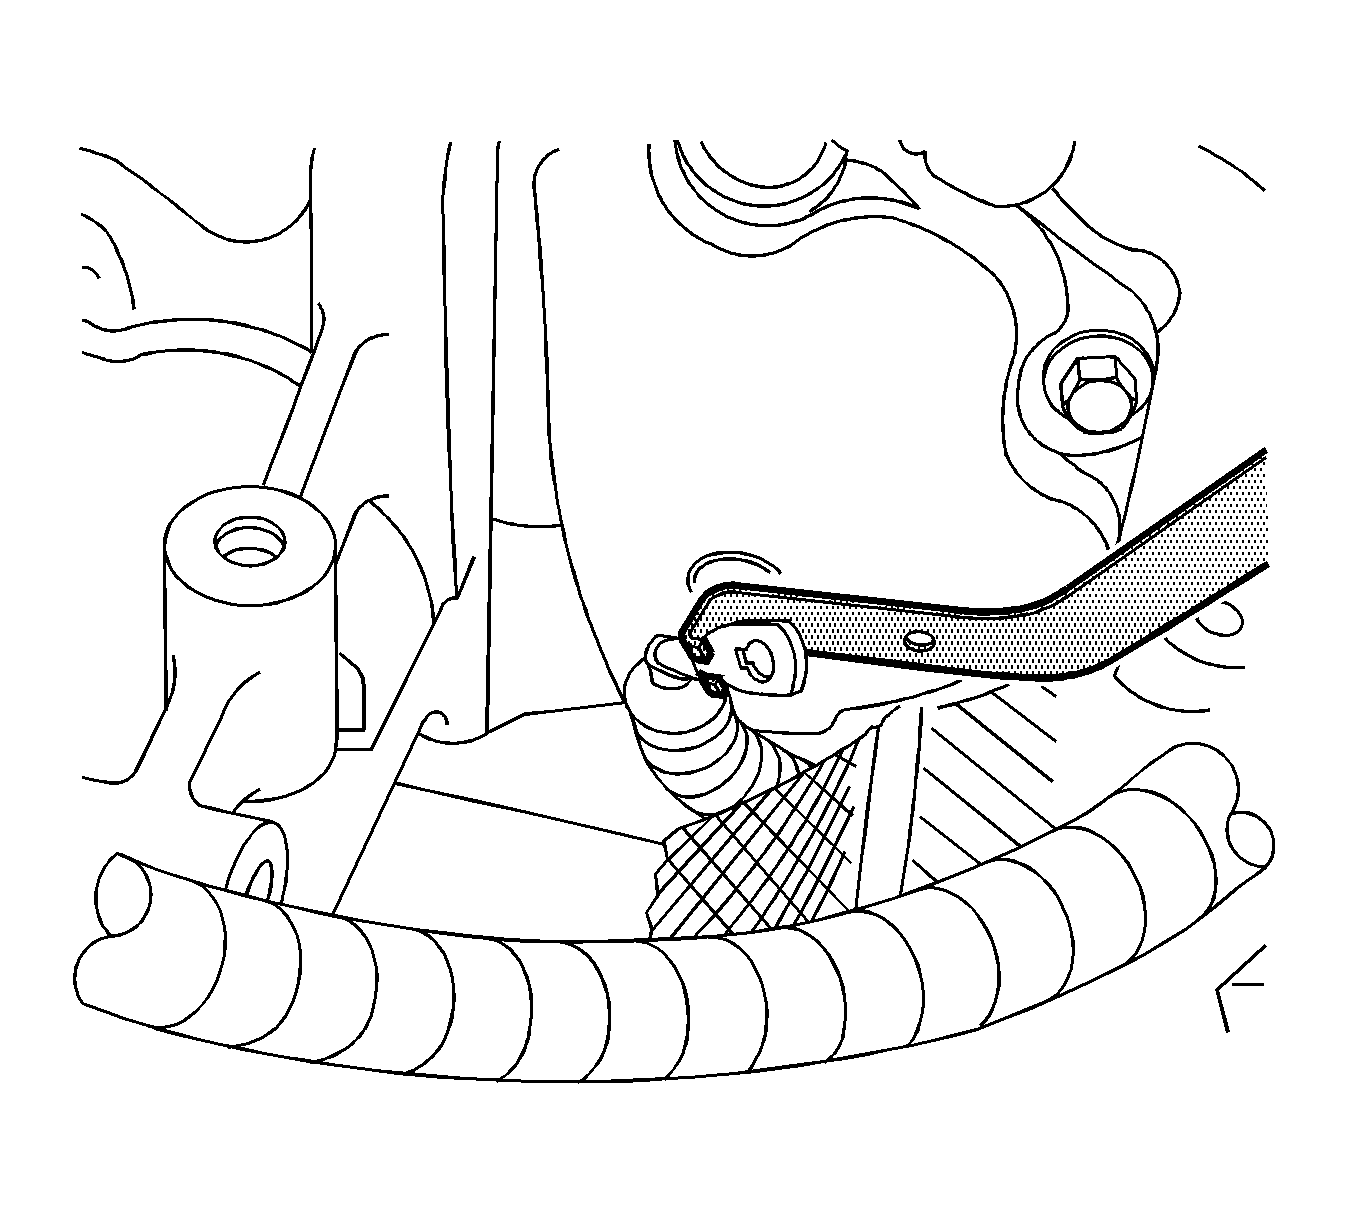
- Pull the cable end towards the front of vehicle and down as shown.
- Install the actuator valve rod to the cable end as shown.
- Remove the EN-47814 .
- Install the actuator valve bolts (1, 2) loosely so that the actuator can be moved up and down by hand.
- Gently pull up on the actuator until all slack from the cable is gone.
- Tighten the bolts (1, 2) enough to hold the actuator in place.
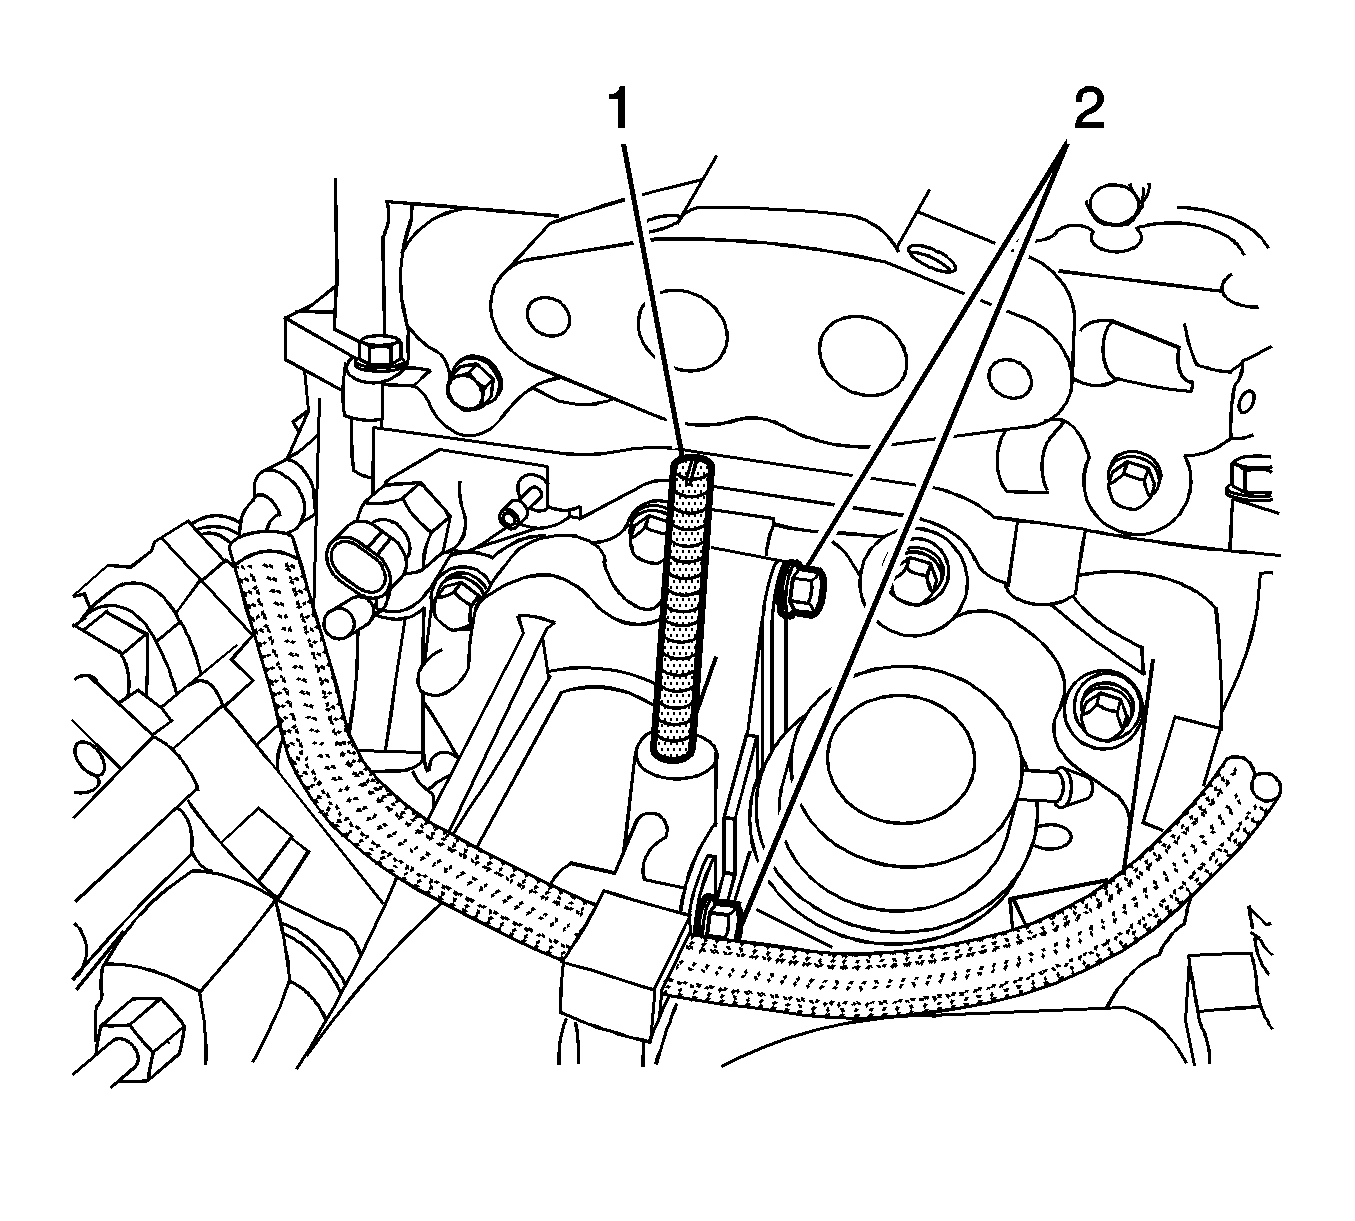
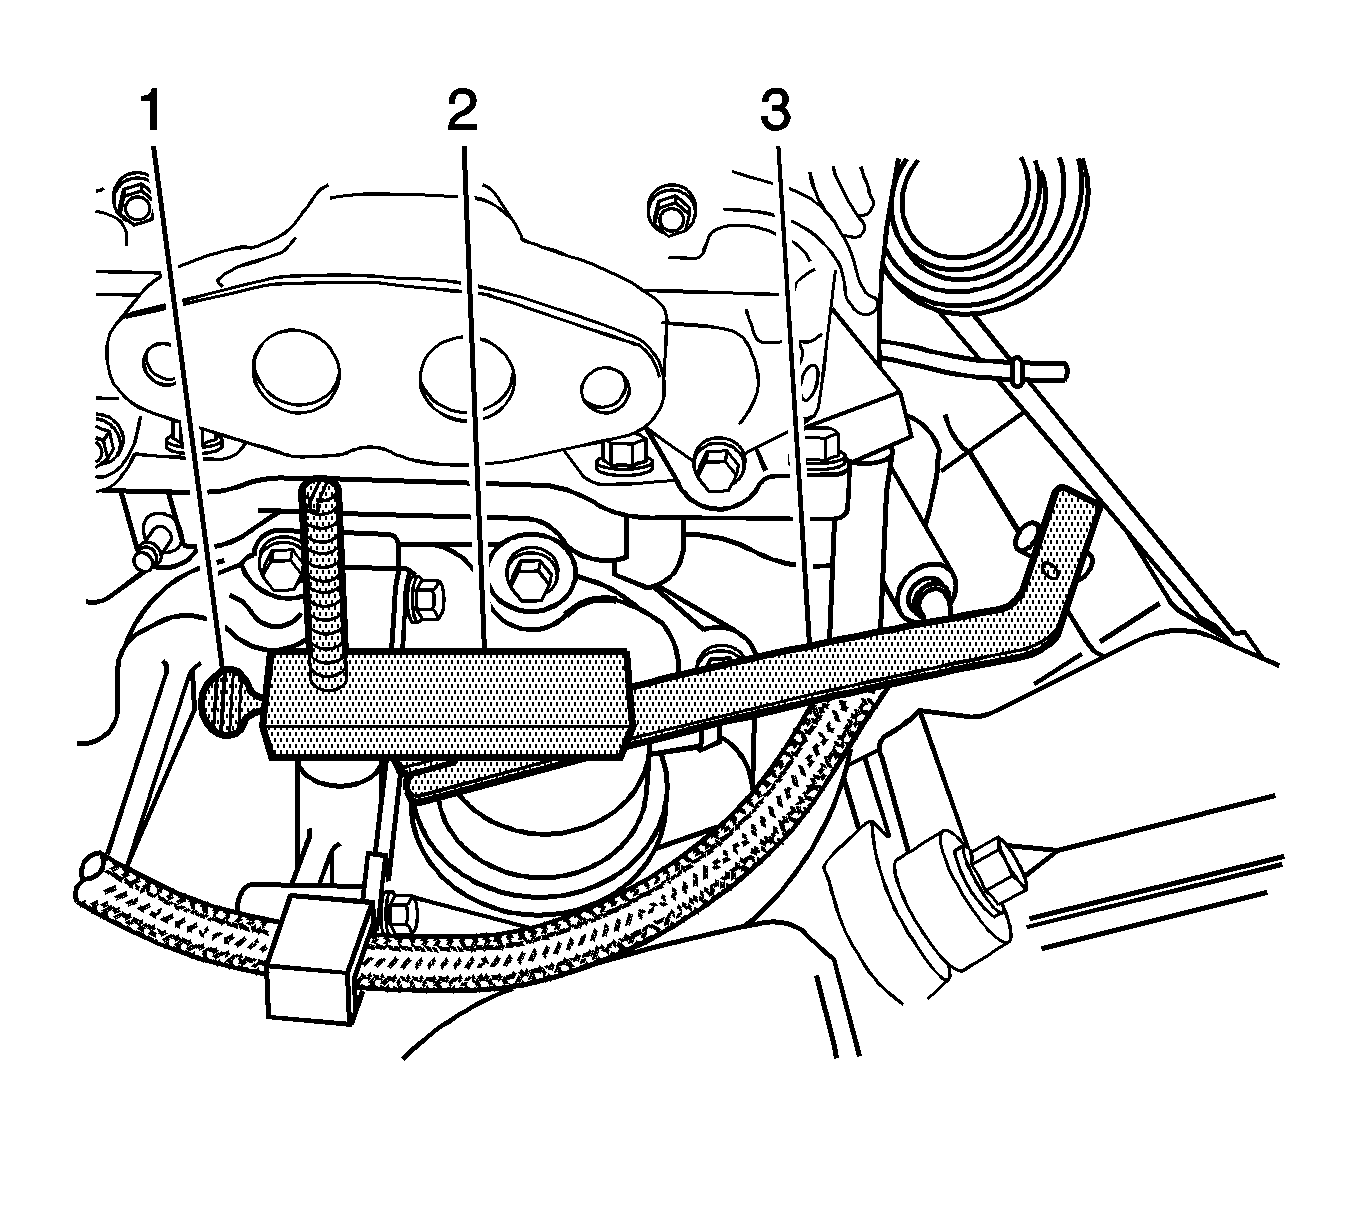
- Install the guide pin (1) from the EN-47814 to the front of the supercharger. Use a screw driver to ensure that the pin is installed tightly.
- Install the adjustment block (3) from the EN-47814 to the guide pin (2).
- With the adjustment block sitting on the actuator (4), tighten the thumb screw (1).
- Loosen the actuator mounting bolts and allow the actuator to drop down.
- Insert the flat handle from the EN-47814 between the actuator and the actuator adjustment block (2).
- With the handle from the EN-47814 in place acting as a spacer, pull the actuator up removing all slack.
- With the slack removed, tighten the actuator mounting bolts.
- Remove the EN-47814 .
- Install the fuel line to the clip on the front of the supercharger.
- Connect the vacuum lines (3, 4) to the supercharger bypass actuator valve.
- Using NEW O-rings, install the front portion of the supercharger front manifold (2). Refer to Charge Air Cooler Front Manifold Replacement .
- Install the supercharger bypass regulator solenoid valve (2). Refer to Charge Air Bypass Regulator Solenoid Valve Replacement .
- Install the front section of the supercharger inlet duct. Refer to Supercharger Inlet Duct Assembly Replacement .
- Install the engine sight shield. Refer to Intake Manifold Sight Shield Replacement .
- Fill the charge air cooling system with coolant and check for leaks. Refer to Charge Air Cooling System Draining and Filling .

Notice: Refer to Fastener Notice in the Preface section.
Tighten
Tighten the supercharger bypass valve actuator bolts to 10 N·m (89 lb in).


