For 1990-2009 cars only
Removal Procedure
- Open the hood.
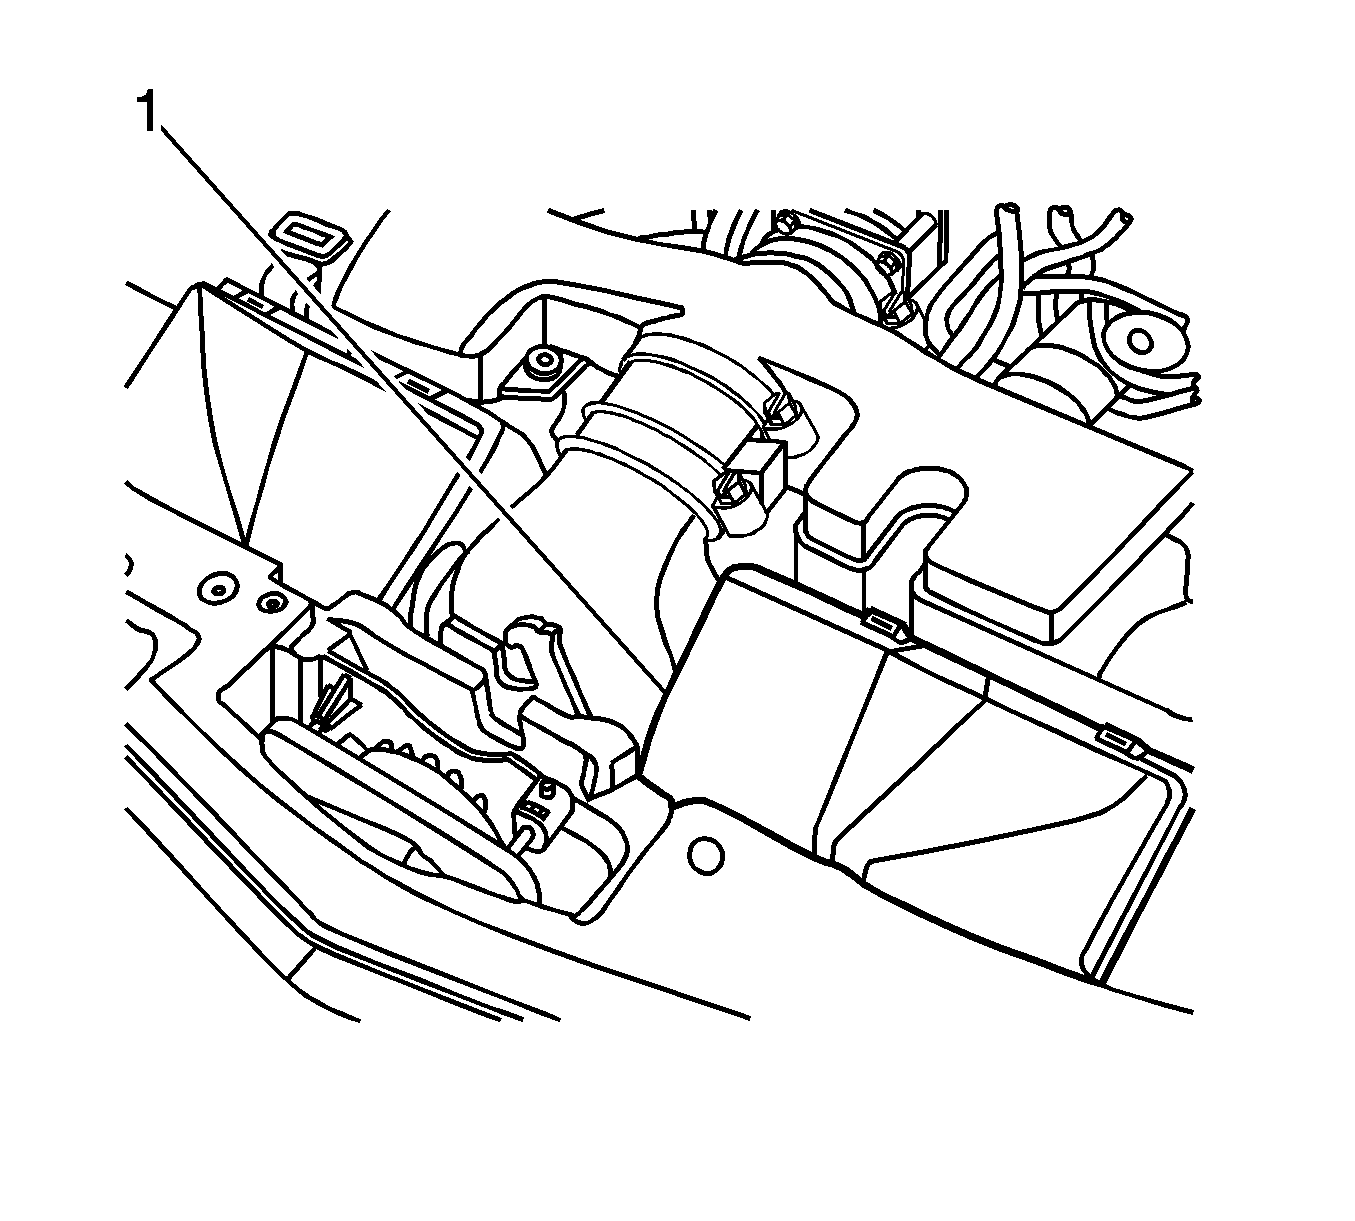
- Remove the left front section (1) of the air cleaner assembly.
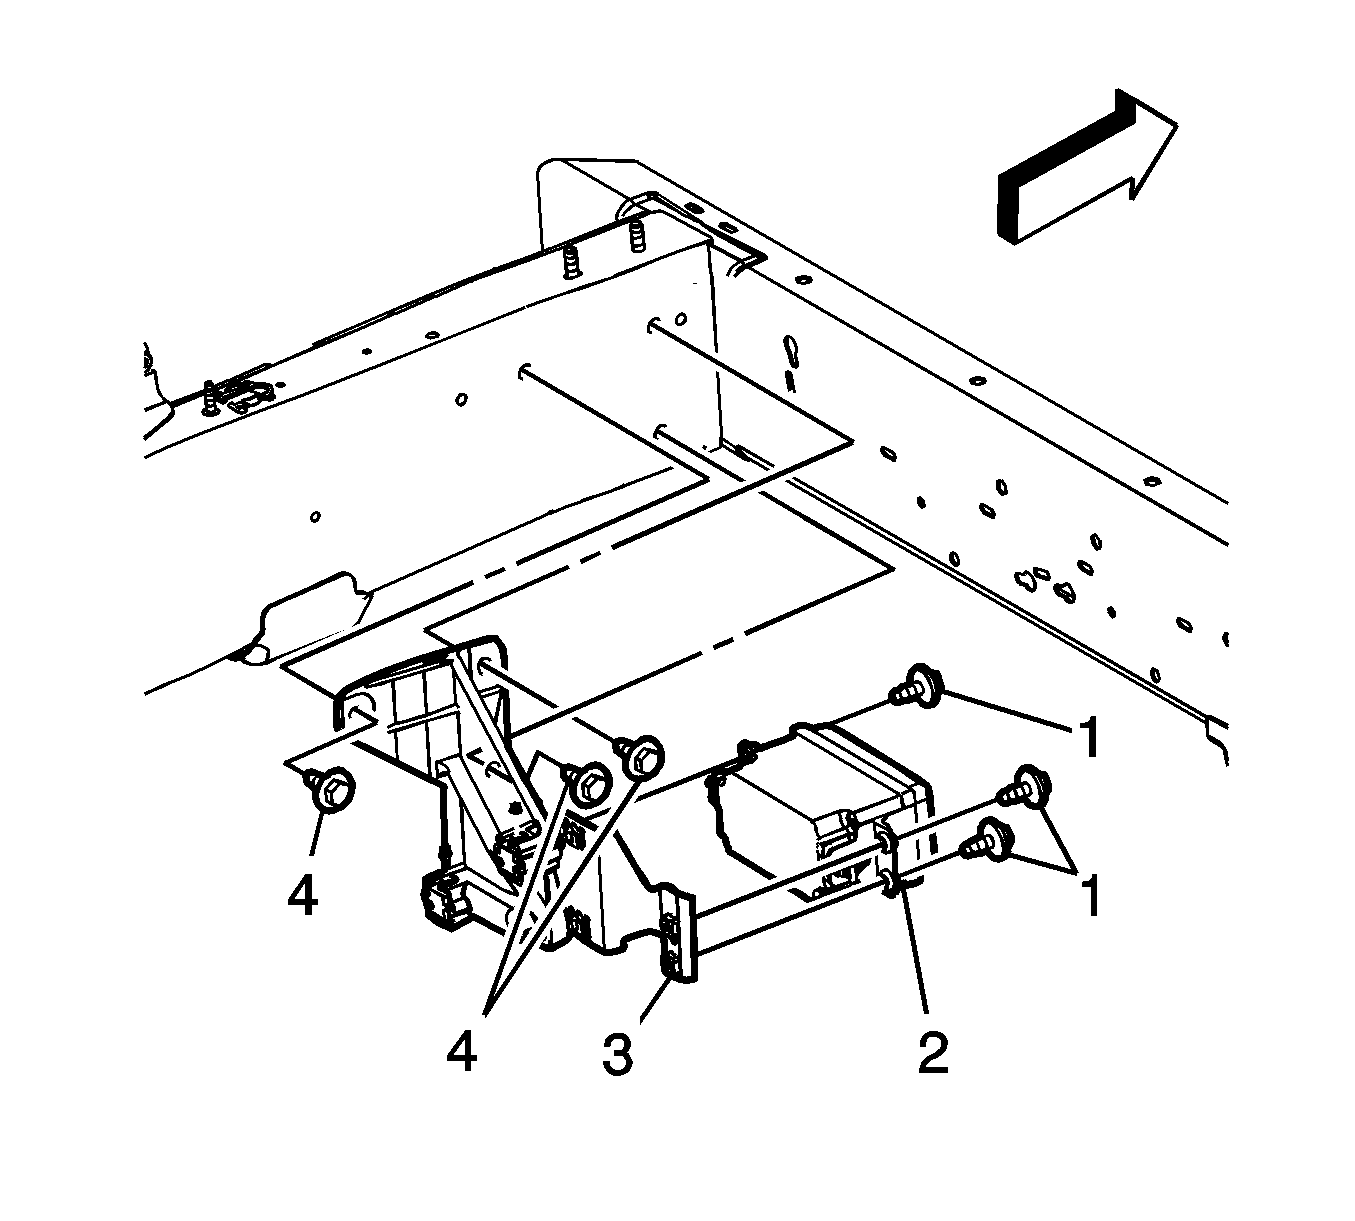
- Disconnect the electrical connector from the vehicle distance module sensor assembly (2).
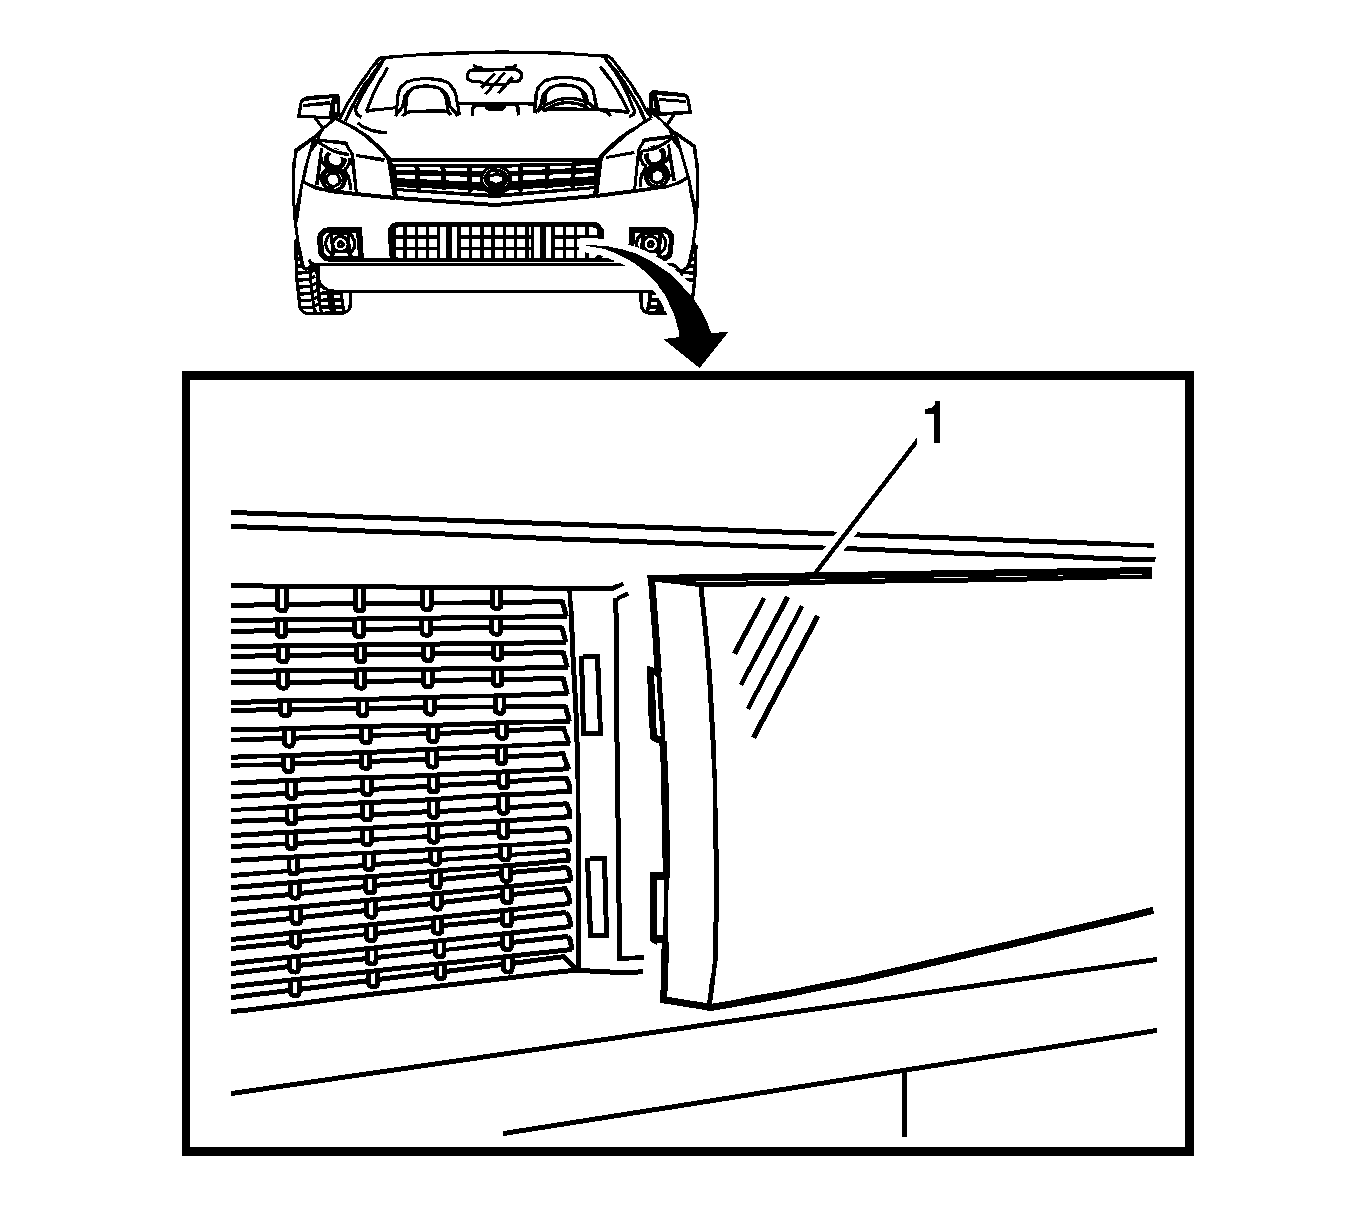
- Remove the sensor assembly from the fascia (1).
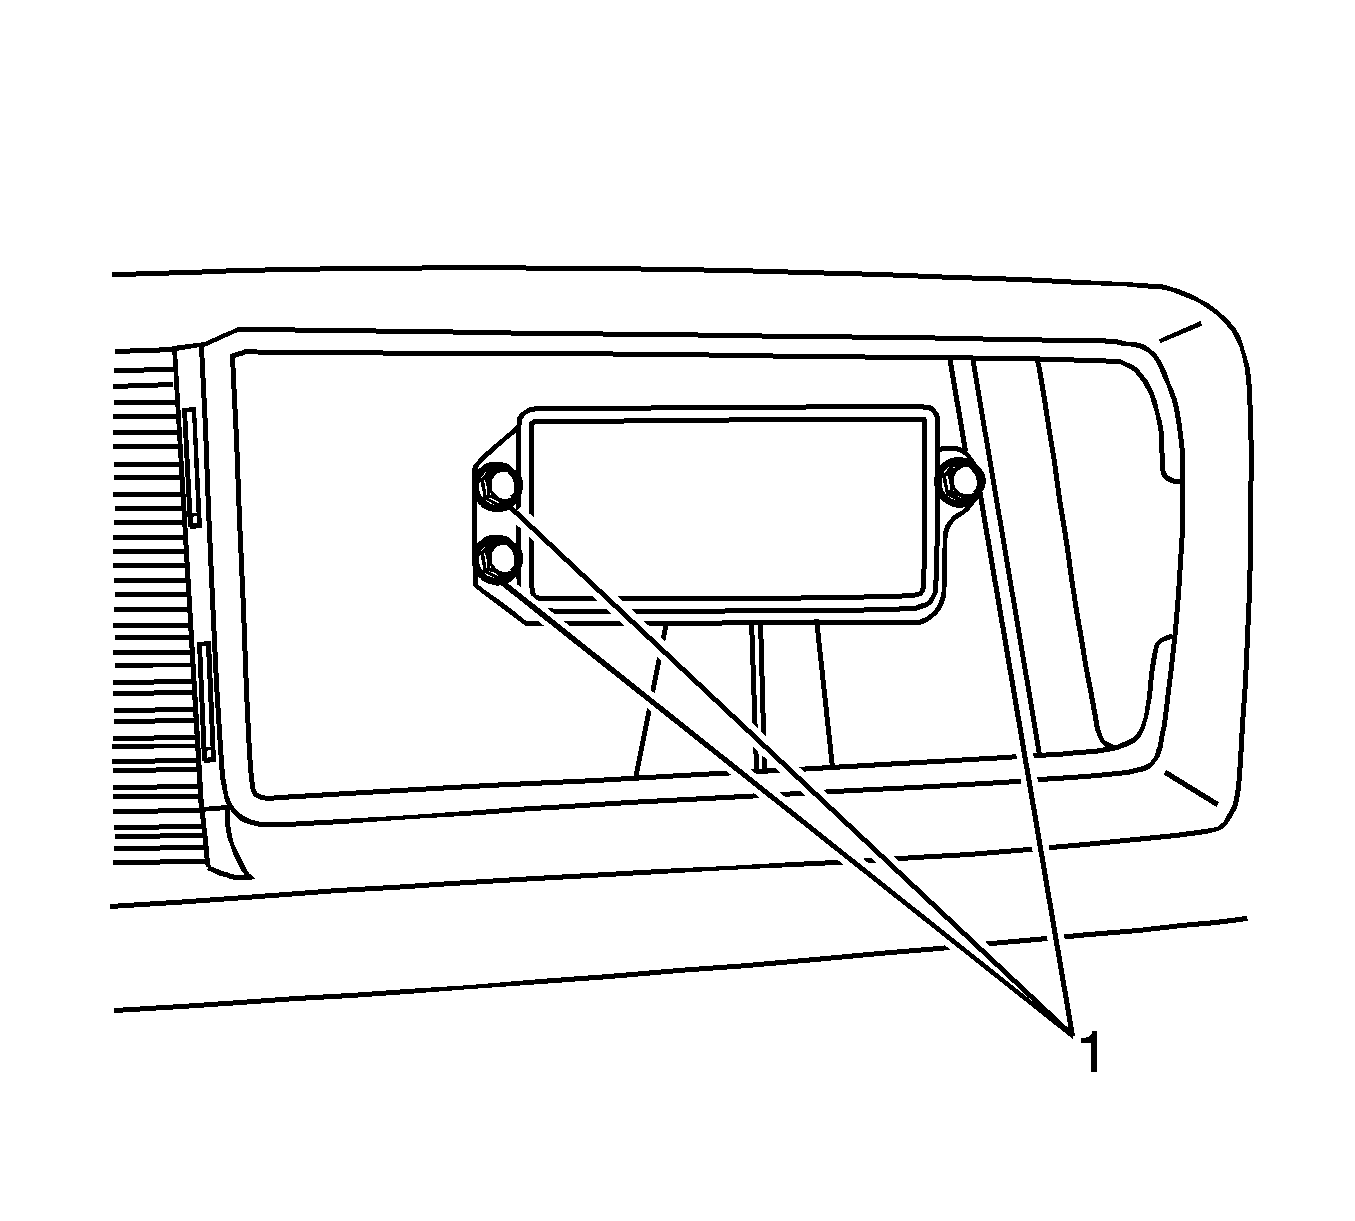
- Remove the three bolts (1) attaching the sensor assembly to the bracket.


Installation Procedure
- Position the sensor assembly to the bracket.
- Hand tighten the three bolts that attach the sensor assembly to the bracket.
- Connect the electrical connector to the sensor assembly (2).
- Install the sensor assembly cover to the fascia (1).
- Install the left front section (1) of the air cleaner assembly.
- Close the hood.
- With the scan tool, change the Automatic Alignment Learn Status Parameter in the DSCC module scan tool data list to Not Aligned after replacing the sensor assembly . This allows the new sensor assembly to automatically align to the vehicle during normal customer driving. Refer to Control Module References
- Performance of the ACC system may be degraded after sensor assembly replacement. Normal customer driving will correct the performance of the ACC system. Refer to Cruise Control Description and Operation
- Refer to Control Module References
Notice: Refer to Fastener Notice in the Preface section.

Tighten
Tighten the bolt to 10 N·m (7 lb ft).


Important: After replacing the sensor assembly the next steps are necessary for the ACC system to perform properly.
