For 1990-2009 cars only
Special Tools
| • | EN 46328 Camshaft Holding Tool |
| • | J 39946 Crankshaft Socket |
Removal Procedure
- Remove the right camshaft cover. Refer to Camshaft Cover Replacement - Right Side.
- Remove the engine oil pump. Refer to Oil Pump Replacement.
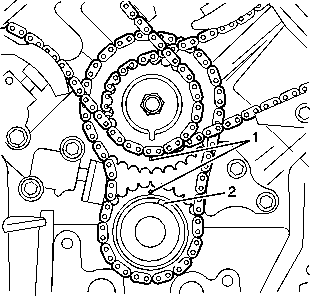
- Align the primary timing marks (1) using the J 39946 .
- Install the EN 46328 (1) on the right bank camshafts (2).
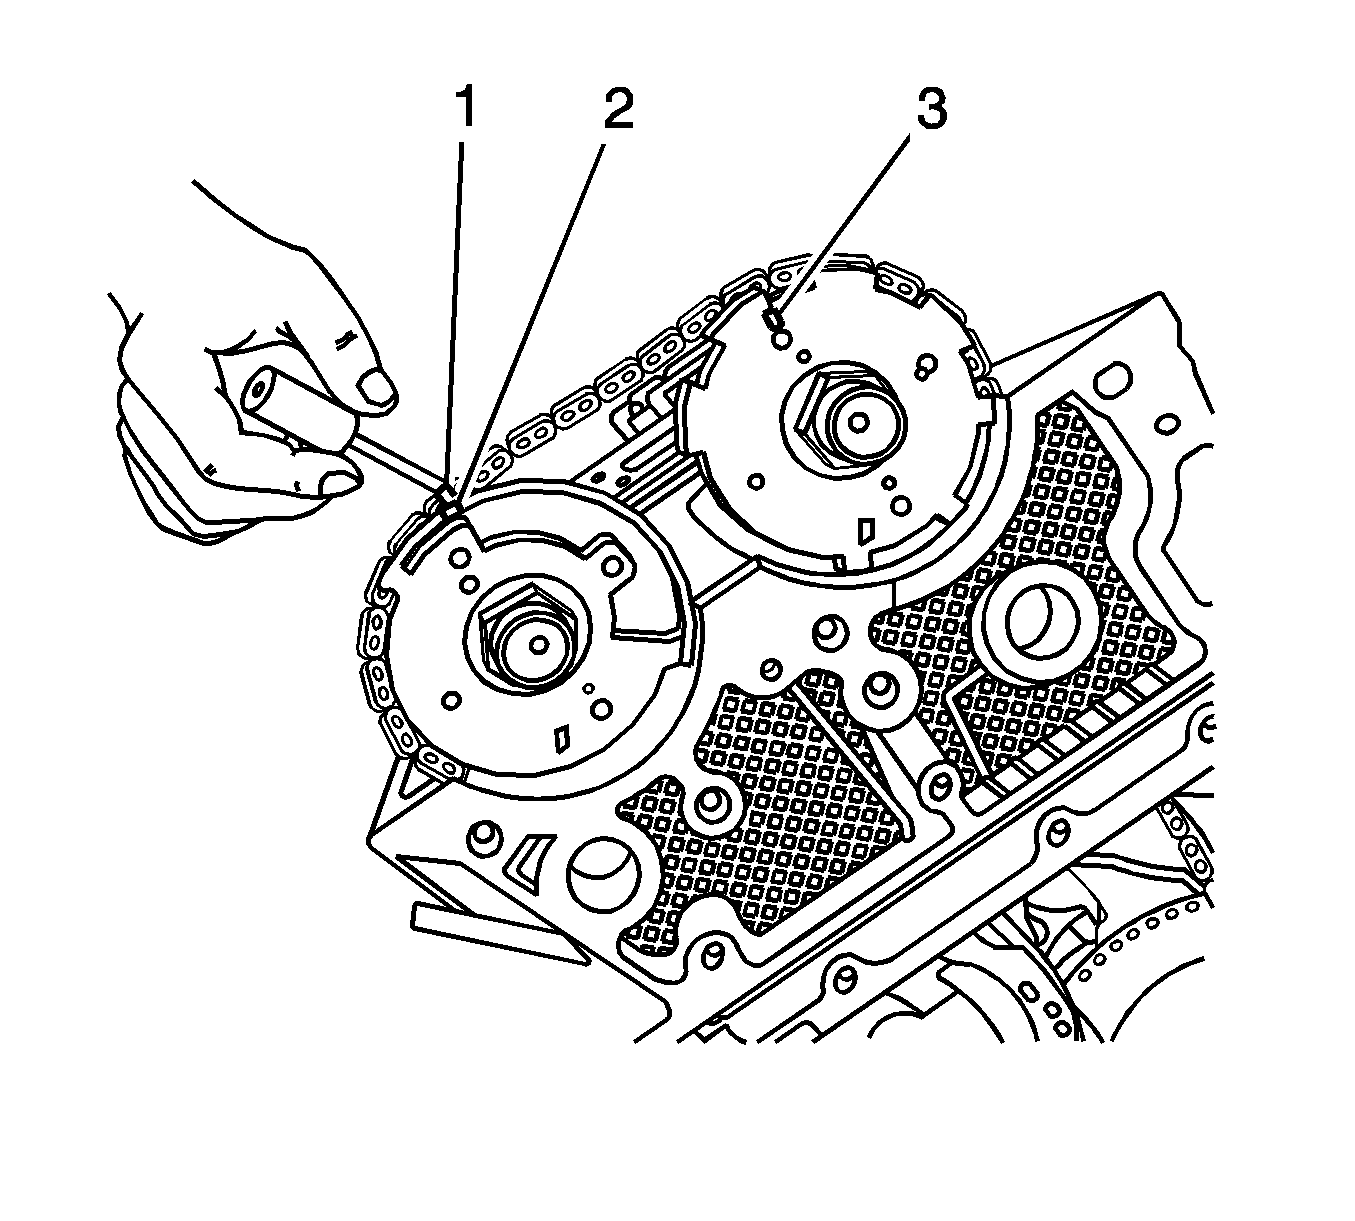
- Create 2 reference marks (1) using a paint stick to identify the chain link adjacent to each actuator timing mark (2, 3).
- Install an engine front cover bolt (2) into the front of the engine.
- Wrap mechanics wire (1) tightly around both the right secondary camshaft drive chain shoe (3) and the front cover bolt (2).
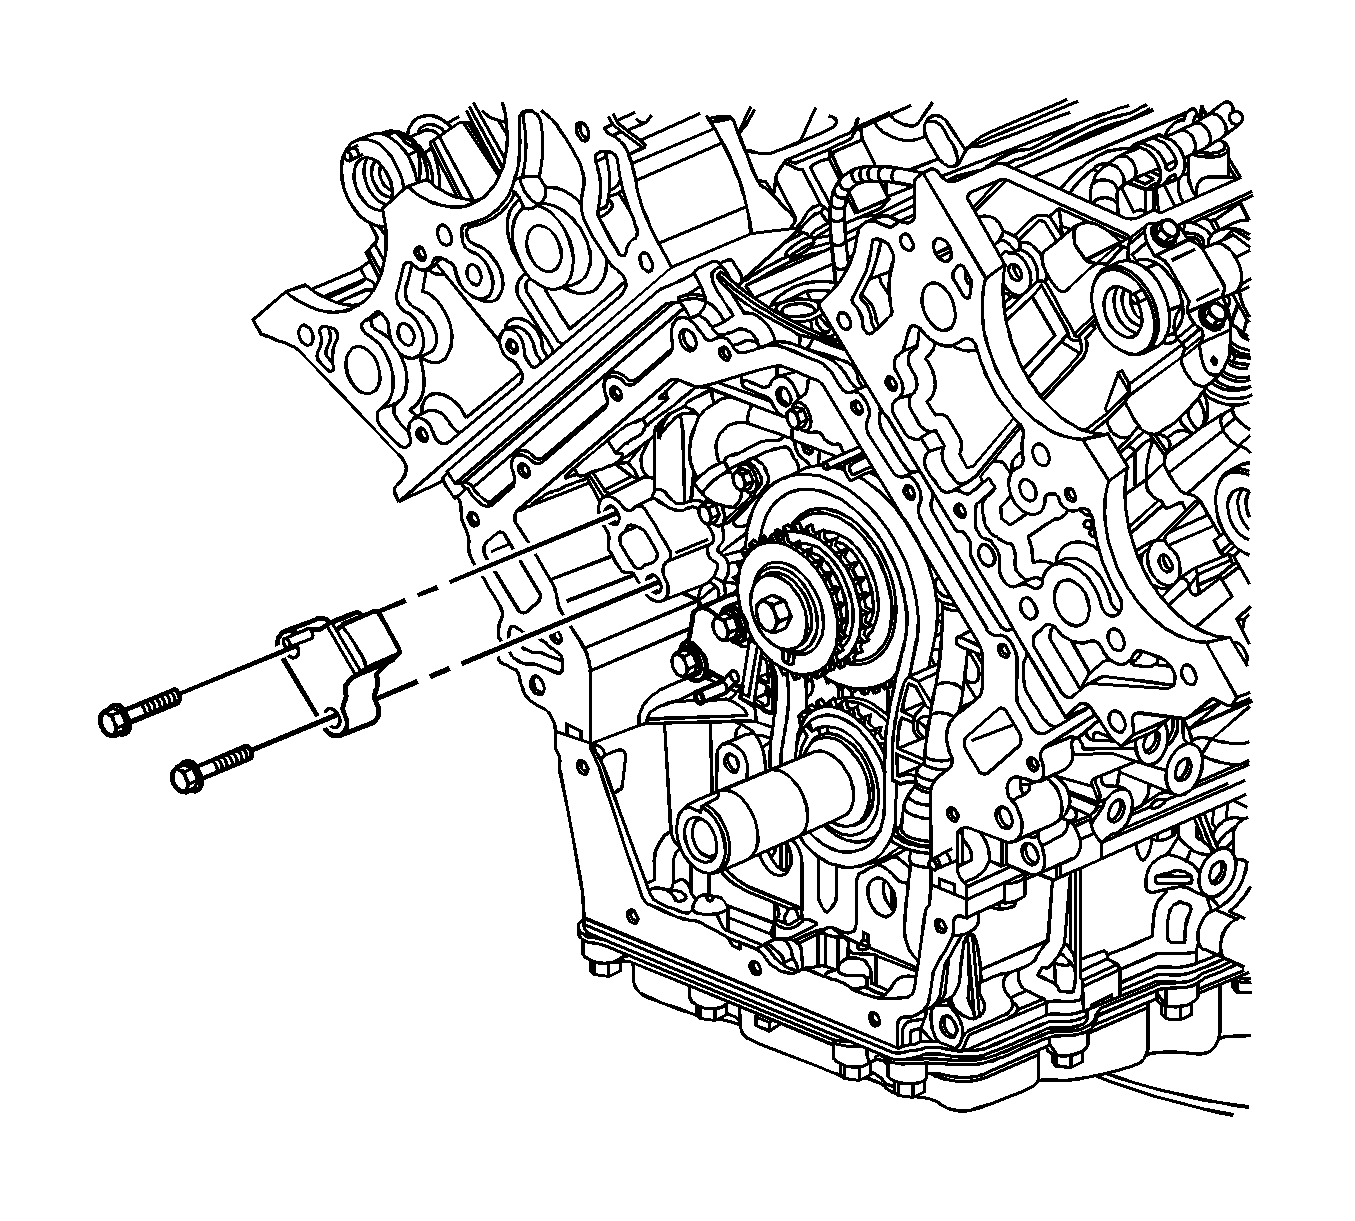
- Remove the 2 bolts attaching the right secondary camshaft drive chain tensioner to the engine block.
- Remove the right secondary camshaft drive chain tensioner, allowing the tensioner to expand as you remove it.
- Clean and inspect the camshaft timing drive components. Refer to Camshaft Timing Drive Components Cleaning and Inspection.
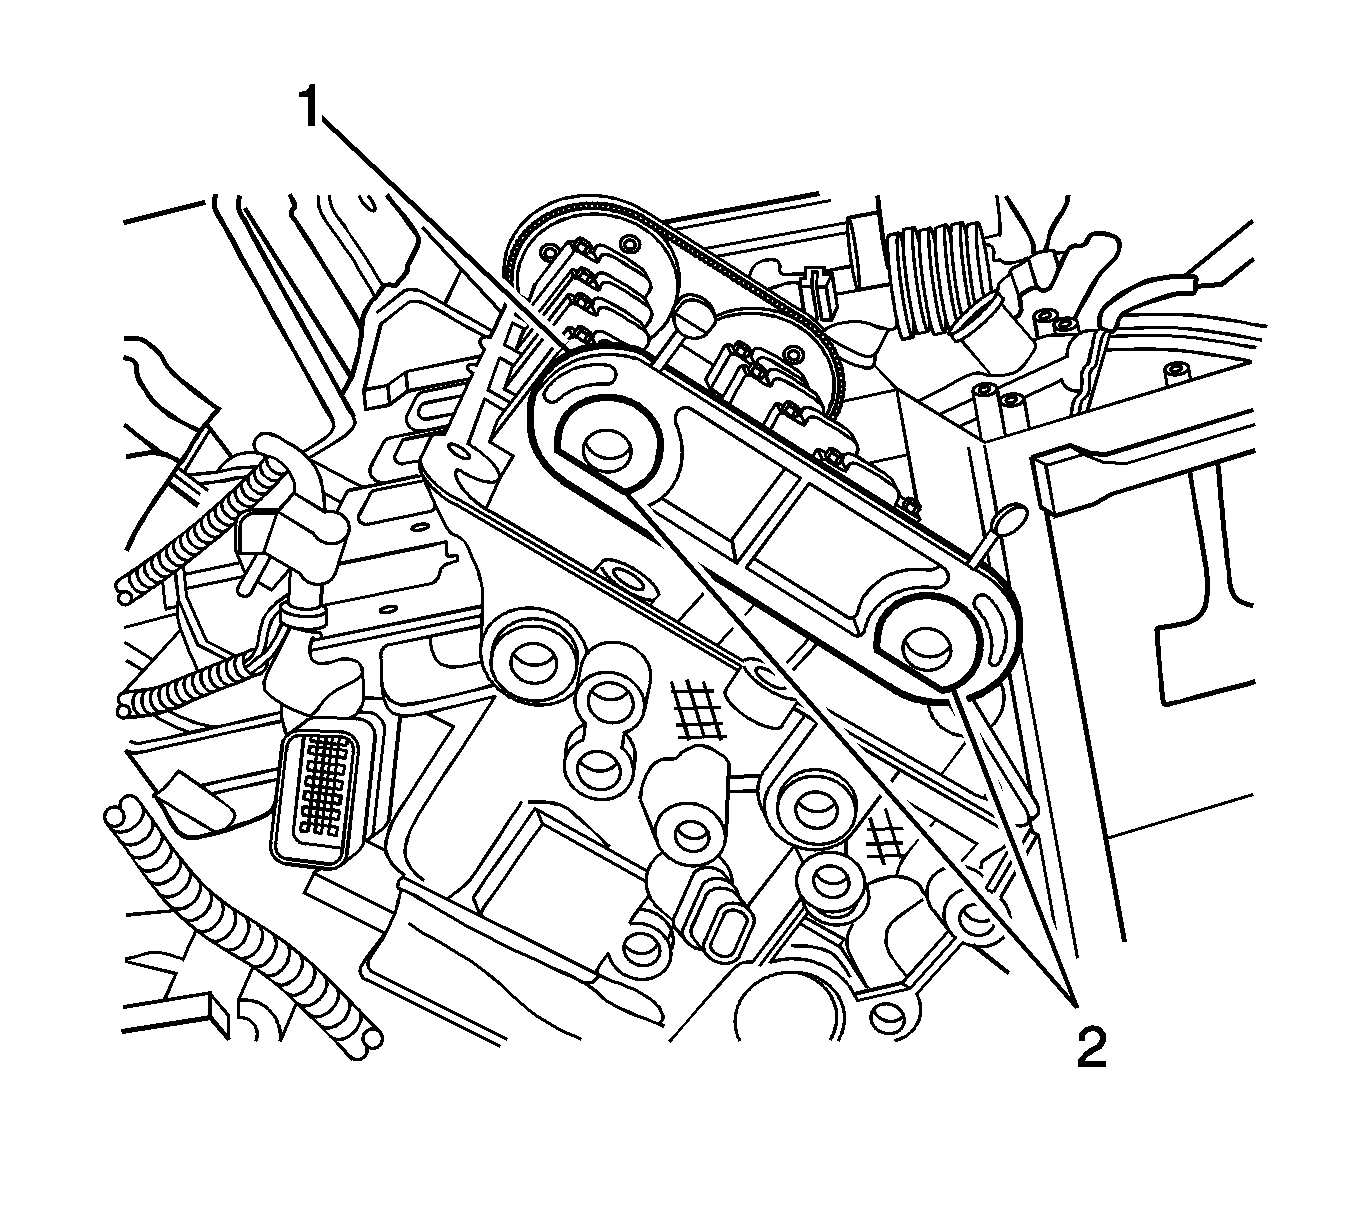
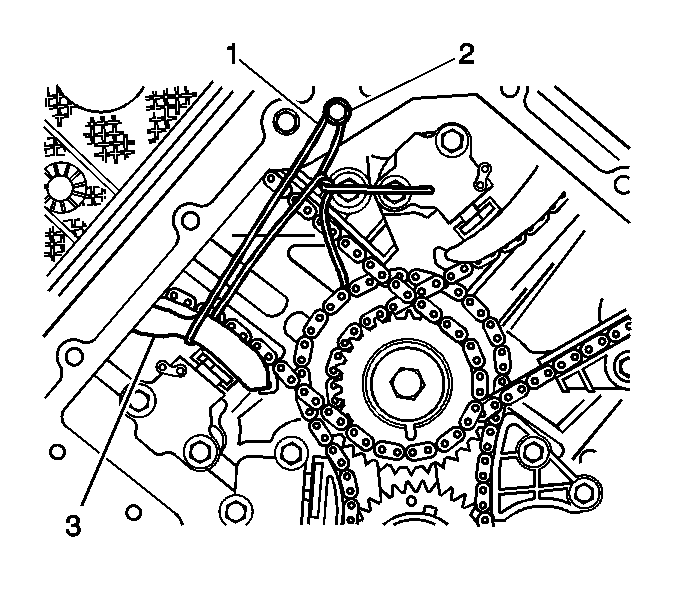
Note: Securing the right secondary camshaft drive chain shoe will prevent the right camshaft drive sprocket teeth from skipping on the right secondary timing chain.
Installation Procedure
- Collapse the right secondary camshaft chain tensioner using the following procedure:
- Slowly release the pressure on the shoe (1), until the ratchet lever (2) moves to the first detent and a "click" is heard and felt.
- Collapse the tensioner shoe (1) and hold.
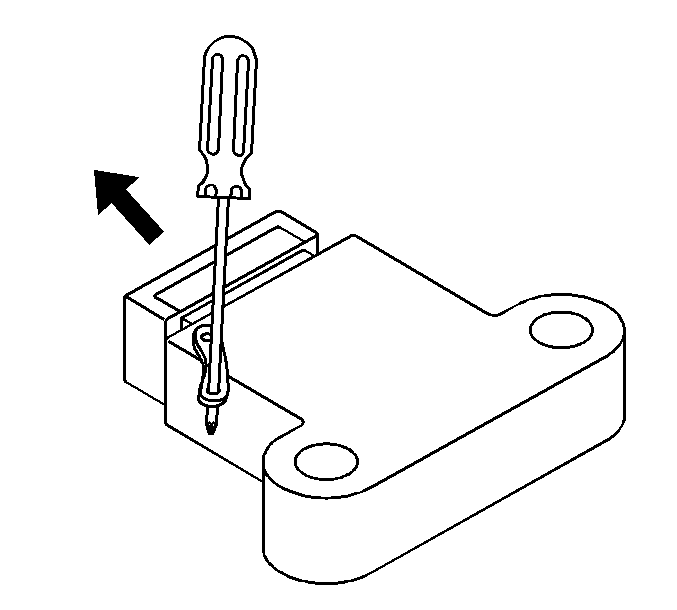
- Insert a pin through the hole in the release lever in order to lock the tensioner shoe in the collapsed position.
- Install the right secondary camshaft drive chain tensioner and retaining bolts then tighten to 25 N·m (18 lb ft).
- Remove the pin holding the tensioner to tighten any slack in the timing chain.
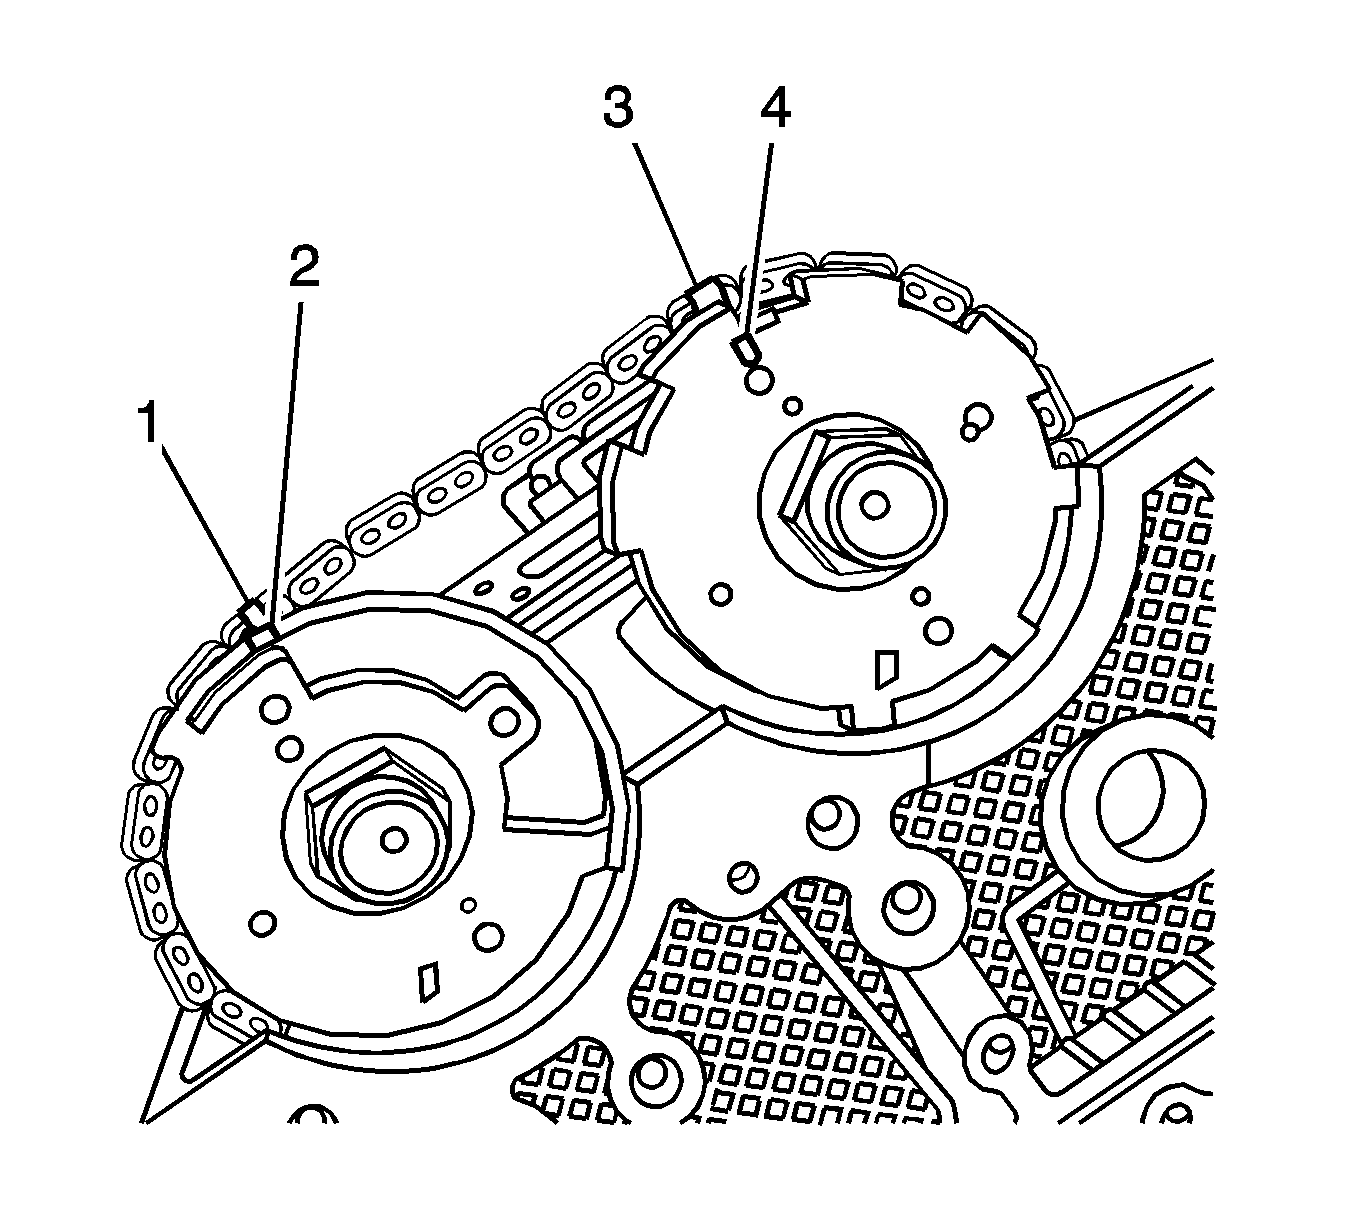
- Inspect the 2 paint marks (1, 3) created previously to ensure they remain aligned with the timing marks (2, 4) on the actuator.
- Remove the mechanics wire (1) supporting the right secondary camshaft drive chain shoe (3).
- Remove the engine front cover bolt (2) from the front of the engine.
- Install the engine oil pump. Refer to Oil Pump Replacement.
- Remove the EN 46328 (1).
- Install the right camshaft cover. Refer to Camshaft Cover Replacement - Right Side.
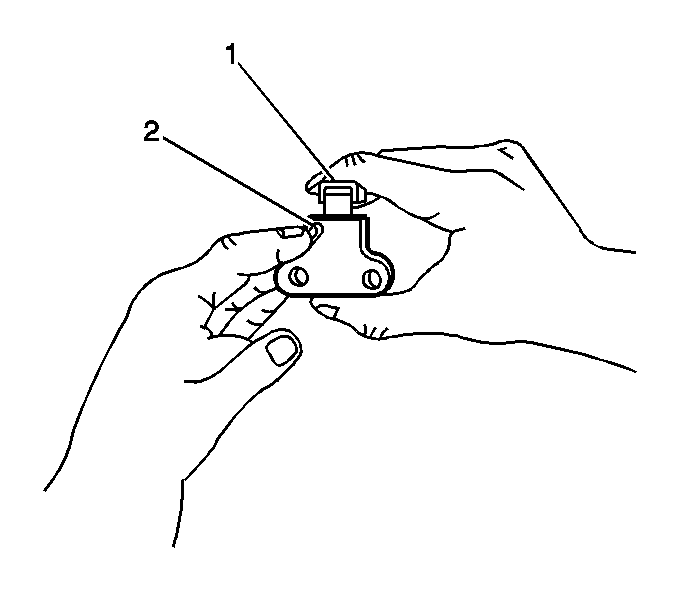
| 1.1. | Rotate the ratchet release lever (2) counterclockwise and hold. |
| 1.2. | Collapse the tensioner shoe (1) and hold. |
| 1.3. | Release the ratchet lever (2). |
Caution: Refer to Fastener Caution in the Preface section.

Note: Ensure the tensioner release lever is facing outward.
