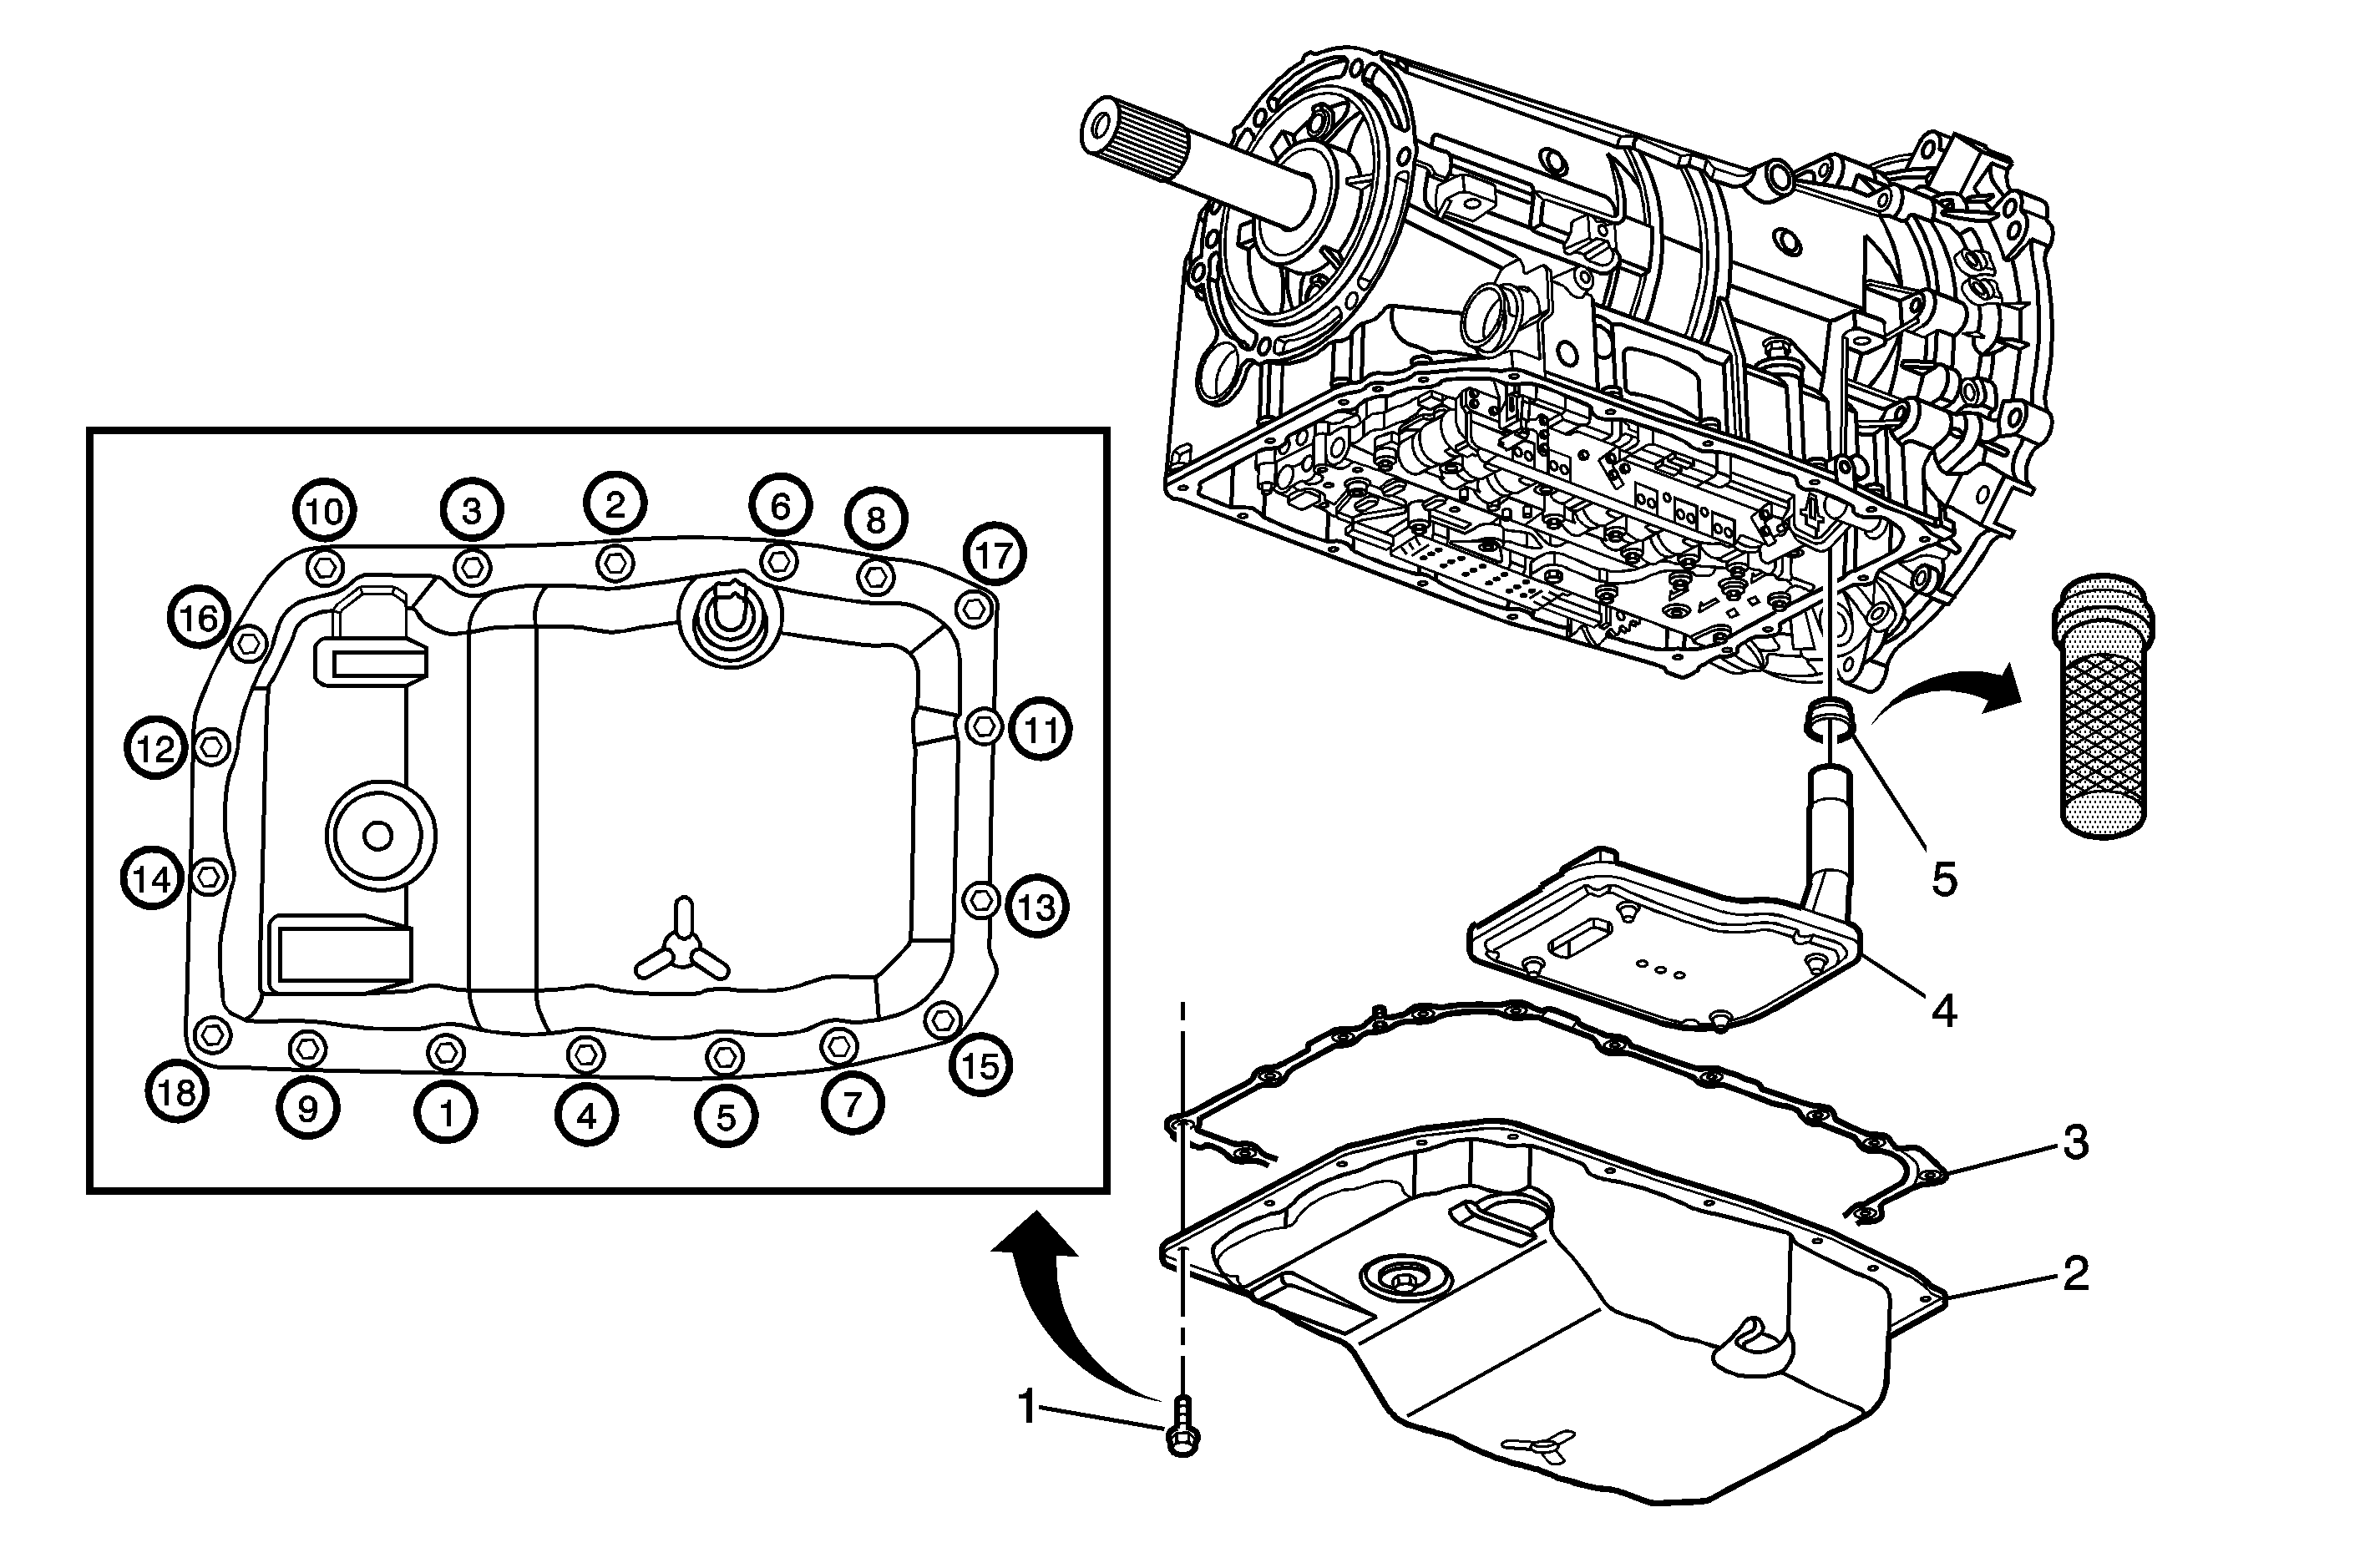
Callout
| Component Name
|
|
Caution: Use Dexron VI transmission fluid only. Failure to use the proper fluid may result in transmission internal damage.
Preliminary Procedures
- Raise and support the vehicle. Refer to
Lifting and Jacking the Vehicle.
- Place a suitable drain pan under the transmission.
- Suitably support the rear drive assembly.
- Remove the transmission mount nuts. Refer to
Transmission Mount Replacement.
- Raise the rear drive assembly to gain access to the transmission pan bolts.
|
1
| Transmission Fluid Pan Bolt (Qty: 18)
Caution: Refer to Fastener Caution in the Preface section.
Tip
Tighten the bolts in the sequence shown.
Tighten
9 N·m (80 lb in) |
2
| Transmission Fluid Pan Assembly
Procedure
- Check the condition of the draining fluid. Refer to
Transmission Fluid Check.
- Fill the transmission with the proper fluid. Refer to
Transmission General Specifications and
Transmission Fluid Fill Procedure.
- Fill the transmission with the proper amount of transmission fluid. Refer to
Fluid Capacity Specifications and
Transmission Fluid Check.
|
3
| Transmission Fluid Pan Gasket
Tip
The fluid pan gasket is reusable. Inspect the gasket to determine if it may be reused. |
4
| Fluid Filter Assembly
Tip
| • | Install a new fluid filter assembly. |
| • | Pull the fluid filter assembly straight out. Do not bend or twist the filter neck. |
|
5
| Fluid Filter Seal Assembly
Caution: Do not damage the case sealing surface when removing the filter seal assembly.
Procedure
- Use a screwdriver or snap ring pliers to remove the filter seal.
- Install a new filter seal.
- Use the
DT 47848
and the
J 42183
to install the filter seal.
- Lubricate the filter seal with transmission fluid before installing the filter.
Special Tools
| • | DT 47848
Water Pump Pulley Holding Tool |
|

