For 1990-2009 cars only
Fore/Aft and Cross Car Adjustment Procedure
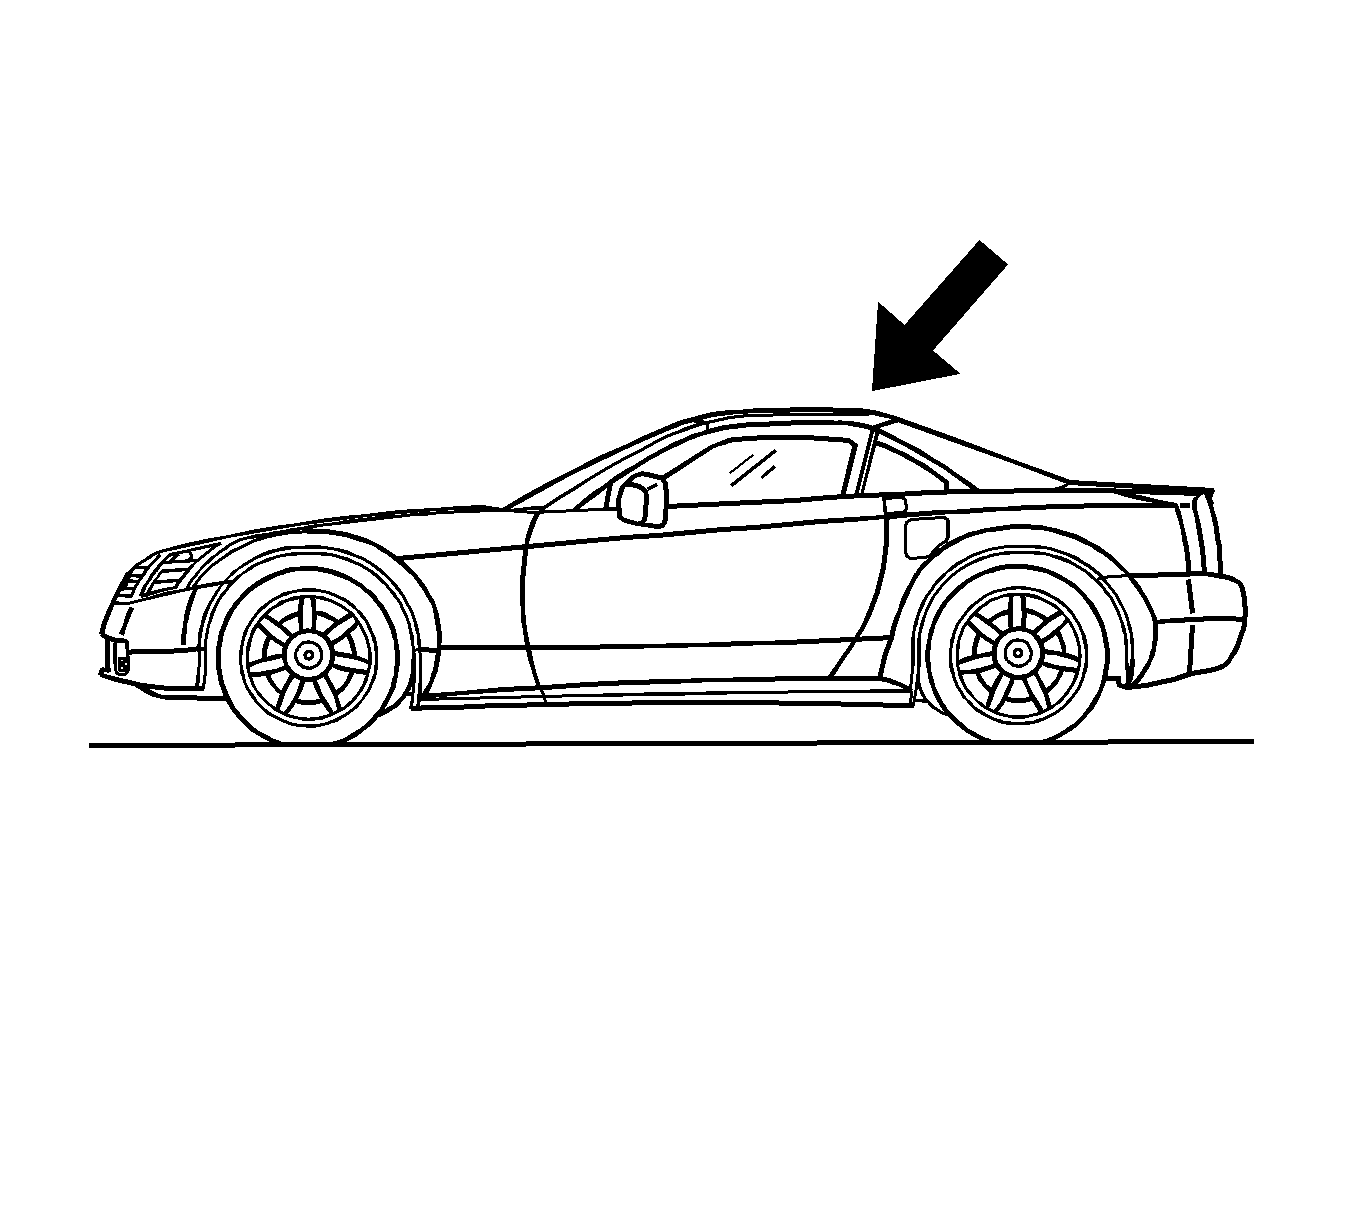
- Place the folding top in the up position.
- Open the rear compartment.
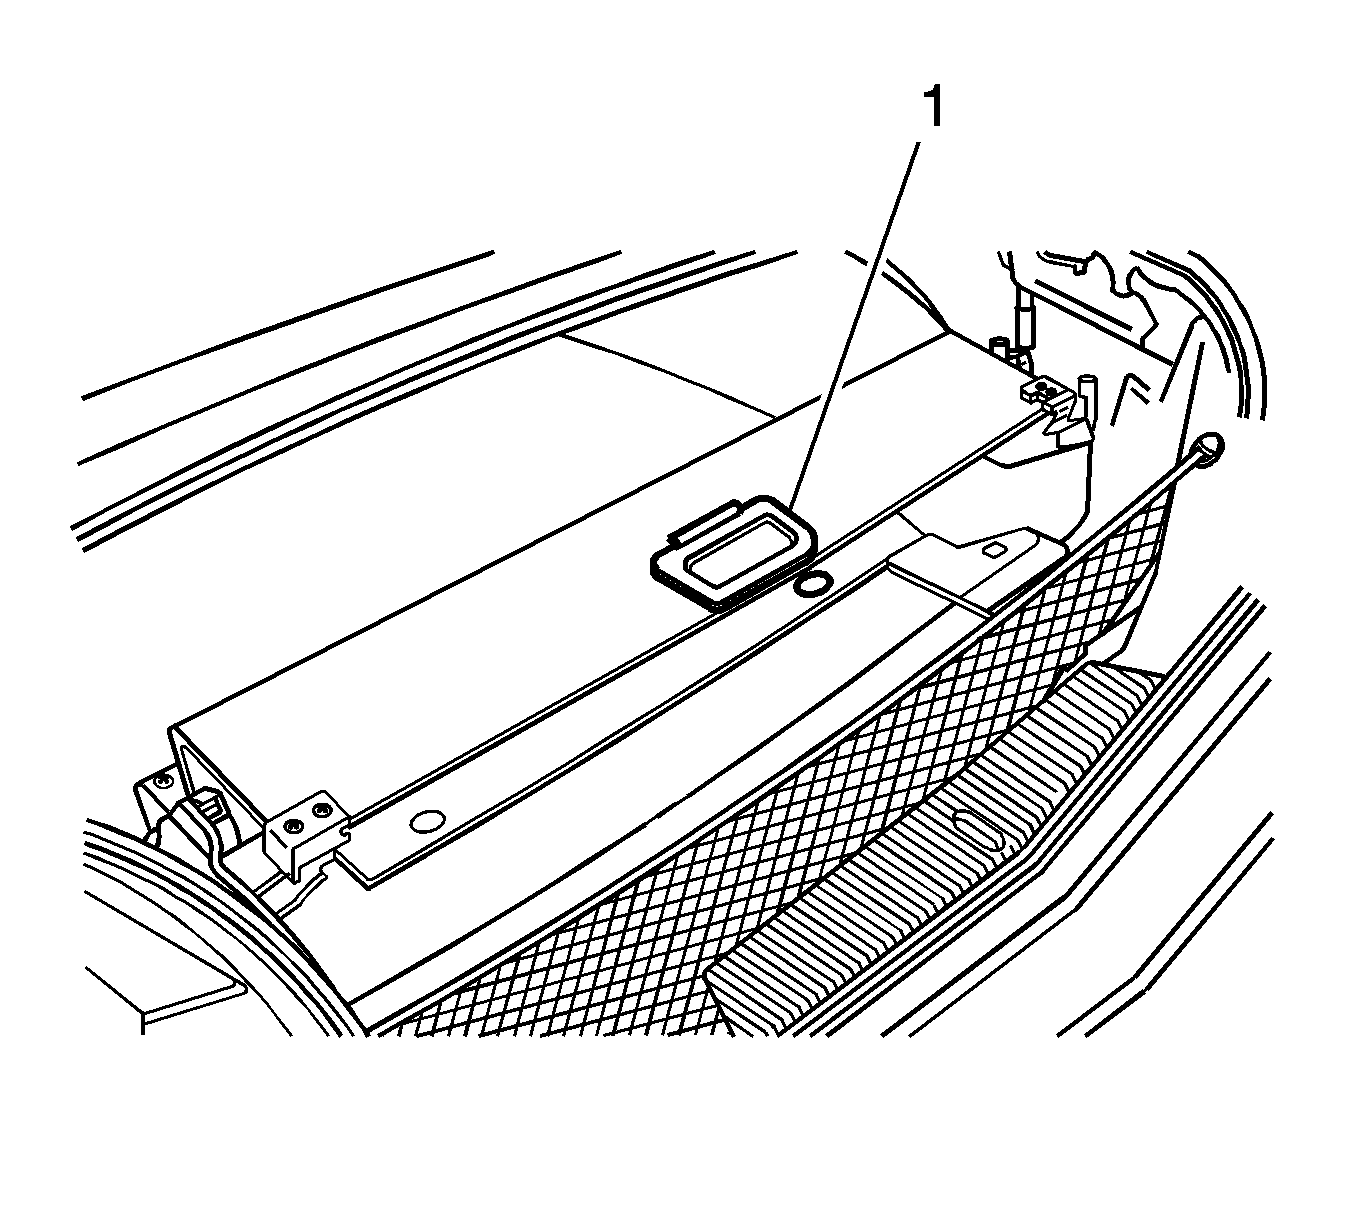
- Lower the rear compartment partition (1).
- Place a protective covering over the interior and the adjacent body panels.
- Locate the hydraulic pump beneath the carpet in the storage compartment on the driver side of the rear compartment.
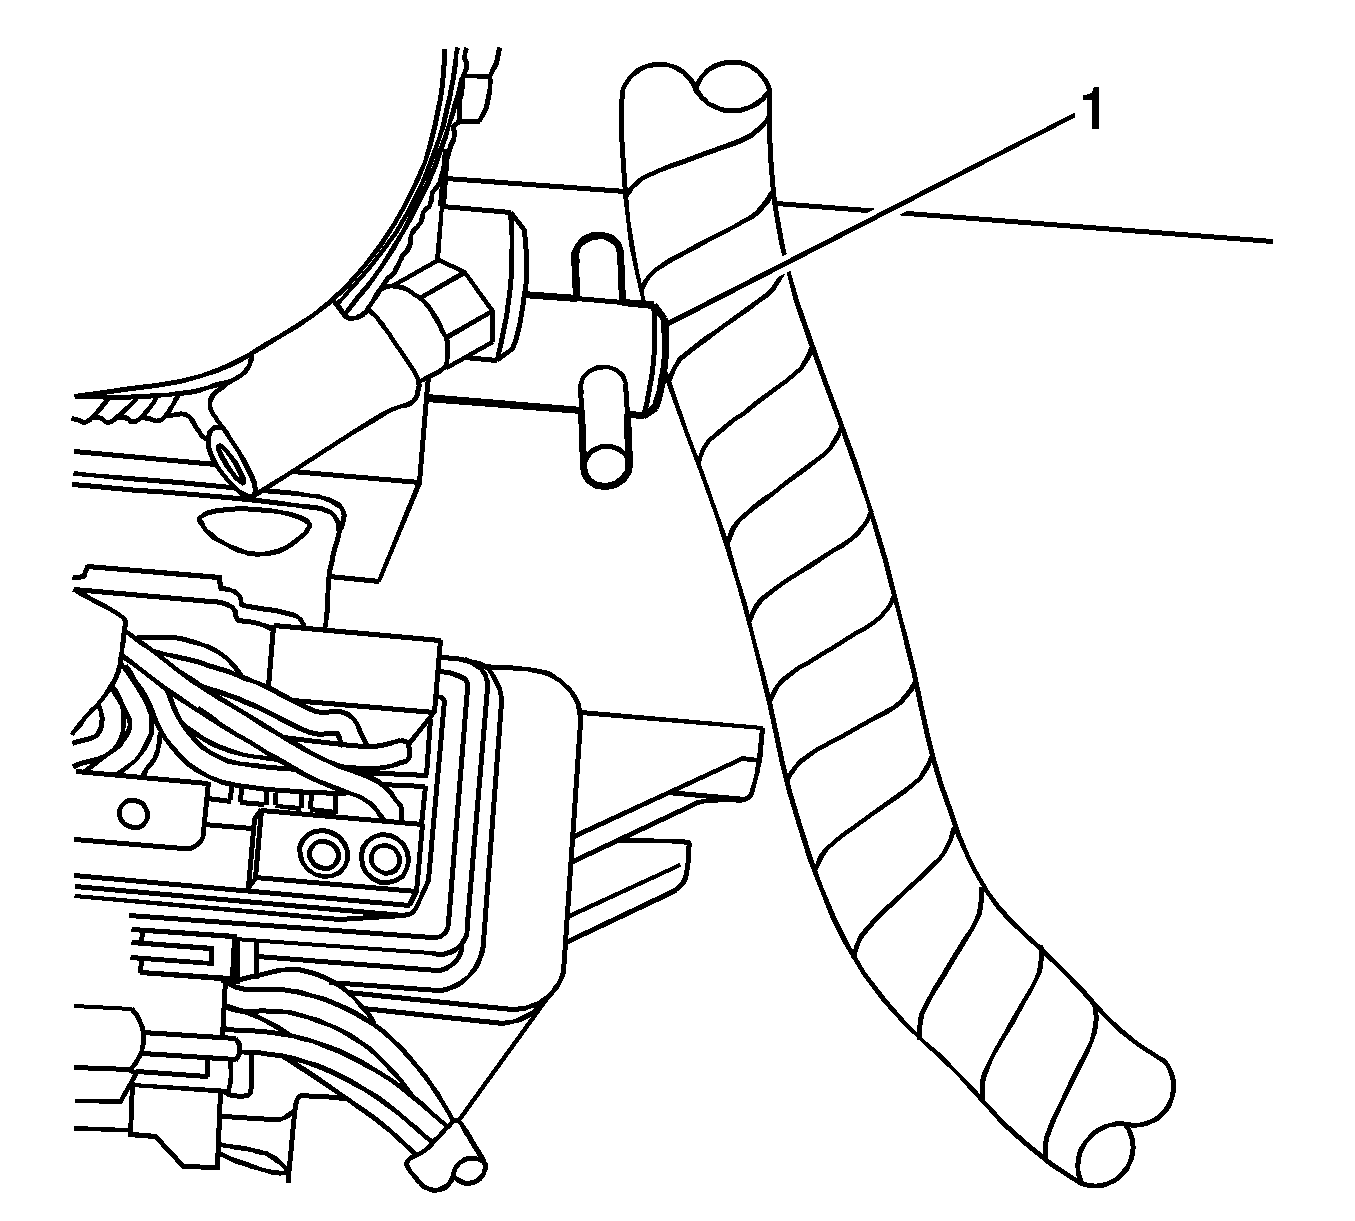
- Turn the pump bypass valve (1) counterclockwise until the valve stops.
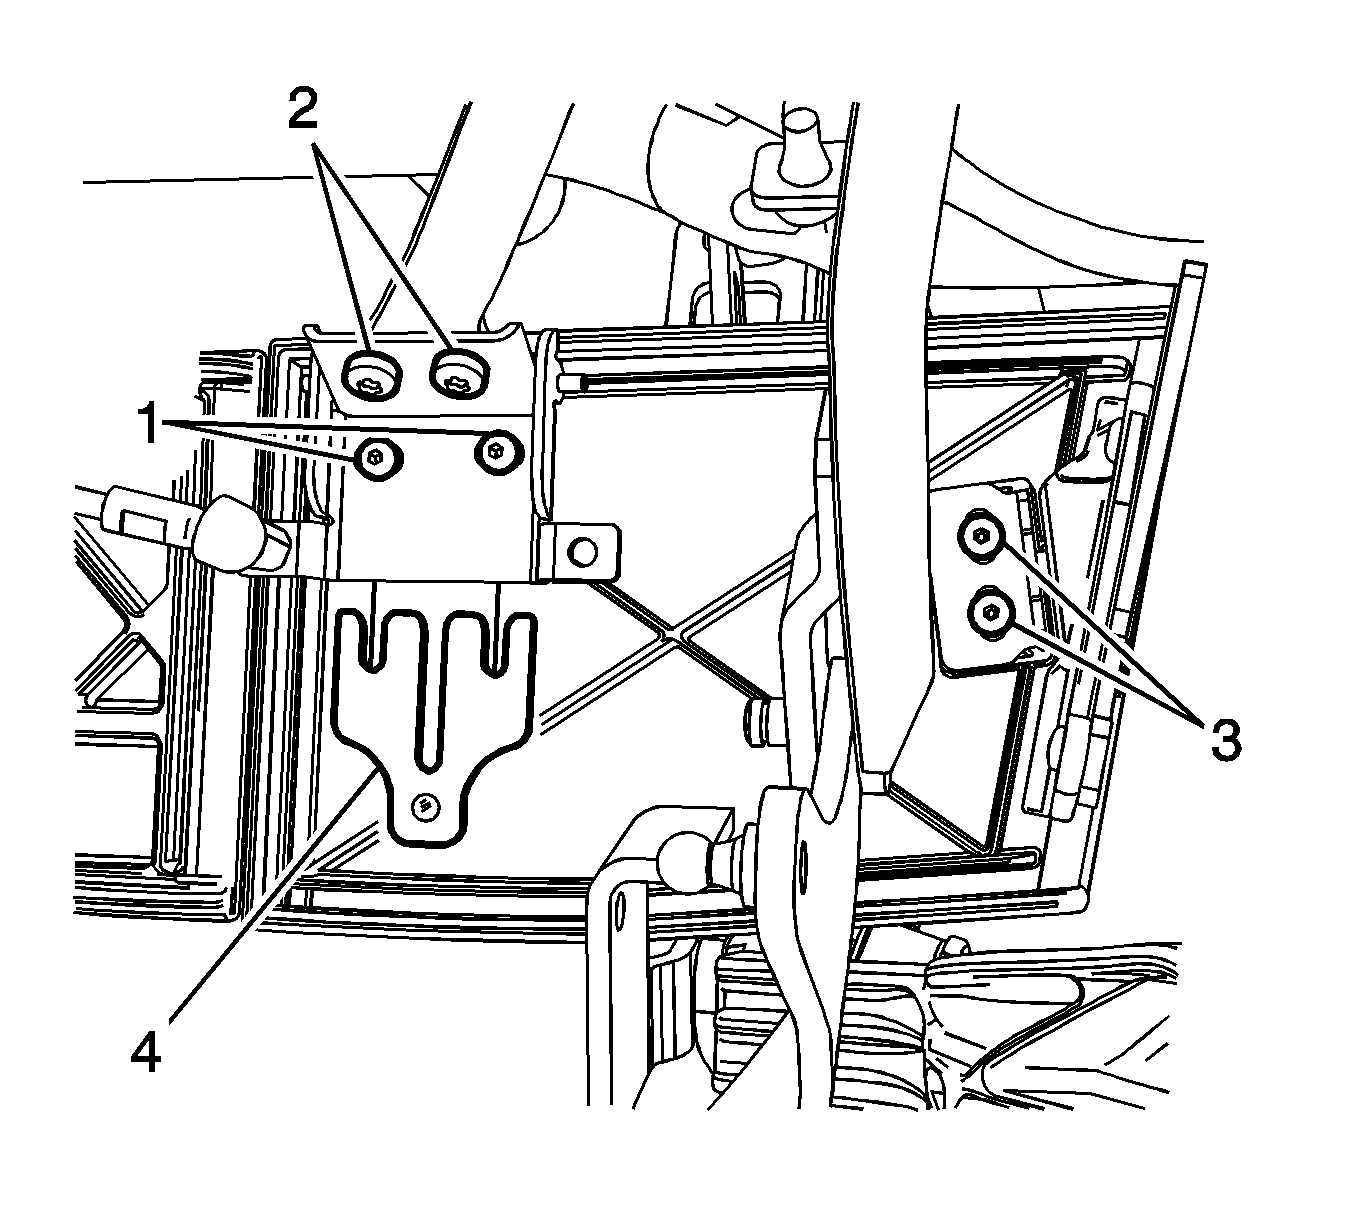
- Loosen the bolts (1) on the compartment closeout panel and loosen the locating pin bolts (3).
- Apply LOCTITE™ Blue, GM P/N 12345382 (Canadian P/N 10953489) or equivalent to the bolts.
- Adjust the closeout panel as necessary. Tighten the bolts to 5 N·m (44 lb in).
- Apply LOCTITE™ Blue, GM P/N 12345382 (Canadian P/N 10953489) or equivalent to the bolts.
- Push the locating pin into the pin receiver and tighten the bolts (3) to 5 N·m (44 lb in).
- Verify that the closeout panel is properly aligned. Refer to Folding Top Clearance Gap Specifications.
- Repeat the adjustment procedure as necessary.
- Turn the pump bypass valve (1) clockwise until the valve stops.
- Remove the protective covering.
- Raise the rear compartment partition (1).
- Close the rear compartment.
- Cycle the folding top under power through one complete cycle in both directions.
- Inspect the folding top for proper operation. Refer to Power Folding Top Description and Operation.
Caution: Refer to Fastener Caution in the Preface section.


Up/Down Adjustment Procedure
- Place the folding top in the up position.
- Open the rear compartment.
- Lower the rear compartment partition (1).
- Place a protective covering over the interior and the adjacent body panels.
- Locate the hydraulic pump beneath the carpet in the storage compartment on the driver side of the rear compartment.
- Turn the pump bypass valve (1) counterclockwise until the valve stops.
- Loosen the bolts (1) on the compartment closeout panel and loosen the locating pin bolts (3).
- Note the number and the location of any shims that may be present.
- Add or remove shims to obtain the necessary alignment.
- Apply LOCTITE™ Blue, GM P/N 12345382 (Canadian P/N 10953489) or equivalent to the bolts and tighten to 5 N·m (44 lb in).
- Push the locating pin into the pin receiver and tighten the bolts (3) to 5 N·m (44 lb in).
- Verify that the closeout panel is properly aligned. Refer to Folding Top Clearance Gap Specifications.
- Repeat the adjustment procedure as necessary. If additional adjustment is required, first adjust the length of the closeout panel drive rod.
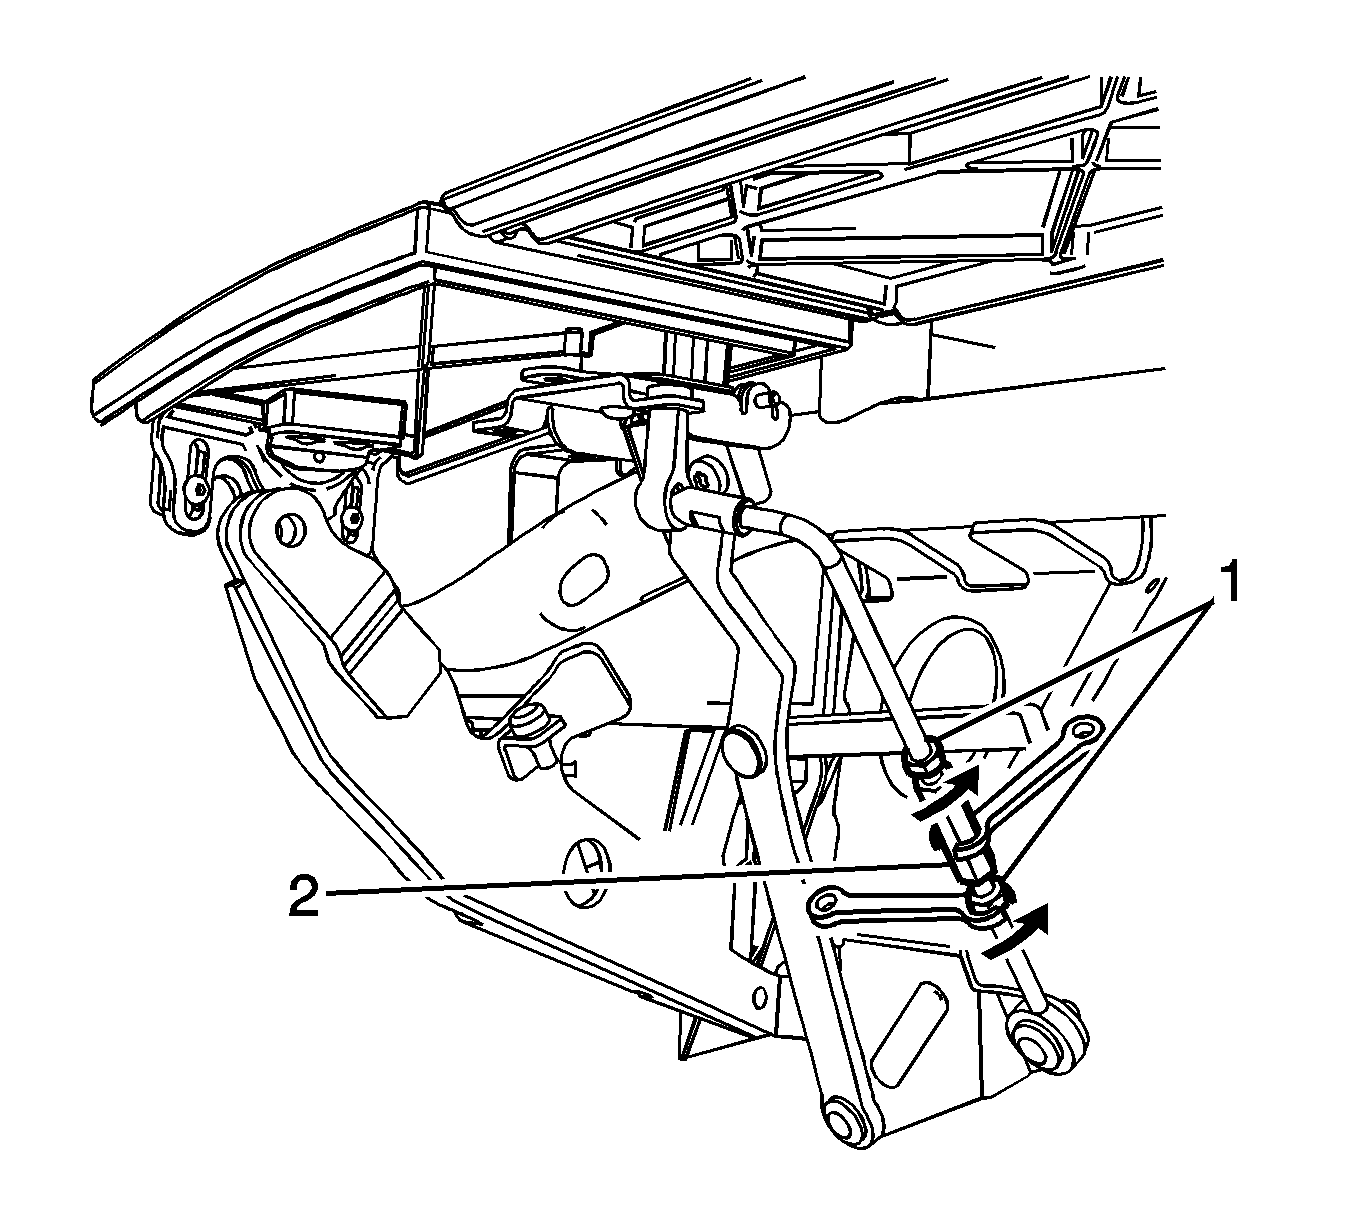
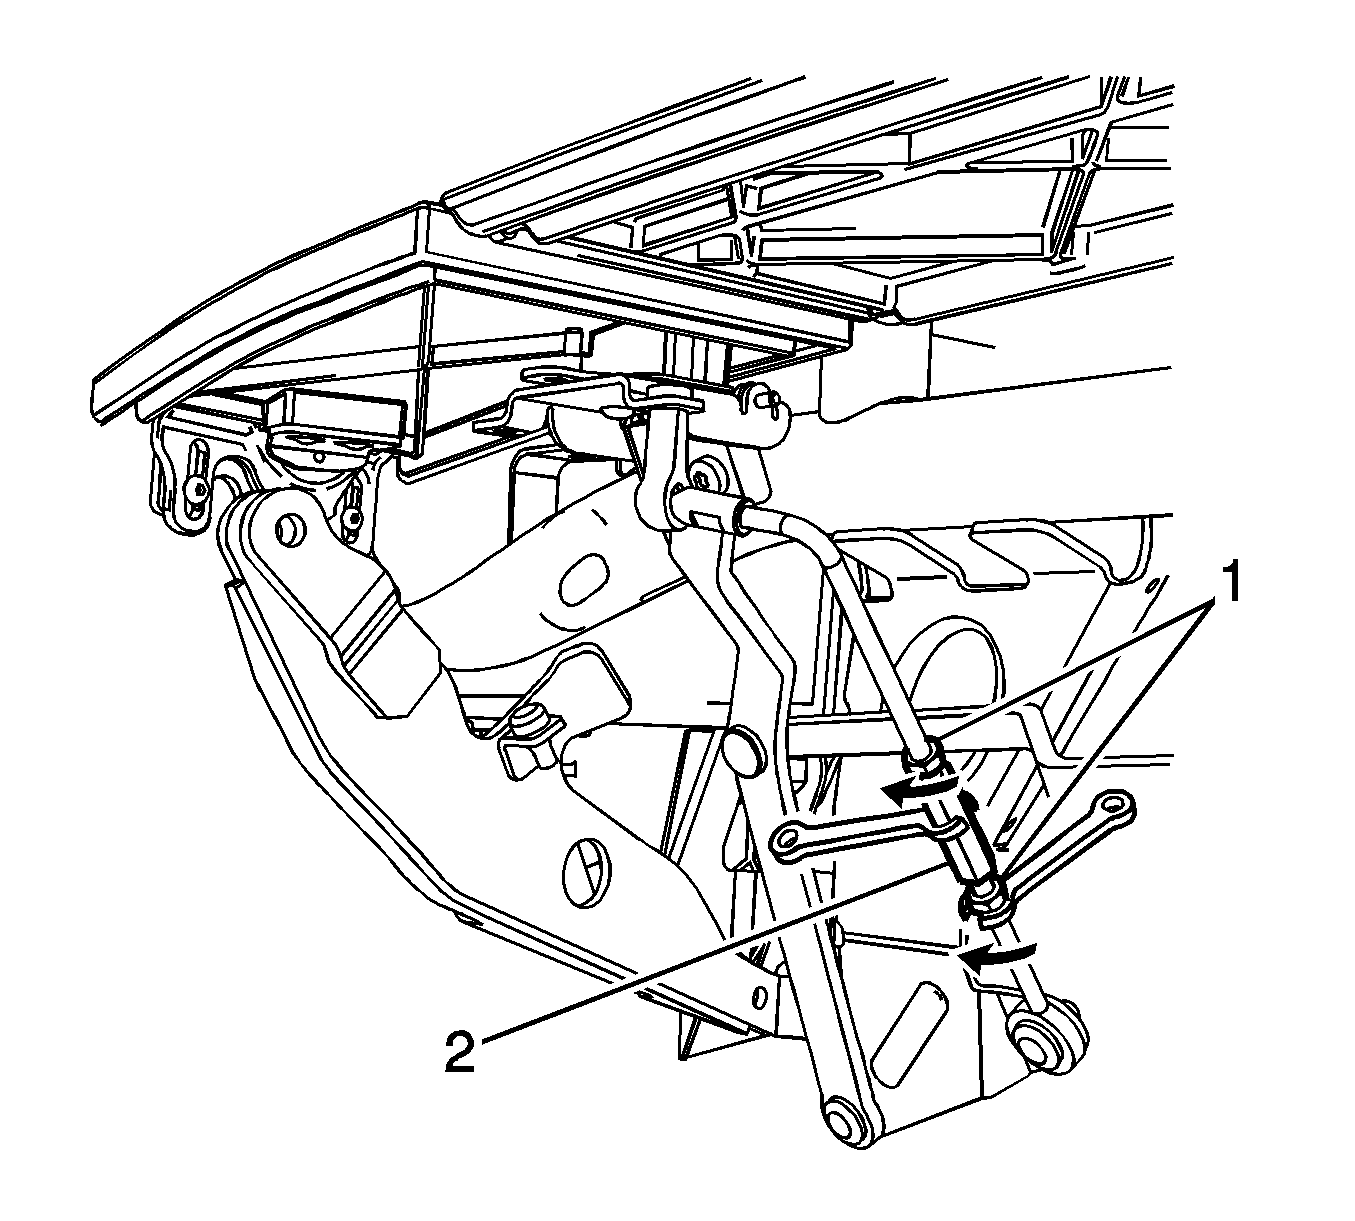
- While holding the drive rod turnbuckle (2), loosen both of the drive rod jam nuts (1).
- Turn the drive rod turnbuckle as necessary to adjust the closeout panel:
- While holding the drive rod turnbuckle (2), tighten both of the drive rod jam nuts (1) to 6 N·m (53 lb in).
- Verify that the closeout panel is properly aligned. Refer to Folding Top Clearance Gap Specifications.
- Repeat the adjustment procedure as necessary.
- Turn the pump bypass valve (1) clockwise until the valve stops.
- Remove the protective covering.
- Raise the rear compartment partition (1).
- Install the support and the carpet over the hydraulic pump.
- Close the rear compartment.
- Cycle the folding top under power through one complete cycle in both directions.
- Inspect the folding top for proper operation. Refer to Power Folding Top Description and Operation.


Caution: Refer to Fastener Caution in the Preface section.
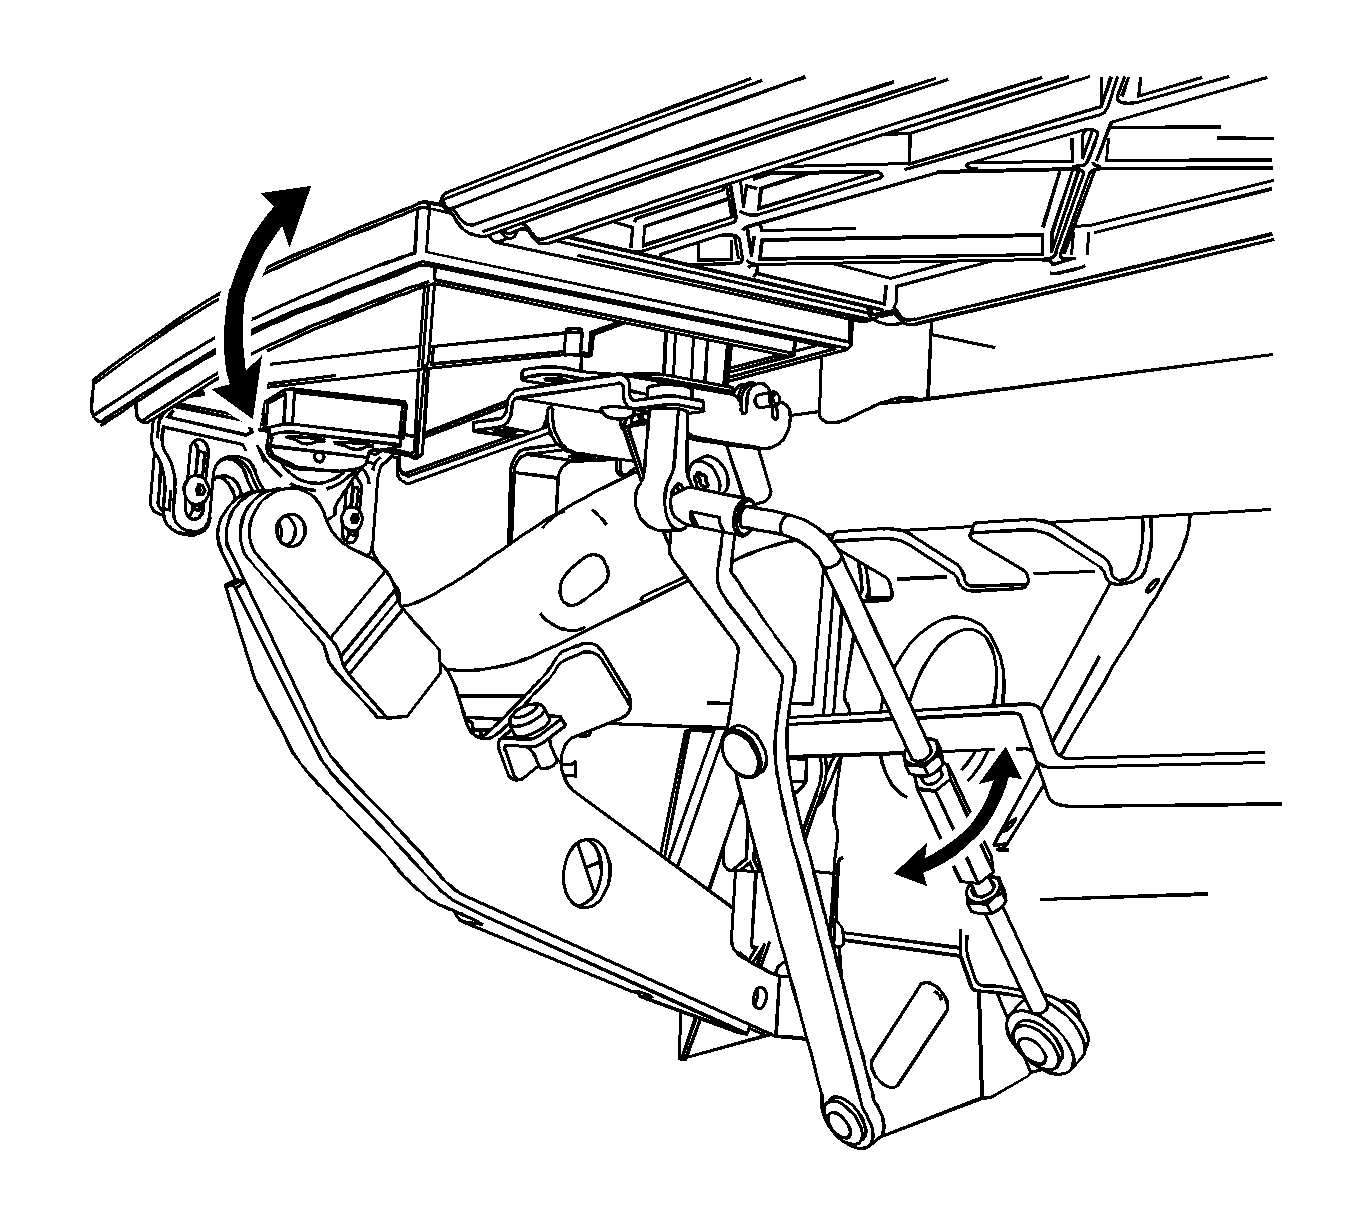
| • | Turn the turnbuckle clockwise to adjust the panel downward. |
| • | Turn the turnbuckle counterclockwise to adjust the panel upward. |
