For 1990-2009 cars only

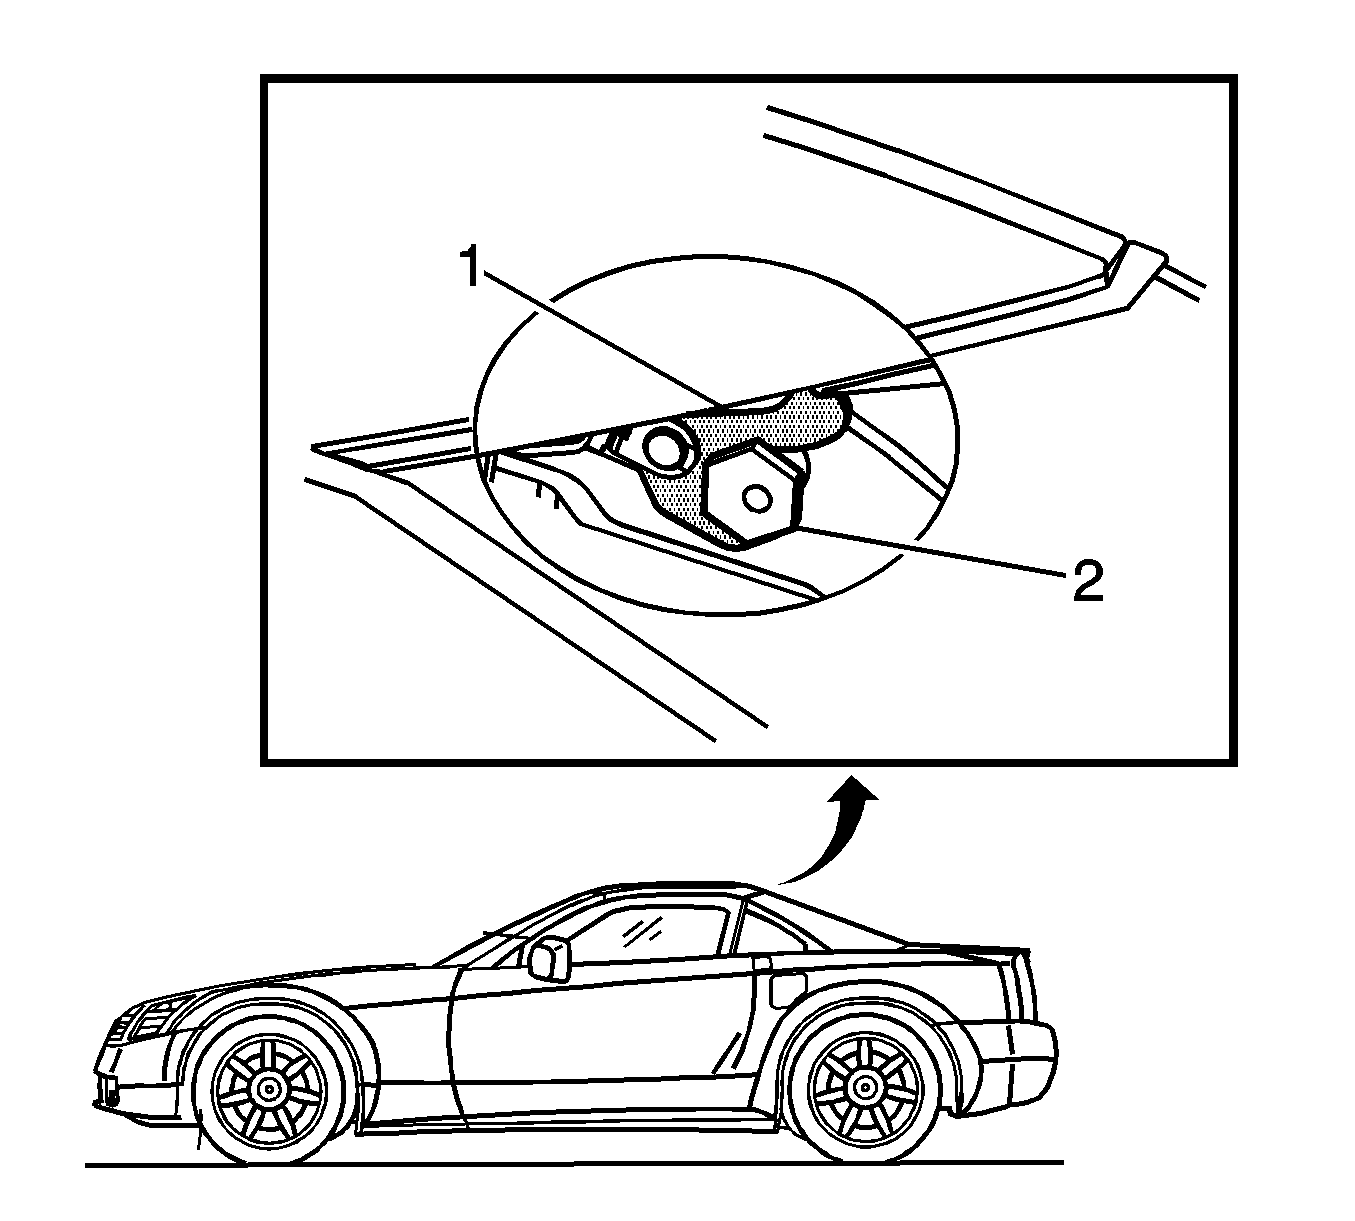
Note: When the top is in the up position, the rear folding top latches (1) grasp the strikers (2). This ensures that the front and the rear folding top panels are latched together. After making adjustments to the front or the rear folding top panels, you need to ensure that the rear folding top latches grasp the strikers. If the latches are not able to grasp the strikers, or if the front and the rear folding top panels are not being pulled together with sufficient force, adjust the strikers following the procedure below.
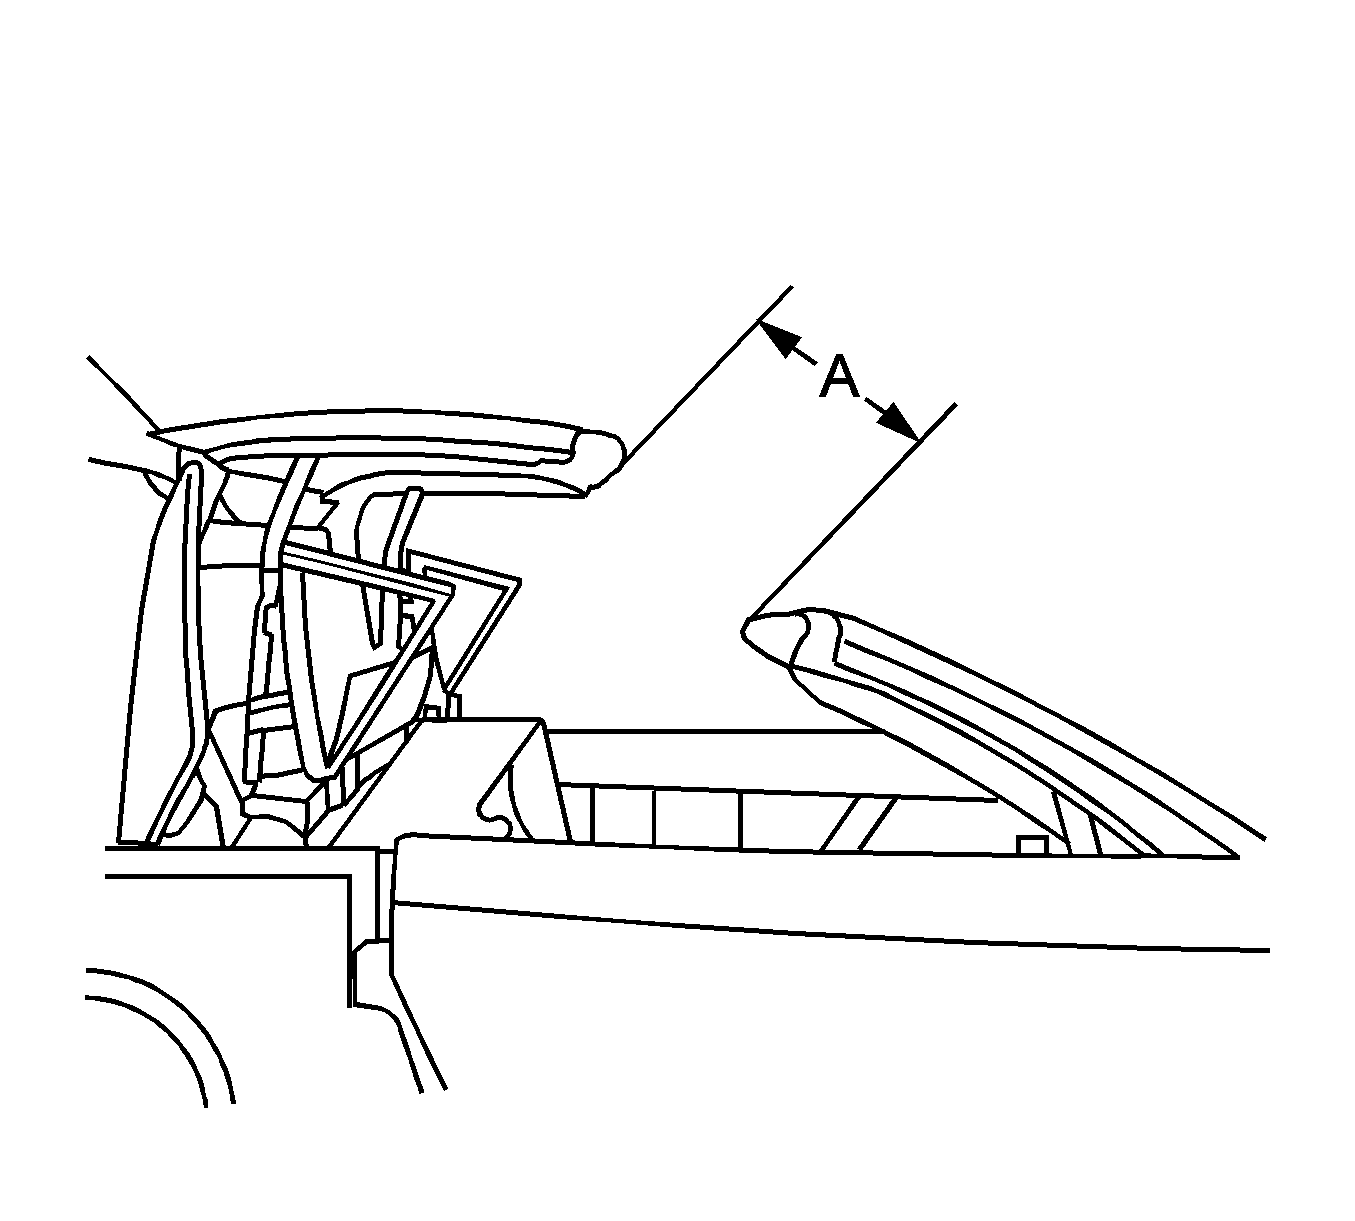
- Open the folding top as shown in the illustration. Dimension (A) is 400 mm (15.75 in) from the windshield header to the leading edge of the folding top panel.
- Place a protective covering over the interior of the vehicle and the adjacent body panels.
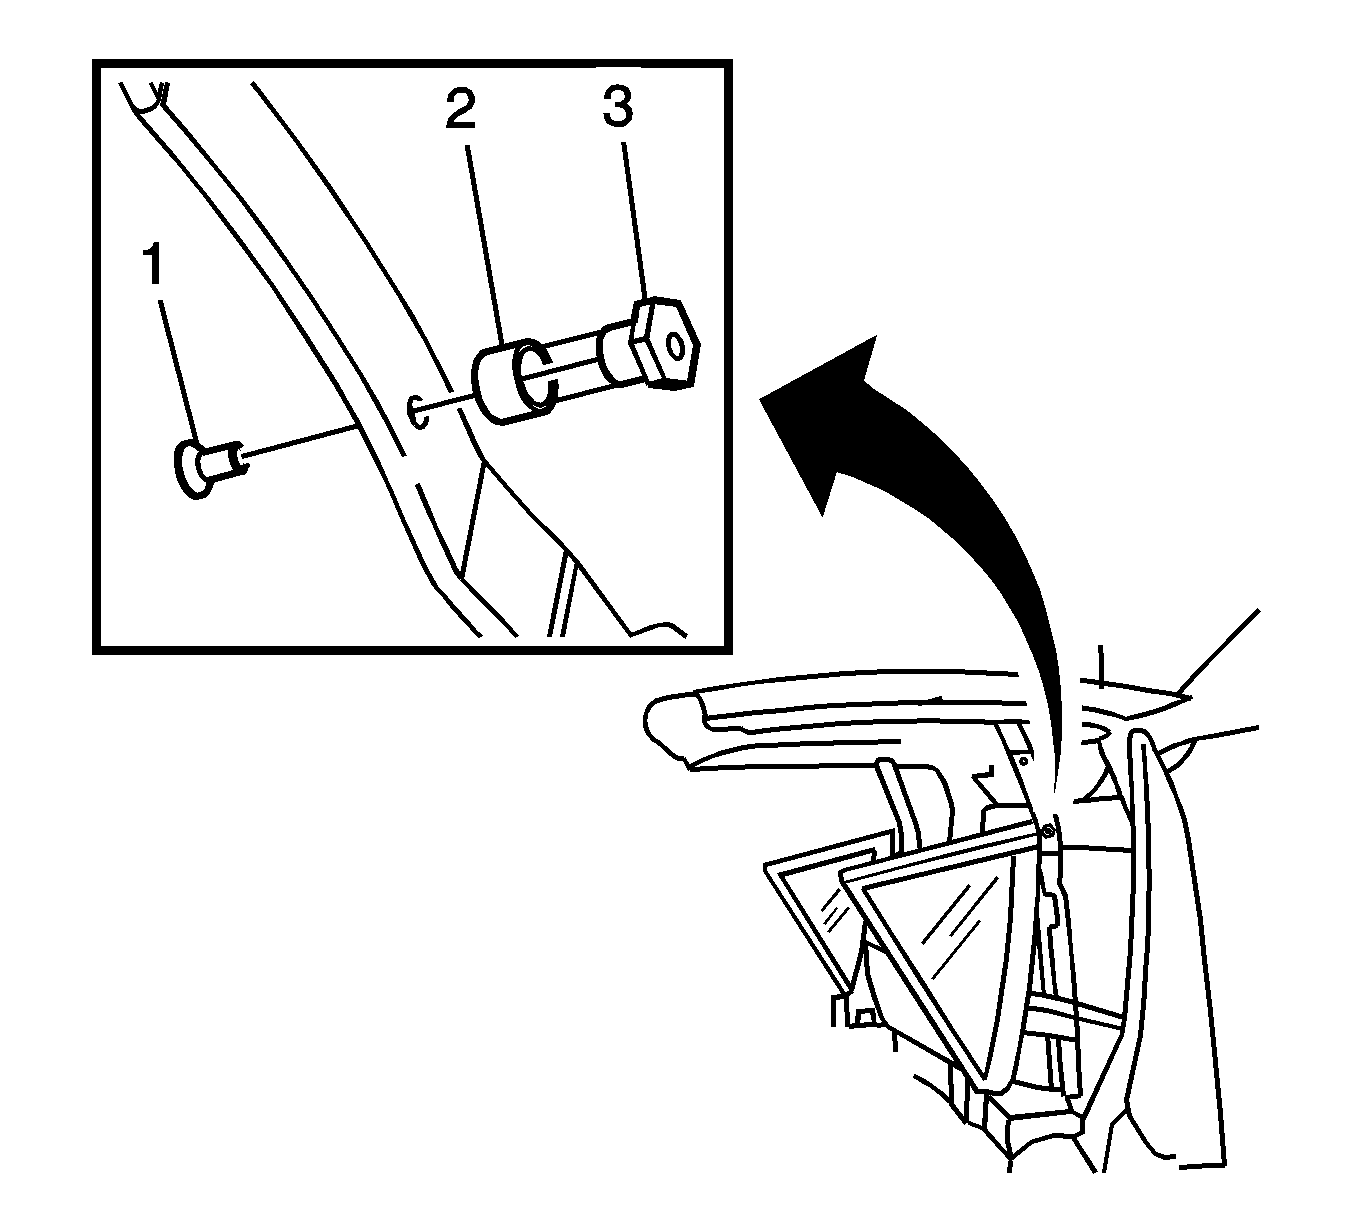
- Loosen the striker bolt (1).
- Adjust the striker (3) as necessary and tighten the bolt to 9 N·m (80 lb in).
- Remove the protective covering.
- Close the folding top.
- Repeat the adjustment procedure as necessary until the rear folding top latches (1) grasp the striker (2).
- Cycle the folding top under power through one complete cycle in both directions.
- Inspect the folding top for proper operation. Refer to Power Folding Top Description and Operation.


Caution: Refer to Fastener Caution in the Preface section.

