For 1990-2009 cars only
Special Tools
J 38185 Spring Hose Clamp Pliers
Removal Procedure
- Recover the refrigerant from the A/C system. Refer to Refrigerant Recovery and Recharging.
- Drain the cooling system. Refer to Cooling System Draining and Filling.
- Remove the rear evaporator line assembly. Refer to Air Conditioning Evaporator Rear Tube Replacement.
- Release and reposition the heater inlet and outlet hose clamps using the J 38185 .
- Separate the heater hoses from heater pipes.
- Cap or plug the open heater hoses.
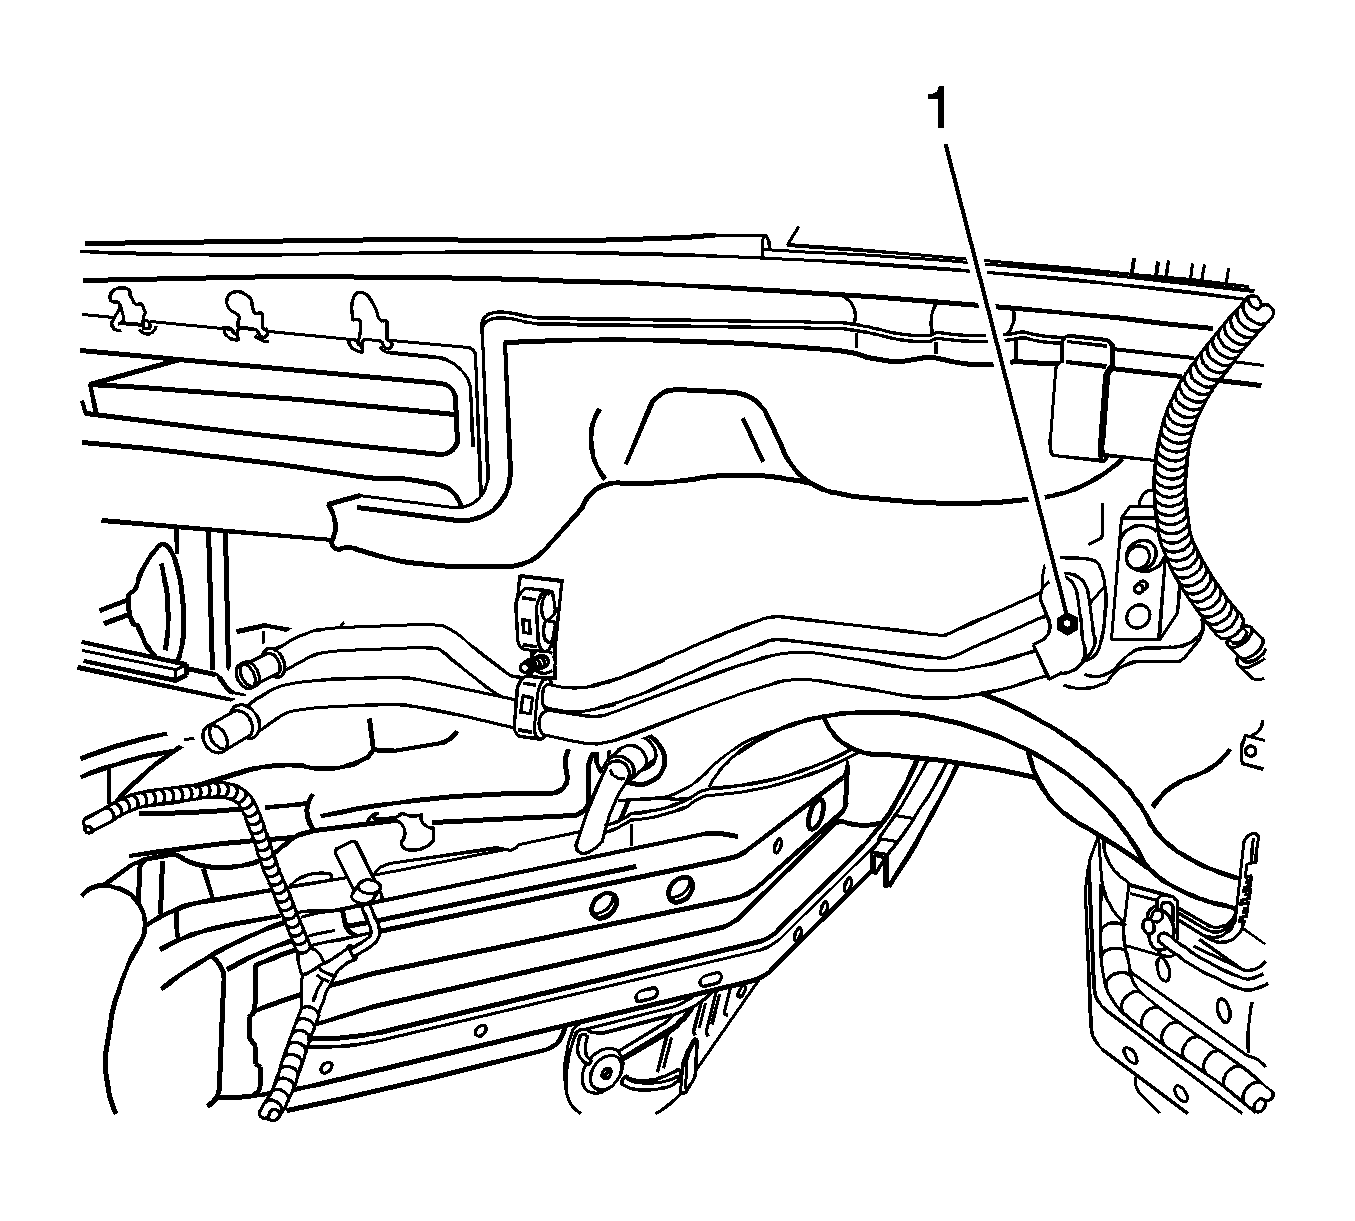
- Remove the heater pipe assembly to heater core retaining bolt (1).
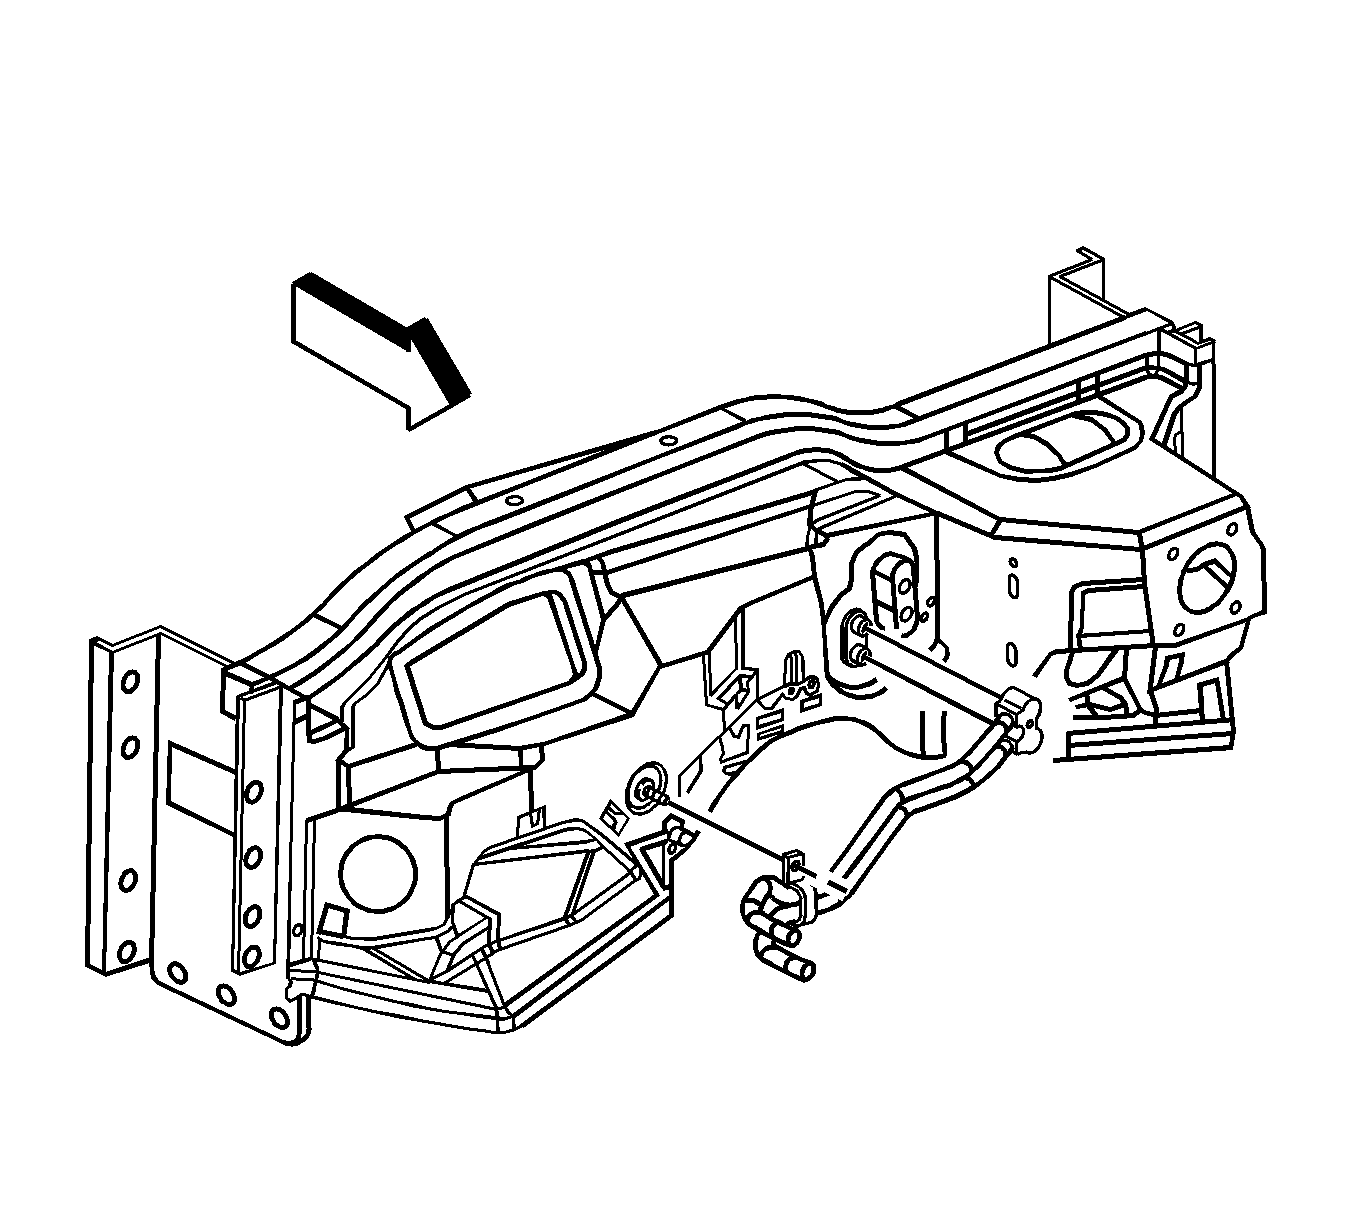
- Disconnect the heater pipe assembly from the heater pipe bracket retainer.
- Disconnect the heater pipe assembly from the heater core.
- Remove the heater pipe assembly from the vehicle.
- Remove and discard the sealing washers.
- Cap or plug the heater core.
Note: Cap or plug the cooling components to prevent system contamination.

Caution: Do not apply excessive force on the heater core pipes during hose removal. Applying excessive force on the heater core pipes may damage the heater core pipes.

Installation Procedure
- Remove the cap or plug from the heater core.
- Using a lint-free clean, dry cloth, carefully clean the sealing surfaces of the heater pipe assembly and the heater core.
- Lightly coat the new seal washers with coolant.
- Carefully slide the new sealing washers onto the heater pipe assembly until properly seated.
- Install the heater pipe assembly into position in the vehicle.
- Install the heater pipe assembly to the heater core.
- Install the heater pipe assembly retaining bolt (1) and tighten to 10 N·m (89 lb in).
- Remove cap or plug from the heater hoses.
- Connect heater inlet and outlet hoses to the heater pipe assembly.
- Install the heater hose clamps into position using the J 38185 .
- Install the rear evaporator line assembly. Refer to Air Conditioning Evaporator Rear Tube Replacement.
- Fill the cooling system. Refer to Cooling System Draining and Filling.

Caution: Refer to Fastener Caution in the Preface section.

