Generator Replacement for Chevrolet Alero Export 2002
Generator Replacement 3.4L
The generator does not require periodic lubrication. The rotor shaft is mounted on bearings. Each bearing contains a permanent grease supply. Periodically check the mounting bolts for tightness, and the drive belt tension. The drive belt is self-adjusting, within the operating limits of the tensioner. Refer to Drive Belt Tensioner Diagnosis for tensioner information.
Removal Procedure
- Disconnect the negative battery cable. Refer to Battery Negative Cable Disconnection and Connection .
- Remove the drive belt. Refer to Drive Belt Replacement in Engine Mechanical - 3.4L.
- Remove the generator electrical connections.
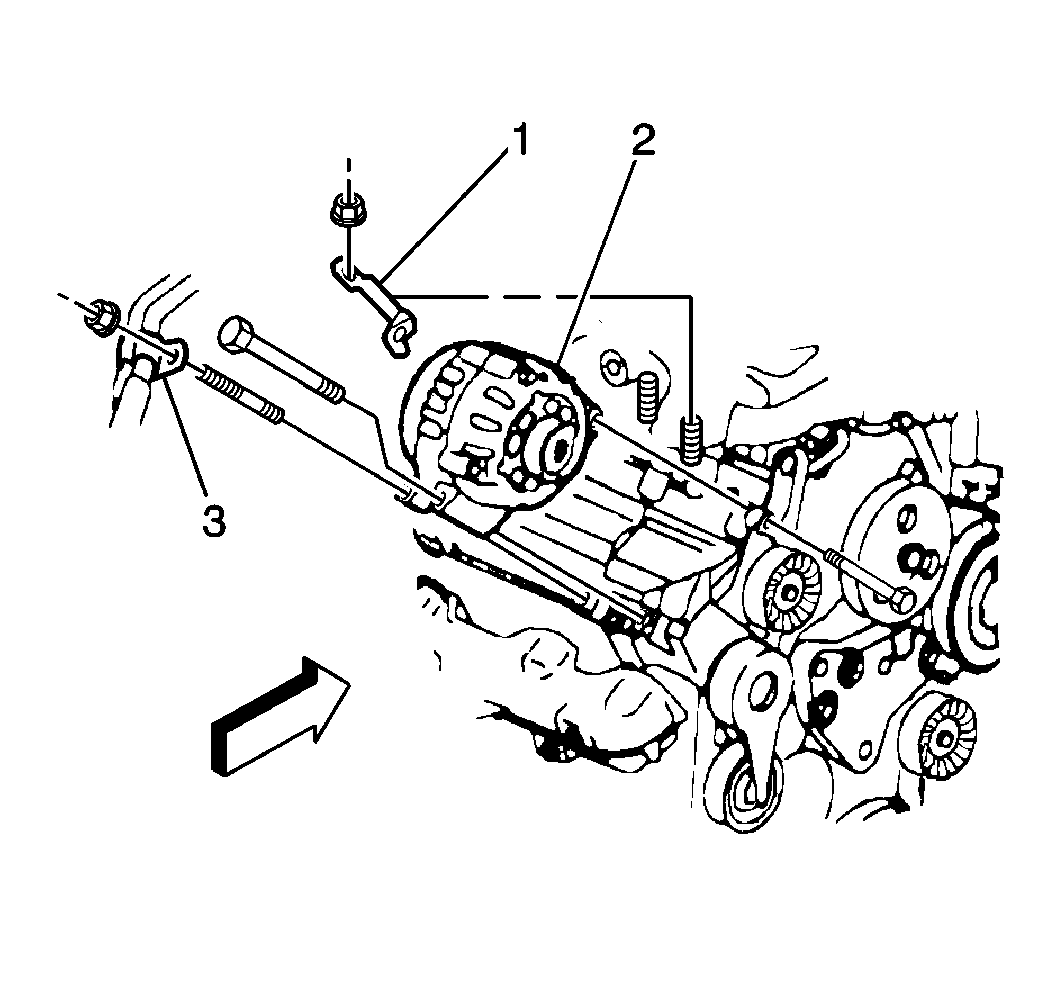
- Remove the power steering line clip (3).
- Remove the generator mounting nuts and bolts.
- Remove the generator (2).
Important: Service the CS-130D generator as a complete unit.
Installation Procedure
- Install the generator (2).
- Install the generator electrical connections.
- Install the power steering line clip (3).
- Install the drive belt. Refer to Drive Belt Replacement in Engine Mechanical - 3.4L.
- Connect the negative battery cable. Refer to Battery Negative Cable Disconnection and Connection .
Notice: Use the correct fastener in the correct location. Replacement fasteners must be the correct part number for that application. Fasteners requiring replacement or fasteners requiring the use of thread locking compound or sealant are identified in the service procedure. Do not use paints, lubricants, or corrosion inhibitors on fasteners or fastener joint surfaces unless specified. These coatings affect fastener torque and joint clamping force and may damage the fastener. Use the correct tightening sequence and specifications when installing fasteners in order to avoid damage to parts and systems.
Tighten
| • | Tighten the bolts to 50 N·m (37 lb ft). |
| • | Tighten the nuts to 30 N·m (22 lb ft). |
Generator Replacement 2.2L (L61)
Removal Procedure
- Disconnect negative battery cable. Refer to Battery Negative Cable Disconnection and Connection .
- Remove the air cleaner resonator. Refer to Air Cleaner Outlet Resonator Replacement in Engine Controls-2.2L (L61).
- Remove the oil level indicator tube bolt and reposition the tube. Refer to Oil Level Indicator and Tube Replacement in Engine Mechanical-2.2L (L61).
- Remove the drive belt. Refer to Drive Belt Replacement in Engine Mechanical-2.2L (L61).
- Disconnect the electrical connectors from the generator.
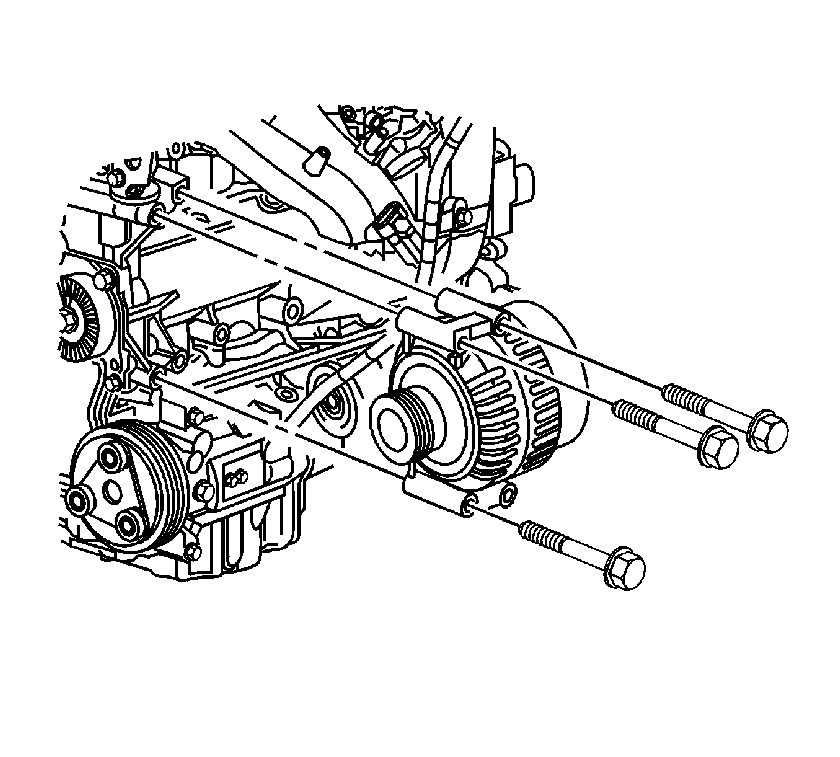
- Remove the generator bolts.
- Lower the vehicle.
- Remove the generator.
Installation Procedure
- Install the generator.
- Raise the vehicle.
- Install the generator bolts.
- Connect the generator electrical connectors.
- Install the drive belt. Refer to Drive Belt Replacement in Engine Mechanical-2.2L (L61).
- Install the oil level indicator tube bolt. Refer to Oil Level Indicator and Tube Replacement in Engine Mechanical-2.2L (L61).
- Remove the air cleaner resonator. Refer to Air Cleaner Outlet Resonator Replacement in Engine Controls-2.2L (L61).
- Lower the vehicle.
- Connect the battery negative cable.
Notice: Use the correct fastener in the correct location. Replacement fasteners must be the correct part number for that application. Fasteners requiring replacement or fasteners requiring the use of thread locking compound or sealant are identified in the service procedure. Do not use paints, lubricants, or corrosion inhibitors on fasteners or fastener joint surfaces unless specified. These coatings affect fastener torque and joint clamping force and may damage the fastener. Use the correct tightening sequence and specifications when installing fasteners in order to avoid damage to parts and systems.
Tighten
Tighten the generator bolts to 22 N·m
(16 lb ft).
Tighten
Tighten the generator electrical connector to 20 N·m
(15 lb ft).
