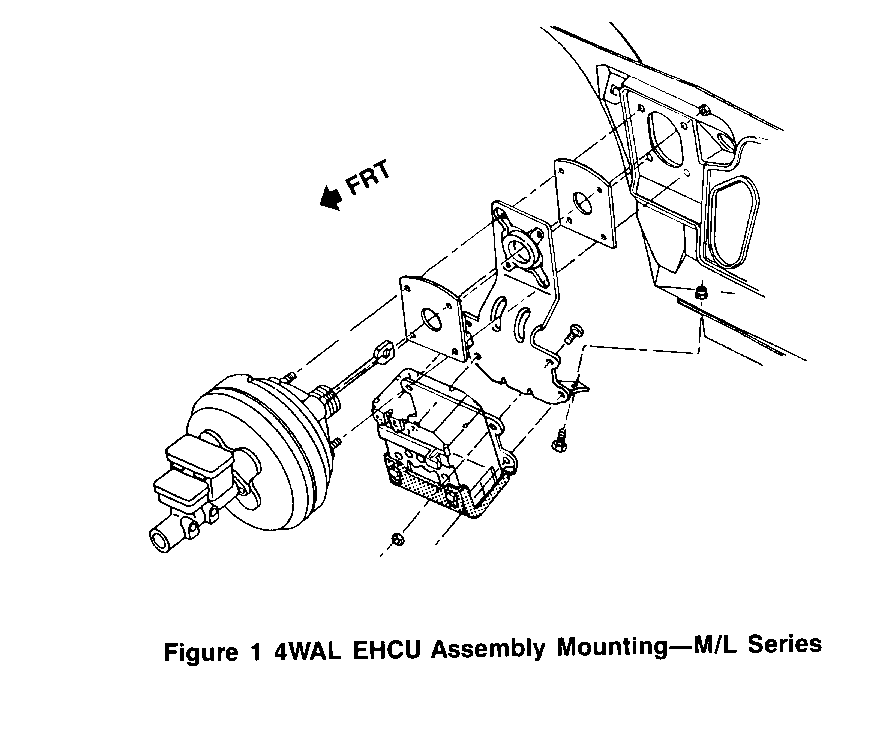
SERVICE MANUAL UPDATE-SEC. 5A4 4WAL BRAKE SYSTEM BLEEDING

Model and Year: 1990 M/L TRUCK
This bleed procedure revises the bleed procedure published in the 1990 Light Duty Truck Service Manual Section 5 (reference Dealer Service Bulletin No. 90-65-5). This procedure is correctly listed in the 1991 S/T service manual as it applies to that model. Please place a copy of this bulletin in the 1990 Light Duty Truck Service Manual. The following brake bleeding procedure is to be used on ALL 1990 M/L Vans equipped with 4 wheel anti-lock brake systems.
IMPORTANT: The ignition switch must be off through-out bleeding or false trouble codes could be set to memory.
4WAL Brake System Bleeding Procedure:
1. Assure ignition is in off position.
2. Deplete brake booster by pumping the brake pedal several times.
3. Assure the master cylinder is full.
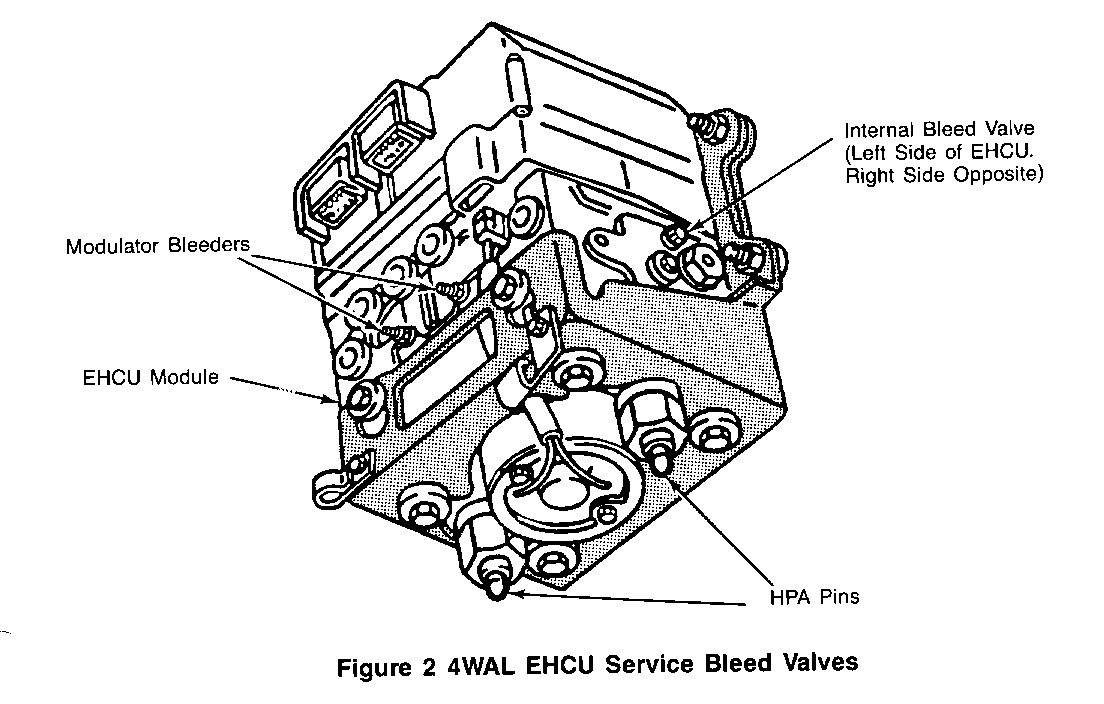
4. Install two J 35856 bleed valve tools on the 4WAL EHCU at the high pressure accumulators (HPA) (see Figure 2).
5. Install one J 35856 bleed valve tool on the combination valve.
6. There are internal bleed screws on each side of the EHCU module (Figure 2). The bleed screws are used to open the internal passages within the EHCU module. Back off the two internal bleed screws 1/4 to 1/2 turn.
7. Use conventional bleeding process; Pressure, Vacuum or Pedal Bleeding.
IMPORTANT: The EHCU module should be bled after replacement or if trapped air is thought to be in the unit. It should not be necessary to bleed the EHCU module if the fluid has not become contaminated or if no air is thought to be in the module. In the event the EHCU module needs to be bled the module should be thoroughly bled BEFORE the wheel cylinders and calipers.
There are two bleeders on the front of the unit that look like normal brake bleeders (Figure 2). These are the modulator bleeders for bleeding the EHCU module and they must remain closed when the unit is not pressurized.
8. EHCU Module Bleed Procedure (if required). Pedal bleeding method described below:
Slowly depress the brake pedal one time and hold.
- Open one of the modulator bleeders on the front of the unit until fluid flows clearly or pedal is depressed.
Close the modulator bleeder and tighten to 7 Nm. (60 in.lbs). DO NOT OVER TIGHTEN!
- Slowly release the pedal.
- Wait 15 seconds, then repeat the above sequence, including the 15 second wait until all air is purged from the EHCU module.
Repeat the above process on the remaining modulator bleeder on the front of the EHCU module until all air is purged from the unit.
9. Always maintain a full master cylinder.
10. Bleed wheel cylinders and calipers as described in HYDRAULIC BRAKES (Sec. 5A of the service manual).
11. Remove the three J 35856 bleed valve tools.
12. Close the left internal bleed screw and tighten to 7 Nm (60 in.lbs.). DO NOT OVER TIGHTEN!
13. Close the right internal bleed screws and tighten to 7 Nm (60 in.lbs). DO NOT OVER TIGHTEN!
14. Start vehicle and evaluate the brake pedal feel. If firm, continue with this procedure. If the pedal is soft or spongy, reinstall tools and re-bleed the system starting with step 1. Any RE-BLEED due to soft or spongy pedal should always include bleeding the EHCU module (step 8).
15. Perform 3 function tests using the Tech-1 Function test procedure.
16. Road test vehicle.
IMPORTANT: Failure to follow this procedure accurately may result in an immediate soft pedal after the first anti-lock stop and technician induced stored codes.


General Motors bulletins are intended for use by professional technicians, not a "do-it-yourselfer". They are written to inform those technicians of conditions that may occur on some vehicles, or to provide information that could assist in the proper service of a vehicle. Properly trained technicians have the equipment, tools, safety instructions and know-how to do a job properly and safely. If a condition is described, do not assume that the bulletin applies to your vehicle, or that your vehicle will have that condition. See a General Motors dealer servicing your brand of General Motors vehicle for information on whether your vehicle may benefit from the information.
