SLIDING DOOR OPEN/CLOSE EFFORT MODIFY LWR BRACKET

SUBJECT: SLIDING DOOR OF OPENING AND CLOSING EFFORT (CENTRE TRACK/CENTRE ROLLER BRACKET/MODIFY LOWER BUMPER BRACKET)
VEHICLES AFFECTED: 1989-91 M/L VANS
THIS BULLETIN IS BEING REVISED TO ADD 1991 MODEL YEAR VEHICLES BUILT BEFORE THE LISTED VIN BREAKPOINTS
Some of the above subject vehicles may experience a binding condition or worn centre track roller bearing. If the centre track roller bearing breaks or has excessive wear, the sliding door operating effort increases and may deform the centre track. This condition may occur when opening or shutting the door.
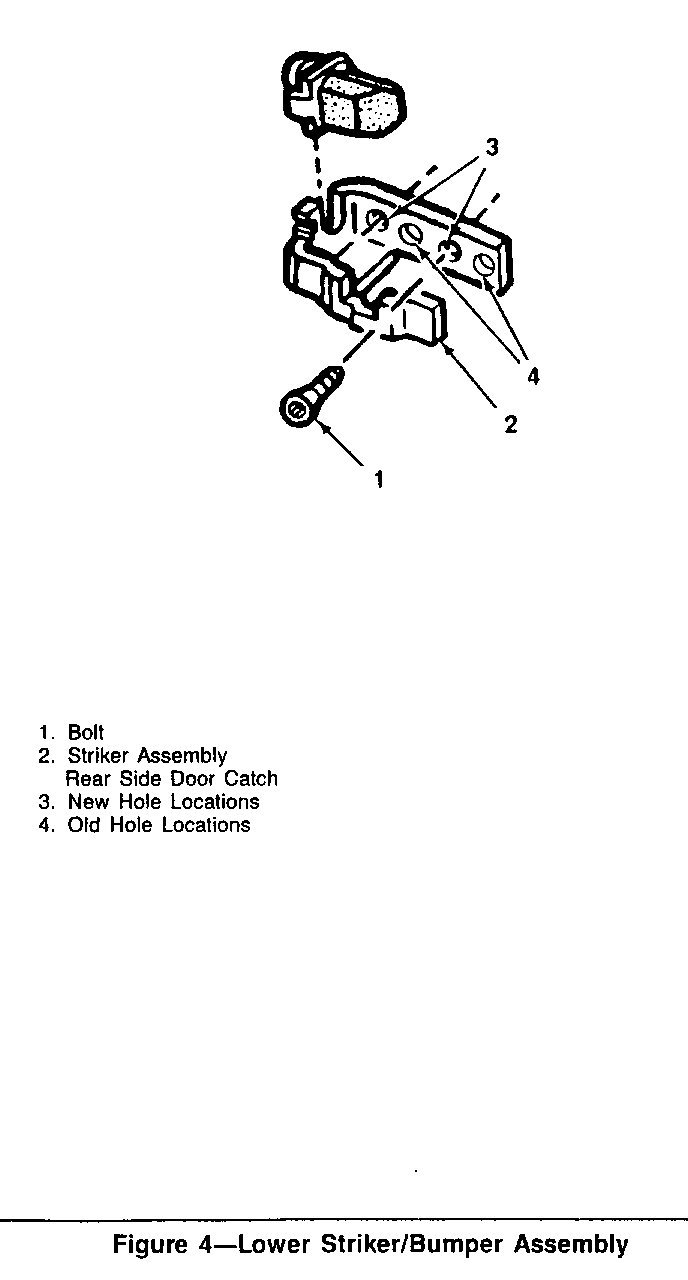
To correct, it is necessary to replace the centre track roller bracket, centre track assembly and install a new lower track striker/bumper assembly. A new lower track striker/bumper assembly is necessary to prevent door components from being damaged when the door is forcefully opened. The only difference between the new lower track striker/bumper assembly and original assembly is bolt hole locations. The hole locations have been moved rearward approximately 15mm.
VEHICLES INVOLVED
Use the new Striker/bumper assembly on vehicles built prior to the following VINS:
GMC 1GTDM15B5BM503571 CHEVROLET 1GCDM15B5BM112077
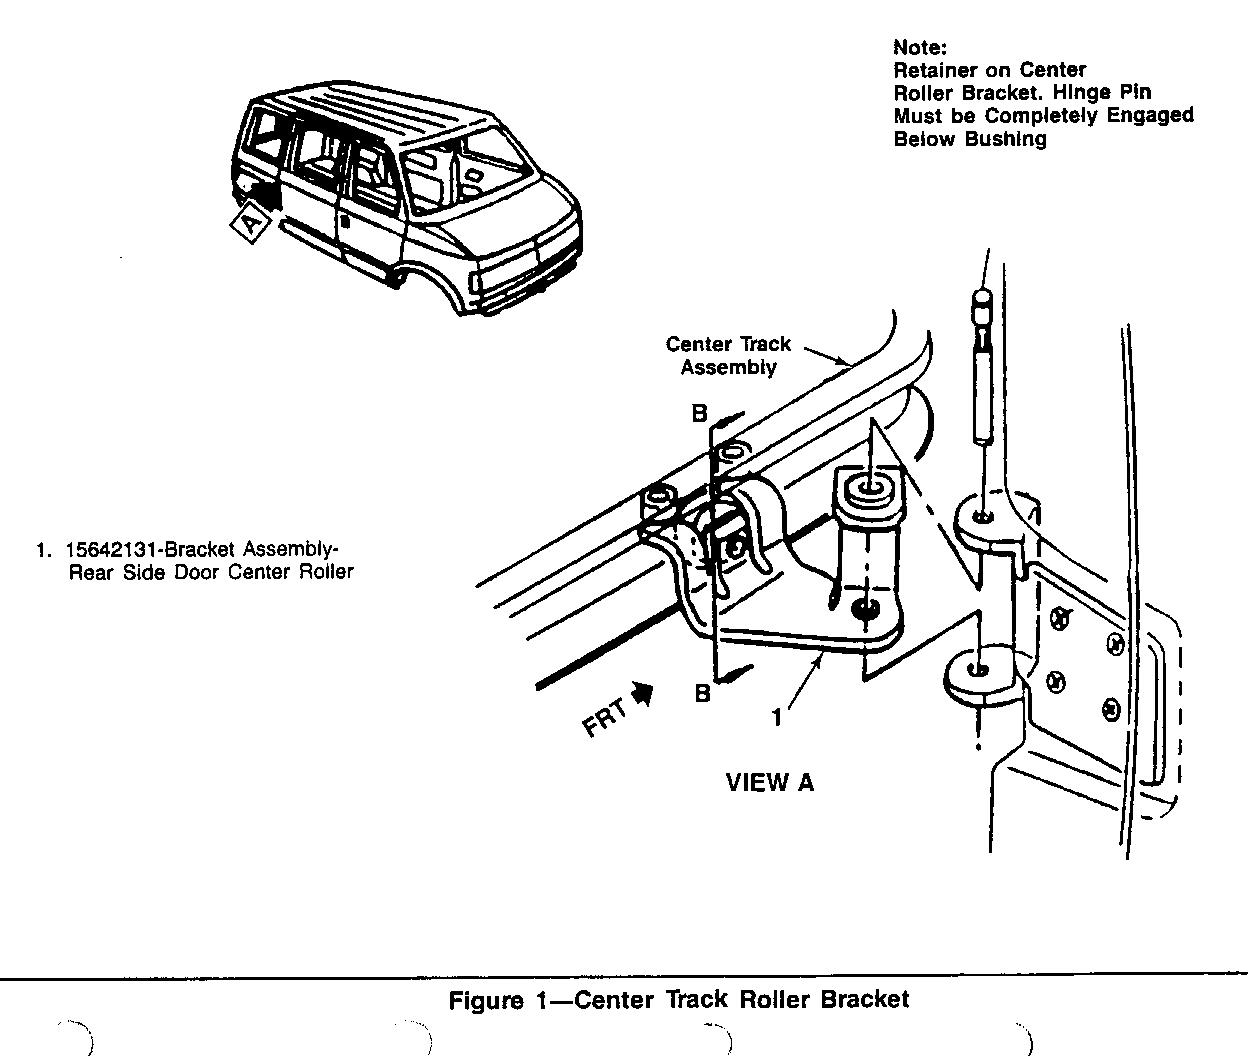
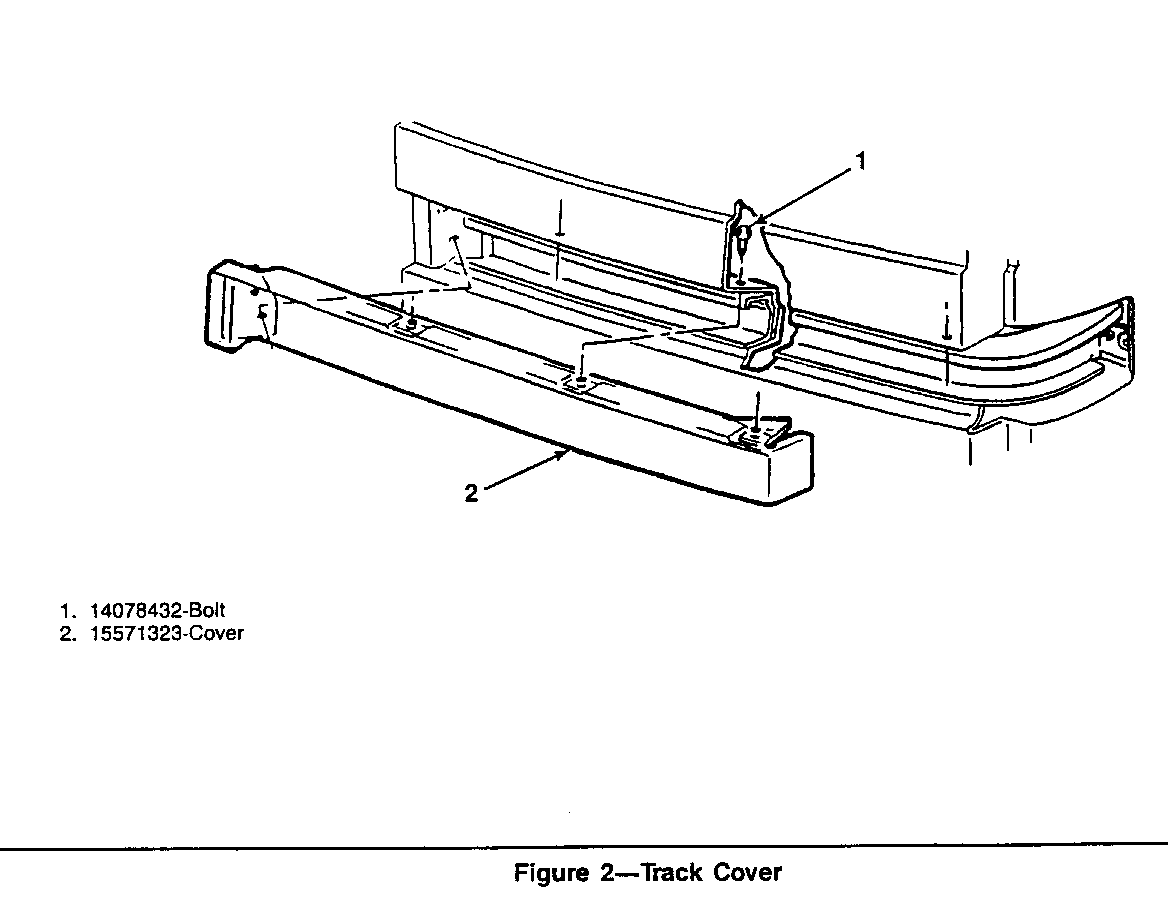
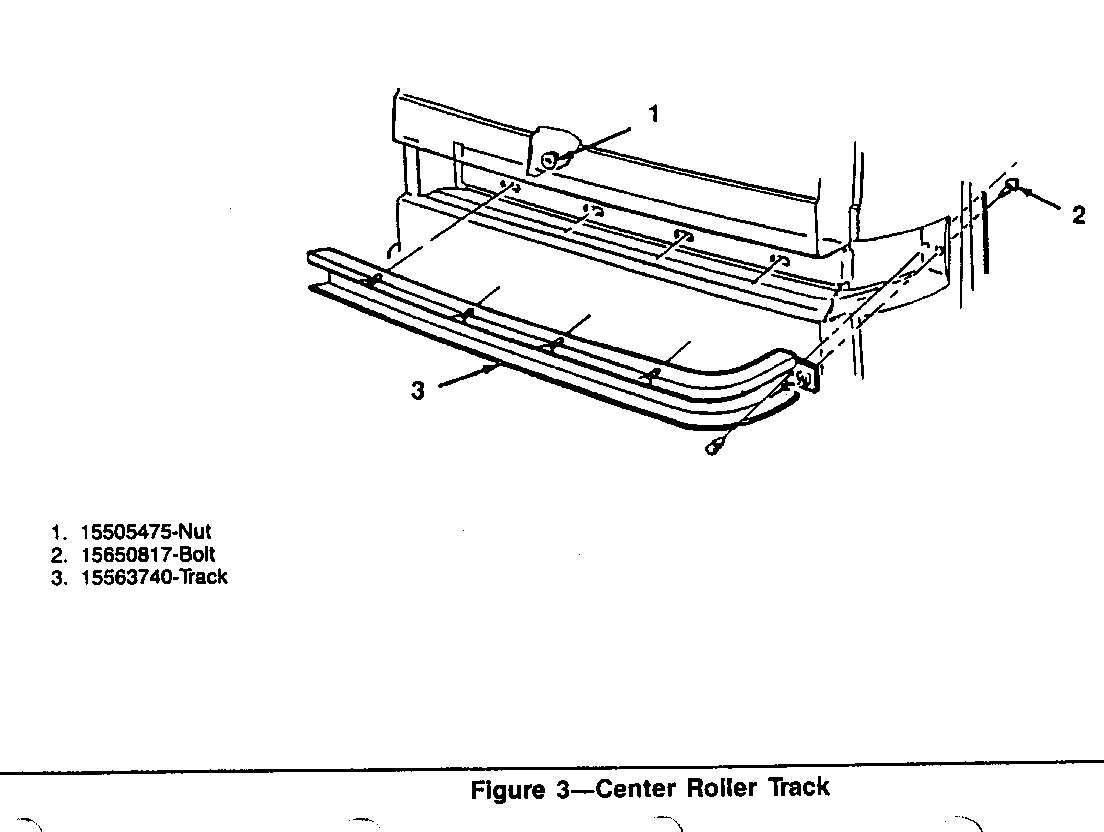
REPAIR INFORMATION: (Refer to Figures 1-4). -------------------------------------------- 1. Remove jack cover.
2. Remove interior quarter panel trim, if equipped.
3. Remove tail light assembly.
4. Remove track cover retainer bolts and remove the cover. Visually Inspect the cover, if damaged replace.
5. Remove interior quarter trim moulding, if equipped.
6. Remove centre roller track.
7. Remove three screws for sliding door latch assembly and lay aside.
8. Support door weight at rear edge of door using a padded floor jack.
9. Remove pin from centre track roller bracket door hinge.
10. Remove and discard roller bracket assembly from centre track.
11. Remove centre track nuts and bolts. Inspect track, if damaged replace.
12. Remove two torx head screws on the lower track rear side door catch striker/bumper assembly, remove and discard the assembly.
13. Using existing screws and existing body assembly holes, install a new lower track rear side door catch striker/bumper assembly (P/N 15683553). Torque screws to 20-30 N.m (15-22 ft.lbs.).
14. Reinstall the centre roller bracket track using the existing nuts and bolt. Torque the nuts to 6-9 N.m (4-7 ft.lbs. ). Torque the bolt to 10-14 N.m (8-10 ft.lbs.).
15. Install new rear side door centre roller bracket assembly (P/N 15642131) to centre roller track.
16. Reinstall existing pin through centre track roller bracket door hinge and roller bracket assembly.
17. Remove padded floor jack from rear edge of door.
18. Reinstall sliding door latch assembly using three existing Screws. Torque screws to 6.4-10.0 N.m (5-8 ft.lbs.).
19. Reinstall the track cover (or if damaged, replace) using the existing retainer bolts. Torque the bolts to 1.2-1.6 N.m (11-14 in.lbs.). If the track cover requires replacement, paint to match.
20. Reinstall the tail light assembly.
21. Reinstall the interior quarter trim panel, if equipped.
22. Reinstall interior quarter trim moulding, if equipped.
23. Reinstall the jack cover.
24. Check door operation.
SERVICE PARTS INFORMATION:
Part No. Description Quantity -------- -------------------------- -------- 15683553 Striker Asm-Rear Side Door 1 15642131 Bracket Asm-Rear Side Door 1 Centre Roller 15563740 Centre Track Asm-Side Door 1 15571323 Centre Track Cover Asm. 1
Use the most applicable Labour Operation and Time from the Canadian Labour Time Guide.


General Motors bulletins are intended for use by professional technicians, not a "do-it-yourselfer". They are written to inform those technicians of conditions that may occur on some vehicles, or to provide information that could assist in the proper service of a vehicle. Properly trained technicians have the equipment, tools, safety instructions and know-how to do a job properly and safely. If a condition is described, do not assume that the bulletin applies to your vehicle, or that your vehicle will have that condition. See a General Motors dealer servicing your brand of General Motors vehicle for information on whether your vehicle may benefit from the information.
