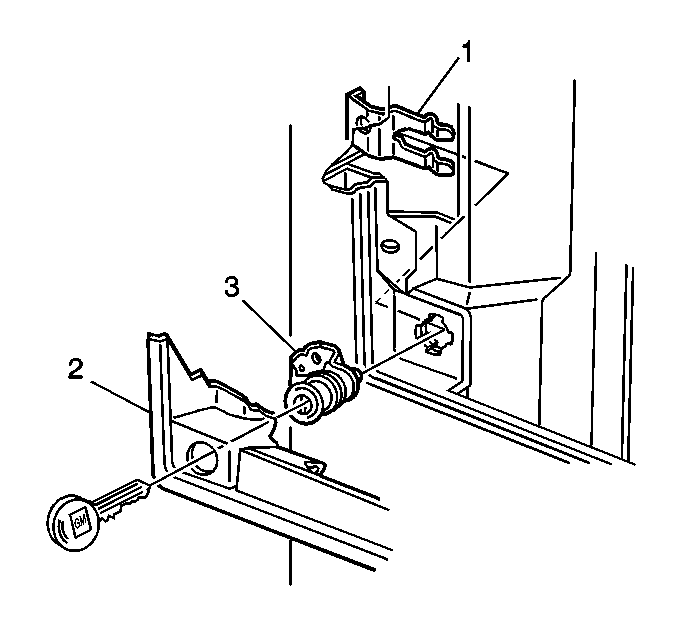
New lock cylinders are available as replacement parts. If the door lock cylinders require replacement for any reason, apply a coating of lubricant GM P/N 12346241 or the equivalent inside the lock case and the cylinder keyway prior to assembling and installing the cylinder.
Refer to Binding Lock Cylinders in order to repair a binding lock cylinder. Refer to Lock Cylinder Coding in General Information in order to code a new lock cylinder.
Removal Procedure
- Remove the trim panel and the access cover. Refer to Rear Door Trim Panel Replacement .
- Separate the water deflector at the perforations Use a sharp knife if needed for the proper access. Refer to Water Deflector Replacement .
- Use the following procedure in order to remove the control rod from the outside handle:
- Remove the outside handle nuts (1).
- Remove the outside handle (2).
- Remove the license lamp wiring.
- Remove the license plate housing bolts.
- Remove the license plate housing.
- Remove the door lock shield.
- Use the following procedure in order to remove the control rod from the lock cylinder:
- Remove the lock cylinder retainer.
- Remove the lock cylinder.

| 3.1. | Pry the clip anchor out of the hole. |
| 3.2. | Push the clip away from the lever. |
| 3.3. | Pull the rod and the clip away from the lever. |
| 10.1. | Pry the clip anchor out of the hole. |
| 10.2. | Push the clip away from the lever. |
| 10.3. | Pull the rod and the clip away from the lever. |
Installation Procedure
- Install the clip to the lock cylinder.
- Install the lock cylinder to the door.
- Install the lock cylinder retainer.
- Install the control rod to the lock cylinder through the clip.
- Install the door lock shield.
- Install the license plate housing.
- Install the license plate housing bolts.
- Install the license lamp bolts.
- Install the clip to the outside handle (2).
- Install the outside handle (2) to the door.
- Install the outside handle nuts (1).
- Install the control rod to the outside handle through the clip.
- Install the water deflector. Refer to Water Deflector Replacement .
- Install the trim panel. Refer to Rear Door Trim Panel Replacement .

Notice: Use the correct fastener in the correct location. Replacement fasteners must be the correct part number for that application. Fasteners requiring replacement or fasteners requiring the use of thread locking compound or sealant are identified in the service procedure. Do not use paints, lubricants, or corrosion inhibitors on fasteners or fastener joint surfaces unless specified. These coatings affect fastener torque and joint clamping force and may damage the fastener. Use the correct tightening sequence and specifications when installing fasteners in order to avoid damage to parts and systems.
Tighten
Tighten the license plate housing bolts to 4 N·m (35 lb in).
Tighten
Tighten the license lamp bolts to 4 N·m (35 lb in).
Tighten
Tighten the outside handle nuts to 7 N·m (62 lb in).
