Radio/Audio System Operation UM7 or UM6 Radio
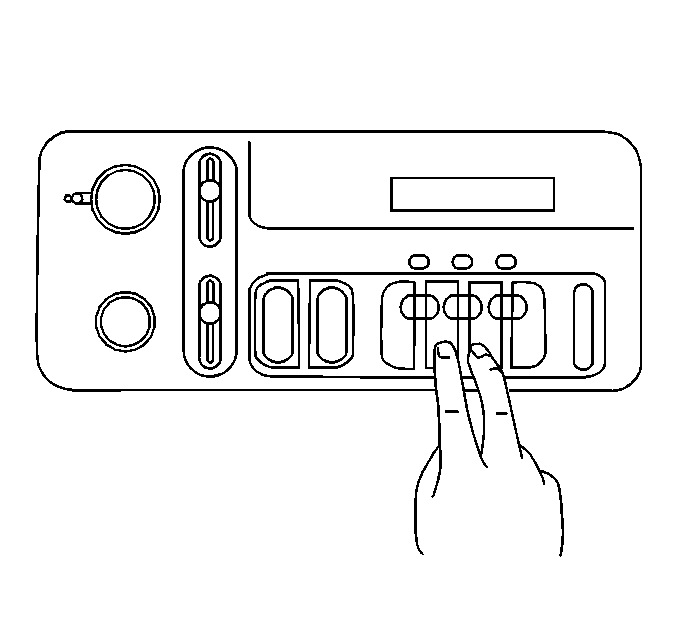
Power (PWR) and Volume Control
| • | The radio power switch is the same knob as the volume control. Use the radio power switch/volume control knob in order to turn the system On and Off and in order to control the volume. |
| • | In order to increase the volume and in order to turn the radio On, turn the knob clockwise. |
| • | In order to decrease the volume or in order to turn the radio Off, turn the knob counterclockwise. |
| • | The ignition lock cylinder must be in the ACCESSORY or the RUN position in order for the radio to operate. |
Band Switching (AM/FM)
| • | Depress the lower knob in order to change the radio band between AM and FM for the UM7 and AM, FM1 and FM2 for the UM6. |
| • | Depress the lower knob in order to tune into the last frequency selected on the opposite band. The display will indicate the frequency and AM or FM mode. |
Tuning (TUNE)
| • | Rotate the TUNE knob clockwise in order to increase the AM or FM frequency. |
| • | Rotate the TUNE knob counterclockwise in order to decrease the AM or FM frequency. |
Treble/Bass (TREB/BASS)
| • | Slide the TREB level up in order to increase the treble response. |
| • | Slide the TREB lever down in order to reduce the noise if the station is weak or noisy. |
| • | Slide the BASS lever up in order to increase the bass response. |
Fade and Balance
Rotate the FADE and the BALANCE function knobs in order to adjust the relative volume between the following components, respectively:
- The front and the rear speakers
- The left and the right speakers
Set (SET) Push button (UM7) or SET/EJECT (SET/EJECT) Pushbutton (UM6)
Use the SET button along with the radio station preset push buttons in order to program the radio frequencies into the memory locations. Refer to Radio Frequency Preset Pushbuttons for instructions on presetting radio stations. Radios equipped with cassette players combine the radio preset SET function with the cassette EJECT function.
Radio Frequency Preset Push buttons
Up to 14 stations can be preset into the UM7 radio's memory, and 21 stations into the UM6 radio memory.
In order to preset 4 AM and 4 FM stations, perform the following steps:
- Tune into the desired radio station.
- Press the SET pushbutton.
- Press any station push button.
- If electrical power is interrupted (by a open fuse, discharged battery, service procedure, etc.), the station(s) and time of day must be reset.
SET will appear on the display.
The SET on the display will disappear. The radio will then tune into the selected station whenever that pushbutton is pressed.
In order to preset 3 additional AM, and 3 additional FM stations, perform the following steps:
- Tune into the desired radio station.
- Press the SET pushbutton.
- Press any two adjacent station pushbuttons at the same time.
- The station will return when the same two push buttons are pressed again. In order to preset the additional 7 FM station on the UM6 radio depress the lower knob to switch to FM2 and follow above the above steps.
SET will appear on the display.
Recall (RECALL)
Press the volume control push button in order to alternately cause the display to change from the time of day (TOD) to the radio frequency display when the radio is ON.
Seek (SEEK)
| • | The 2000 Series radio is capable of seeking stations in the forward and the reverse directions. |
| • | Press the button that is marked with the UP arrow in order to tune into the next station higher in frequency that has sufficient signal strength to be listenable. |
| • | Press the button that is marked with the DOWN arrow in order to tune into the next station lower in frequency that has sufficient strength to be listenable. |
Scan (SCAN) (UM7)
Each listenable station is sampled for a few seconds in the SCAN mode. SCAN appears on the display. SCAN is a two-button operating that requires the use of both SEEK pushbuttons.
Use the following procedure in order to use the SCAN mode:
- Press and hold the SEEK UP pushbutton.
- Press the SEEK pushbutton.
- Press and hold the pushbuttons in the opposite sequence in order to SCAN down the dial.
The receiver will continue scanning each listenable station until you press the VOL control or press both SEEK pushbuttons again.
Preset Scan (PSCAN) (UM7)
Sample any stations that are already stored on the preset pushbuttons by using the PSCAN mode.
Press both SEEK pushbuttons. PSCAN appears on the display. Each station preset (both FM1 and FM2) is scanned and sampled for a few seconds. Sampling will continue until you press either the SEEK pushbutton or the RECALL knob again.
Loudness
The auto-loudness feature boosts low-frequency audio response in order to compensate for the inability of the ear to hear low-level, low-frequency tones.
The auto-loudness compensation varies inversely with the volume control setting. Which means that at low volume settings, the low frequencies are boosted much more than at high volume settings.
Clock
In order to set the clock, perform the following steps:
- Press the SET push button.
- Within 5 seconds, press and hold the SEEK UP pushbutton until the correct minute appears on the display.
- In order to set the hour, press and hold the SEEK DOWN pushbutton until the correct hour appears on the display.
Radio/Audio System Operation RPO UM6
To Play A Cassette
The tape player is built to operate best with tapes that are 30-45 minutes of length per side. Tapes that are longer than 30-45 minutes are thin and may not work well in the player.
Use the following procedure in order to play a cassette:
- Turn the lock cylinder to the ACCESSORY or to the RUN position.
- Turn the receiver ON.
- End-load the tape into the player. This is accomplished by inserting the tape squarely through the door.
- Verify that the tape is fully inserted.
- Use the upper and the lower knobs in order to adjust the volume, the balance, and the fade (just as with the radio).
- Press SEEK UP in order to fast forward the tape.
- Press SEEK DOWN in order to rewind the tape.
- Press the upper knob in order to go from one side of the tape to the other.
- Press the EJECT pushbutton in order to stop the tape or to remove the tape from the player.
Ensure that the exposed tape side of the cassette faces the right.
The AM/FM portion of the radio turns off and the tape begins playing when fully inserted.
An arrow indicates which side of the tape is being played.
The tape will rapidly advance until you press the SEEK UP pushbutton again.
The tape will rewind rapidly until you press the SEEK DOWN pushbutton again.
Radio/Audio System Operation RPO UL0 or UN0
To Operate the Radio
- Turn the ignition lock cylinder to the ACCESSORY or to the RUN position.
- Push the PWR knob in order to turn ON the radio.
Volume (VOL)
Rotate the volume control in order to increase or to decrease the volume. The faster you rotate the VOL knob, the quicker the radio goes to maximum volume. The knob is capable of rotating continuously.
Speed Control Volume (SCV)
The Speed Control Volume (SCV) automatically adjusts the volume level in order to compensate for road and wind noise as you drive. Adjust the volume to the listening level you want at any time. The volume will change up or down in order to compensate for the high and low noise levels as you speed up or slow down. The volume should always sound the same level as you drive. Each detent on the SCV allows a little more compensation at a faster rate.
Band Switching (AM/FM)
Press the AM/FM pushbutton in order to toggle between AM, FM1, and FM2. The display indicates the current band.
Recall (RECALL)
Press the RECALL push-button in order to display the station when the radio is on and while in the clock mode. When the ignition is off, press the RECALL push-button in order to recall the time of day. RECALL toggles between the station and the time of day.
Tuning
| • | Press lightly on the TUNE control in order to release the TUNE control from the recessed position. |
| • | Rotate the TUNE knob to the right in order to increase frequency. |
| • | Rotate the TUNE knob to the left in order to decrease frequency. |
| • | Push the TUNE control in for storage when not tuning. |
Seek (SEEK)
Press SEEK up or down in order to seek the next higher or lower station of sufficient strength and stop.
The SEEK operation will mute the audio system.
Scan (SCAN)
- Press and hold SEEK for 2 seconds.
- Press SEEK again in order to stop scanning.
SCAN will appear on the display and the stations will play for a few seconds.
Automatic Tone Control (ATC)
The automatic Tone Control (ATC) feature tailors the equalization to the type of broadcast being received. Press AUTO TONE in order to step through the five following preset equalization settings:
| • | CLASSIC |
| • | NEWS |
| • | ROCK |
| • | POP |
| • | JAZZ |
| Note the graph and the words in the display for each press of the pushbutton. |
Press the AUTO TONE pushbutton at least one time in order to bring up manual (MAN) and return the control of tone back to the TREB and the BASS controls. Tone is automatically set to MAN when you rotate the BASS or the TREBLE control.
Bass
BASS control has a center detent position. Operation of the BASS control will switch the radio's AUTO TONE feature to MAN. Use the following procedure in order to operate the BASS control:
- Depress the BASS control in order to remove the BASS control from the recessed position.
- Rotate the BASS control to the right in order to increase bass response.
- Rotate the BASS control to the left in order to decrease bass response.
- Push the BASS control back in for storage when not in use.
Treble
TREB control has a center detent position. Operation of the TREB control will switch the radio's AUTO TONE feature to MAN. Use the following procedure in order to operate the TREB control:
- Depress the TREB control in order to remove the TREB control from the recessed position.
- Rotate the TREB control to the right in order to increase treble response.
- Rotate the TREB control to the left in order to decrease treble response.
- Push the TREB control back in for storage when not in use.
Station Presets
Six pushbuttons store stations in preset memory. You may set the pushbuttons for up to 18 stations (6 AM, 6 FM, and 6 FM2). Use the following procedure in order to store a station in preset memory:
- Use the TUNE knob or the SEEK knob in order to find the desired station.
- Press TONE in order to select the graph that best suits the type of station selected.
- Press and hold one of the 6 pushbuttons until audio returns (approximately two seconds).
Press the pushbutton for the desired preset station. The station and the AUTO TONE that you selected will be automatically selected.
Preset Scan (PSCAN)
Sample stations that are in the preset memory by using the PSCAN mode. Press the PSCAN pushbutton. The radio scans each of the presets and stops for a few seconds. The AUTO TONE setting stored for that station is automatically chosen. The tuner pauses momentarily, then continues scanning until PSCAN or one of the preset pushbuttons is pressed again. PSCAN will appear in the display whenever the tuner is in the PSCAN mode. The channel number (P1-P6) will appear momentarily just before the frequency is displayed.
Balance (BAL)
This control has a center detent position. Use the following procedure in order to operate the BAL control:
- Depress the BAL control in order to remove the BAL control from the recessed position.
- Rotate the BAL control in order to adjust the sound between the right and the left speakers.
- Push the BAL control back in for storage when not in use.
Fade (FADE)
This control has a center detent position. Use the following procedure in order to operate the FADE control:
- Depress the FADE control in order to remove the FADE control from the recessed position.
- Rotate the FADE control in order to adjust the sound between the front and the rear speakers.
- Push the FADE control back in for storage when not in use.
Clock
The clock may be set with the vehicle turned OFF. Use the following procedure in order to set the clock:
- Press and hold the HR or the MIN pushbuttons until the display begins to change.
- Release the pushbutton when the correct time is displayed.
There will be an initial two-second delay before the clock enters the time-set mode.
Radio/Audio System Operation RPO UL0
Cassette Player (UL0)
| • | If the ignition is ON but the radio is OFF, the tape will begin playing. A tape symbol, and tape direction arrows, appear in the center of the graphic display whenever a tape is playing. |
| • | Tapes are end-loaded into these players. Insert the tape squarely through the door, exposed tape side of the cassette facing the right. |
| • | When the tape is fully inserted, the AM/FM portion of the radio will turn OFF and the tape will begin playing. |
| • | The tape player works best with tapes that are 30-45 minutes long on each side. Longer tapes may not work well in the cassette player because the tapes are thin. |
| • | The player automatically senses the tape cartridge for metal or CR02 tape media and presets the pre-emphasis. |
| For metal tapes, a metal tape indicator displays |
| • | Any time a tape is playing, use the volume, balance, fade, treble, and bass just as with the radio. |
| An arrow indicates which side of the tape is being played. |
Previous (PREV)
| • | Press the SEEK or the PREV pushbuttons in order to search for the previous selection. |
| The tape direction arrow blinks during SEEK operation. |
| • | A minimum 3 second blank gap is required for proper operation. |
| • | Audio is muted during SEEK. |
Program (PROG)
Press the PROG push button in order to play the other side of a tape.
The tape direction will reverse.
Next (NEXT)
Press the SEEK or NEXT push buttons in order to search for the next selection.
Hold this pushbutton, or press the pushbutton more than once, in order to advance the tape further.
NEXT appears in the display. Audio is muted during NEXT.
Reverse (REV)
Press REV in order to rewind the tape. The tape will rapidly reverse to the beginning of the cassette or until you press the REV push-button a second time.
The radio will play the last selected station during the REV operation.
Dolby® Noise Reduction
Press the Dolby pushbutton in order to reduce inherent tape noise such as hiss. The Dolby® symbol will appear in the display.
Fast Forward (FWD)
Press FWD in order to fast-forward the tape. The tape will rapidly advance to the end of the tape or until you press the FWD push-button again.
The radio will play the last selected station during the FWD operation.
Tape/Auxiliary (TAPE/AUX)
Press the AM/FM push buttons after inserting a tape in order to switch between tape and radio. The radio will play.
In order to return to tape, press TAPE AUX. The display will show the proper tape direction indicator. The UPO, press the tape AUX button a second time to switch to the remote CD player.
Eject (EJECT)
In order to remove the tape, press EJECT. EJECT may be activated with either the ignition or the radio OFF.
The radio will play upon ejection of the cassettes if the radio is on. The cassettes may be loaded if the radio OFF.
Tape Clean Indicator
UN0/UL0 models have an indicator that appears approximately every 50 hours of operation, as a reminder that the capstan and the pinch roller need to be cleaned. Refer to Tape Player and Cassette Care.
Radio/Audio System Operation RPO UN0
To Play A Compact Disc
In order to operate the compact disc player, perform the following steps:
- Press the PWR knob in order to turn the system ON.
- Insert a disc part way into the slot, label side up. The player will pull the disc in.
- Wait a few seconds.
- The disc should then begin to play. A CD symbol and CD will appear in the display.
- If the disc is very hot, or if you're driving on a very rough road, a disc may come out or just not play.
- Press RECALL in order to cancel ERR.
When the disc player is too hot to play a disc, ERR will appear on the display.
When the disc player returns to normal temperature, the disc should play again.
If the disc still will not play, check for the following possible problems:
- An upside down disc
- A dirty, scratched, or wet disc
- Too much moisture in the air
If there is too much moisture in the air, wait about one hour and try again.
Recall (RECALL)
| • | Press RECALL in order to see what track is playing, and the elapsed time. |
| • | Press RECALL again within 5 seconds in order to view elapsed time. |
| The elapsed time is displayed in minutes and in tenths of a second. |
| • | Press RECALL again in order to return to the time of day. |
| • | The track number appears when a new track starts to play. |
Previous Track (PREV)
Press SEEK down or PREV in order to search for the previous selection. If you hold this button in or press it more than once to continue the search for previous tracks.
Random Playback (RDM)
The random playback (RDM) feature allows the tracks on the compact disc to be played in random order rather than in sequential order.
In order to stop the random playback feature, press RDM.
During random playback, a RANDOM indicator appears in the display.
Next Selection (NEXT)
Press SEEK up or NEXT in order to search for the next selection. Hold the push-button or press it more than once in order to advance the disc further. Audio is muted during NEXT.
Reverse (REV)
Press and hold the REV button in order to return rapidly to a favorite passage. This is an audible search at a high rate of speed.
Release REV in order to resume play at a normal speed.
Forward (FWD)
Press and hold FWD in order to advance quickly within a track. This is an audible search at a high rate of speed.
Release FWD in order to resume play at normal speed.
Band Switching (AM/FM)
While a compact disc is playing, press the AM/FM push button in order to cancel the CD player and turn ON the radio.
The CD symbol will still be displayed, but the word CD will be replaced by FM1, FM2, or AM in the display.
If the radio is turned OFF during compact disc playback, the disc stays in the player. The CD will resume playing at the point where the CD stopped.
Compact Disc/Auxiliary (CD/AUX)
The CD/AUX push-button toggles between CD play mode and radio operation.
When a CD is inserted, the CD plays until the AM/FM push-button is pressed.
The CD will cease playback and the radio will play after the AM/FM push button is pressed.
Ejecting a Compact Disk (EJECT)
Press EJECT in order to release the disc from the CD player. The disc will eject and the radio will play. The disc will start at track 1 when you reinsert it.
Radio/Audio System Operation RPO UK6
The Rear Seat Audio Controller feature allows the rear seat passengers to listen to a different music source than the front seat passengers including the cassette tape and the remote compact disc (CD) players. For example, the rear seat passengers may listen to the cassette or CD through headphones while the driver listens to the radio through the front speakers. The rear seat passengers have control of the volume for each headphone. Be aware that the primary radio controls always override the rear seat audio controls.
Seek (SEEK)
The sound will mute while seeking. The SEEK button is inactive when the front radio is also using the SEEK feature. Use the following procedure in order to seek:
- Press the up arrow in order to tune to the next higher station (with enough strength) and stay there.
- Press the down arrow to tune to the next lower station (with enough strength) and stay there.
Use the following procedure in order to seek selections on a cassette tape:
- Press the up arrow in order to hear the next selection on the tape.
- Press the down arrow in order to go back to the previous selection.
Use the following procedure in order to seek selections on a compact disc:
- Press the up arrow in order to immediately listen to the next track instead of waiting until the current track is finished.
- Hold the up arrow button or press it more than once in order to advance to further tracks.
- Press the down arrow in order to go to the start of the current track if more than 8 seconds have played.
Power (PWR)
Press this button in order to turn the rear seat audio system ON or OFF. The rear speakers mute when the power is turned ON. You may operate the rear seat audio functions even when the primary radio power is off.
Band Switching (AM/FM)
Press the AM/FM button in order to switch between AM, FM1 and FM2. The selection appears on the display. If the front passengers are already listening to AM-FM, the rear seat audio controller will not switch between the bands and cannot change the frequency.
Source Switching (TAPE CD)
Use the following procedure in order to switch between listening sources:
- Press the TAPE CD button in order to activate the source switching feature. There must be a cassette tape and/or compact disc in the player.
- Press the TAPE CD button in order to switch between the cassette tape and the compact disc functions.
Preset Program (P.SET PROG)
The front passenger must be listening to something different for the P.SET PROG to operate. Press the P.SET PROG in order to use the following functions:
| • | To seek through your preset radio stations that are set on your primary radio push-buttons. |
| • | To go to the other side of the cassette tape while the cassette is playing. |
| • | To change discs when a compact disc is playing. This button will no operate if used with a single remote compact disc player. |
Volume (VOL)
The upper VOL knob, the upper headphone jack, and the lower VOL knob controls the lower headphone jack.
Use the following procedure in order to operate the volume control:
- Press lightly on the VOL knob in order to extend the knob.
- Turn the knob clockwise in order to increase the volume.
- Turn the knob counterclockwise in order to decrease the volume.
- Push the knob in when you are not using the volume control.
Radio/Audio System Operation RPO UPO-Remote
To Play A Compact Disc
Press EJECT or RCL and insert the compact disc (CD) in order to load a CD with the ignition off. If the ignition is on, but the radio is off, the tape will begin playing. Note the CD symbol shown in the center of the graphic display whenever a CD is inserted. Use the VOL, FADE, TREB, and BASS controls as described for the radio.
Previous (PREV)
Use the following procedure in order to operate the PREV function:
- Press SEEK down or PREV in order to search for the previous selection. A minimum 3 second blank gap is required for proper operation. The tape direction arrow blinks and audio is muted during SEEK operation.
- Hold this button or press it more than once in order to advance the tape.
Program (PROGRAM)
Press PROG in order to play the other side of the tape. The tape direction will reverse.
Next (NEXT)
Use the following procedure in order to operate the NEXT function:
- Press SEEK up or NEXT in order to search for the next selection.
- Hold this button or press it more than once in order to advance the cassette further.
Note the indicator NEXT in the graphic display. The audio is muted in this mode.
Reverse (REV)
Press and hold the REV button in order to return rapidly to a favorite passage. This is an audible search at a high rate of speed.
Release REV in order to resume play at a normal speed.
Noise Reduction
Noise reduction is active at all times with a tape inserted in the remote cassette.
Forward (FWD)
Press and hold FWD in order to advance quickly within a track. This is an audible search at a high rate of speed.
Release FWD in order to resume play at normal speed.
Tape Aux
Use the following procedure in order to switch between the cd and the radio after you insert a cd:
- Press the AM FM buttons. The radio will play.
- Go back to the cd function by pressing TAPE AUX.
Eject (EJECT)
Press the EJECT button in order to remove the cd. The radio will play. EJECT may be activated with either the ignition or the radio OFF.
Radio/Audio System Operation RPO UPO
To Play A Compact Disc
While Listening a CD, press the up arrow to hear the next selection on the CD, Press the down arrow to go back to the start of the current selection (if more than eight seconds have played). The SEEK Button is inactive if the CD mode on the front radio is in use. Use the following procedure in order to operate the function:.
SCAN
Press and hold SEEK until the radio goes into SCAN mode. SCAN allows you to listen to stations for a few seconds. The receiver will continue to scan and momentarily stop at each station until you press SEEK again. The SCAN function is inactive if the AM-FM mode on the front radio is in use.
TAPE CD
With a cassette tape/CD in the player and the radio playing, press this button to play a cassette tape/CD. Press AM-FM to return to the radio when a cassette tape/CD is playing. The inactive tape/CD will remain safely inside the radio for future listening.
Remote Compact Disc Player (If Equipped)
Remote Compact Disc Player (If Equipped) If you have this option, you can play one compact disc (CD) at a time.
To load a CD into the player, hold the disc with the label side up and insert it carefully into the player (approximately halfway). The disc will automatically be pulled into the player. If the radio is off and the ignition is on when a CD is inserted, the radio will turn on and begin playing the CD. It is possible to load and unload CDs with the ignition off. To load a disc with the ignition off, press the EJECT button on the remote player and then insert the disc. To remove the disc, push the EJECT button and remove the disc from the player.
A disc that has been ejected but is still sitting in the remote CD player will be pulled back into the player after approximately 30 seconds. his protects the disc and player from damage. The disc will not start playing. o remove the disc, press the eject button and remove the disc from the player.
All of the compact disc functions are controlled by the radio buttons except for EJECT. When a disc is in the player, a CD symbol will appear on the display. When a disc is playing, the letters CD will appear next to the CD symbol in the bottom left corner. The track number will also be displayed.
If the disc comes back out and ERR appears on the display, it could be that:
| • | The disc is upside down. |
| It is dirty, scratched or wet. |
| There is too much moisture in the air. (Wait about an hour and try again.) |
| You are driving on a very rough road. |
| • | Please contact your dealership if any error recurs or cannot be corrected. |
PREV
(1): Press this button to go back to the start of the current track if more than eight seconds have played Press PREV again to go to the previous track on the disc.
NEXT
(3): Press this button to advance to the next track on the disc.
REV
(4): Press and hold this button to quickly reverse within a track. As the CD reverses, elapsed time will be displayed to help you find the correct passage.
FWD
(6): Press and hold this button to quickly advance within a track. As the CD advances, elapsed time will be displayed to help you find the correct passage.
SEEK
Press the left arrow while playing a CD to go back to the start of the current track. It will go back to the current track if more than eight seconds have played. Press the left arrow again to go to previous tracks. Press the right arrow to go to the next higher track on the disc.
RANDOM
Press P.SCAN to enter the random play mode. RANDOM will appear on the display . While in this mode, the tracks on the discs will be played in random order. If you press SEEK, PREV or NEXT while in the random mode, the previous or next track will be scanned randomly.
P.SCAN
Press P.SCAN again to turn off RANDOM and return to normal operation.
RECALL
Press this button to see what track is currently playing. Press RECALL again within five seconds to see how long the track has been playing. When a new track starts to play, the track number will also appear. Press RECALL a third time and the time of of day will be displayed.
TAPE AUX
With a disc loaded in the player and the radio playing, press this button once to play the compact disc. To return to playing the radio, press AM-FM. If both a cassette tape and CD are loaded, press TAPE AUX to switch between the tape and compact disc.
EJECT
Press this button on the remote player to eject compact disc.
