Removal Procedure
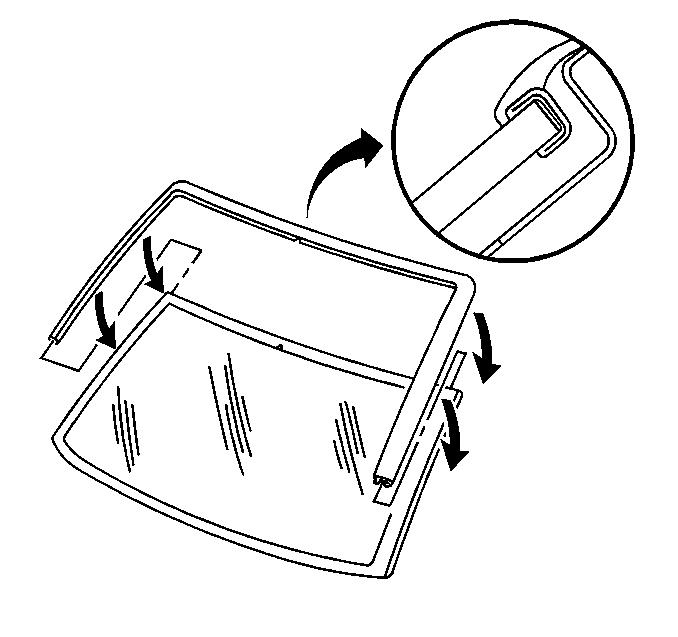
The windshield reveal molding is a one piece molding. The windshield reveal molding fills the cavities between the body and the windshield and can not be reused if stretched or damaged.
- Open the doors.
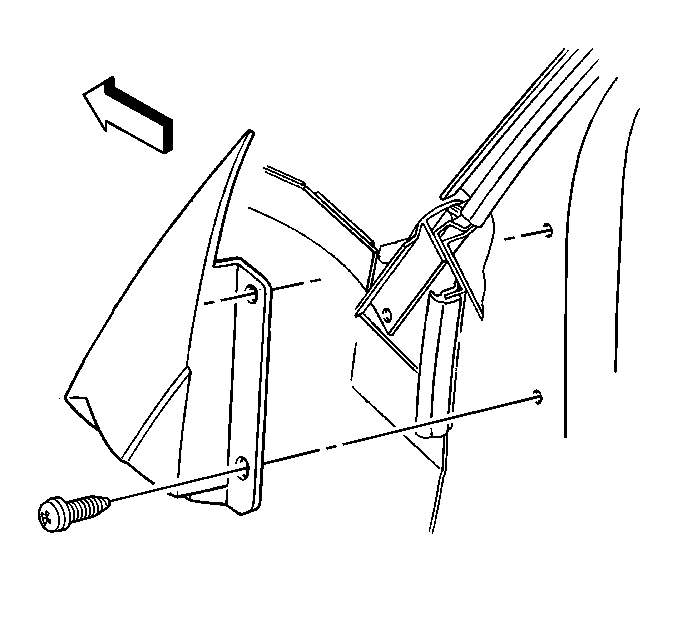
- Remove the screws that retain the right and left sides of the windshield frame filler panel
- Use a flat-bladed tool in order to carefully pry up one end of the windshield reveal molding.
- Grasp the windshield reveal molding at the lower corner.
- Slowly pull the windshield reveal molding away from the body until the entire molding has been removed. If the windshield reveal molding get stretched or damaged it can not be reused.
- Cut the urethane from the cavity with a utility knife in order to clean the excess urethane from the reveal molding cavity.


Important: Do not cut between the windshield and the pinchweld flange.
Installation Procedure
The windshield reveal molding must be prefit to the windshield and cavity before installation.
- Apply primer to the reveal molding cavity.
- Apply urethane adhesive into the reveal molding cavity and along the window edge.
- Flush the windshield reveal molding cavity with low pressure lukewarm water.
- Begin at the top of the window centerline and press the reveal molding into place.
- Apply a second application of water on top of the molding.
- Apply tape over the windshield reveal molding in order to keep the windshield reveal molding flush with the windshield while the adhesive cures.
- Install the screws that retain the right and left sides of the windshield frame filler panel.

This will help to shorten the urethane adhesive curing time.

Notice: Use the correct fastener in the correct location. Replacement fasteners must be the correct part number for that application. Fasteners requiring replacement or fasteners requiring the use of thread locking compound or sealant are identified in the service procedure. Do not use paints, lubricants, or corrosion inhibitors on fasteners or fastener joint surfaces unless specified. These coatings affect fastener torque and joint clamping force and may damage the fastener. Use the correct tightening sequence and specifications when installing fasteners in order to avoid damage to parts and systems.
Tighten
Tighten the right and left sides of the windshield frame filler panel
screws to 2 N·m (18 lb in).
