Stabilizer Shaft Replacement Rear Wheel Drive
Removal Procedure
- Raise the vehicle. Refer to
Lifting and Jacking the Vehicle
in General Information.
- Remove the tire and wheel assembly. Refer to
Wheel Removal
in Tires and Wheels.
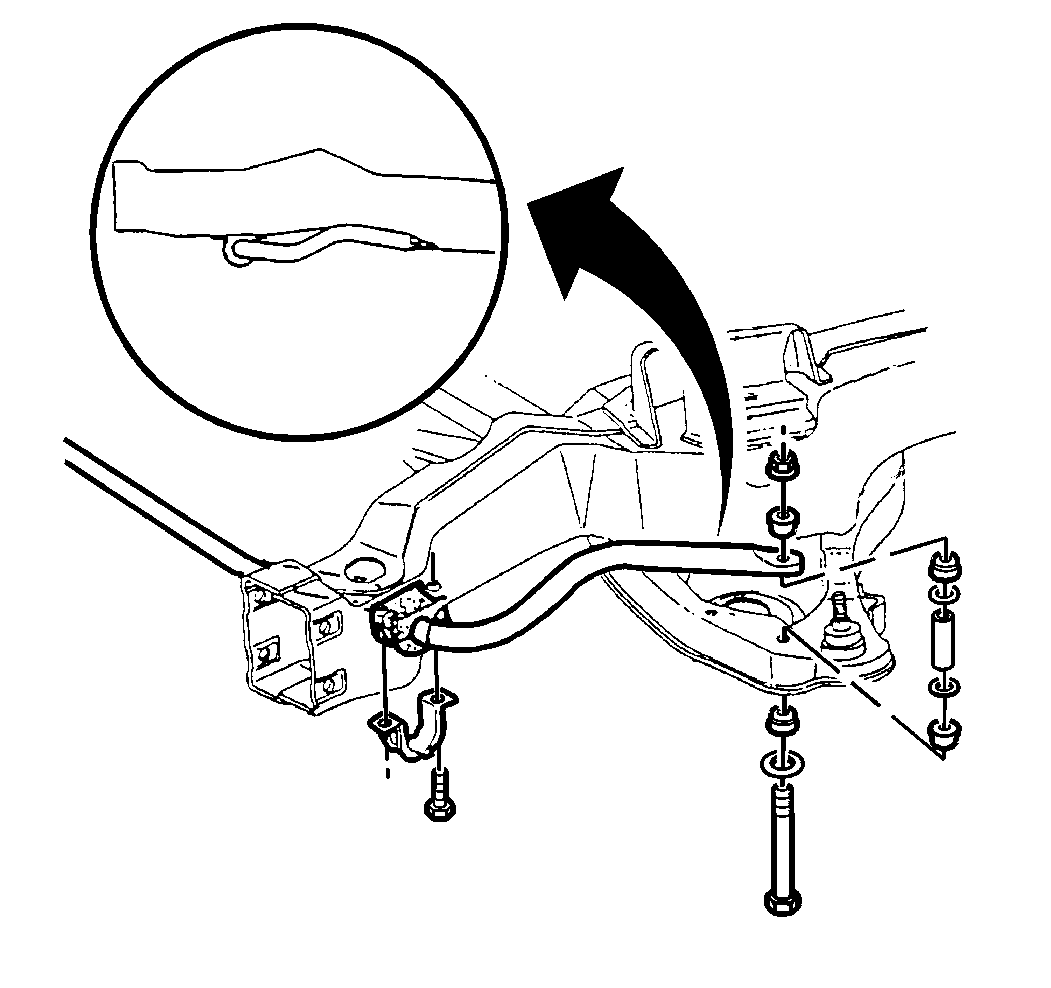
- Remove the stabilizer
link nuts.
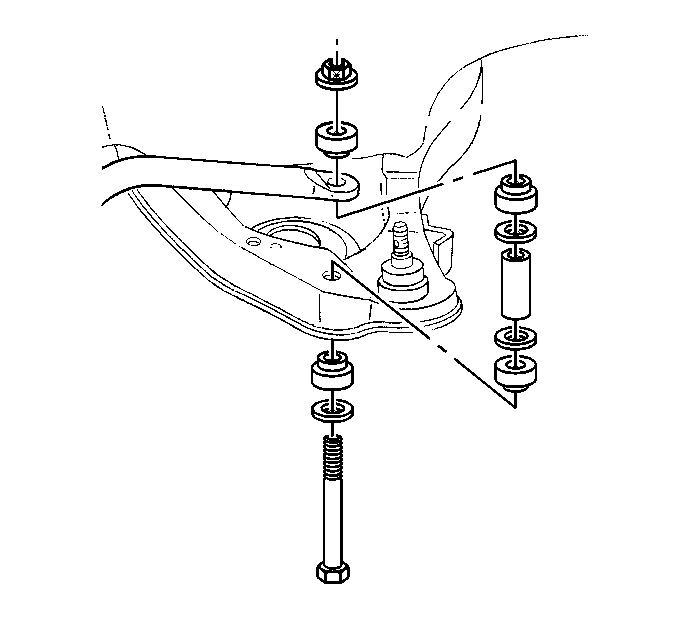
- Remove the stabilizer
link bolts.
| • | Pull the bolts down through the retainers, the insulators, and
the link spacer. |
| • | These components will come free, along with the ends of the stabilizer
shaft. |
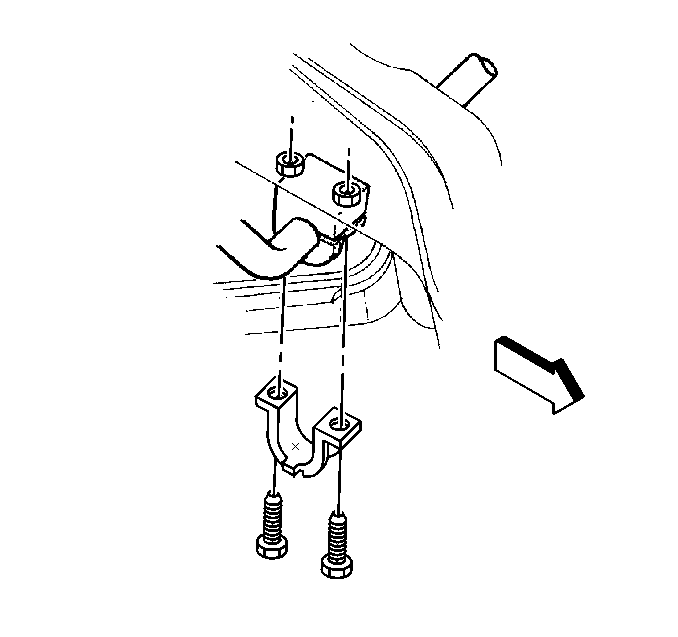
- Remove the insulator clamp
bolts.
- Remove the insulator clamps.
- Remove the stabilizer shaft.
- Remove the insulators from the stabilizer shaft.
- Inspect all of the parts for wear and damage.
Installation Procedure

- Install the insulators
on the stabilizer shaft. Position the slit on the insulator toward the front
of the vehicle.

- Install the stabilizer
shaft and the clamps.
| 2.1. | Mount the stabilizer shaft with the identification facing on the
right side of the vehicle. |
| 2.2. | Install the offset in the stabilizer shaft in the downward position. |
| 2.3. | Position the insulators squarely in the clamps. |
| 2.4. | Install the insulator clamp bolts in the proper holes. |

Notice: Use the correct fastener in the correct location. Replacement fasteners
must be the correct part number for that application. Fasteners requiring
replacement or fasteners requiring the use of thread locking compound or sealant
are identified in the service procedure. Do not use paints, lubricants, or
corrosion inhibitors on fasteners or fastener joint surfaces unless specified.
These coatings affect fastener torque and joint clamping force and may damage
the fastener. Use the correct tightening sequence and specifications when
installing fasteners in order to avoid damage to parts and systems.
- Install the following
stabilizer link parts in position:
Tighten
| • | Tighten the clamp bolts to 36 N·m (27 lb ft) |
| • | Tighten the link nut to 17 N·m (13 lb ft). |
- Install the tire and wheel assembly. Refer to
Wheel Installation
in Tires and Wheels.
- Lower the vehicle.
Stabilizer Shaft Replacement Full-Time Four-Wheel Drive
Removal Procedure
- Raise the vehicle. Refer to
Lifting and Jacking the Vehicle
in General Information.
- Remove the tire and wheel assembly. Refer to
Wheel Removal
in Tires and Wheels.
- Remove the idler arms from the frame.
Move the steering linkage to gain access to the stabilizer shaft.
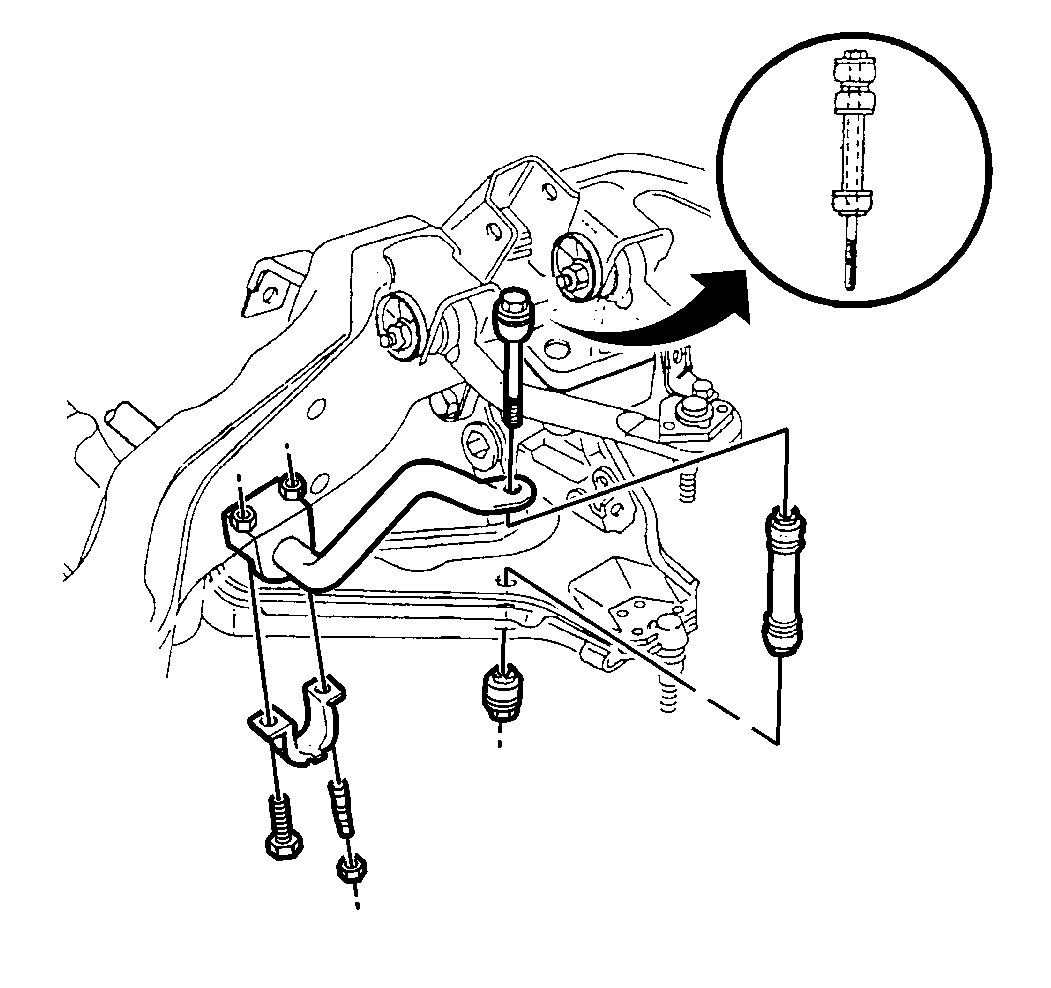
Important: Make sure to remove parts from the right and left front of the vehicle,
and keep the parts separated.
- Remove the stabilizer link nuts.
- Remove the stabilizer link bolts.
| 5.1. | Pull the stabilizer link bolts up through the retainers, the insulators,
and the link spacers. |
| 5.2. | These components will come free, along with the end of the stabilizer
shaft. |
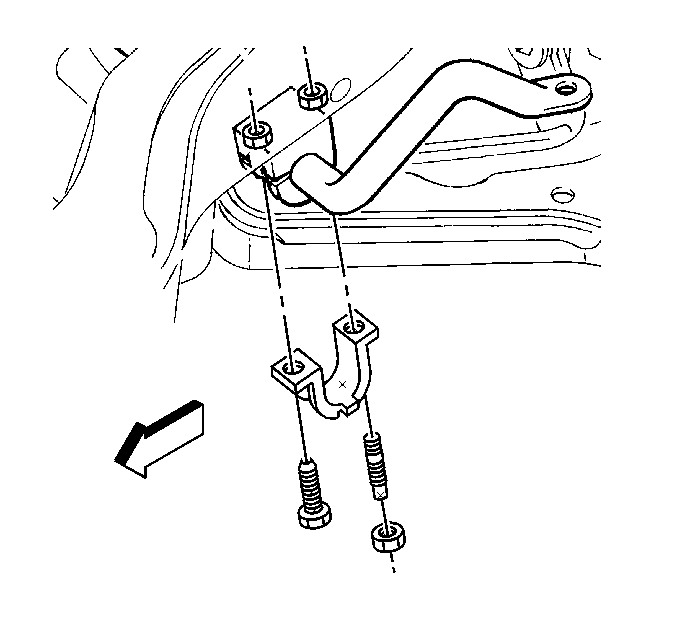
- Remove the insulator bolt
and the nut (left hand).

- Remove the insulator bolts
(right hand).
- Remove the insulator clamps.
- Remove the stabilizer shaft.
- Remove the insulators from the stabilizer shaft.
- Inspect all of the parts for wear and damage.
Installation Procedure
- Install the insulators to the stabilizer shaft. Make sure the
slit in the insulator faces forward.
- Install the stabilizer shaft to the frame and the lower control
arm. In order to allow alignment of the control arm to stabilizer shaft insulator
clamp holes, unload the torsion bar. Refer to
Torsion Bar Replacement
.
- Install the clamps to the insulators, and then to the frame.

- Install the insulator
clamp bolts (right hand).

Notice: Use the correct fastener in the correct location. Replacement fasteners
must be the correct part number for that application. Fasteners requiring
replacement or fasteners requiring the use of thread locking compound or sealant
are identified in the service procedure. Do not use paints, lubricants, or
corrosion inhibitors on fasteners or fastener joint surfaces unless specified.
These coatings affect fastener torque and joint clamping force and may damage
the fastener. Use the correct tightening sequence and specifications when
installing fasteners in order to avoid damage to parts and systems.
- Install the insulator
clamp bolt and nut (left hand).
Tighten
Tighten the bolts and the nut to 55 N·m (41 lb ft).

- Install the following
stabilizer link parts in position:
- Install the link bolts.
- Install the link nuts.
Tighten
Tighten the bolts to 17 N·m (13 lb ft).
- Install the idler arms to the frame.
- Install the idler arm bolts.
Tighten
Tighten the idler arm bolts to 105 N·m (77 lb ft).
- Install the tire and wheel assembly. Refer to
Wheel Installation
in Tires and Wheels.
- Lower the vehicle.
- Adjust the trim height of the vehicle. Refer to
Trim Height
in Suspension General Diagnosis.


