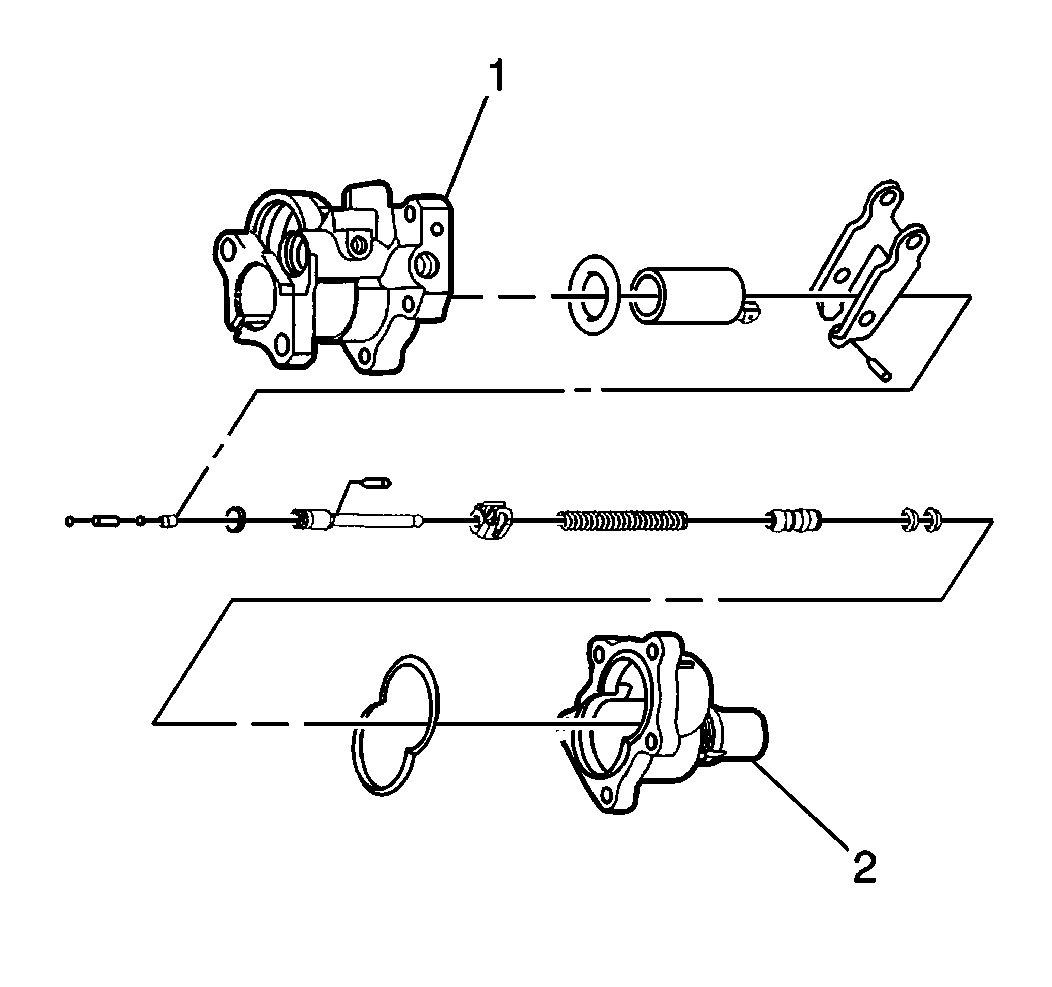
Hydraulic Brake Booster Overhaul Accumulator
Removal Procedure
Caution: The accumulator contains compressed gas. Always use the proper tools and follow the recommended procedures or personal injury may result. Do not apply heat to accumulator. Do not attempt to repair an inoperative accumulator. Always replace an inoperative accumulator with a new one. Dispose of an inoperative accumulator by drilling a 1.5 mm (1/16 in) diameter hole through the end of the accumulator can, opposite the O-ring.
Caution: Push rod removal is not recommended. Improper staking of the push rod to the Hydroboost reaction piston can result in a loss of brakes. If the rod or seals require service, the entire unit must be replaced.
Tools Required
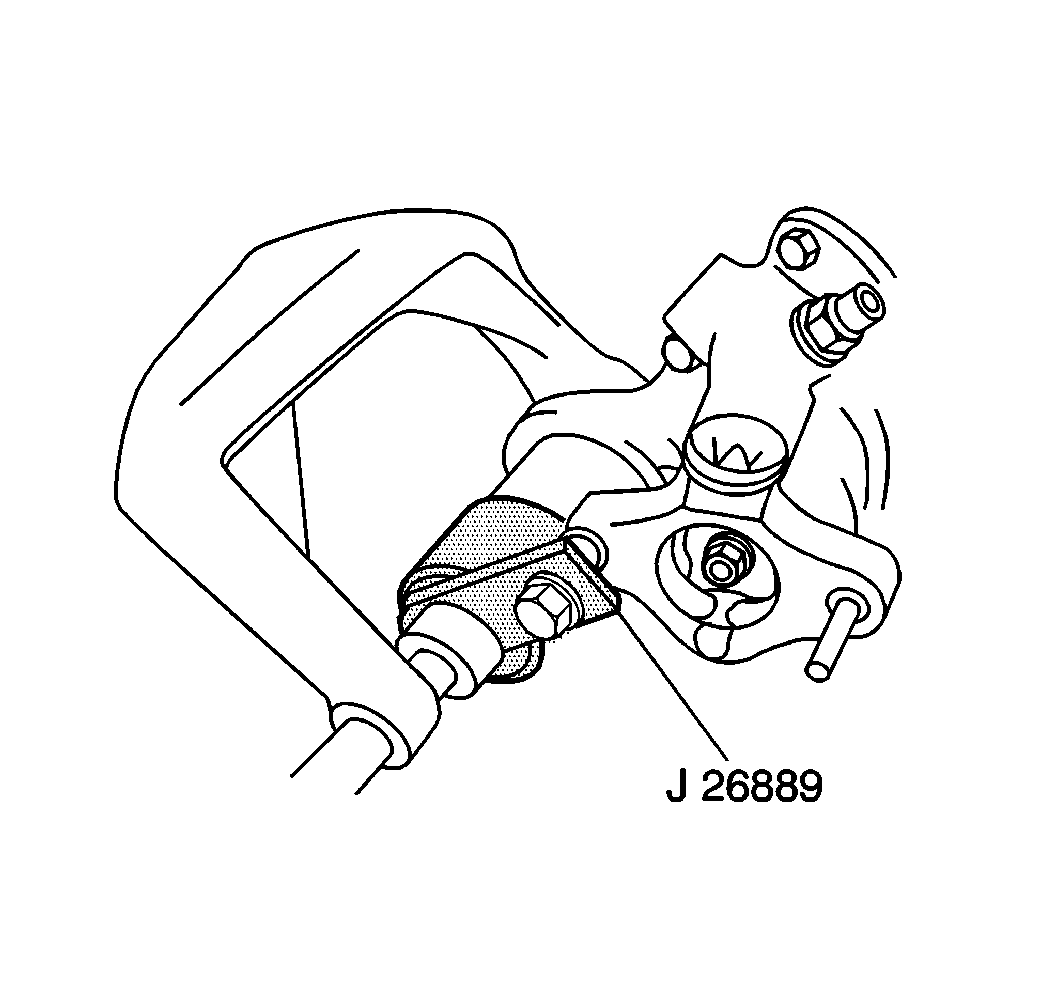
J 26889 Accumulator Piston Compressor
- Place the J 26889 over the end of the accumulator.
- Install the nuts on the stud.
- Depress the accumulator with a C-clamp.
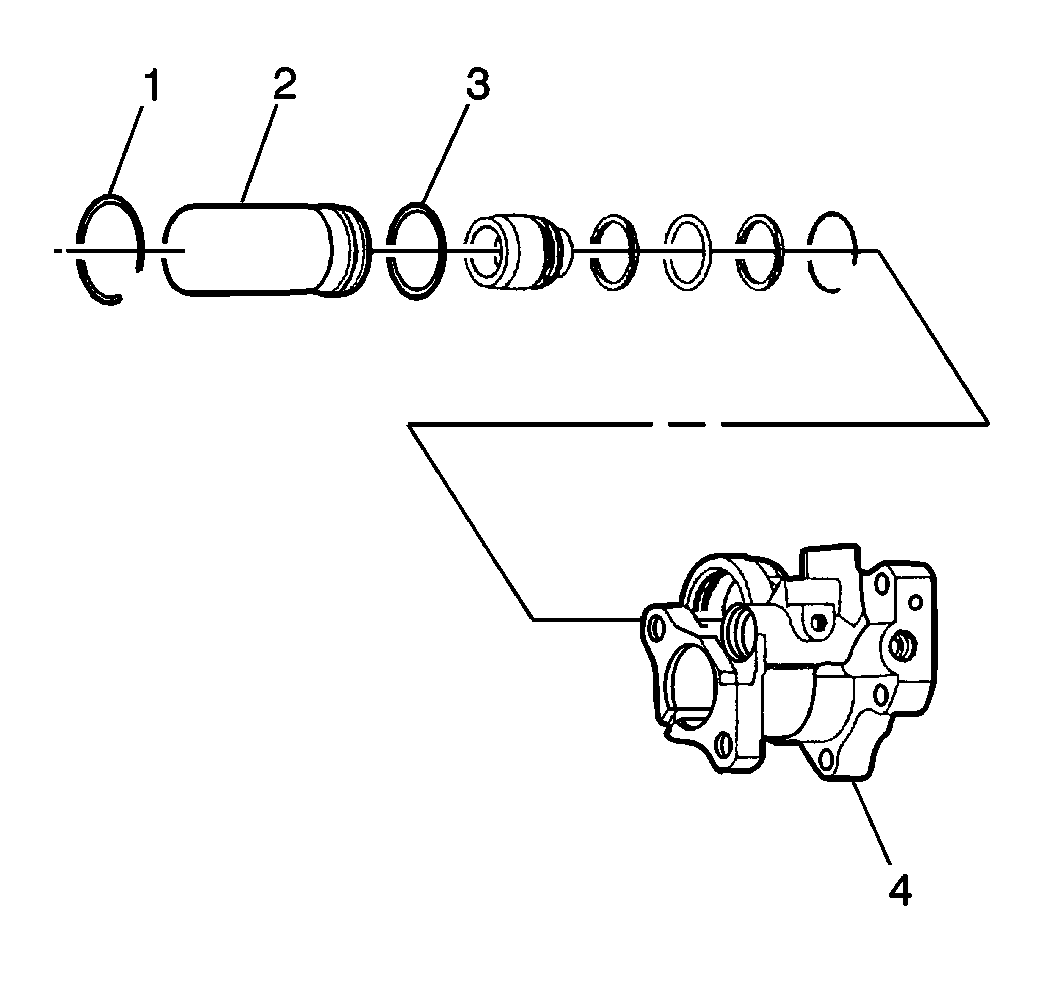
- Remove the accumulator retainer ring (1).
- Release the C-clamp.
- Remove the nut from the stud.
- Remove the J 26889 .
- Remove the accumulator (2) and O-ring seal (3).
Installation Procedure
- Lubricate all seals and metal friction points with power steering fluid.
- Install the accumulator (2) and O-ring seal (3).
- Place the J 26889 over the end of the accumulator.
- Install the nuts on the stud.
- Depress the accumulator with a C-clamp.
- Install the accumulator retainer ring (1).
- Release the C-clamp.
- Remove the nut from the stud.
- Remove the J 26889 .
Hydraulic Brake Booster Overhaul Check Valve
Removal Procedure
Caution: The accumulator contains compressed gas. Always use the proper tools and follow the recommended procedures or personal injury may result. Do not apply heat to accumulator. Do not attempt to repair an inoperative accumulator. Always replace an inoperative accumulator with a new one. Dispose of an inoperative accumulator by drilling a 1.5 mm (1/16 in) diameter hole through the end of the accumulator can, opposite the O-ring.
Caution: Push rod removal is not recommended. Improper staking of the push rod to the Hydroboost reaction piston can result in a loss of brakes. If the rod or seals require service, the entire unit must be replaced.
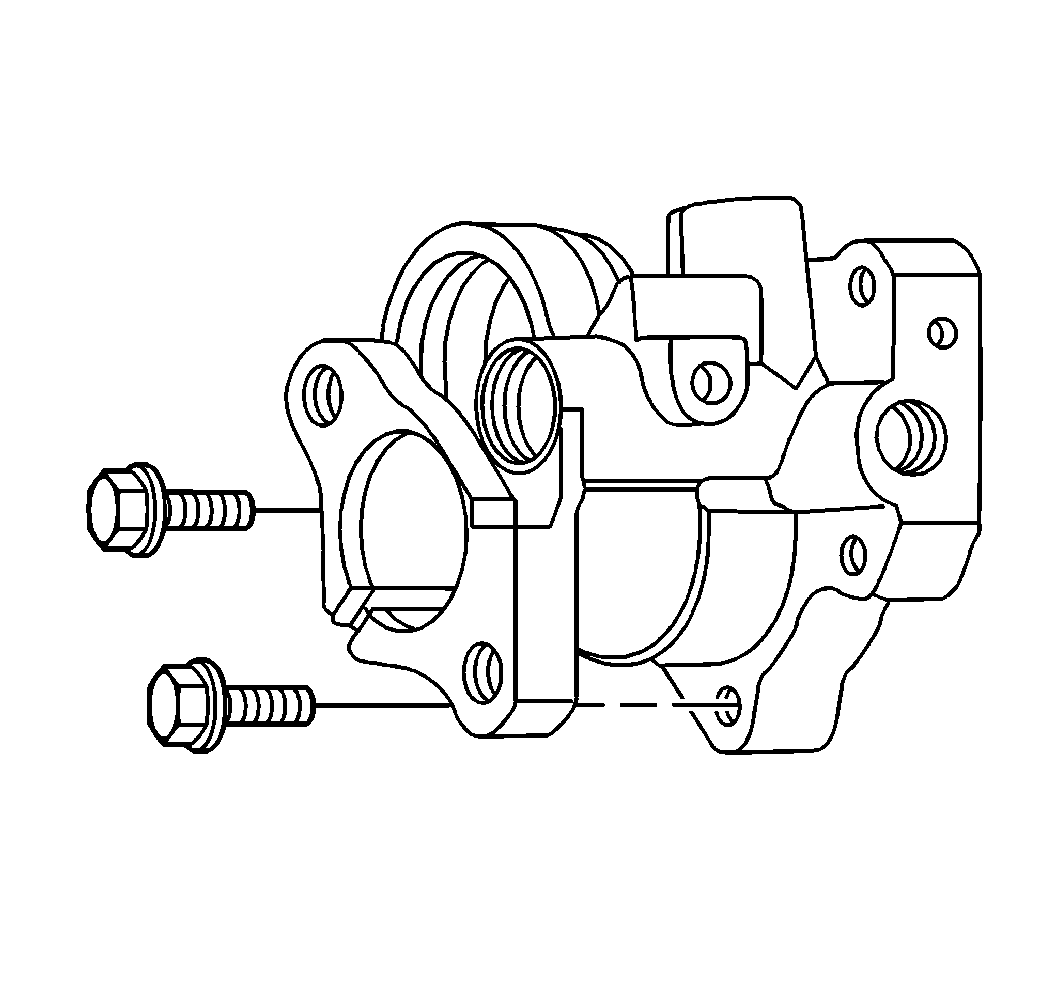
- Remove the bolts fastening the booster cover to the booster housing.
- Separate the booster cover (2) from the booster housing (1).
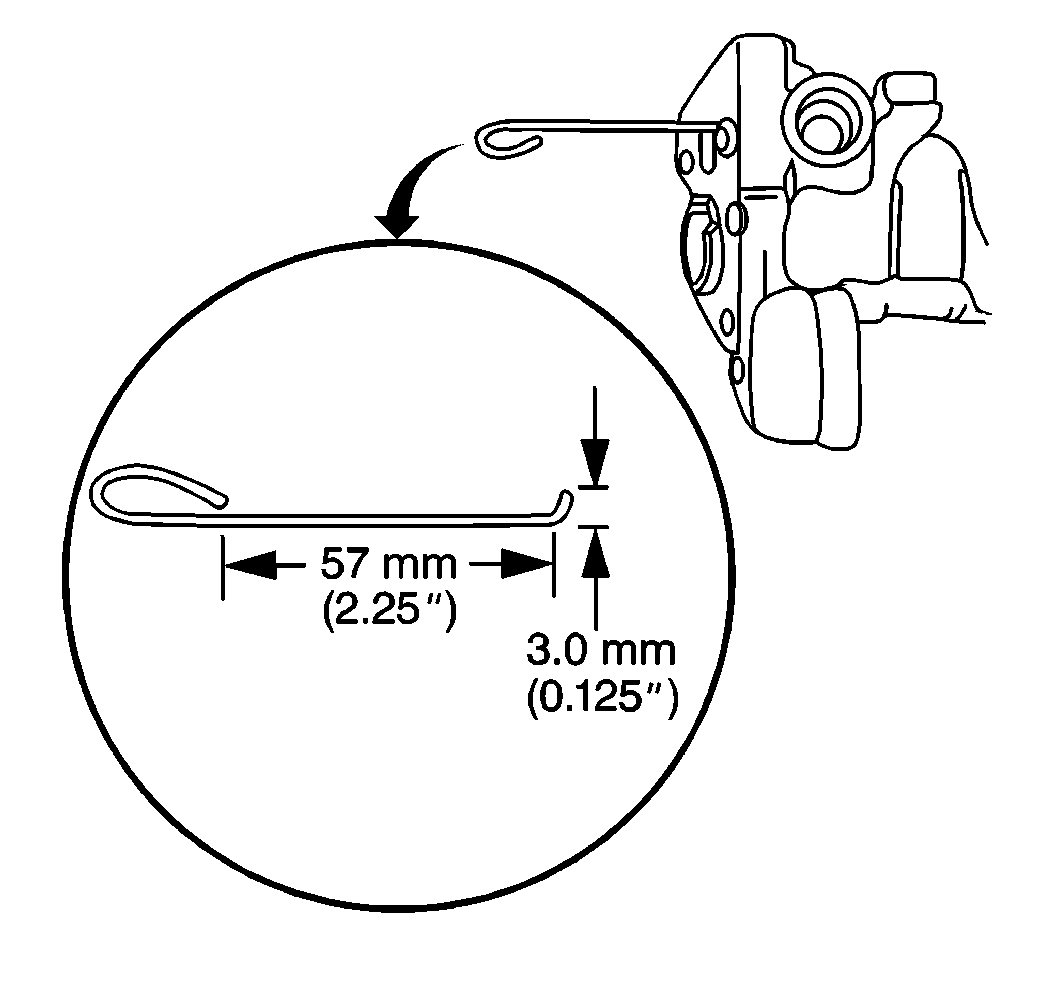
- Remove the check valve. Use a locally fabricated wire hook with dimensions as shown.
Installation Procedure
- Install the check valve.
- Assemble the booster cover (2) to the booster housing (1).
- Install the bolts fastening the booster cover to the booster housing.
Tighten
Tighten the bolts to 30 N·m (20 lb ft).
Notice: Use the correct fastener in the correct location. Replacement fasteners must be the correct part number for that application. Fasteners requiring replacement or fasteners requiring the use of thread locking compound or sealant are identified in the service procedure. Do not use paints, lubricants, or corrosion inhibitors on fasteners or fastener joint surfaces unless specified. These coatings affect fastener torque and joint clamping force and may damage the fastener. Use the correct tightening sequence and specifications when installing fasteners in order to avoid damage to parts and systems.
