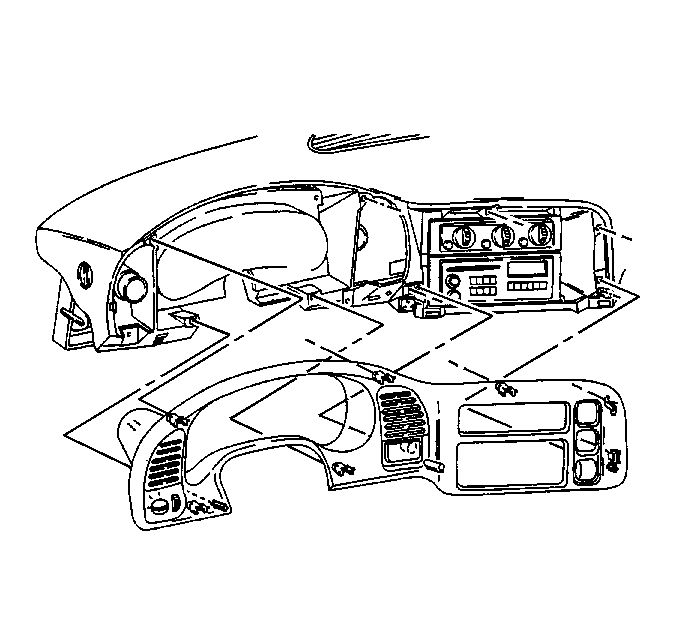
For 1990-2009 cars only
Removal Procedure
- Disconnect the battery negative cable.
- Set the parking brake, turn the ignition key to the ON position and move the gear selector to 1st gear position.
- Lower the tilt steering column to the lowest position (if equipped).
- Remove the instrument panel cluster trim plate by grasping it around the edges until the retainers release from the instrument panel.
- Remove the accessory switches from the instrument panel cluster trim plate by releasing the tabs located on the sides of each switch.
- Remove the headlamp and accessories electrical connectors.
- Remove the instrument panel cluster trim plate.
Caution: Before servicing any electrical component, the ignition and start switch must be in the OFF or LOCK position and all electrical loads must be OFF, unless instructed otherwise in these procedures. If a tool or equipment could easily come in contact with a live exposed electrical terminal, also disconnect the negative battery cable. Failure to follow these precautions may cause personal injury and/or damage to the vehicle or its components.

Installation Procedure
- Install the instrument panel cluster trim plate.
- Install the accessory switches to the instrument panel cluster trim plate by snapping in place.
- Install the headlamp and accessories electrical connectors.
- Install the instrument panel cluster trim plate by aligning the retainers to the opening in the instrument panel and push in place until fully seated.
- Move gear selector into PARK position, turn the ignition to the OFF position and release the park brake.
- Connect the battery negative cable.

