Removal Procedure
The sliding side door is designed with minor adjustment provisions in order to obtain the best function and fit of the door.
Adjust the following items in order to ensure the proper function of the door:
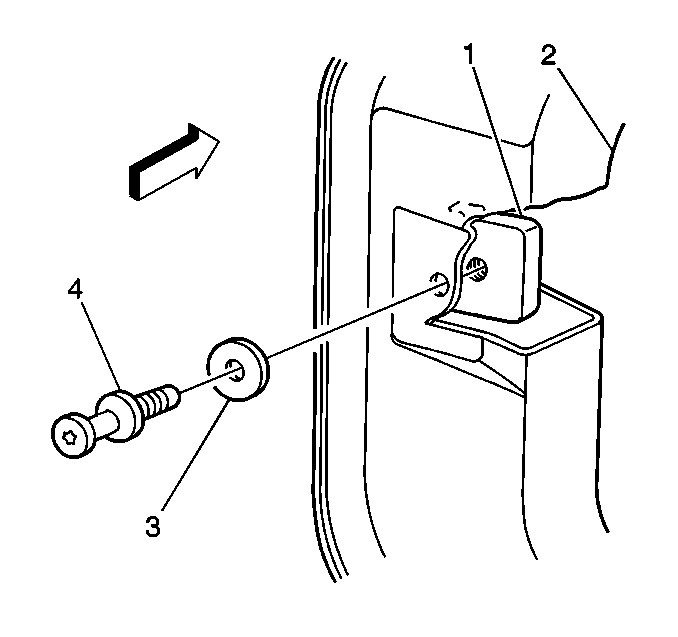
- Use the striker (4) in order to adjust the height and the flushness at the center rear of the door.
- Use the lower roller bracket in order to adjust the parallel gap at the front and the rear of the door and the height at the front of the door.
- Adjust the upper and the lower locator pockets in order to obtain flushness at the front of the door.
- Adjust the center roller bracket fore and aft, by adding or removing shims, in order to obtain the proper gap at the rear of the door.
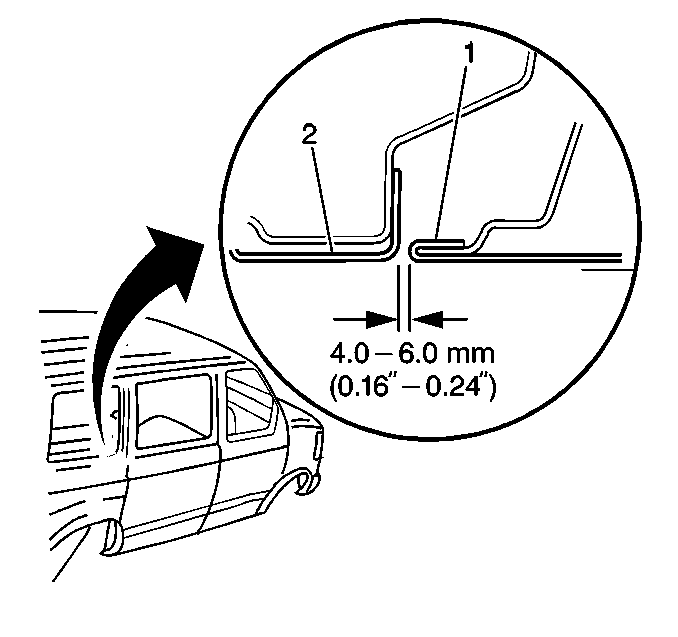
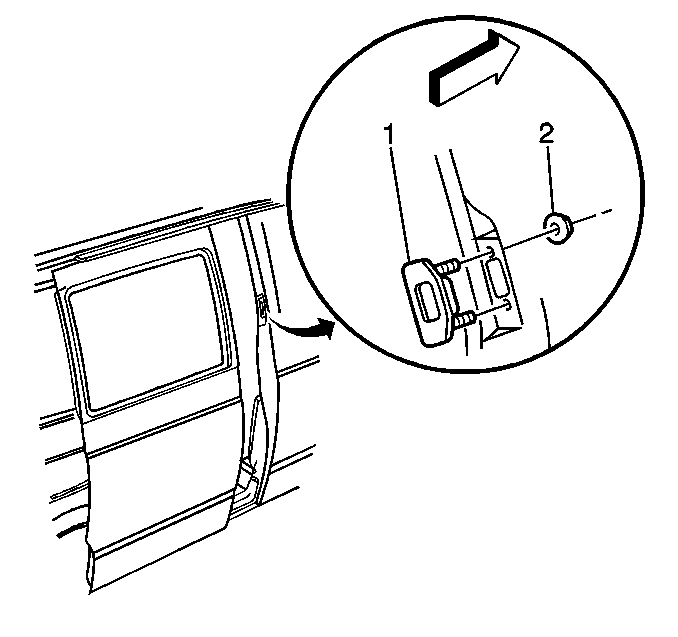
- Adjust the center roller track height (2) in order to obtain a level swing-in at the rear of the door.
- If needed, adjust the center roller track fore and aft in order to obtain the proper gap at the rear of the door.
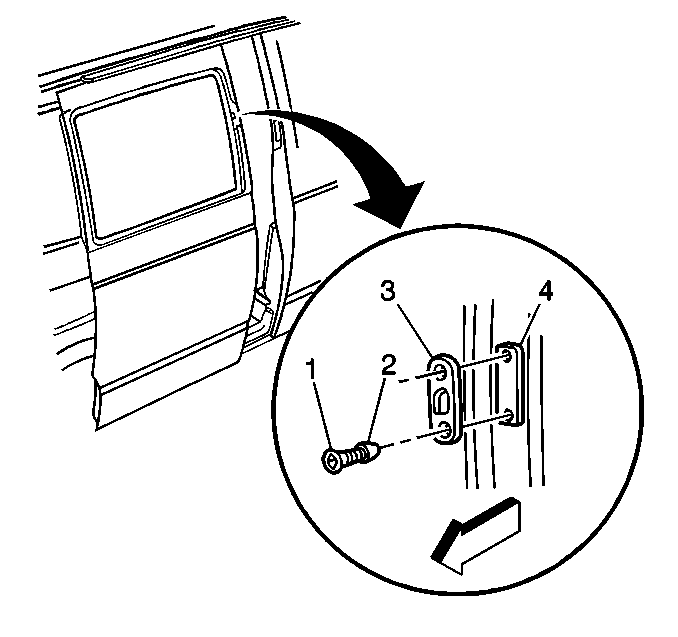
- Adjust the rear striker (4) in/out or up/down in order to obtain flushness or feature line alignment between the surface of the door and the surface of the quarter panel.
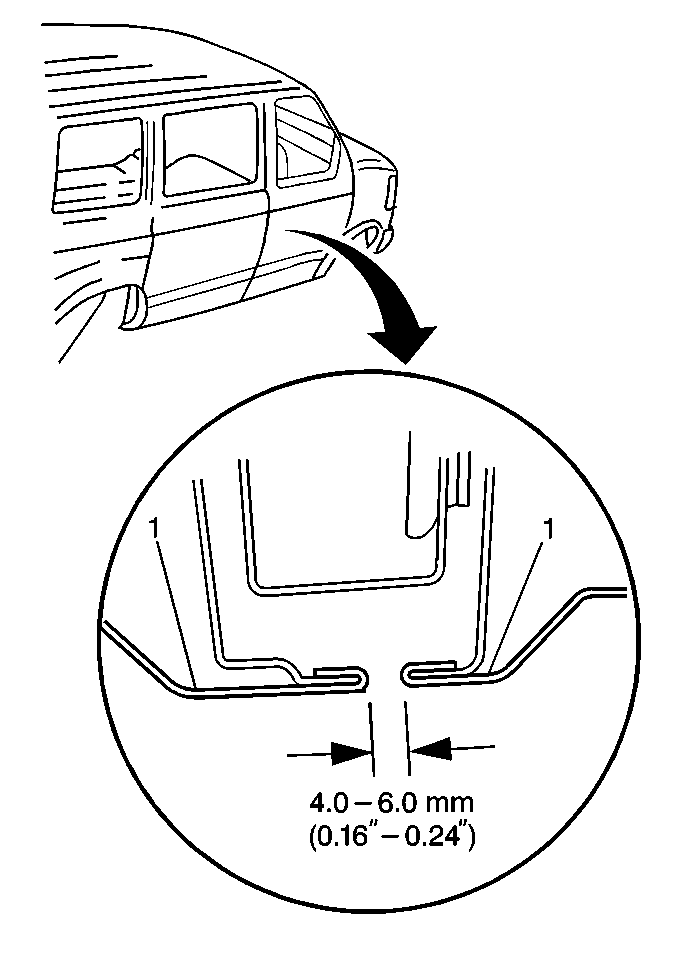
- Adjust the lower roller bracket (2) in order to obtain a parallel gap between the base of the door and the rocker panel. Check the gap between the quarter panel and the door. Ensure that the gap is parallel from the window area to the rocker panel.
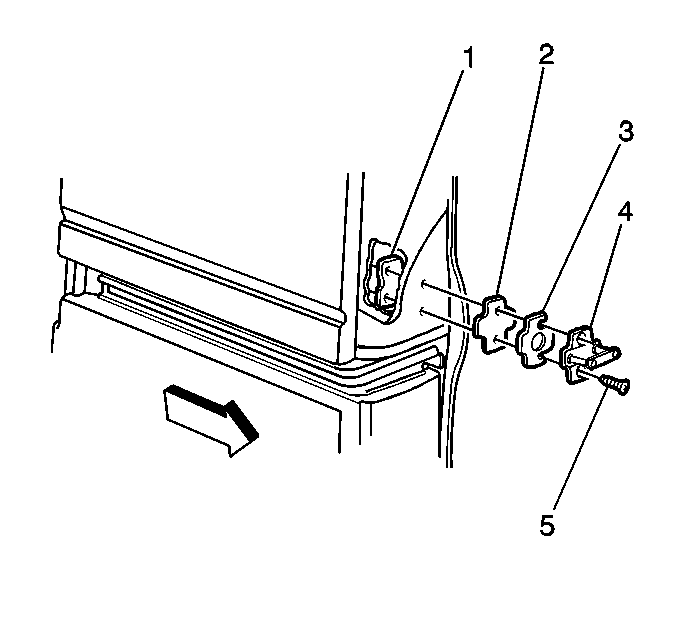
- Adjust the upper and the lower locator pockets so the surfaces contact the outer edges of the locator pins (3) in order to obtain flushness between the sliding door and the front door.
- If needed, enlarge the mounting holes for the locator pockets (1).
- Loosely install the locator pockets (1) to the vehicle.
- Close the sliding door.
- Tighten the locator pockets.
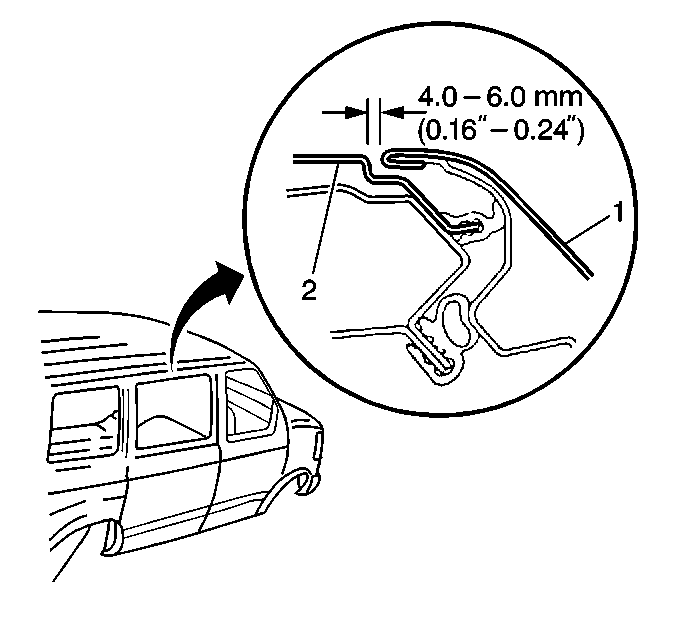
- Adjust the center roller bracket for and aft in order to obtain equal gaps between the sliding door, the quarter panel, and the front door. Add or remove shims as needed.
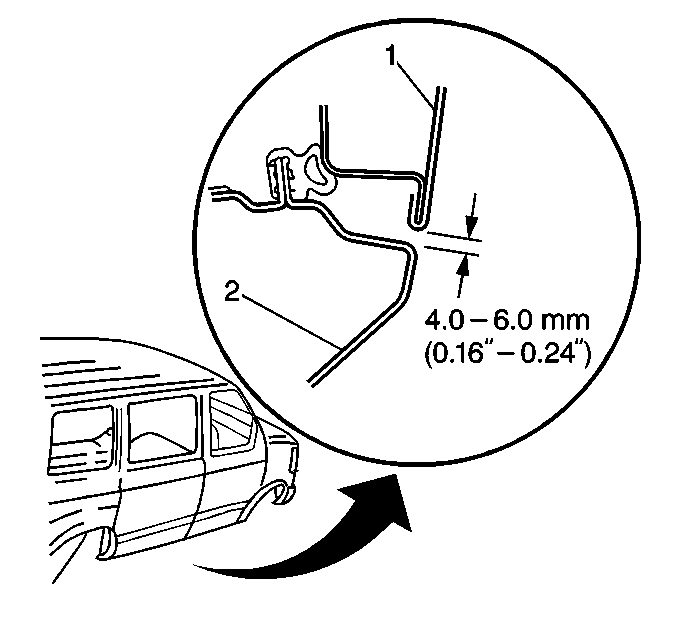
- Adjust the center roller track for and aft in order to obtain equal gaps between the sliding door (1), the quarter panel, and the front door.
Do this only if adding or removing shims from the center roller bracket does not correct the adjustment.
| 8.1. | Loosen the lower roller bracket bolt. |
| 8.2. | Remove the upper and the lower locator pockets. |
| 8.3. | Install the lower bracket bolts. |
Notice: Use the correct fastener in the correct location. Replacement fasteners must be the correct part number for that application. Fasteners requiring replacement or fasteners requiring the use of thread locking compound or sealant are identified in the service procedure. Do not use paints, lubricants, or corrosion inhibitors on fasteners or fastener joint surfaces unless specified. These coatings affect fastener torque and joint clamping force and may damage the fastener. Use the correct tightening sequence and specifications when installing fasteners in order to avoid damage to parts and systems.
Tighten
Tighten the nuts to 8 N·m (71 lb in).
0-6 mm (0.025 in) of shim depth can be used. If additional adjustment is required, adjust the center roller track.
Enlarge the forward center roller track mounting hole in order to obtain the proper adjustments.
