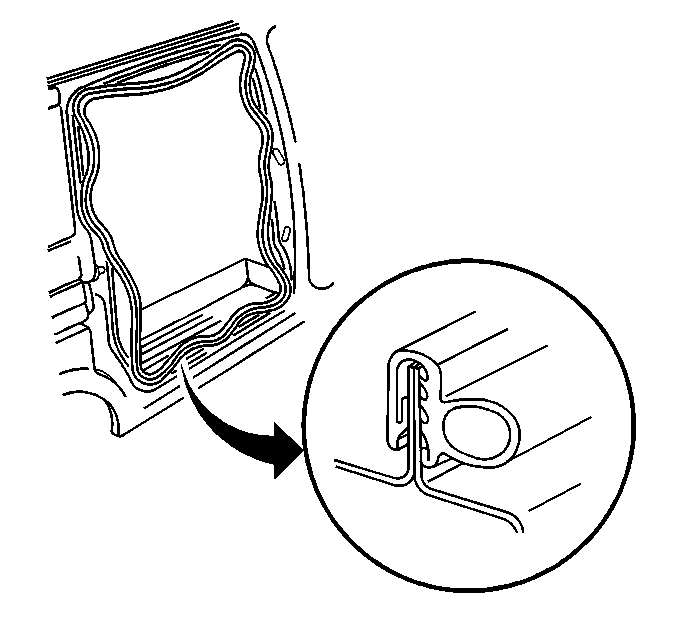
For 1990-2009 cars only
Removal Procedure
- Remove the necessary interior trim in order to access the weatherstrip. Refer to Rear Side Door Garnish Molding Replacement .
- Pull the weatherstrip from the pinchweld flange, starting at the upper right corner.

Installation Procedure
- Align the weatherstrip so that the seam, or the butt joint, is in the center of the rocker panel.
- Align the white dot and install the weatherstrip at the upper left corner.
- Seat the weatherstrip onto the pinchweld flange approximately 152 mm (6 in) from the corner.
- Drape the weatherstrip and align the white dot to the upper right corner.
- Seat the weatherstrip onto the pinchweld flange approximately 152 mm (6 in) from the corner.
- Install the weatherstrip to the lower right corner.
- Seat the weatherstrip onto the pinchweld flange approximately 152 mm (6 in) from the corner.
- Install the weatherstrip to the lower left corner.
- Seat the weatherstrip onto the pinchweld flange approximately 152 mm (6 in) from the corner.
- Install the weatherstrip to the pinchweld flange at the horizontal and vertical surfaces.
- Ensure that the top of the solid plug inside the weatherstrip is even with the front striker hole.
- Use a rubber mallet in order to gently tap the pinchweld flange areas and each corner in order to ensure the proper weatherstrip seating.
- Install the interior trim. Refer to Rear Side Door Garnish Molding Replacement .

