Poor Heat Distribution in Drivers Area of Vehicle (Install New Heat Diverter Ductsj)

| Subject: | Poor Heat Distribution in Driver's Area of Vehicle (Install New Heat Diverter Ducts) |
| Models: | 1996-2001 Chevrolet and GMC M/L-Van Models |
| Built Prior to the following VIN Breakpoints: |
Make | VIN Breakpoint |
|---|---|
Chevrolet | 1B111821 |
GMC | 1B504468 |
Condition
Some customers may comment that there is very little heat in the driver's area of the vehicle.
Correction
This condition may be corrected by installing a newly designed center heat duct and diverter tube. Use the following procedure and the part numbers listed below to install the new ductwork.
- Remove the screw covers from the top of the instrument panel (IP) extension and remove the retaining screws.
- Remove the retaining nuts from the bottom of the IP extension.
- Remove the IP extension from under the IP by pulling the extension outward and disconnecting the electrical connector.
- Remove the screws (total of 3) that retain the driver's knee bolster to the IP.
- Disconnect the park brake release cable from the park brake assembly and remove the knee bolster from the vehicle.
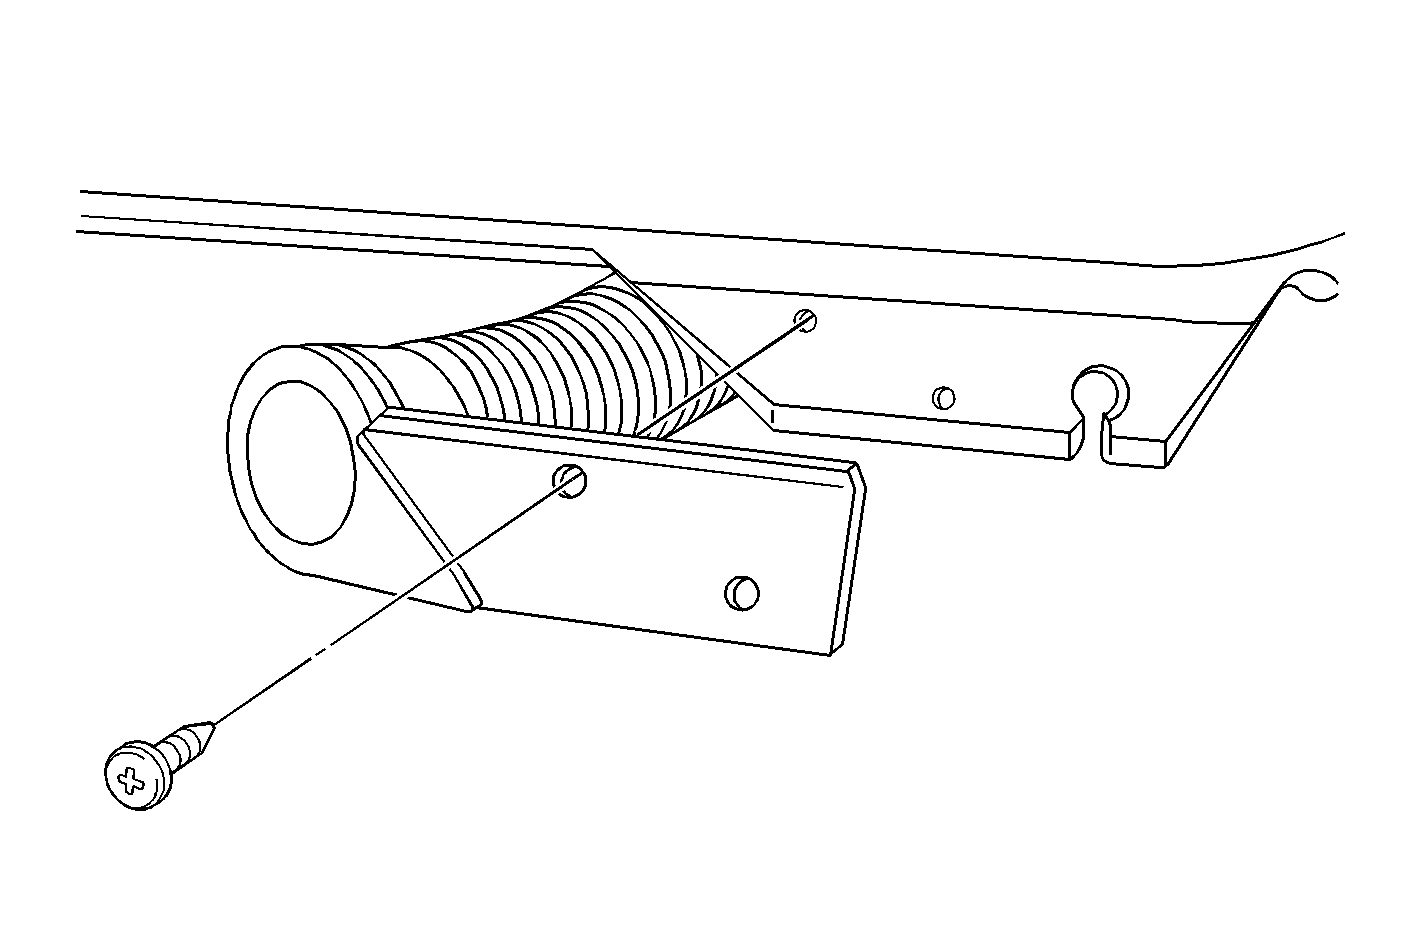
- Place the knee bolster on a clean, flat surface with the colored side up. The knee bolster will be resting on the lower edge tabs on the bench. The right side tab is where the tube must be attached.
- Lift the knee bolster and place the mounting of the flexible heat duct on the right side mounting tab of the knee bolster. Mark and drill two 5 mm (13/64 in) holes in the knee bolster mounting flange.
- Attach the mounting flange to the knee bolster with the screws.
- On panel vans, it will be necessary to remove the duct attaching screws from the floor of the vehicle.
- Remove the original center heat duct from the vehicle by grabbing at the top left corner of the duct and then pulling the duct to the left and out of the vehicle.
- Position the new heat duct to the floor outlet, if equipped, and snap into the heater case.
- On panel vans, reinstall the retainers for the heat duct into the floor of the vehicle.
- Reinstall the knee bolster to the vehicle. Position the new heat duct into the opening of the IP support brace and onto the outlet from the center heat duct.
- Reconnect the park release cable to the park brake assembly and install the three knee bolster retaining screws.
- Reposition the IP extension to the IP and reconnect the electrical connector.
- Install the retainers.
- Install the screw covers to the IP extension.

Tighten
Tighten the screws to 2 N·m (18 lb in).
Tighten
Tighten the retaining nuts to 2 N·m (18 lbN·min).
Tighten
Tighten to the retainers to 8 N·m (71 lbN·min).
Parts Information
Part Number | Description | Qty |
|---|---|---|
15754078 | Duct Asm - Flr Air Outlet | 1 per vehicle |
15754076 | Outlet, Flr Air (Passenger Vans) | 1 per vehicle* |
15754077 | Outlet, Flr Air (Panel Vans) | 1 per vehicle** |
9423101 | Screw, Tap | 2 screws required per vehicle (5 screws per pack) |
* Not used on panel vans. ** Not used on passenger or conversion vans | ||
Parts are currently available from GMSPO.
Warranty Information
For vehicles repaired under warranty, use:
Labor Operation | Description | Labor Time |
|---|---|---|
D1508 | Duct, Air Distribution Outlet-Front Floor (Left) - R&R or Replace | 0.4 hr |
This is a unique labor operation number for use only with this bulletin. This number will not be published in the Labor Time Guide. | ||
