For 1990-2009 cars only
SMU - Revised Evaporator Core Replacement Procedure

| Subject: | Revised Evaporator Core Replacement Procedure |
| Models: | 1997-2001 Chevrolet and GMC M/L-Van |
This bulletin is being issued to revise the Evaporator Core Replacement procedure in the Heating, Ventilation and Air Conditioning sub-section of the Service Manual. Please replace the current information in the Service Manual with the following information.
The following information has been updated within SI2000. If you are using a paper version of this Service Manual, please make a reference to this bulletin on the affected page.
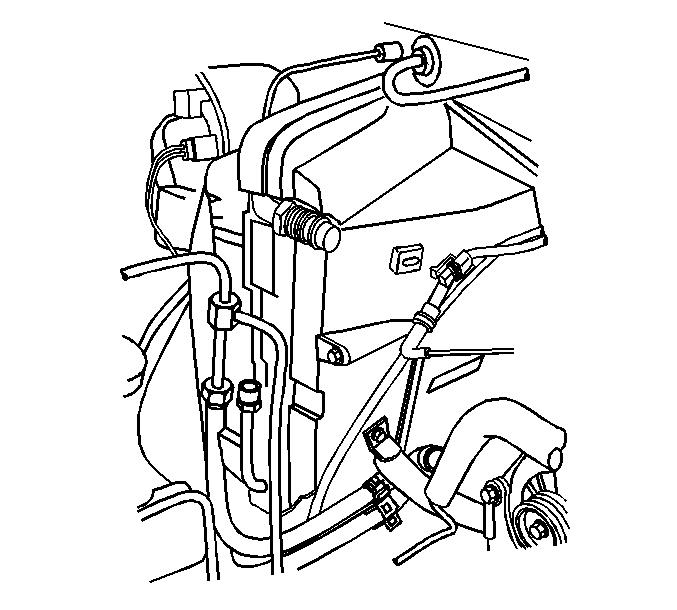
Removal Procedure
- Remove the air cleaner. Refer to Air Cleaner Assembly Replacement.
- Recover the refrigerant from the system. Refer to Refrigerant Recovery and Recharging.
- Remove the coolant recovery reservoir. Refer to Coolant Recovery Reservoir Replacement.
- Disconnect the electrical connectors.
- Remove the compressor hose assembly from the accumulator. Refer to Compressor/Condenser Hose Replacement - Auxiliary.
- Remove the bypass valve bracket from the outer case.
- Remove the evaporator tube from the accumulator.
- Remove the relay bracket.
- Remove the evaporator tube from the evaporator. Refer to the appropriate procedure:
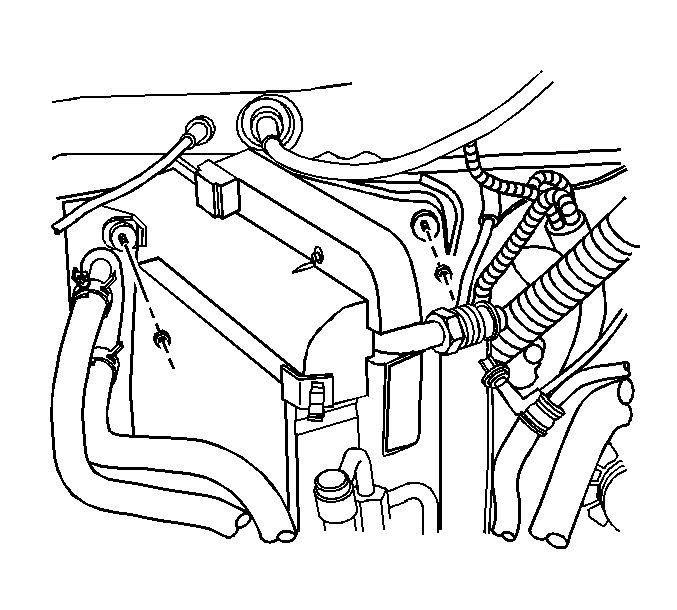
- Remove the screws from the outer evaporator case.
- Remove the outer case from the module.
- Remove the screws in order to split the evaporator module in half.
- Remove the inner case from the module.
- Remove the evaporator core.
| • | Evaporator Tube Replacement |
| • | Evaporator Tube Replacement - Auxiliary Front |
Installation Procedure
- Install the evaporator core.
- Install the inner case to the evaporator module.
- Install the outer case to the evaporator module.
- Install the evaporator tube to the evaporator.
- Install the bypass valve bracket to the outer case.
- Install the evaporator to the accumulator.
- Install the compressor hose assembly to the accumulator. Refer to Compressor/Condenser Hose Replacement - Auxiliary.
- Install the relay bracket.
- Connect the electrical connectors.
- Install the coolant recovery reservoir. Refer to Coolant Recovery Reservoir Replacement.
- Refill the engine coolant. Refer to Draining and Filling Cooling System.
- Evacuate and recharge the system. Refer to Refrigerant Recovery and Recharging.
- Install the air cleaner. Refer to Air Cleaner Assembly Replacement.
Notice: Refer to Fastener Notice in Cautions and Notices.
Tighten
Tighten the screws to the evaporator case to 6 N·m (53 lb in).
Tighten
Tighten the screws to the evaporator case to 6 N·m (53 lb in).
| • | Evaporator Tube Replacement |
| • | Evaporator Tube Replacement - Auxiliary Front |
