For 1990-2009 cars only
Removal Procedure
- Raise and support the vehicle. Refer to Lifting and Jacking the Vehicle in General Information.
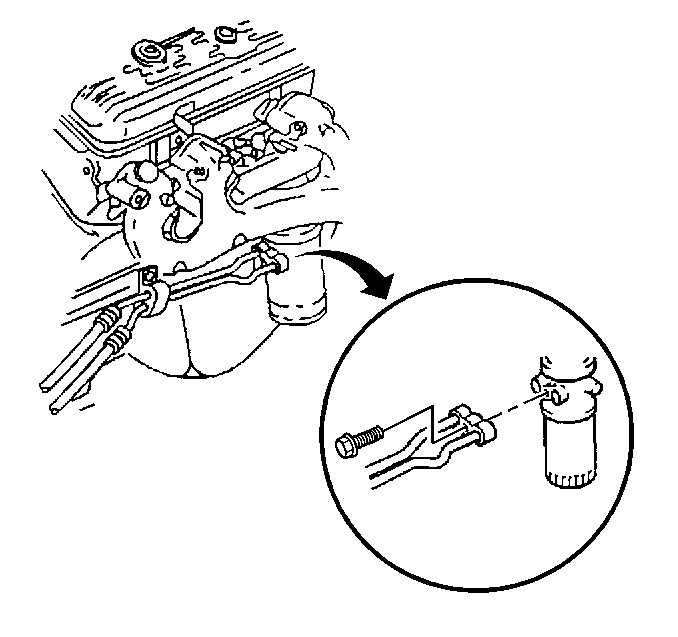
- Place a drain pan under the oil filter adapter.
- Remove the engine oil cooler lines mounting bolt from the oil filter adapter assembly.
- Remove the engine oil cooler lines from the oil filter assembly.
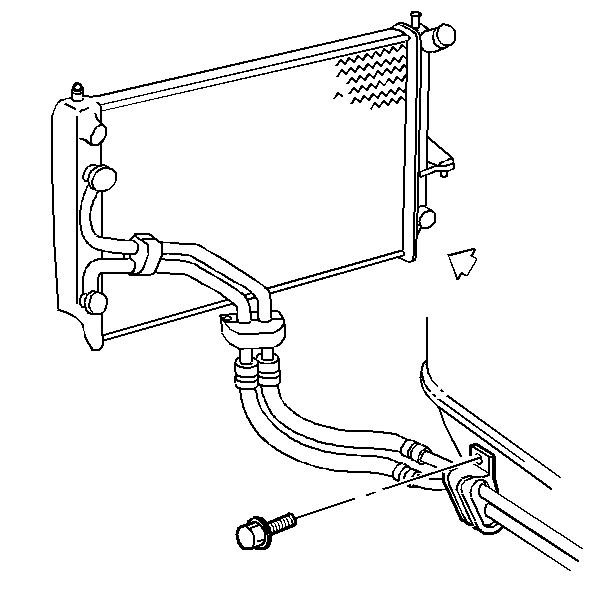
- Remove the engine oil cooler line to engine bracket bolt.
- Remove the engine oil cooler lines from the engine bracket.
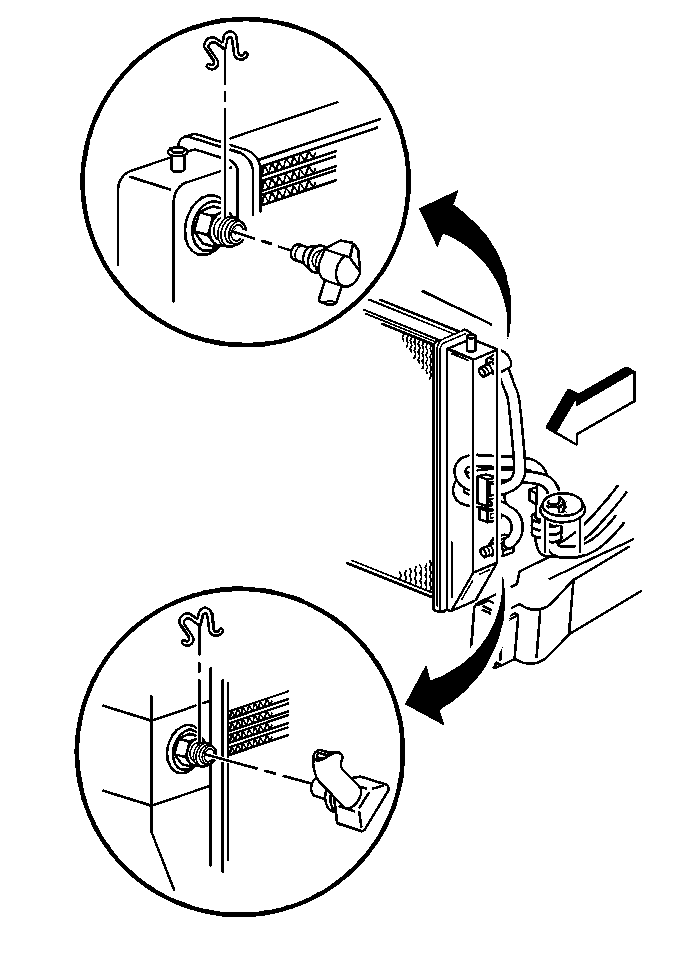
- Remove the lower engine oil cooler line from the radiator. Refer to Engine Oil Cooler Pipe/Hose Quick Connect Fitting .
- Lower the vehicle.
- Remove the upper engine oil cooler line from the radiator. Refer to Engine Oil Cooler Pipe/Hose Quick Connect Fitting .
- Remove the engine oil cooler lines, through the hood opening.
- Clean all of the components with a suitable solvent. Dry the components with compressed air.
- Inspect the following for damage or distortion:
Caution: In order to avoid being burned, do not service the engine while it is still hot. Service the engine when it is cool.


| • | The connector fittings |
| • | The connectors |
| • | The engine oil cooler lines |
Installation Procedure
- Install the engine oil cooler lines, through the hood openings.
- Install the upper engine oil cooler line to the radiator. Refer to Engine Oil Cooler Pipe/Hose Quick Connect Fitting .
- Raise the vehicle.
- Install the lower engine oil cooler line to the radiator. Refer to Engine Oil Cooler Pipe/Hose Quick Connect Fitting .
- Install the engine oil cooler lines to the engine bracket.
- Install the engine oil cooler line bracket bolt.
- Install the engine oil cooler lines to the oil filter adapter assembly.
- Install the engine oil cooler line bolt to the oil filter assembly.
- Run the engine. Inspect for leaks.
Important: Inspect the cooler line for a damaged or missing plastic cap. If the plastic cap is damaged or missing, replace it with a new plastic cap.

Notice: Refer to Fastener Notice in the Preface section.
Tighten
Tighten the bolt to 10 N·m (89 lb in).

Tighten
Tighten the bolt to 35 N·m (26 lb ft).
