For 1990-2009 cars only
Tools Required
| • | J 9522-3 U Joint Bearing Separator |
| • | J 9522-5 U Joint Bearing Spacer Remover |
Removal Procedure
- Remove the propeller shaft. Refer to Front Propeller Shaft Replacement or Rear Propeller Shaft Replacement .
- Support the propeller shaft in a line horizontal with the table of a press.
- Mark the propeller shaft in order to show which end connects to the transmission or transfer case and which end connects to the rear or front axle.
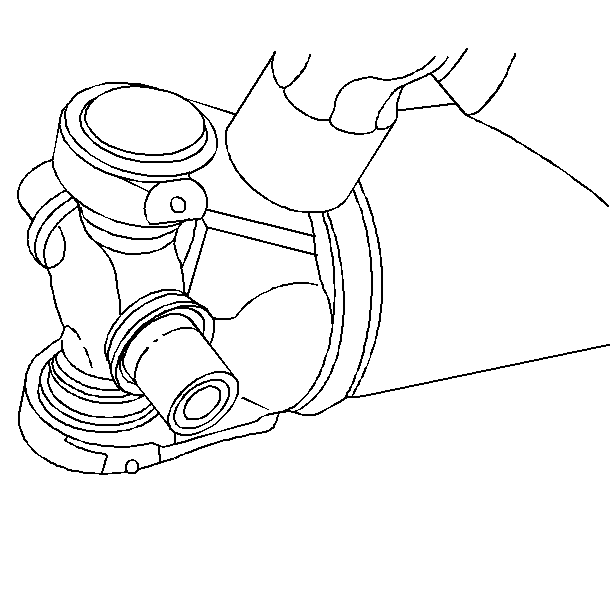
- Place the universal joint so that the lower ear of the yoke is supported on a 30 mm (11/8 in) socket.
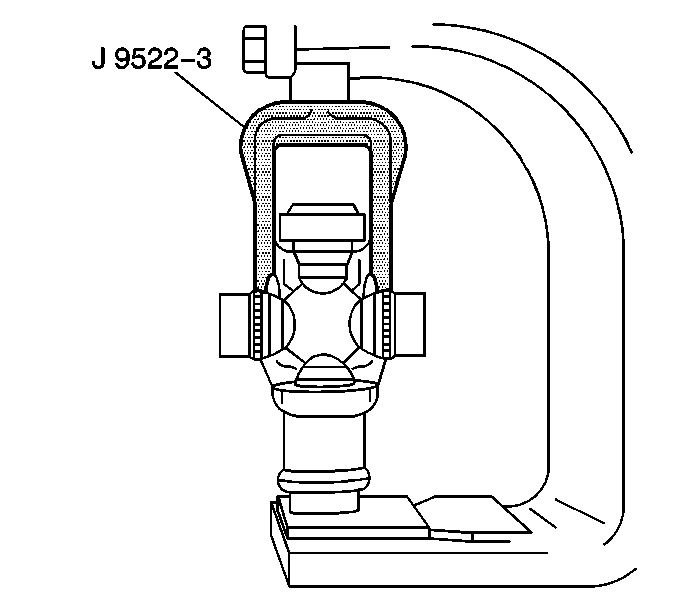
- In order to shear the plastic retaining ring on the bearing cup, place the J 9522-3 on the on the open horizontal bearing cups and press the lower bearing cup out of the yoke ear.
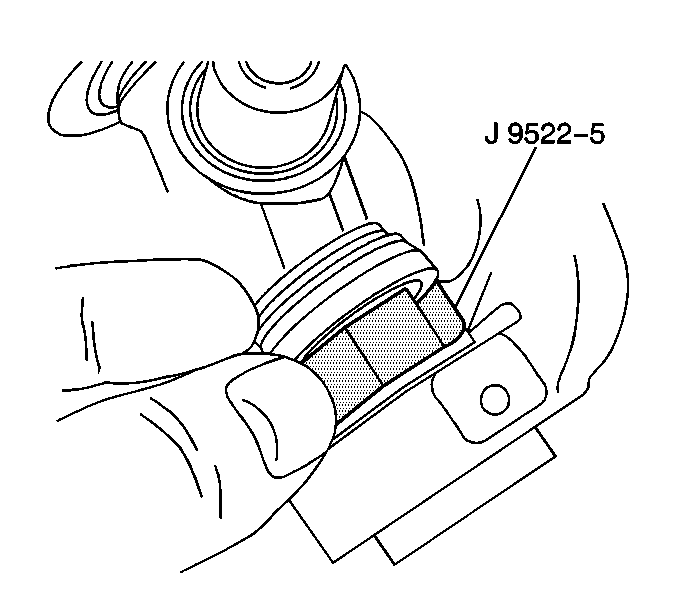
- If the bearing cup is not completely removed, lift the cross, and insert J 9522-5 between the seal and bearing cup being removed. Continue pressing the bearing cup out of the yoke.
- Rotate the propeller shaft and press the opposite bearing cup out of the yoke.
- Disassemble the cross from the yoke.
- Remove the remaining universal joint parts from the yoke.
- If you are replacing the front universal joint (rear axle only), remove the bearing cups in the slip yoke in the same manner.
- Inspect the retaining ring grooves for plastic.
- Inspect the bearing cup bores for burrs or imperfections.
- Clean the remains of the sheared plastic bearing retainers from the grooves in the yoke.
- The sheared plastic may prevent the bearing cups from being pressed into place and thus prevent the bearing retainers from being properly seated.
Notice: Never clamp propeller shaft tubing in a vise. Clamping propeller shaft tubing in a vise could dent or deform the tube causing an imbalance or unsafe condition. Always clamp on one of the yokes and support the shaft horizontally. Avoid damaging the slip yoke sealing surface. Nicks may damage the bushing or cut the lip seal.
Installation Procedure
- Remove the bearing cups from the new universal joint journals.
- Coat the needle bearings in the bearing cups with a thin layer of chassis grease. Use your finger to apply the grease.
- Install one bearing cup part way into one side of the yoke.
- Turn the yoke ear towards the bottom.
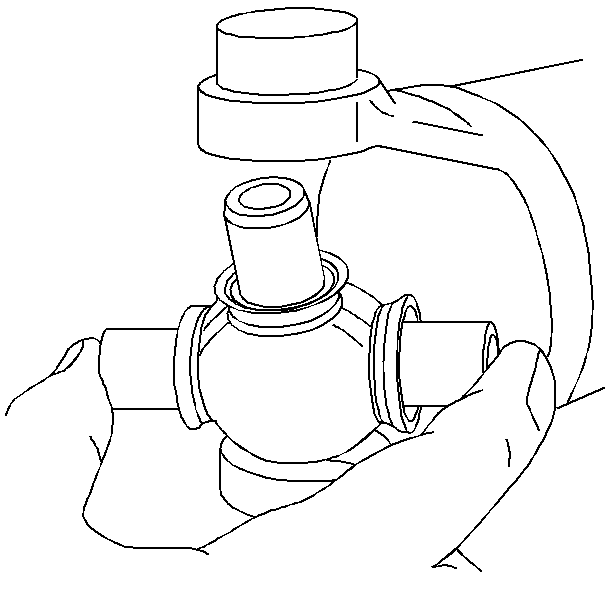
- Install the cross into the yoke so that the trunnion seats freely into the bearing cup.
- With the trunnion seated in the bearing cup, press the bearing cup into the yoke until it is flush with the yoke ear.
- Install the opposite bearing cup part way into the yoke ear. Make sure that the trunnions are started straight and true into both bearing cups.
- Press the opposite bearing cup into the yoke ear.
- Install the bearing retainer in the retainer groove.
- If the retainer does not seat, spring the yoke slightly with a firm blow from a dead blow hammer.
- Install the propeller shaft. Refer to Front Propeller Shaft Replacement or Rear Propeller Shaft Replacement .

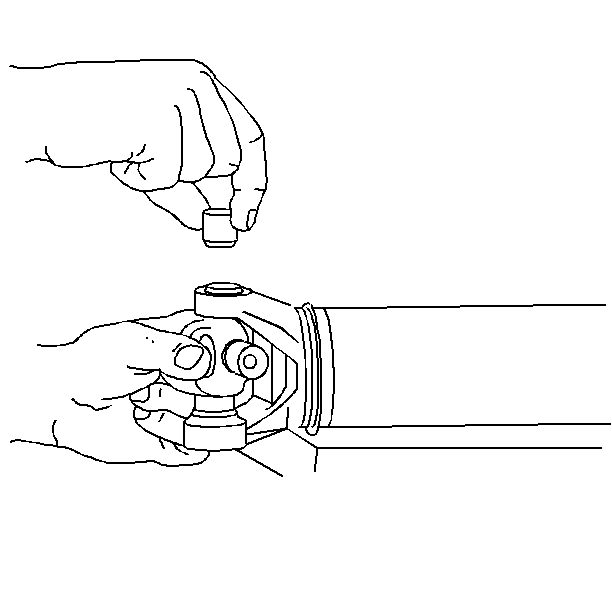
Important: If the bearing cup seems to bind or hang-up, stop pressing. Check the needle bearings for misalignment in the bearing cup.
| • | Work the cross all the time. |
| • | Check for free unbinding movement of the trunnions in the bearing cups. |
| • | Press the bearing cup into the yoke until the bearing retainer groove clears the inside of the yoke. |
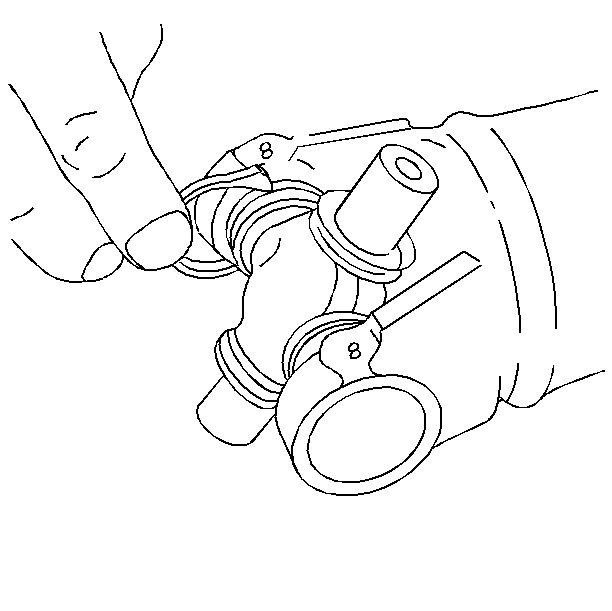
| • | Continue pressing until you can snap both retainers into place. |
| • | A small amount of chassis grease may help the snap ring seat in the bearing cup groove. |
