Tools Required
| • | J 33791 Bushing Remover and Installer Set |
| • | J 42211 Axle Bearing Installer |
| • | J 42738 Seal Installer |
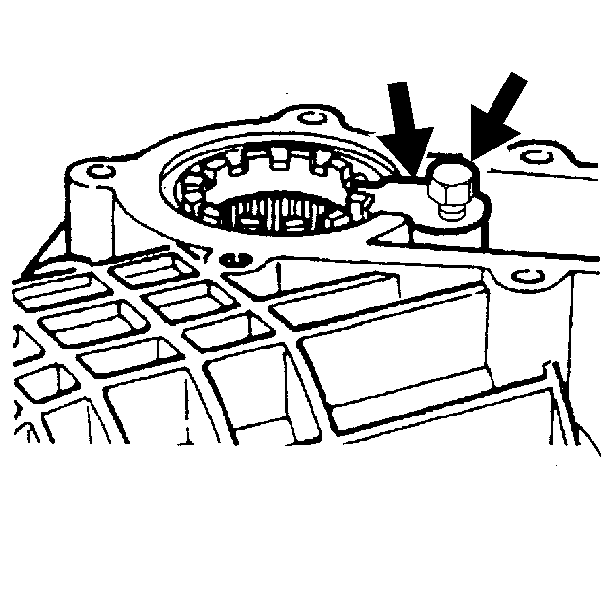
- Install the differential adjuster nut lock tabs over the differential adjuster nut sleeves.
- Install the differential adjuster nut lock tab bolts.
- Remove the differential carrier assembly bolts.
- Remove the right differential carrier case half.
- Clean the sealing surface of each half of the differential carrier case and the inner axle housing to differential carrier assembly.
- Apply a bead of sealer, GM P/N 1052942 (Canadian P/N 10953466) or the equivalent, to one side of the differential carrier case half sealing surface.
- Install the right differential carrier case half.
- Install the differential carrier case bolts.
- Install the inner shaft seal cover.
- Install the inner shaft seal cover bolts.
- Install the new left side axle shaft seal using the J 42738 .
- Install the inner axle shaft retaining ring.
- Install the left inner axle shaft.
- Install the differential carrier bushings using the J 33791 .
- Install the differential carrier assembly. Refer to Differential Carrier Assembly Replacement .
- Install the right side inner axle shaft housing bearing and the seal using the following procedure:
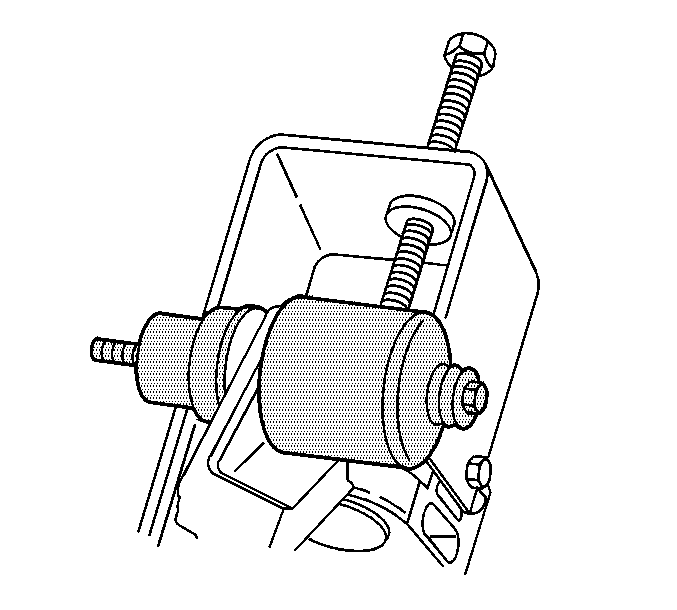
- Apply sealant, GM P/N 1052492 (Canadian P/N 10953466)or equivalent, to the inner axle housing to differential carrier sealing surface.
- Install the inner axle shaft housing to the differential carrier assembly.
- Install the inner axle shaft housing to differential carrier assembly bolts.
- Install the inner axle shaft housing to the frame bracket nuts.
- Install the new inner axle shaft retaining ring onto the inner axle shaft.
- Install the inner axle shaft through the inner axle shaft housing and into the differential side gear.
- Push the inner axle shaft into the differential side gear until the retaining ring snaps the inner axle shaft into place.
- Install the drain plug and the washer.
- Fill the axle with lubricant. Use the proper fluid. Refer to Approximate Fluid Capacities and Fluid and Lubricant Recommendations in Maintenance and Lubrication.
- Install the fill plug and the washer.
Notice: Use the correct fastener in the correct location. Replacement fasteners must be the correct part number for that application. Fasteners requiring replacement or fasteners requiring the use of thread locking compound or sealant are identified in the service procedure. Do not use paints, lubricants, or corrosion inhibitors on fasteners or fastener joint surfaces unless specified. These coatings affect fastener torque and joint clamping force and may damage the fastener. Use the correct tightening sequence and specifications when installing fasteners in order to avoid damage to parts and systems.
Tighten
Tighten the differential adjuster nut lock tab bolt to 8 N·m
(71 lb in).
The surfaces must be clean of all the grease and the oil.
Tighten
Tighten the differential carrier case bolts to 50 N·m (37 lb ft).
Tighten
Tighten the inner axle shaft seal cover bolts to 25 N·m (18 lb ft).
Carefully tap the inner axle shaft into place with a soft mallet.
| 16.1. | Install the bearing with the square shoulder in using the J 42211 . |
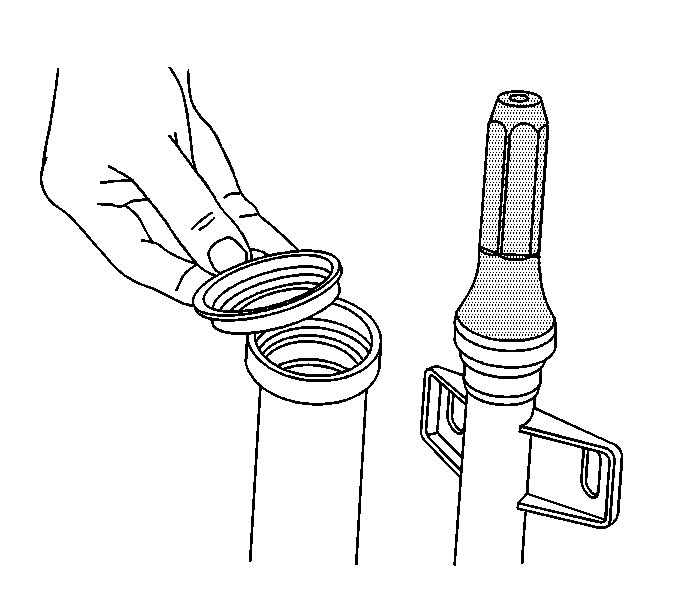
| 16.2. | Install the new axle shaft seal using the J 42738 . |
Tighten
Tighten the inner axle housing to differential carrier assembly bolts to 48 N·m
(36 lb ft).
Tighten
Tighten the inner axle housing to frame bracket nuts to 73 N·m
(54 lb ft).
Important: Do not nick or cut the inner axle shaft oil seal.
Carefully guide the inner axle shaft through the inner axle shaft housing oil seal and into the differential side gear turning as necessary in order to align the inner axle shaft splines with the differential side gear splines.
Pull on the inner axle shaft to ensure that it is locked into position.
Tighten
Tighten the drain plug to 33 N·m (24 lb ft).
Tighten
Tighten the fill plug to 33 N·m (24 lb ft).
