Removal Procedure
- Remove the driver seat. Refer to
Bucket Seat Replacement
in Seats.
Caution: Unless directed otherwise, the ignition and start switch must be in the OFF or LOCK position, and all electrical loads must be OFF before servicing
any electrical component. Disconnect the negative battery cable to prevent an electrical spark should a tool or equipment come in contact with an exposed electrical terminal. Failure to follow these precautions may result in personal injury and/or damage to
the vehicle or its components.
- Disconnect the battery cables, and remove the battery. Refer
to
Battery Replacement
in Engine Electrical.
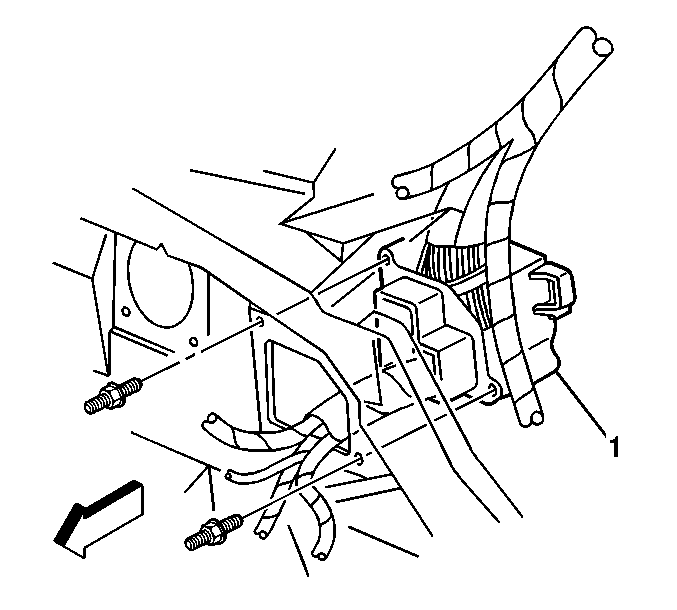
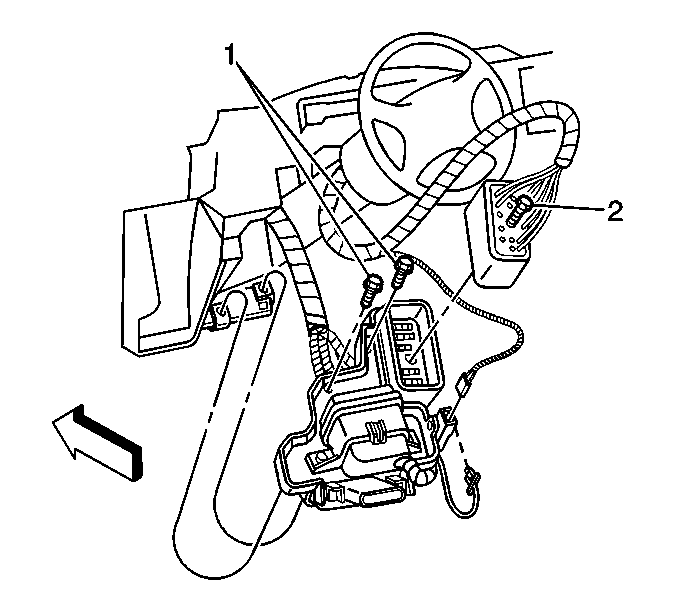
- Remove the bolt that retains the underhood fuse block to the bulkhead.
Caution: Refer to SIR Caution in the Preface section.
- Disable the SIR system. Refer to
SIR Disabling and Enabling
,
SIR Disabling and Enabling
, and
SIR Disabling and Enabling
in SIR.

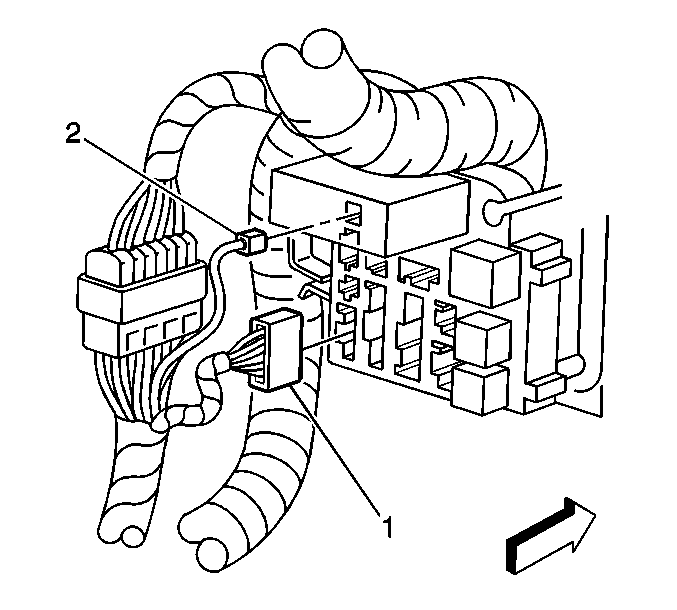
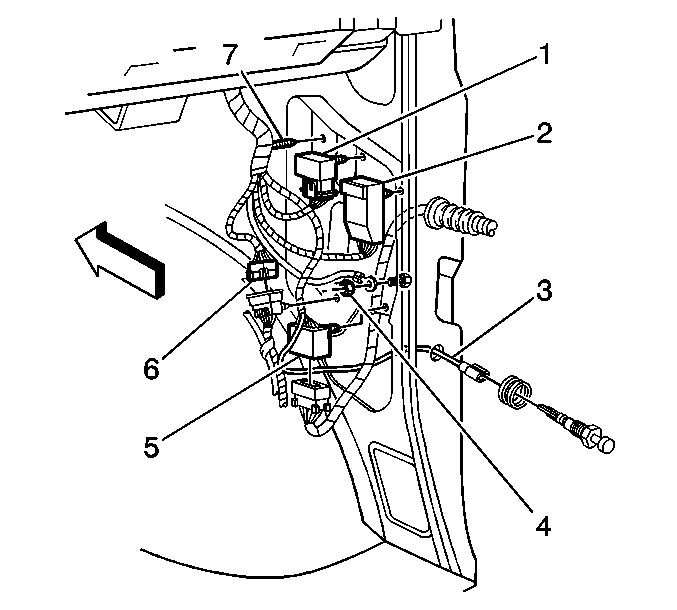
- Remove the face-plate (2) from the outer housing of the junction block (1).
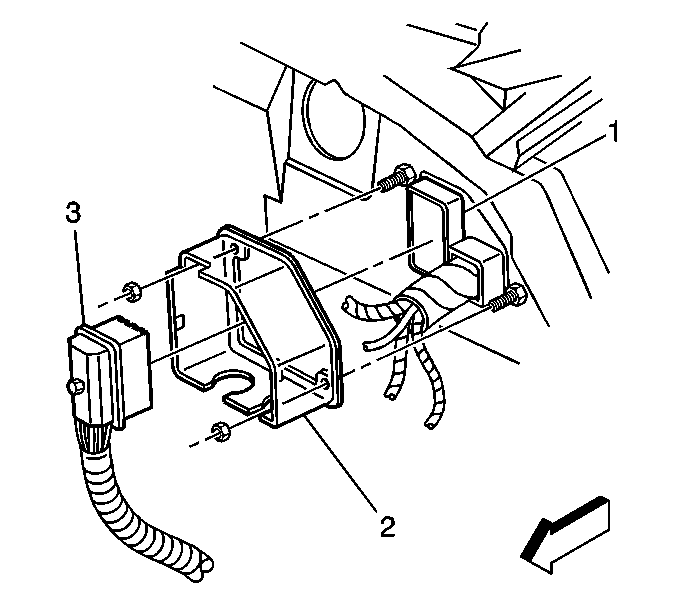
- Disconnect
the engine harness electrical connector (3) from the junction block (1).
- Separate the outer housing of the junction block (2) from the bulkhead.
- Remove
the 2 studs that retain the junction block (1) to the bulkhead.
- Remove the junction block from the bulkhead.
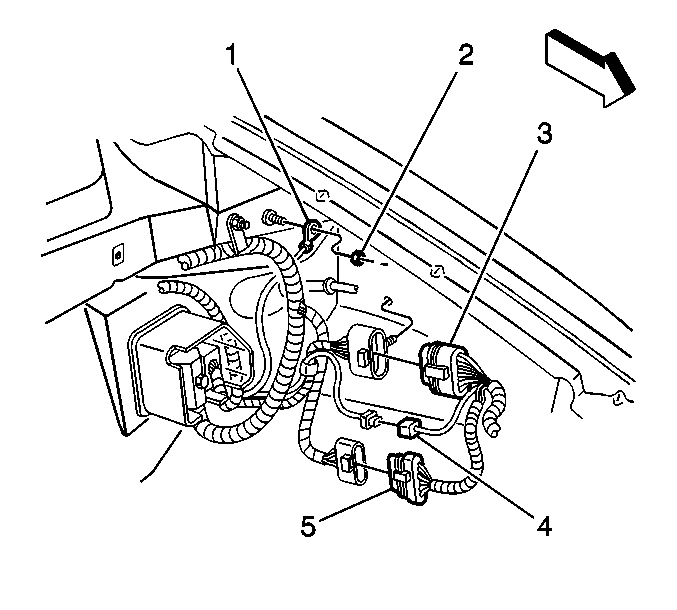
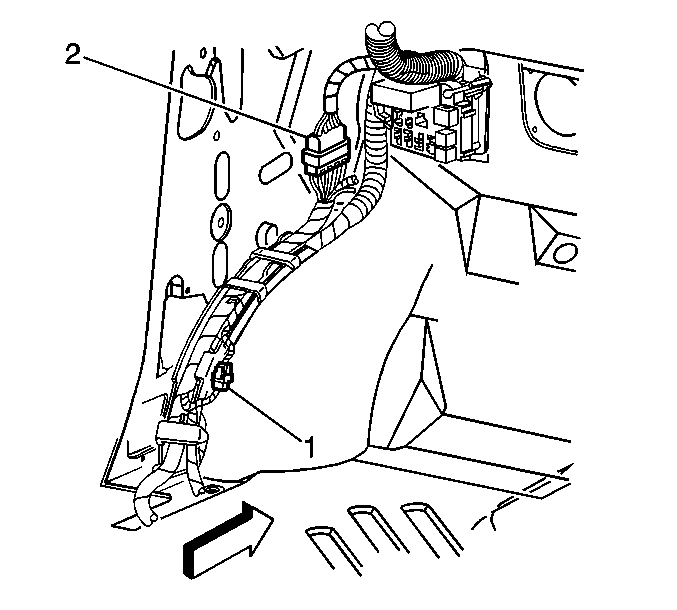
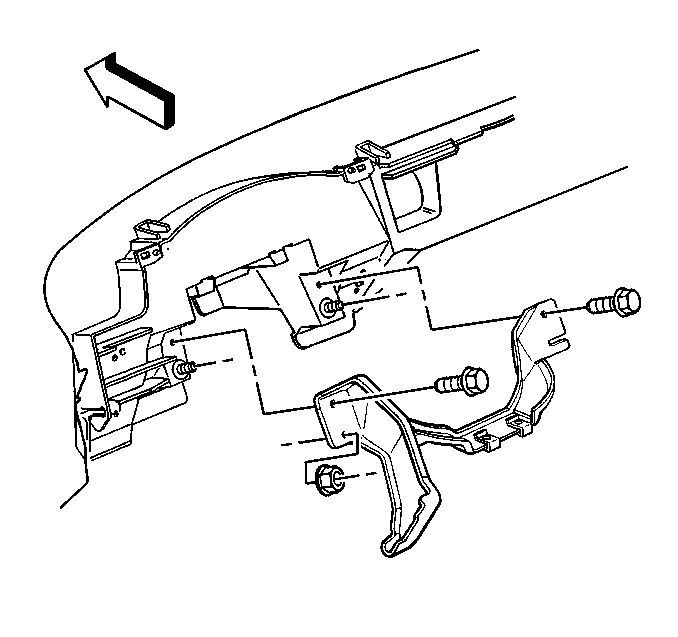
- Remove
the nut (2) that retains the I/P harness grounding strap (1) to the body.
- Remove the I/P harness grounding strap (1) from the body.
- Disconnect the I/P from the forward lamp harness connector (3).
- Disconnect the forward lamp from the I/P harness connector (4).
- Disconnect the engine from the forward lamp harness connector (5).
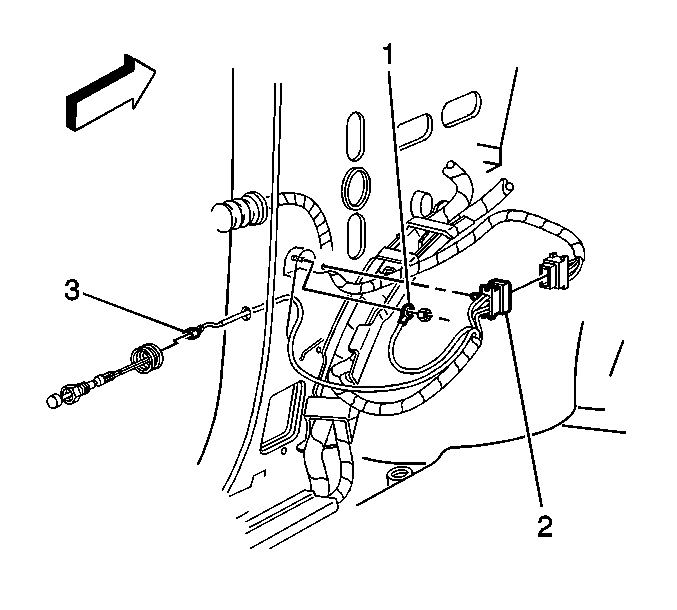
- Disconnect
the electrical connector of the cruise control module (3).
- Disconnect the electrical connector of the windshield wiper motor (2).
- Disconnect the electrical connector of the rear lamp wiring harness
(1).
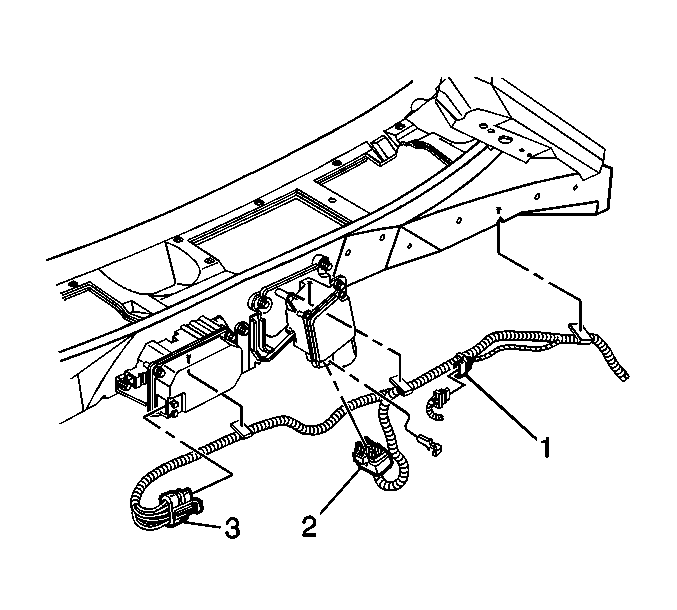
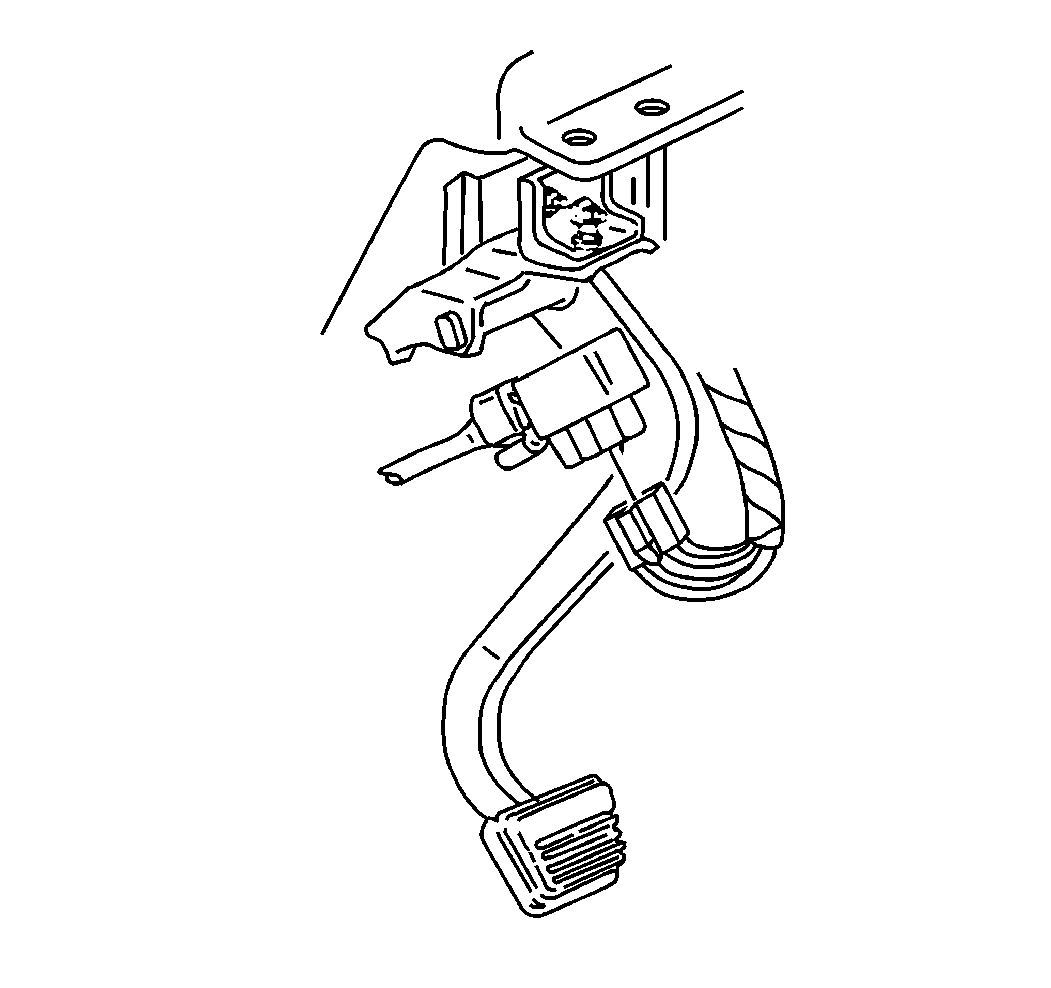
- Remove the power steering fluid reservoir from the bulkhead. Refer
to
Remote Power Steering Fluid Reservoir Replacement
in Power Steering System.
- Remove the cruise control module from the bulkhead. Refer to
Cruise Control Module Replacement
in Cruise Control.
- Note the routing of the I/P wire harness on the engine side of the
bulkhead. Remove the I/P wire harness from the bulkhead.
- Remove the I/P extension from the vehicle. Refer to
Instrument Panel Extension Replacement
.
- Remove the engine cover from the vehicle. Refer to
Engine Cover Replacement
in Interior Trim.
- Remove the driver knee bolsters and the passenger knee bolsters. Refer
to
Passenger Knee Bolster Replacement
or to
Driver Knee Bolster Replacement
.
- Remove cowl trim panels on the right side, and on the left side. Refer
to
Cowl Side Trim Panel Replacement
in Interior Trim.
- Remove the left carpet retainers and the right carpet retainers. Refer
to
Carpet Retainer Replacement
in Interior
Trim.
- Remove the HVAC floor vent cover that is located behind the driver
seat. Refer to
Rear Floor Air Outlet Replacement
in Heating, Ventilation and Air Conditioning.
- Lift the carpet in order to access the sensing and diagnostic module
(SDM).
- Disconnect the CPA and the electrical connector from the SDM.
- Feed the seat wire harnesses through the access hole in the carpet.
- Remove the SDM and the seat wire harness from the trough along the
left door sill.
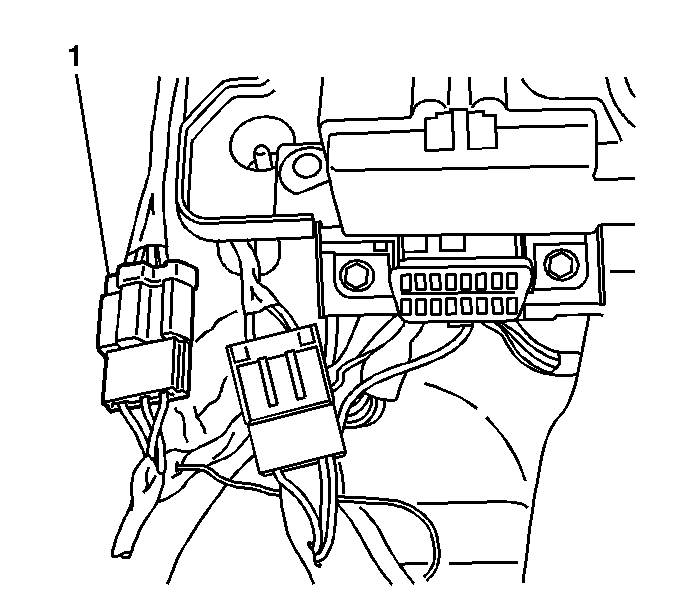
- Disconnect the 16-way I/P from the body harness (2).
- Disconnect the 10-way I/P from the body harness (1).
- Disconnect the ground strap harness for the left door (1).
- Disconnect the left door harness connector (2).
- Disconnect the door jamb switch connector on the left (3).
- Release the harness straps in order to remove the harnesses from the
trough.

- Disconnect the headliner connector (2) from the I/P junction block.
- Disconnect the heater jumper connector (3) from the body harness.
- Remove the electrical connector of the power seat harness from the
I/P junction block.
- Disconnect the electrical connector of the park brake from the park
brake switch. Refer to
Parking Brake Indicator Switch Replacement
in Park Brake.
- Remove the black 6-way connector from the I/P junction block.
- Disconnect the roof console harness connector (1) from the I/P junction
block.
- Disconnect the trailer wiring harness connector (2) from the I/P
junction block.
- Disconnect the orange 3-way in-line connector
(1).
- Disconnect the black 5-way in-line connector.
- Disconnect the brake switch electrical
connector.
- Remove the air outlet duct from the left lap. Refer to
Lap Air Outlet Duct Replacement - Left Side
in Heating, Ventilation and Air
Conditioning.
- Remove the bolts that are retaining the
left lap bracket of the air outlet duct to the I/P carrier.
- Remove the left lap bracket of the air outlet duct from the I/P carrier.
- Disconnect
the steering column harness connector by loosening the bolt (2) in the center
of the connector.
- Remove the steering column from the I/P carrier. Refer to
Steering Column Replacement
in Steering Wheel and Column.
- In order to remove the right I/P harness, disconnect the following components:
| • | The door lock relay harness (1) |
| • | The door jamb switch harness (3) |
| • | The ground terminal harness (4) |
| • | The I/P door connector harness (5) |
| • | The liftgate connector harness (6) |
| • | The I/P harness fastener (7) |
- Remove the fastener that is retaining the door lock control module
(2) to the body.
- Disconnect
the HVAC actuator, which is a black 5-way connector, and the vacuum lines.
- Remove the I/P cluster trim panel. Refer to
Instrument Cluster Trim Panel Replacement
.
- Remove the radio. Refer to
Radio Replacement
in Entertainment.
- Remove the HVAC control assembly. Refer to
Heater and Air Conditioning Control Replacement
in Heating, Ventilation and Air Conditioning.
- Remove the I/P cluster. Refer to
Instrument Cluster Replacement
.
- Locate the instrument panel that retains the I/P carrier to the carrier
support brackets. Remove the 2 bolts on the left sides and on the right sides
of the instrument panel.
- Slide the instrument panel away from the bulkhead.
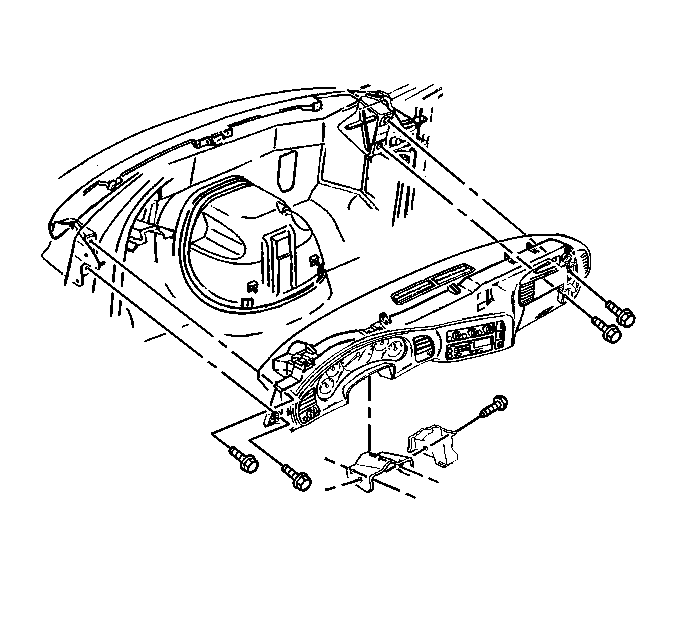
- Lift the instrument panel up and off the pivot points.
- Remove the I/P assembly from the vehicle.
- Place the I/P assembly on a clean surface.
- In order to remove the I/P from the I/P carrier, perform the remaining
steps of this procedure. Remove the center defogger grille from the I/P.
- Remove the ambient light sensor of the daytime running lamps (DRL)
. Refer to
Daytime Running Lamp (DRL) Ambient Light Sensor Replacement
in Lighting Systems.
- Remove the HVAC ducts from the I/P assembly. Refer to
Floor Air Outlet Duct Replacement - Left Side
in Heating, Ventilation and
Air Conditioning.
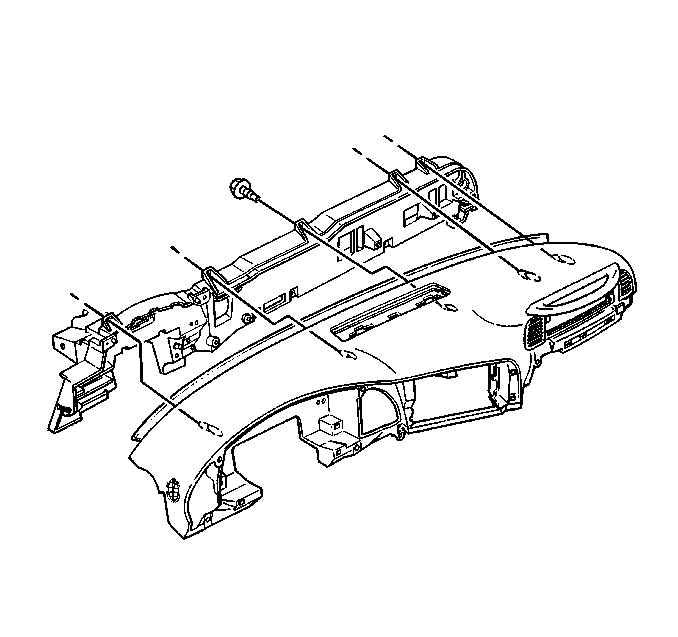
- From the rear of the I/P, remove the
5 screws that retain the top of the I/P to the carrier.
- Remove the body control module (BCM) from the BCM bracket. Refer to
Body Control Module Replacement
in Body Control
System.
- Remove the remote keyless entry receiver from the I/P substrate. Refer
to
Remote Control Door Lock Receiver Replacement
in Keyless Entry.
- From the front of the I/P, remove the 6 screws that retain the bottom
of the I/P to the carrier.
- Remove the I/P inflatable restraint. Refer to
Inflatable Restraint Instrument Panel Module Replacement
in SIR.
- Remove the I/P from the I/P carrier.
Installation Procedure
- Install the I/P inflatable restraint. Refer to
Inflatable Restraint Instrument Panel Module Replacement
in SIR.
- At the front of the I/P, install the 6 screws that retain the bottom
of the I/P to the carrier.
- Install the remote keyless entry receiver to the I/P substrate. Refer
to
Remote Control Door Lock Receiver Replacement
in Keyless Entry.
- Install the body control module (BCM) to the BCM bracket. Refer to
Body Control Module Replacement
in Body Control
System.
Notice: Refer to Fastener Notice in the Preface section.
- At the rear of the I/P, install the 5 screws that retain the top of
the I/P to the carrier.
Tighten
Tighten the bolt to 20 N·m (15 lb ft).
- Install the HVAC ducts to the I/P assembly. Refer to
Floor Air Outlet Duct Replacement - Left Side
in Heating, Ventilation and
Air Conditioning.
- Install the ambient light sensor of the daytime running lamps (DRL)
. Refer to
Daytime Running Lamp (DRL) Ambient Light Sensor Replacement
in Lighting Systems.
- Install the center defogger grille to the I/P. This completes the installation
of the I/P to the I/P carrier.
- Install the I/P assembly to the vehicle.
- Lift the instrument panel up and off the pivot points.
- Slide the instrument panel away to the bulkhead.
- Locate the instrument panel that retains the I/P carrier to the carrier
support brackets. Install the 2 bolts on the left sides, and on the
right sides of the instrument panel.
Tighten
Tighten the bolt to 45 N·m (33 lb ft).
- Install the I/P cluster. Refer to
Instrument Cluster Replacement
.
- Install the HVAC control assembly. Refer to
Heater and Air Conditioning Control Replacement
in Heating, Ventilation and Air Conditioning.
- Install the radio. Refer to
Radio Replacement
in Entertainment.
- Install the I/P cluster trim panel. Refer to
Instrument Cluster Trim Panel Replacement
.
- Connect
the HVAC actuator, which is a black 5-way connector, and the vacuum lines.
- Install the fastener that is retaining the door lock control module
to the body.
- In order to install the right I/P harness, connect the following components:
| • | The door lock relay harness (1) |
| • | The door jamb switch harness (3) |
| • | The ground terminal harness (4) |
| • | The I/P door connector harness (5) |
| • | The liftgate connector harness (6) |
| • | The I/P harness fastener (7) |
- Install the steering column to the I/P carrier. Refer to
Steering Column Replacement
in Steering Wheel and Column.
- Connect
the steering column harness connector by loosening the bolt (2) in the center of
the connector.
- Install the left lap bracket of the air outlet duct to the I/P carrier.
- Install the bolts that are retaining
the left lap bracket of the air outlet duct to the I/P carrier.
- Install the air outlet duct to the left lap. Refer to
Lap Air Outlet Duct Replacement - Left Side
in Heating, Ventilation and Air
Conditioning.
- Connect the brake switch electrical connector.
- Connect the black 5-way in-line connector.
- Connect the orange 3-way in-line connector
(1).
- Connect the trailer wiring harness connector to the I/P junction block.
- Connect the roof console harness connector (1) to the I/P junction block.
- Install the black 6-way connector to the I/P junction block.
- Connect the electrical connector of the park brake to the park brake
switch. Refer to
Parking Brake Indicator Switch Replacement
in Park Brake.
- Install the electrical connector of the power seat harness to the I/P
junction block.
- Connect the heater jumper connector to the body harness.
- Connect the headliner connector (2) to the I/P junction block.
- Release the harness straps in order to install the harnesses to the
trough.
- Connect the door jamb switch connector on the left (3).
- Connect the left door harness connector (2).
- Connect the ground strap harness for the left door (1).
- Connect the 10-way I/P to the body harness (1).
- Connect the 16-way I/P to the body harness (2).
- Install the SDM and the seat wire harness to the trough along the left
door sill.
- Feed the seat wire harnesses through the access hole in the carpet.
- Connect the CPA and the electrical connector to the SDM.
- Lift the carpet in order to access the sensing and diagnostic module
(SDM).
- Install the HVAC floor vent cover that is located behind the driver
seat. Refer to
Rear Floor Air Outlet Replacement
in Heating, Ventilation and Air Conditioning.
- Install the left carpet retainers and the right carpet retainers.
Refer to
Carpet Retainer Replacement
in Interior Trim.
- Install cowl trim panels on the right side, and on the left side.
Refer to
Cowl Side Trim Panel Replacement
in Interior Trim.
- Install the driver knee bolsters and the passenger knee bolsters.
Refer to
Passenger Knee Bolster Replacement
or to
Driver Knee Bolster Replacement
.
- Install the engine cover to the vehicle. Refer to
Engine Cover Replacement
in Interior Trim.
- Install the I/P extension to the vehicle. Refer to
Instrument Panel Extension Replacement
.
- Note the routing of the I/P wire harness on the engine side of the
bulkhead. Install the I/P wire harness to the bulkhead.
- Install the cruise control module to the bulkhead. Refer to
Cruise Control Module Replacement
in Cruise Control.
- Install the power steering fluid reservoir to the bulkhead. Refer to
Remote Power Steering Fluid Reservoir Replacement
in Power
Steering System.
- Connect the electrical connector of the rear lamp wiring harness (1).
- Connect the electrical connector of the windshield wiper motor (2).
- Connect
the electrical connector of the cruise control module (3).
- Connect the engine to the forward lamp harness connector .
- Connect the forward lamp to the I/P harness connector .
- Connect the I/P to the forward lamp harness connector (3).
- Install the I/P harness grounding strap (1) to the body.
- Install
the nut (2) that retains the I/P harness grounding strap (1) to the body.
Tighten
Tighten the bolt to 2 N·m (18 lb in).
- Install the junction block to the bulkhead.
- Install
the 2 studs that retain the junction block (1) to the bulkhead.
Tighten
Tighten the bolt to 2 N·m (18 lb in).
- Separate the outer housing of the junction block to the bulkhead.
- Connect
the engine harness electrical connector (3) to the junction block (1).
- Install the face-plate (2) to the outer housing of the junction block (1).
- Enable the SIR system. Refer to
SIR Disabling and Enabling
,
SIR Disabling and Enabling
, and
SIR Disabling and Enabling
in SIR.
- Install the bolt that retains the underhood fuse block to the bulkhead.
Tighten
Tighten the bolt to 2 N·m (18 lb in).
- Connect the battery cables, and install the battery. Refer to
Battery Replacement
in Engine Electrical.
- Install the driver seat. Refer to
Bucket Seat Replacement
in Seats.
