Tools Required
J 45859 Axle Remover
Removal Procedure
Important: Observe and accurately reference mark the positions of all driveline components relative to the propeller shaft prior to disassembly. These components include the propeller shafts, drive axles, pinion flange, inner axle shafts, etc. Reassemble all components in the exact relationship the components had to one another prior to disassembly. Follow the specifications, torque values and any measurement made prior to disassembly in order to maintain the factory system balance of the driveline components. System balance provides a smoother running driveline operation.
- Unlock the steering column allowing the steering linkage to move freely.
- Raise the vehicle. Refer to Lifting and Jacking the Vehicle in General Information.
- Remove the tire and wheel assembly. Refer to Tire and Wheel Removal and Installation in Tires and Wheels.
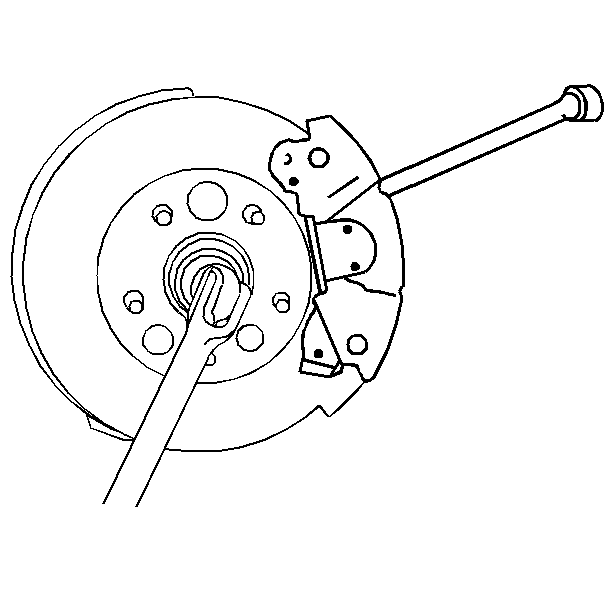
- Insert a drift through the brake caliper and into a brake rotor vane to prevent the wheel drive shaft from turning.
- Remove the wheel drive shaft nut. Discard the nut.
- Using the J 45859 or equivalent, press the wheel drive shaft from the hub.
- Remove the drift from the brake rotor.
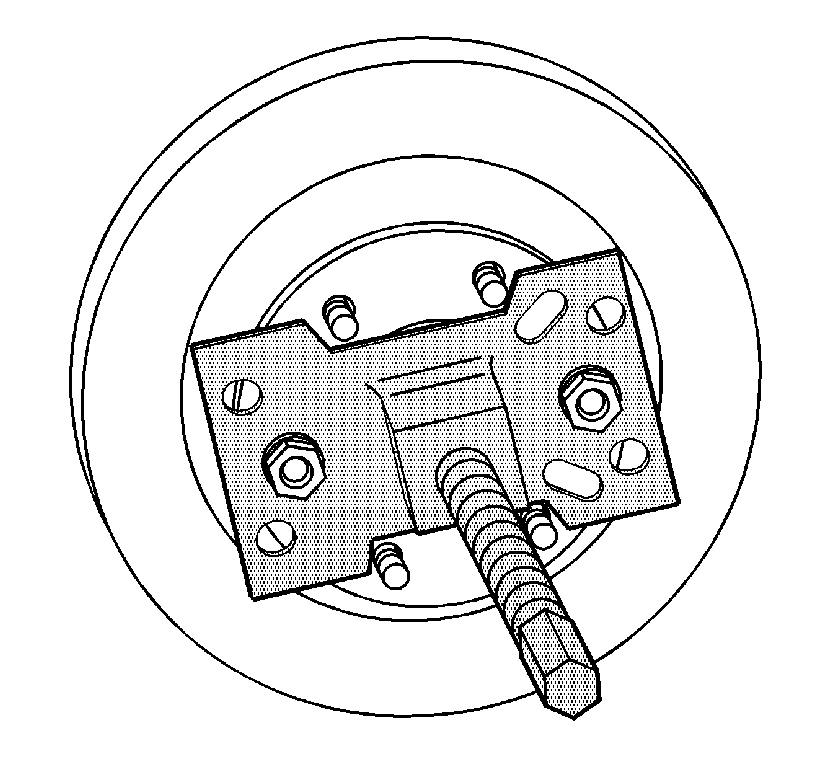
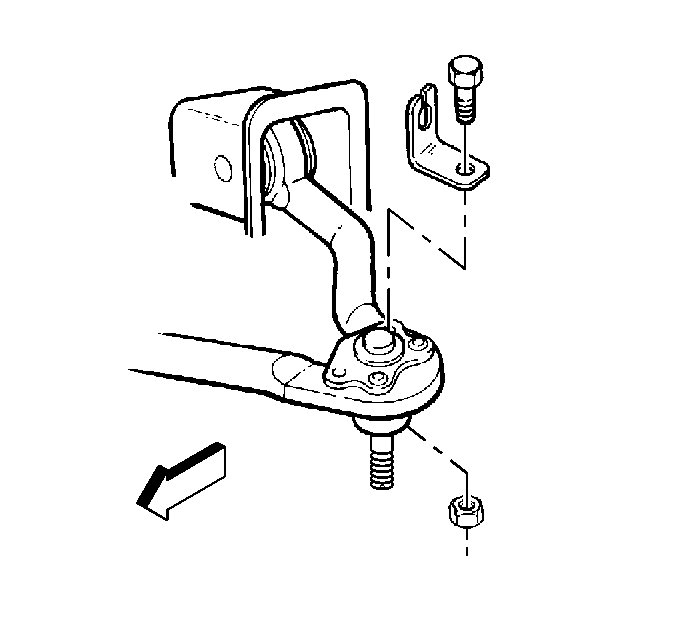
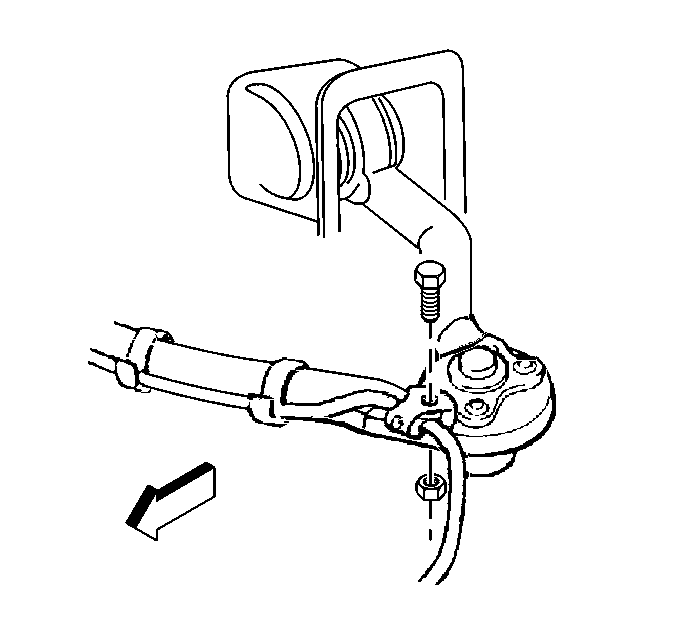
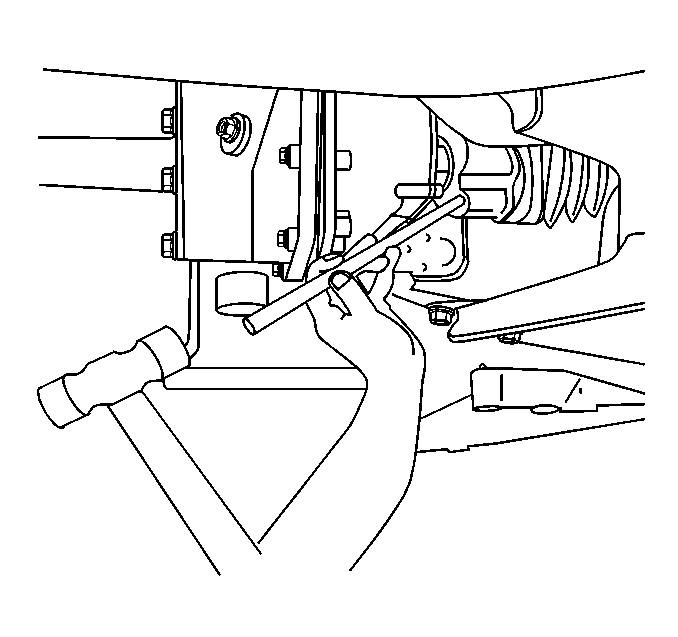
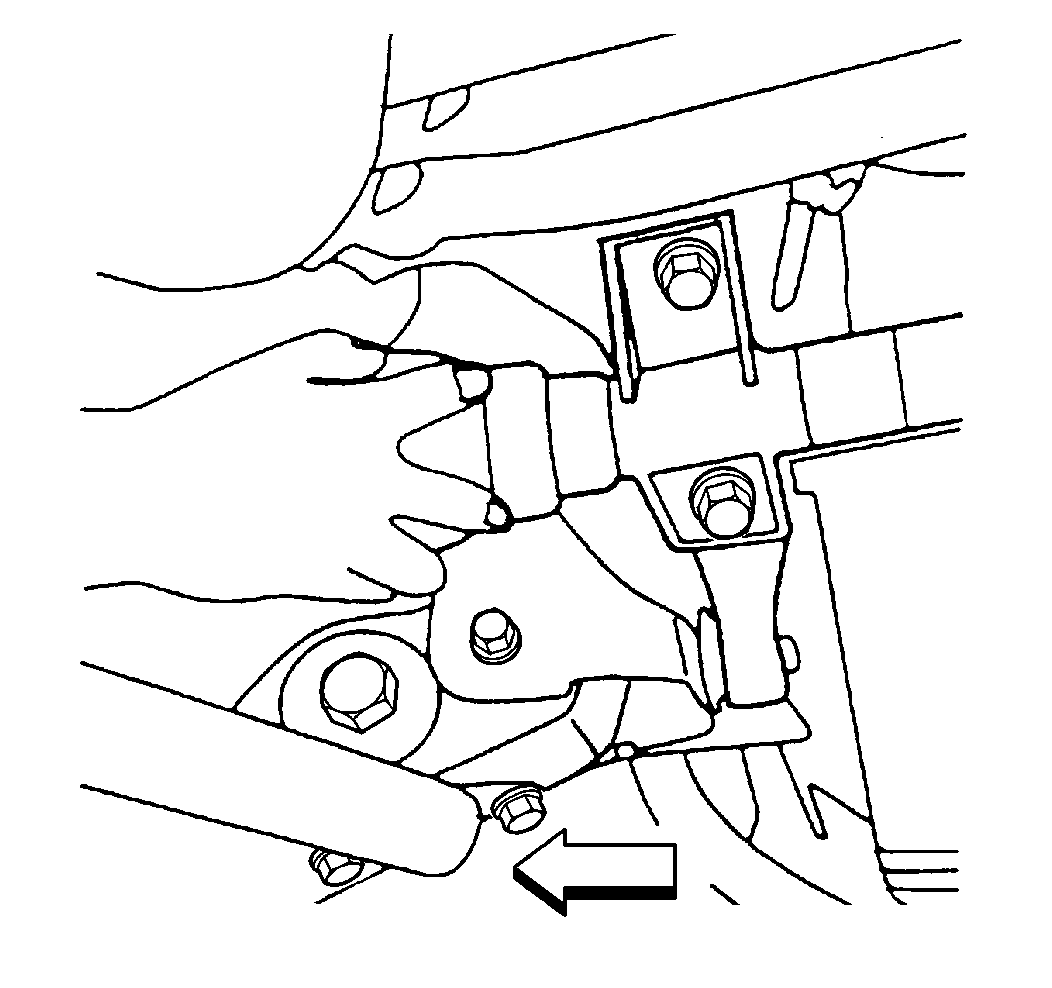
- Remove the brake hose bracket from the upper control arm.
- Remove the wheel sensor wire bracket from the upper control arm.
- Remove the steering knuckle. Refer to Steering Knuckle Replacement in Front Suspension.
- In order to prevent damage to the drive axle CV joint boots, cover the following components with a shop towel:
- Disconnect the wheel drive shaft from the front differential carrier assembly by placing a brass drift or block of wood on the tripot housing and striking the drift with a hammer. Strike hard enough to overcome the snap ring pressure holding the drive axle to the differential carrier assembly.
- Remove the wheel drive shaft.
It is not necessary to remove the wheel hub assembly from the steering knuckle.
Important: Do not damage the differential carrier assembly axle seals during wheel drive shaft removal.
| • | The shock mounting bracket |
| • | The lower control arm ball stud |
| • | All other sharp edges |
Installation Procedure
- In order to prevent damage to the drive axle CV joint boots, cover the following components with a shop towel:
- Install the wheel drive shaft into the differential carrier assembly by doing the following:
- Pull back on the tripot housing to ensure that the retaining ring is properly retaining the wheel drive shaft in the differential carrier assembly. You should not be able to pull the wheel drive shaft out of the differential carrier assembly when the retaining ring is properly seated.
- Remove the shop towels.
- Install the steering knuckle. Refer to Steering Knuckle Replacement in Front Suspension.
- Install the wheel speed sensor bracket to the upper control arm.
- Install the brake hose bracket to the upper control arm.
- Insert a drift through the brake caliper and into a brake rotor vane to prevent the wheel drive shaft from turning.
- Install the new wheel drive shaft nut.
- Install the tire and the wheel. Refer to Tire and Wheel Removal and Installation in Tires and Wheels.
- Check the front axle fluid level and add, if necessary. Use the proper fluid. Refer to Front Axle Lubricant Level Inspection In Front Drive Axle.
- Lower the vehicle.
Important: Do not lubricate or damage the differential carrier assembly axle seals during installation.
| • | The shock mounting bracket |
| • | The lower control arm ball stud |
| • | All other sharp edges |
| 2.1. | Using both hands, align the splines on the shaft with the differential housing. |
| 2.2. | Center the wheel drive shaft into the differential carrier assembly. |
| 2.3. | Firmly push the shaft straight into the differential carrier assembly until the retaining rings sits in the differential carrier assembly. |
Notice: Refer to Fastener Notice in the Preface section.
Tighten
Tighten the wheel speed sensor bracket nut to 16 N·m (12 lb ft).
Tighten
Tighten the brake hose bracket nut to 16 N·m (12 lb ft).
Tighten
Tighten the axle nut to 235 N·m (173 lb ft).
