Lower Control Arm Ball Joint Replacement RWD
Tools Required
| • | J 9519-E Lower Ball Joint Remover and Installer Set |
| • | J 23742 Ball Joint Separator |
Removal Procedure
- Raise the vehicle. Refer to Lifting and Jacking the Vehicle in General Information.
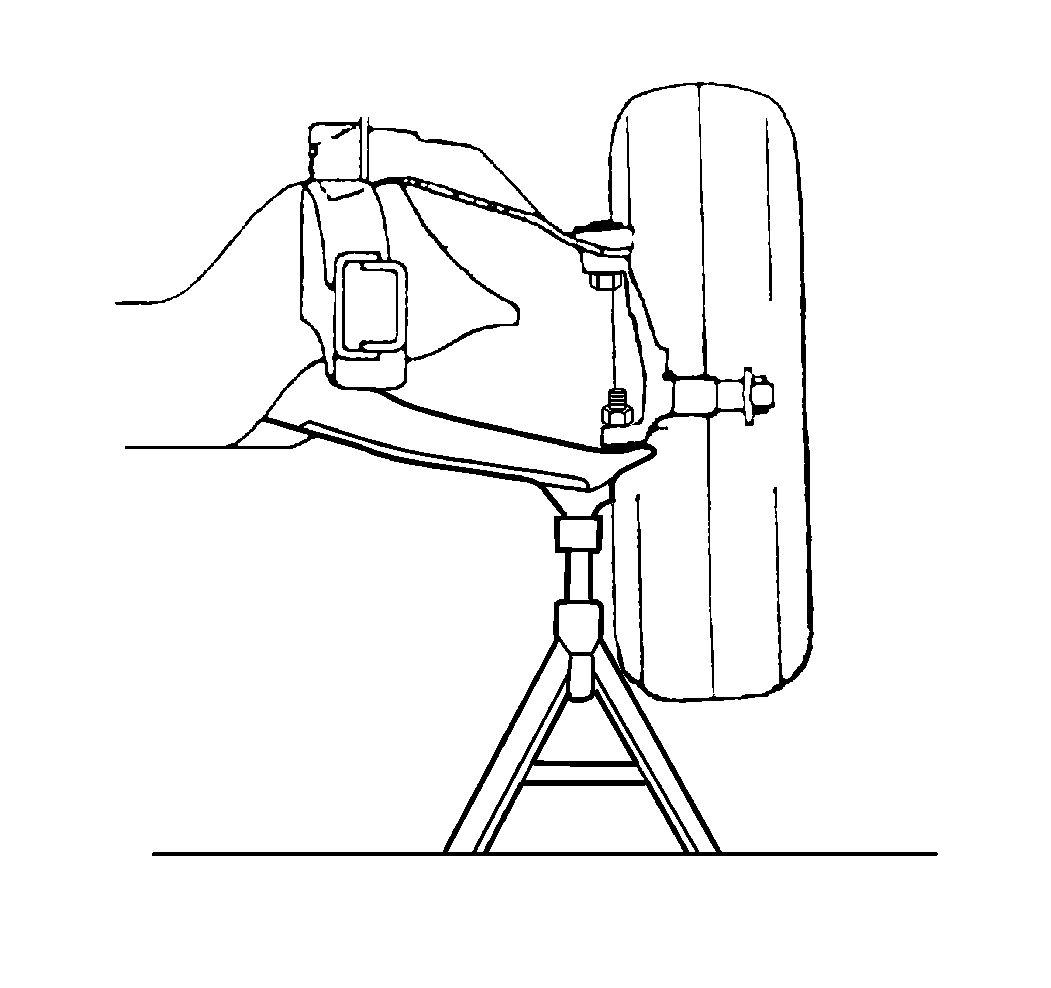
- Support the lower control arm with a safety stand.
- Remove the tire and wheel. Refer to Tire and Wheel Removal and Installation in Tires and Wheels.
- Remove the lower ball joint cotter pin and the retaining nut.
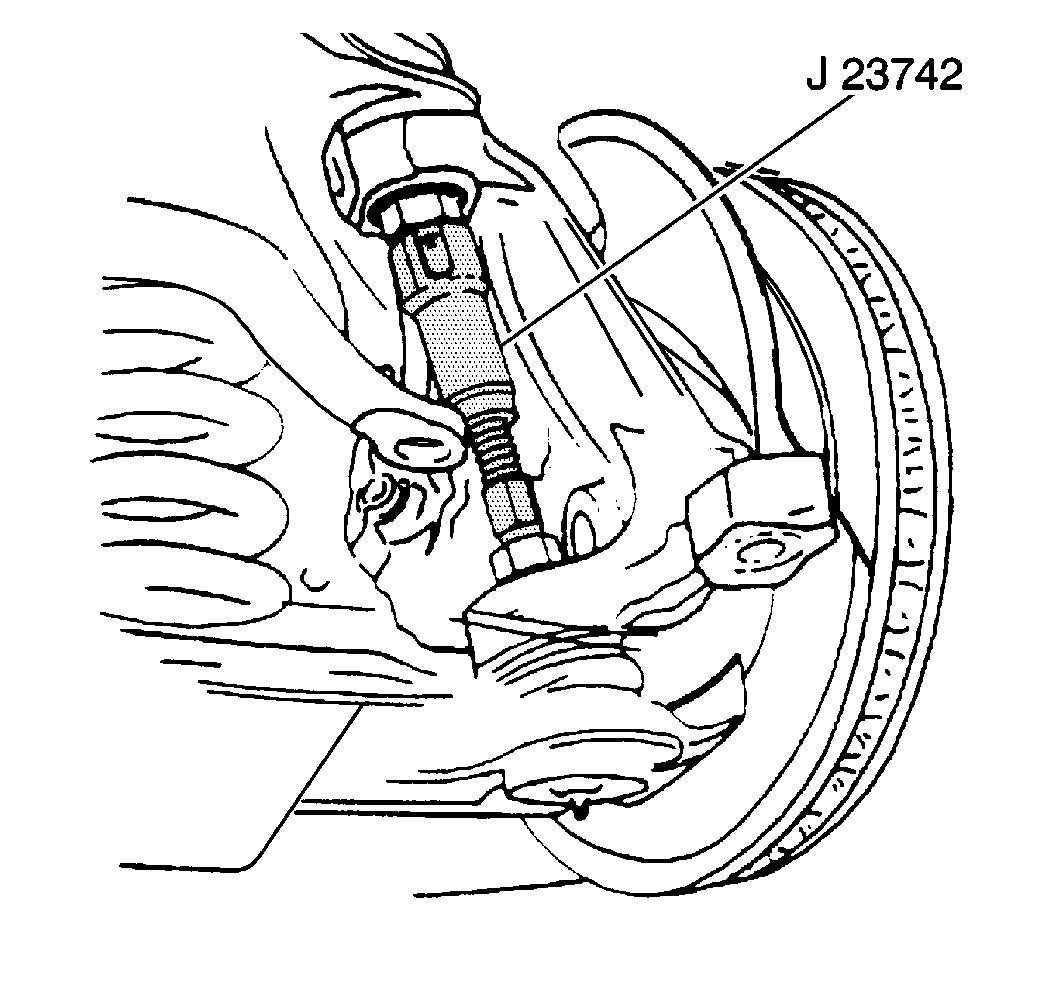
- Break the lower ball joint loose from the steering knuckle using J 23742 .
- Remove J 23742 .
- Pull the steering knuckle free from the lower ball joint.
- Support the steering knuckle in order to prevent the steering knuckle weight from damaging the brake hose.
- Remove the rubber grease seal from the lower ball joint.
- Remove the lower ball joint grease fitting.
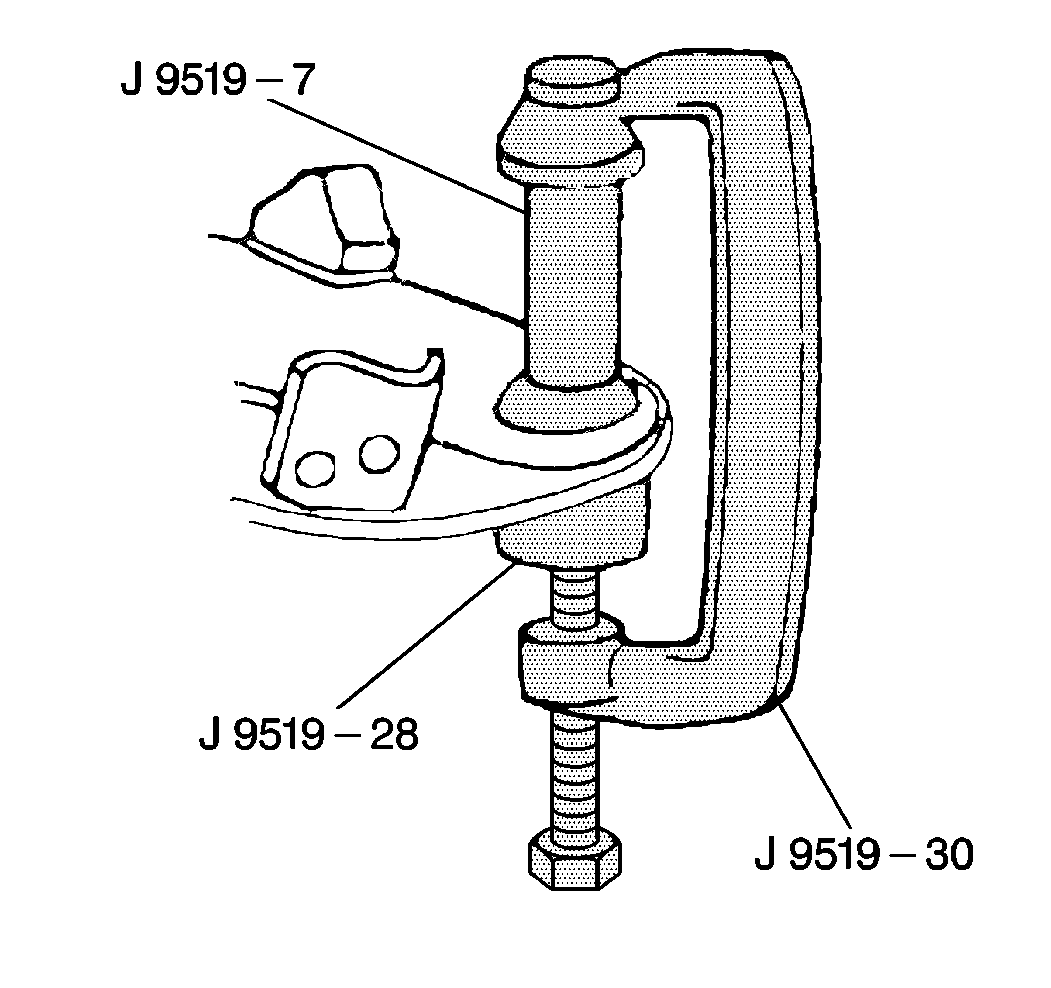
- Remove the lower ball joint from the lower control arm using J 9519-E .
Caution: Refer to Floor Jack Caution in the Preface section.
Installation Procedure
- Install the lower ball joint to the lower control arm.
- Press the lower ball joint into the lower control arm using J 9519-E .
- Install the grease seal and the grease fitting to the lower ball joint.
- Remove the steering knuckle support.
- Install the lower ball joint to the steering knuckle.
- Install the lower ball joint retaining nut.
- Install a new cotter pin. Tighten the nut up to an additional 1/6 amount in order to insert the cotter pin through the lower ball joint stud. Bend the pin ends against the nut flats.
- Using a grease gun, grease to the lower ball joint until grease appears at the lower ball joint grease seal.
- Install the tire and wheel. Refer to Tire and Wheel Removal and Installation in Tires and Wheels.
- Remove the safety stand from the lower control arm.
- Lower the vehicle.
- Check the front wheel alignment. Refer to Wheel Alignment Measurement in Wheel Alignment.
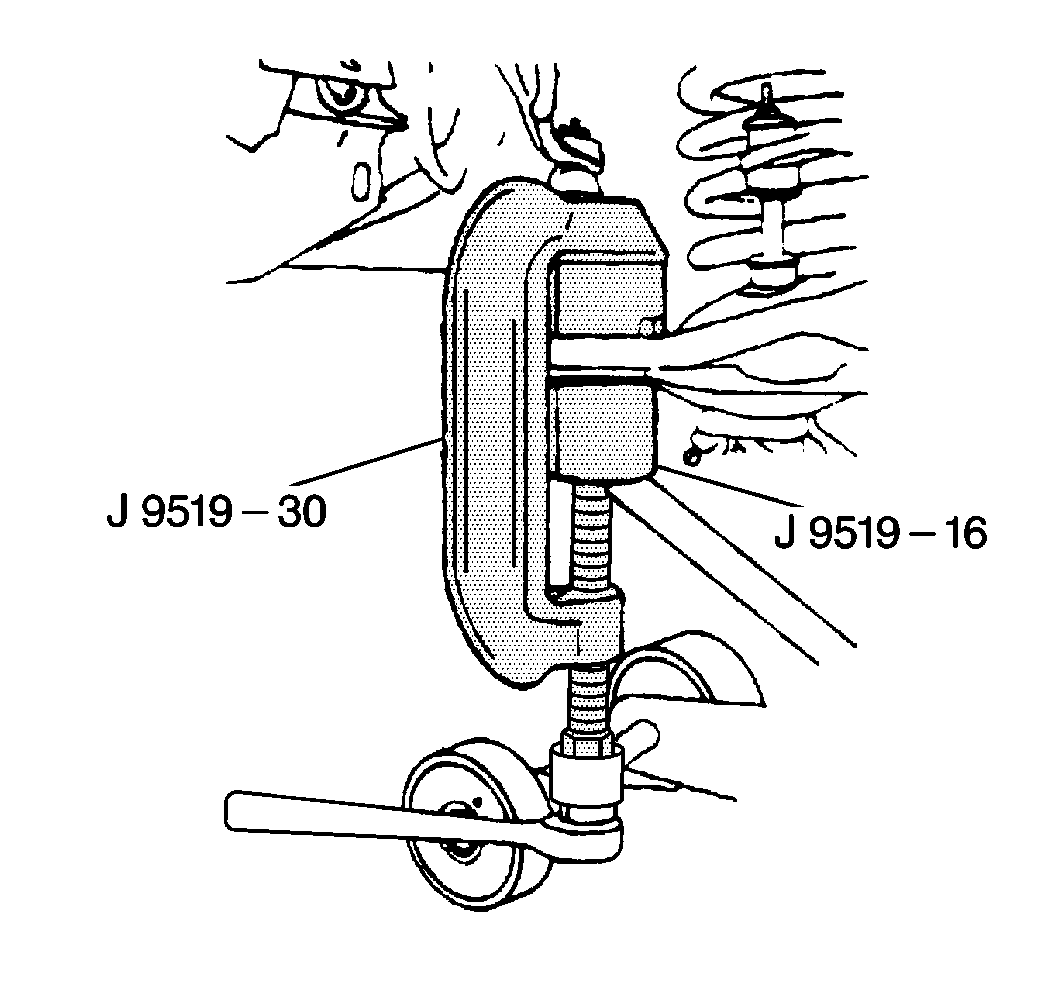
Press in until the ball joint bottoms in the control arm.
| • | The grease-purge hole of the seal must face inboard. |
| • | Press the grease seal into place. The seal must be fully seated on the ball joint. |
Notice: Use the correct fastener in the correct location. Replacement fasteners must be the correct part number for that application. Fasteners requiring replacement or fasteners requiring the use of thread locking compound or sealant are identified in the service procedure. Do not use paints, lubricants, or corrosion inhibitors on fasteners or fastener joint surfaces unless specified. These coatings affect fastener torque and joint clamping force and may damage the fastener. Use the correct tightening sequence and specifications when installing fasteners in order to avoid damage to parts and systems.
Tighten
Tighten the lower ball joint retaining nut to 125 N·m (90 lb ft).
Lower Control Arm Ball Joint Replacement 4WD
Removal Procedure
Tools Required
J 35917 Ball Joint Remover
- Raise the vehicle. Refer to Lifting and Jacking the Vehicle.
- Remove the tire and wheel assembly. Refer to Tire and Wheel Removal and Installation.
- Unload the torsion bar. Refer to Torsion Bar Replacement .
- Remove the drive axle nut and the washer.
- Remove the brake caliper. Refer to Front Brake Caliper Replacement.
- Remove the brake rotor.
- Disconnect the speed sensor electrical connector.
- Remove the speed sensor from the bearing. Refer to Wheel Speed Sensor Replacement.
- Remove the bolts from the hub and bearing assembly.
- Remove the hub and bearing assembly.
- Remove the front splash shield.
- Disconnect the outer tie rod end from the steering knuckle. Refer to Tie Rod Replacement.
- Remove the lower ball joint cotter pin.
- Remove the lower ball joint nut.
- Using the J 35917 , disconnect the knuckle from the lower ball joint.
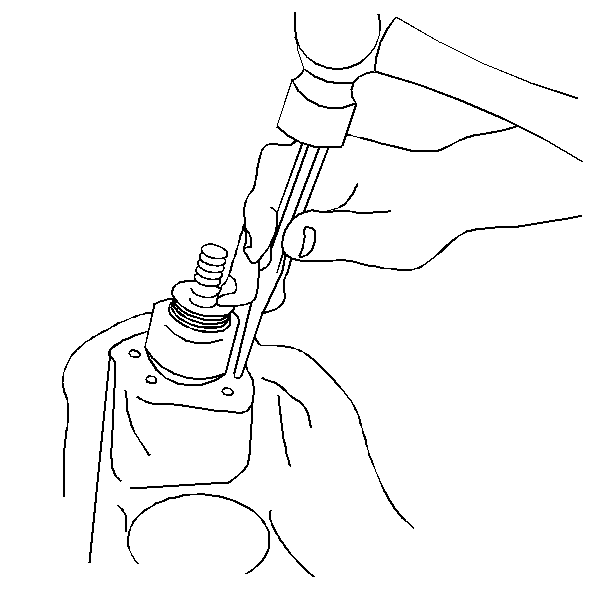
- Remove the lower ball joint rivets.
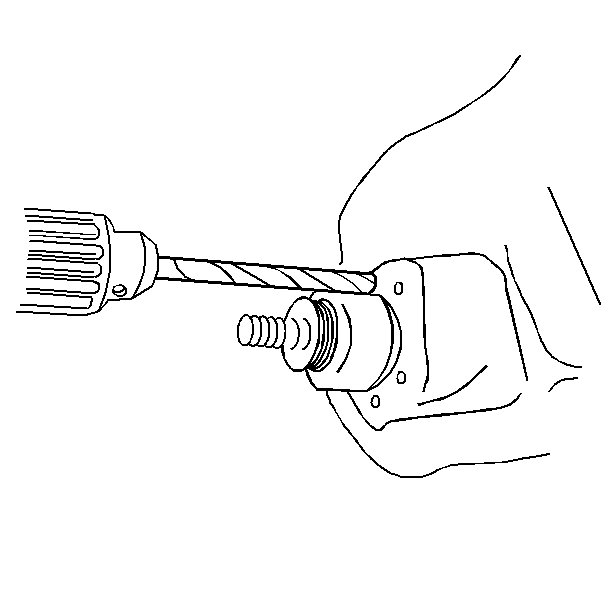
- Using a 8 mm (5/16 in) drill bit, drill the rivet head off. Drill a hole two-thirds the length of the rivet shank using an 8 mm (5/16 in) drill bit.
- Using a 8 mm (5/16 in) pin punch, punch out the rivets.
- Remove the ball joint.
Mark the adjuster bolt for loading the torsion bar.
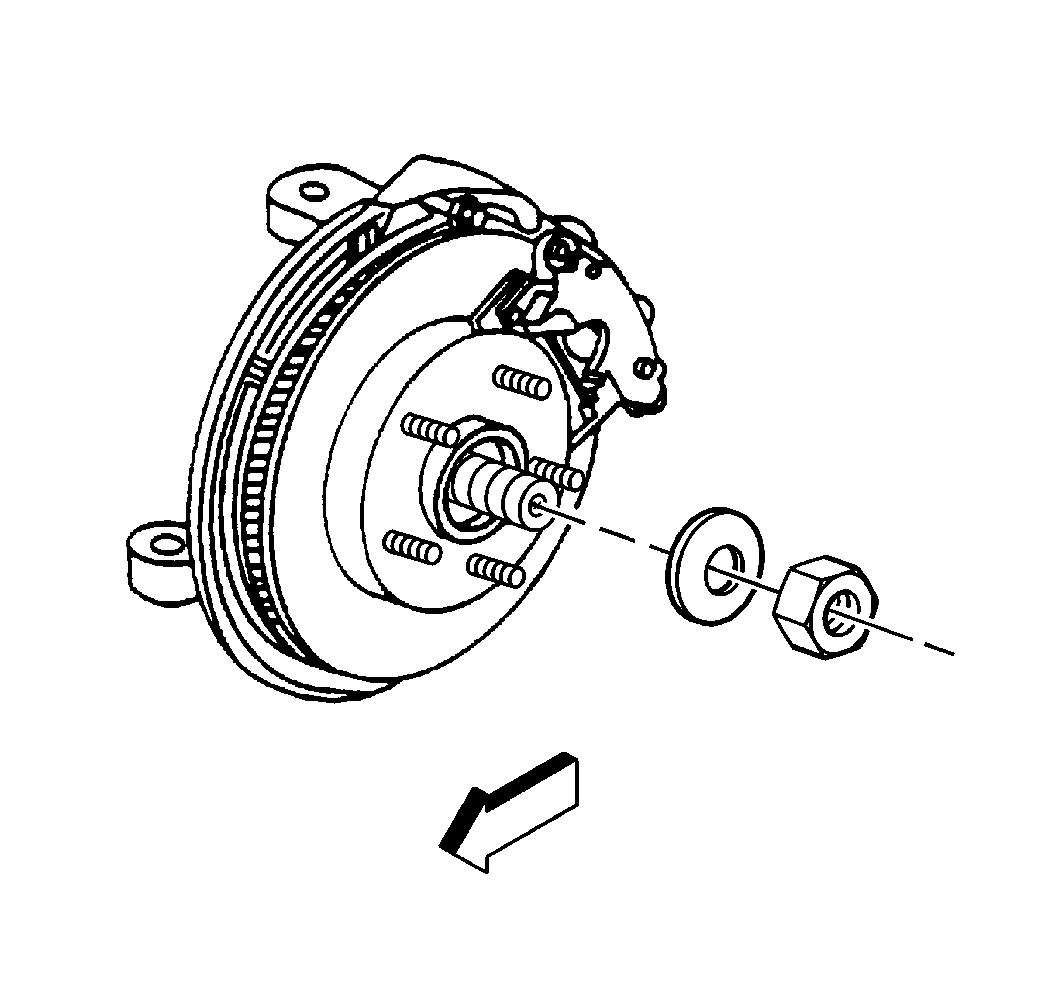
Notice: Support the caliper with a piece of wire to prevent damage to the brake line.
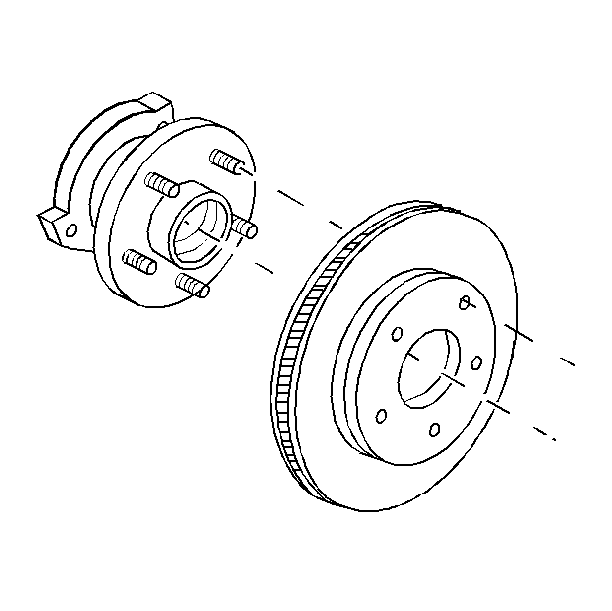
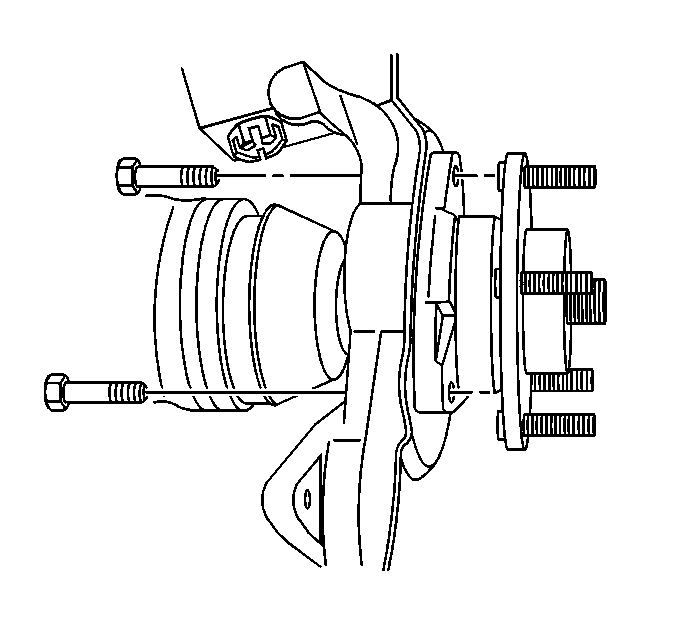
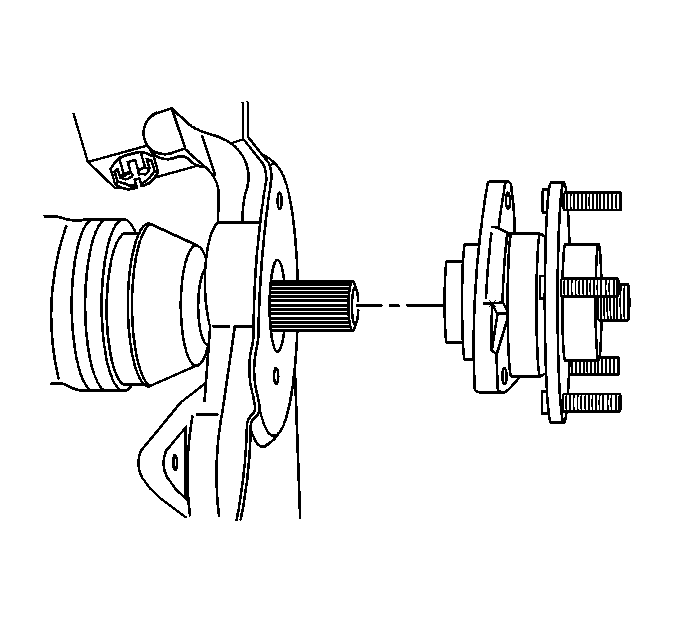
Important: Lay the wheel hub and bearing assembly on the wheel hub bolts on the outboard side. This prevents damage or contamination to the bearing seal.
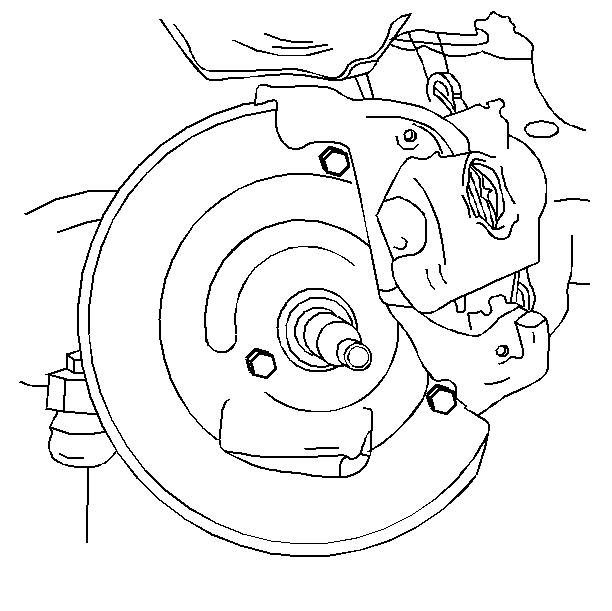
| 11.1. | Remove the two bolts. |
| 11.2. | Pivot the shield in order to gain access to the tie rod. |
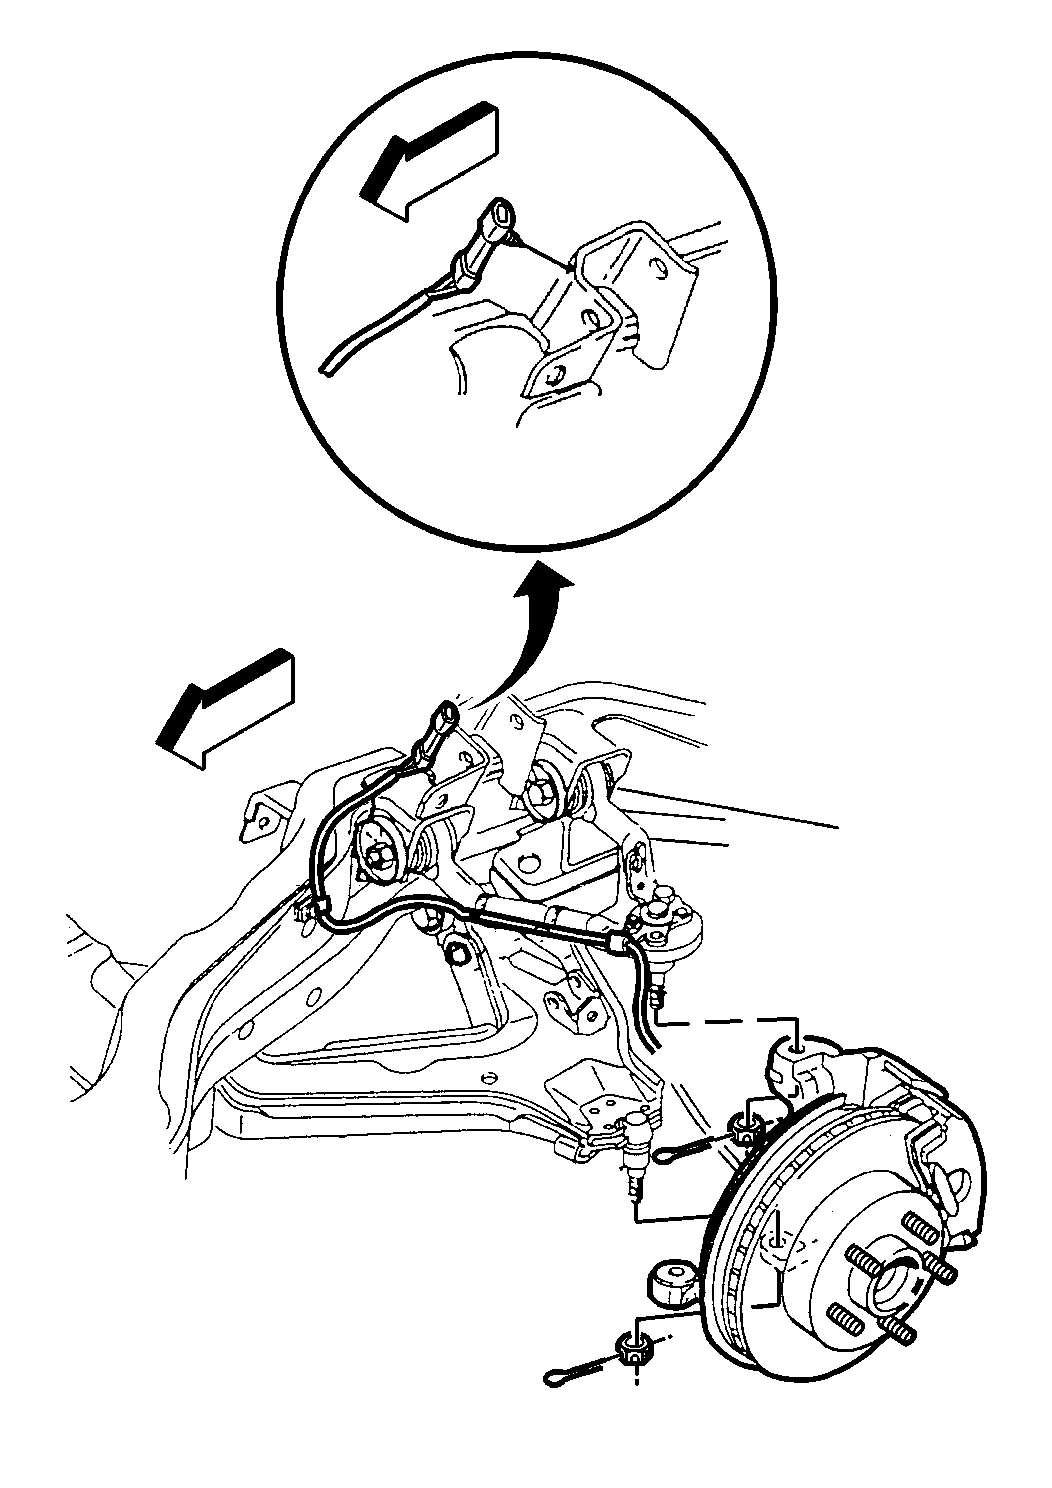
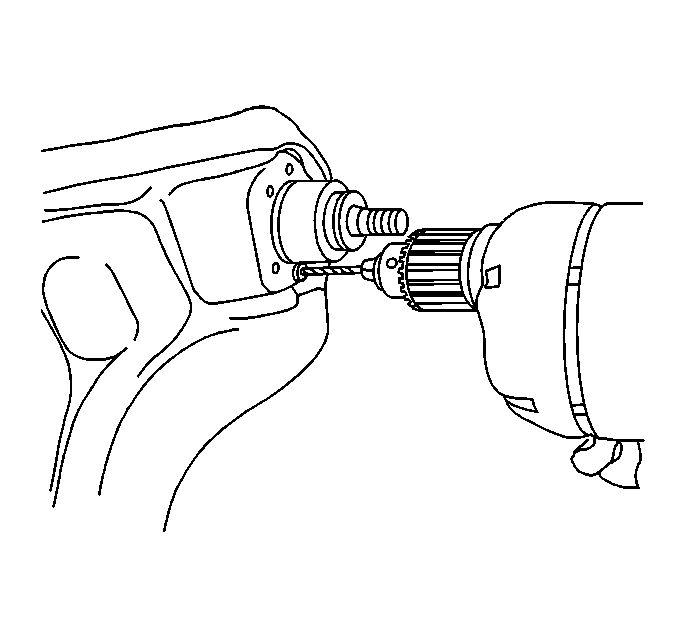
| 16.1. | Center punch the bottom of the rivets. |
| 16.2. | Using a 3 mm (1/8 in) drill bit, drill a guide hole 13 mm (½ in) into the rivet heads. |
Installation Procedure
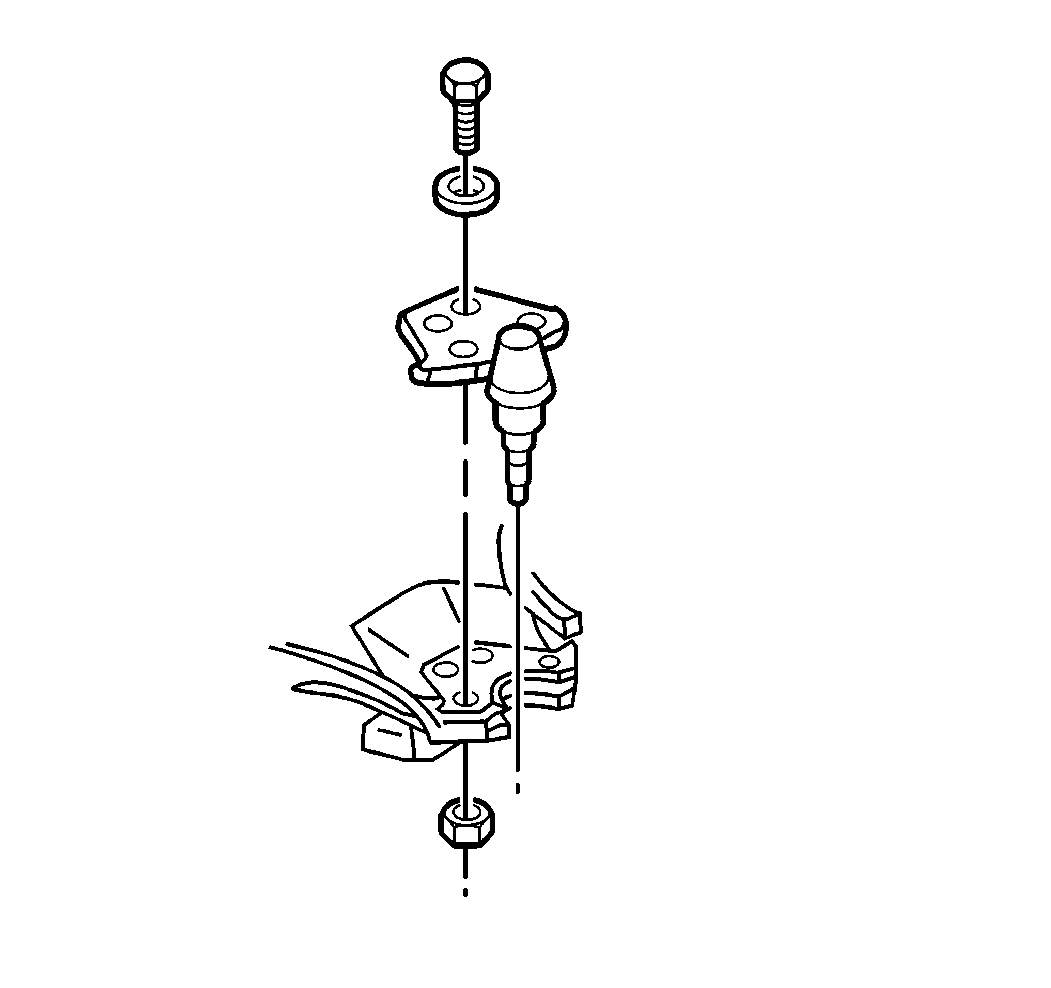
- Install the ball joint to the lower control arm.
- Install the bolts, the flat washers, and the nuts to the ball joint.
- Install the lower ball joint into the steering knuckle. Raise the lower control arm with the jack.
- Install the ball joint nut.
- Install a new cotter pin. Tighten the nut up to an additional 1/6 amount in order to insert the cotter pin through the lower ball joint stud. Bend the pin ends against the nut flats.
- Using a grease gun, grease the lower ball joint until grease appears at the lower ball joint seal.
- Connect the outer tie rod end to the steering knuckle. Refer to Tie Rod Replacement in Steering Linkage.
- Install the front splash shield and the splash shield bolts.
- Install the hub and bearing assembly to the steering knuckle.
- Install the bolts.
- Connect the drive axle to the hub and bearing assembly.
- Install the speed sensor to the bearing. Refer to Wheel Speed Sensor Replacement.
- Connect the speed sensor electrical connector.
- Install the brake rotor.
- Install the brake caliper. Refer to Front Brake Caliper Replacement.
- Install the drive axle washer and the nut.
- Load the torsion bar. Set the adjuster bolt at the mark made during disassembly. Refer to Torsion Bar Replacement .
- Install the tire and wheel assembly. Refer to Tire and Wheel Removal and Installation.
- Lower the vehicle.
- Check the front wheel alignment. Refer to Wheel Alignment Specifications.
Notice: Use the correct fastener in the correct location. Replacement fasteners must be the correct part number for that application. Fasteners requiring replacement or fasteners requiring the use of thread locking compound or sealant are identified in the service procedure. Do not use paints, lubricants, or corrosion inhibitors on fasteners or fastener joint surfaces unless specified. These coatings affect fastener torque and joint clamping force and may damage the fastener. Use the correct tightening sequence and specifications when installing fasteners in order to avoid damage to parts and systems.
Tighten
Tighten the nuts to 30 N·m (22 lb ft).

Tighten
Tighten the nut to 128 N·m (95 lb ft).

Tighten
Tighten the bolts to 14 N·m (124 lb in).


Tighten
Tighten the bolts to 90 N·m (66 lb ft).


Tighten
Tighten the nut to 200 N·m (147 lb ft).
