Shifting into Neutral
Important: For ease of reassembly, if possible shift the transfer case to Neutral prior to removing any components.
- Make sure the vehicle is parked so that it will not roll and set the parking brake.
- Start the vehicle or turn the ignition to RUN.
- Put the transmission in NEUTRAL (N).
- Shift the transfer case to NEUTRAL.
- Turn the ignition to ACCESSORY, which will turn the engine off.
- Place the transmission shift lever in PARK (P).
- Turn the ignition to LOCK.
NEUTRAL position may be obtained only if the following criteria has been met:.
| • | The engine is running. |
| • | The automatic transmission is in NEUTRAL. |
| • | The vehicle speed is below 5 km/h (3 mph). |
| • | The transfer case is in 2HI mode. |
| • | Once these conditions have been met, turn the switch clockwise past the 4 low mode and hold for 10 seconds. When the system completes the shift to NEUTRAL the red NEUTRAL lamp will illuminate. |
Removal Procedure
- Remove the transfer case shield, if equipped. Refer to Transfer Case Shield Replacement .
- Remove the front propeller shaft. Refer to Front Propeller Shaft Replacement .
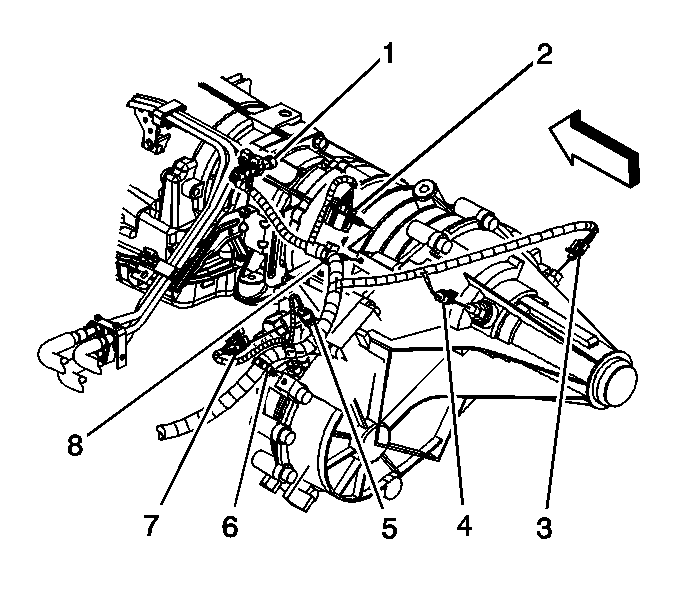
- Disconnect the transfer case switch electrical connector (2).
- Disconnect the encoder motor electrical connector (7).
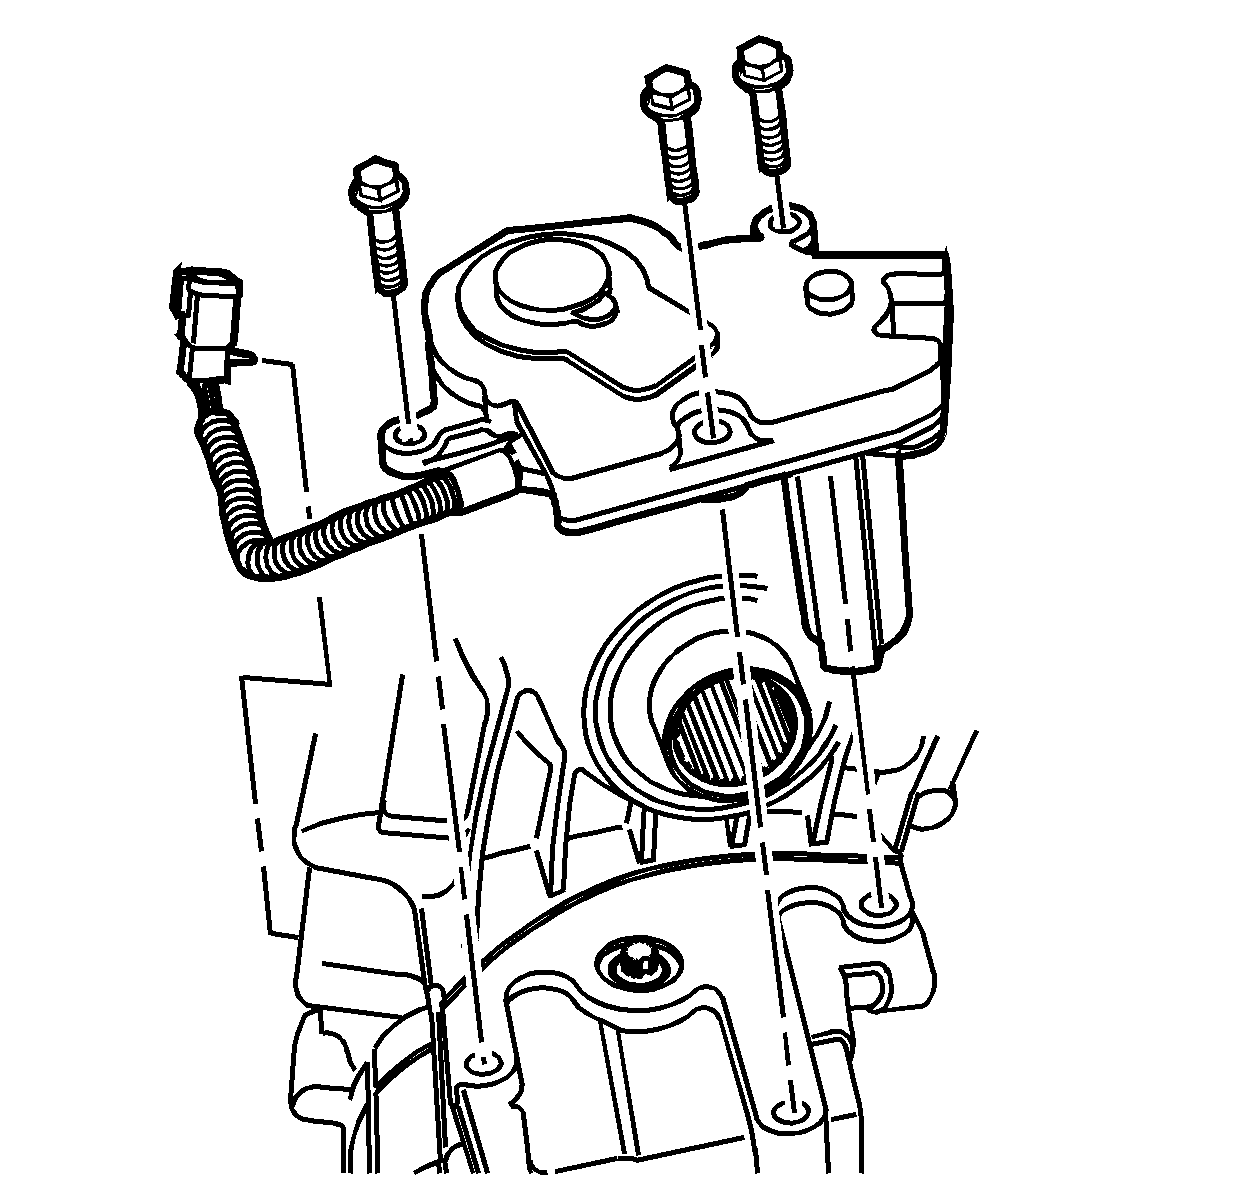
- Remove the encoder motor bolts.
- Remove the encoder motor.
- Remove the actuator insulator gasket.
- If replacing the encoder motor, remove the locating pins from the old motor.


Installation Procedure
Important:
• If the encoder motor is being replaced, ensure that the transfer case is in the neutral position. Manually shift the transfer case at the actuator lever shaft, using a crescent wrench if necessary. • When installing the encoder motor, ensure that the encoder motor is indexed correctly and the motor is flat against the transfer case before tightening the bolts. • A NEW encoder motor does NOT come with locating pins.
- Install the locating pins to the NEW encoder motor.
- Position a NEW actuator insulator gasket to the transfer case.
- Install the encoder motor.
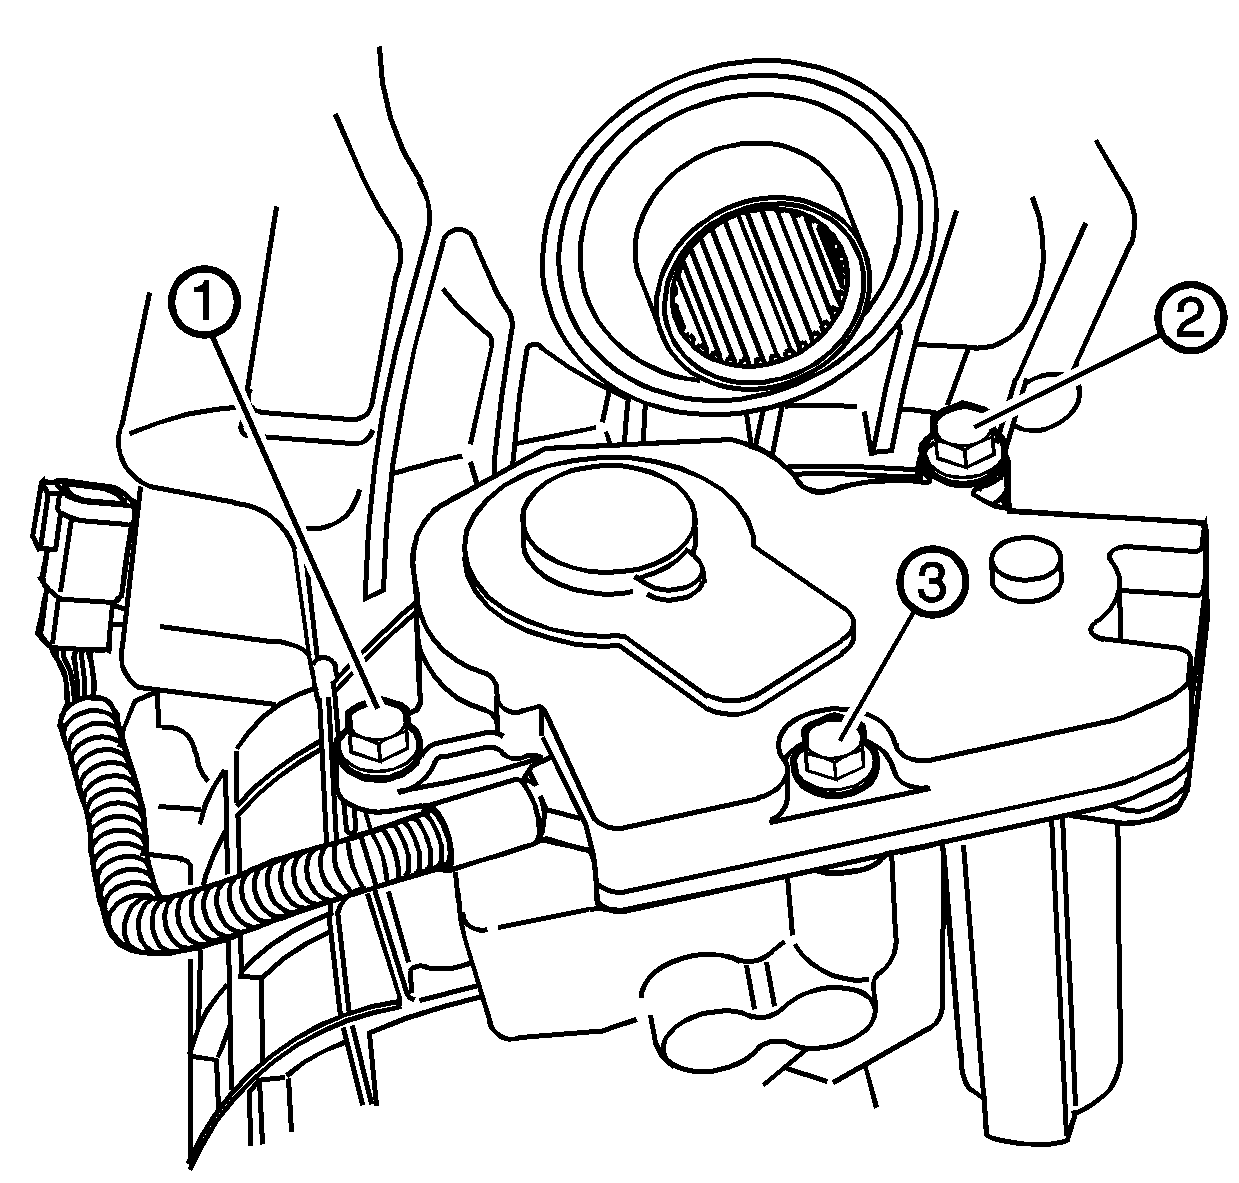
- Install encoder motor bolts.
- Connect the encoder motor electrical connector (7).
- Connect the transfer case switch electrical connector (2).
- Install the front propeller shaft. Refer to Front Propeller Shaft Replacement .
- Install the transfer case shield, if equipped. Refer to Transfer Case Shield Replacement .

Notice: Use the correct fastener in the correct location. Replacement fasteners must be the correct part number for that application. Fasteners requiring replacement or fasteners requiring the use of thread locking compound or sealant are identified in the service procedure. Do not use paints, lubricants, or corrosion inhibitors on fasteners or fastener joint surfaces unless specified. These coatings affect fastener torque and joint clamping force and may damage the fastener. Use the correct tightening sequence and specifications when installing fasteners in order to avoid damage to parts and systems.
Tighten
Tighten the bolts, in the sequence shown, to 20 N·m (15 lb ft).

Shifting Out of Neutral
- Set the parking brake and apply the regular brake pedal.
- Shift the transmission to NEUTRAL (N) and turn the ignition to RUN with the engine off.
- Turn the switch to the desired transfer case shift position (Two-Wheel High, Four-Wheel High, AUTO 4WD, or Four-Wheel Low). After the transfer case has shifted out of NEUTRAL the NEUTRAL light will go out.
- Release the parking brake.
