Oil Pan Replacement 2WD
Removal Procedure
- Raise and support the vehicle. Refer to Lifting and Jacking the Vehicle .
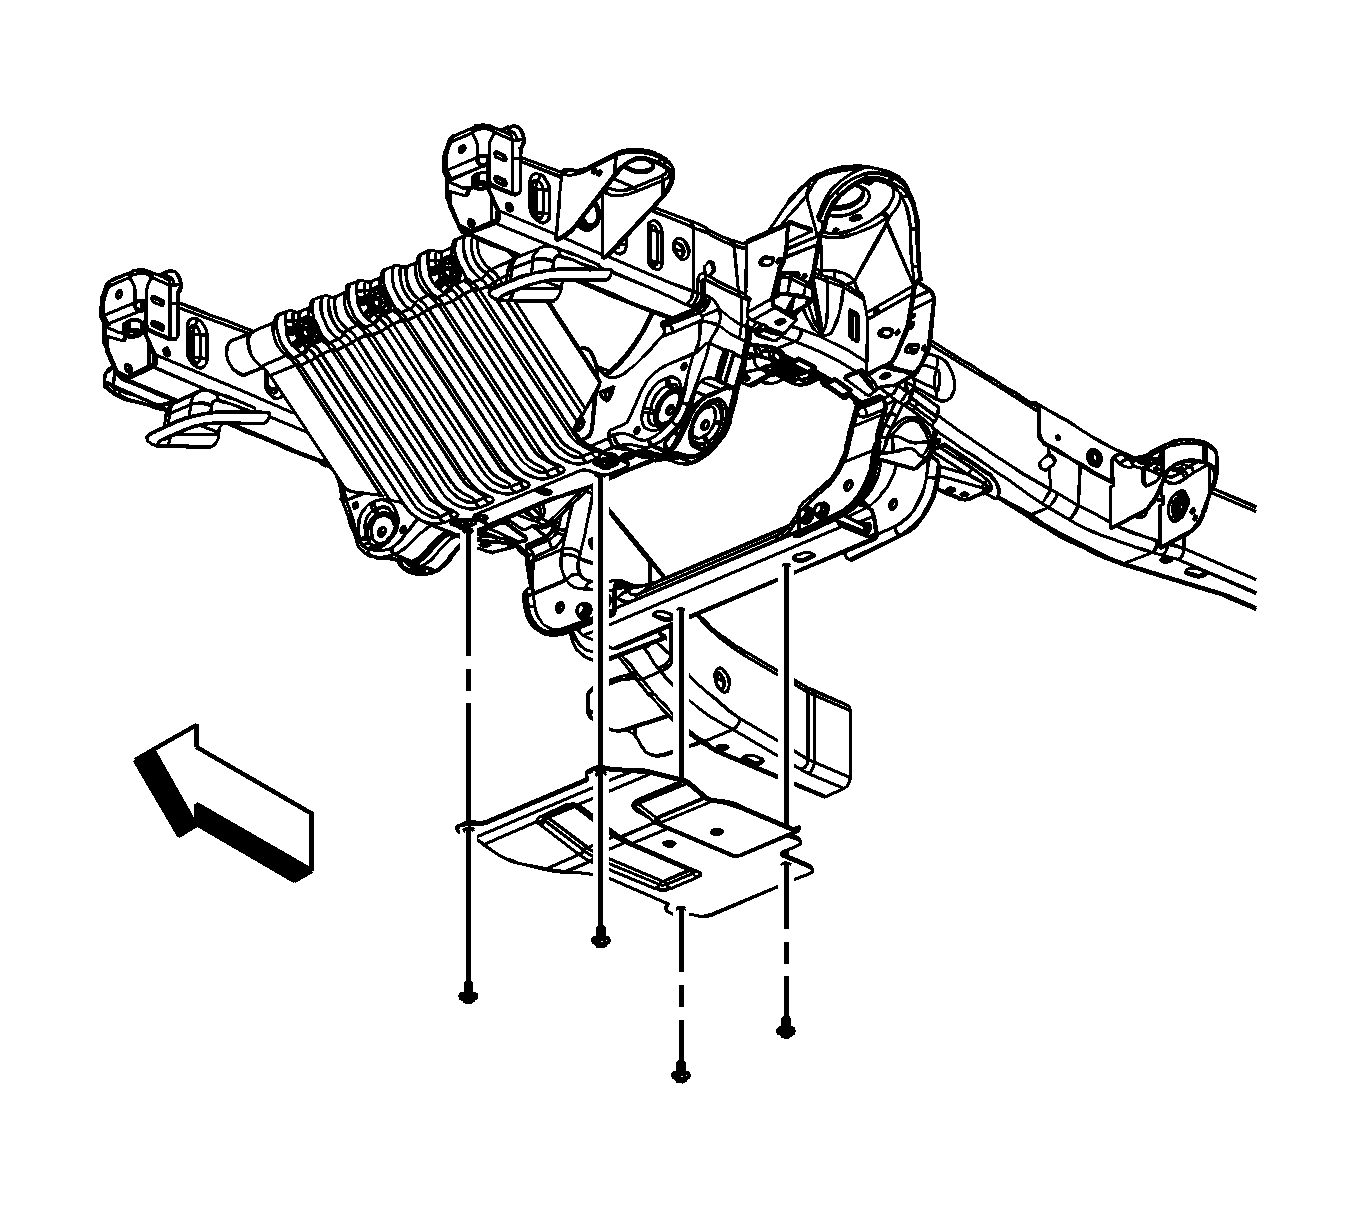
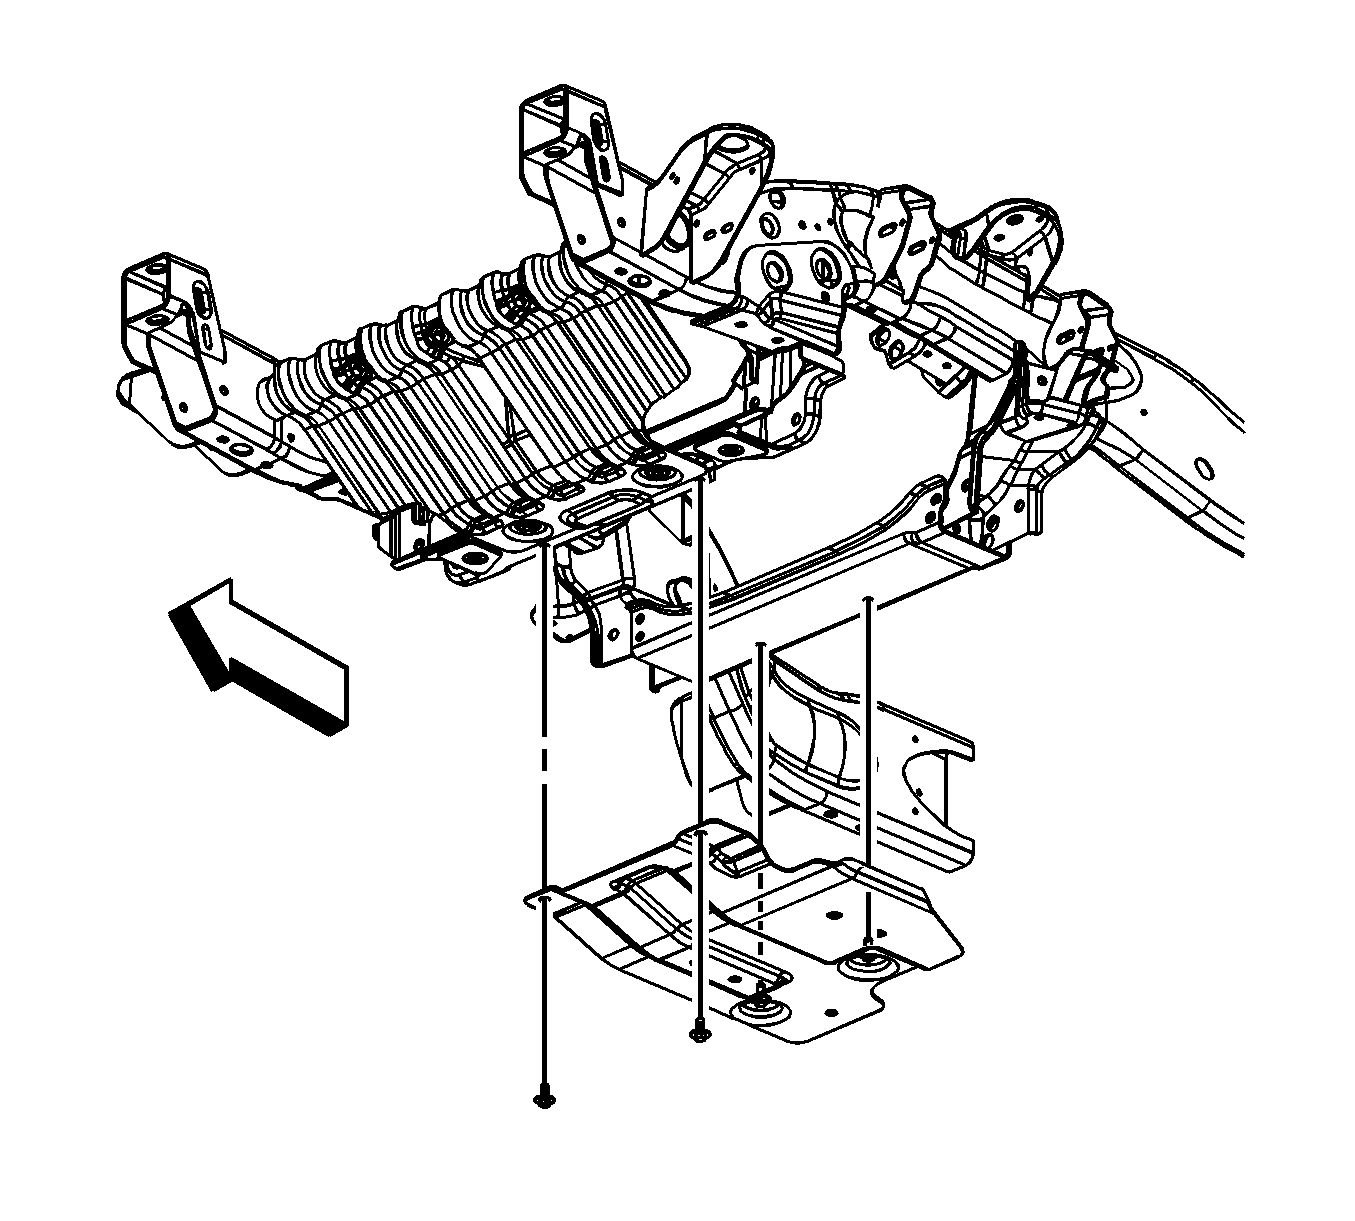
- For 1500 series vehicles, remove the oil pan skid plate bolts and skid plate, if equipped.
- For 2500 series vehicles, loosen the 2 rear oil pan skid plate bolts, remove the 2 front oil pan skid plate bolts and skid plate, if equipped.
- Unbolt the steering rack and hang downward.
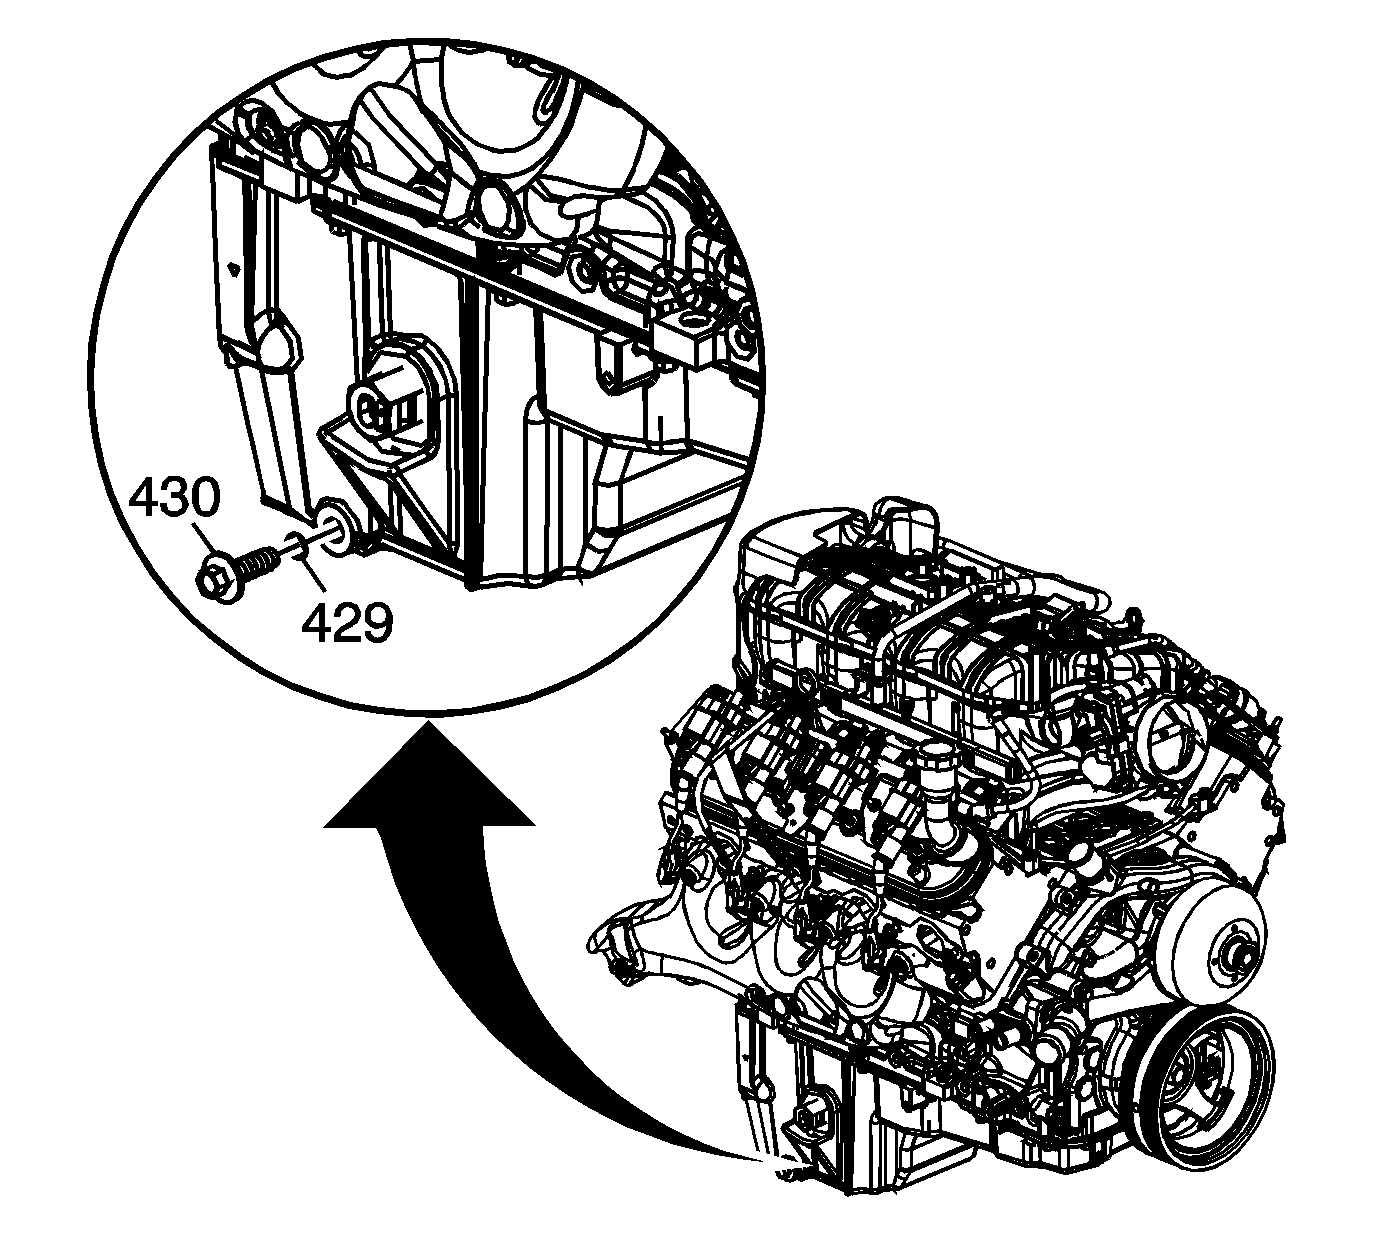
- Place a suitable drain pan under the oil pan drain plug.
- Remove the oil pan drain plug (430).
- Allow the oil pan to drain completely.
- Re-install the oil pan drain plug.
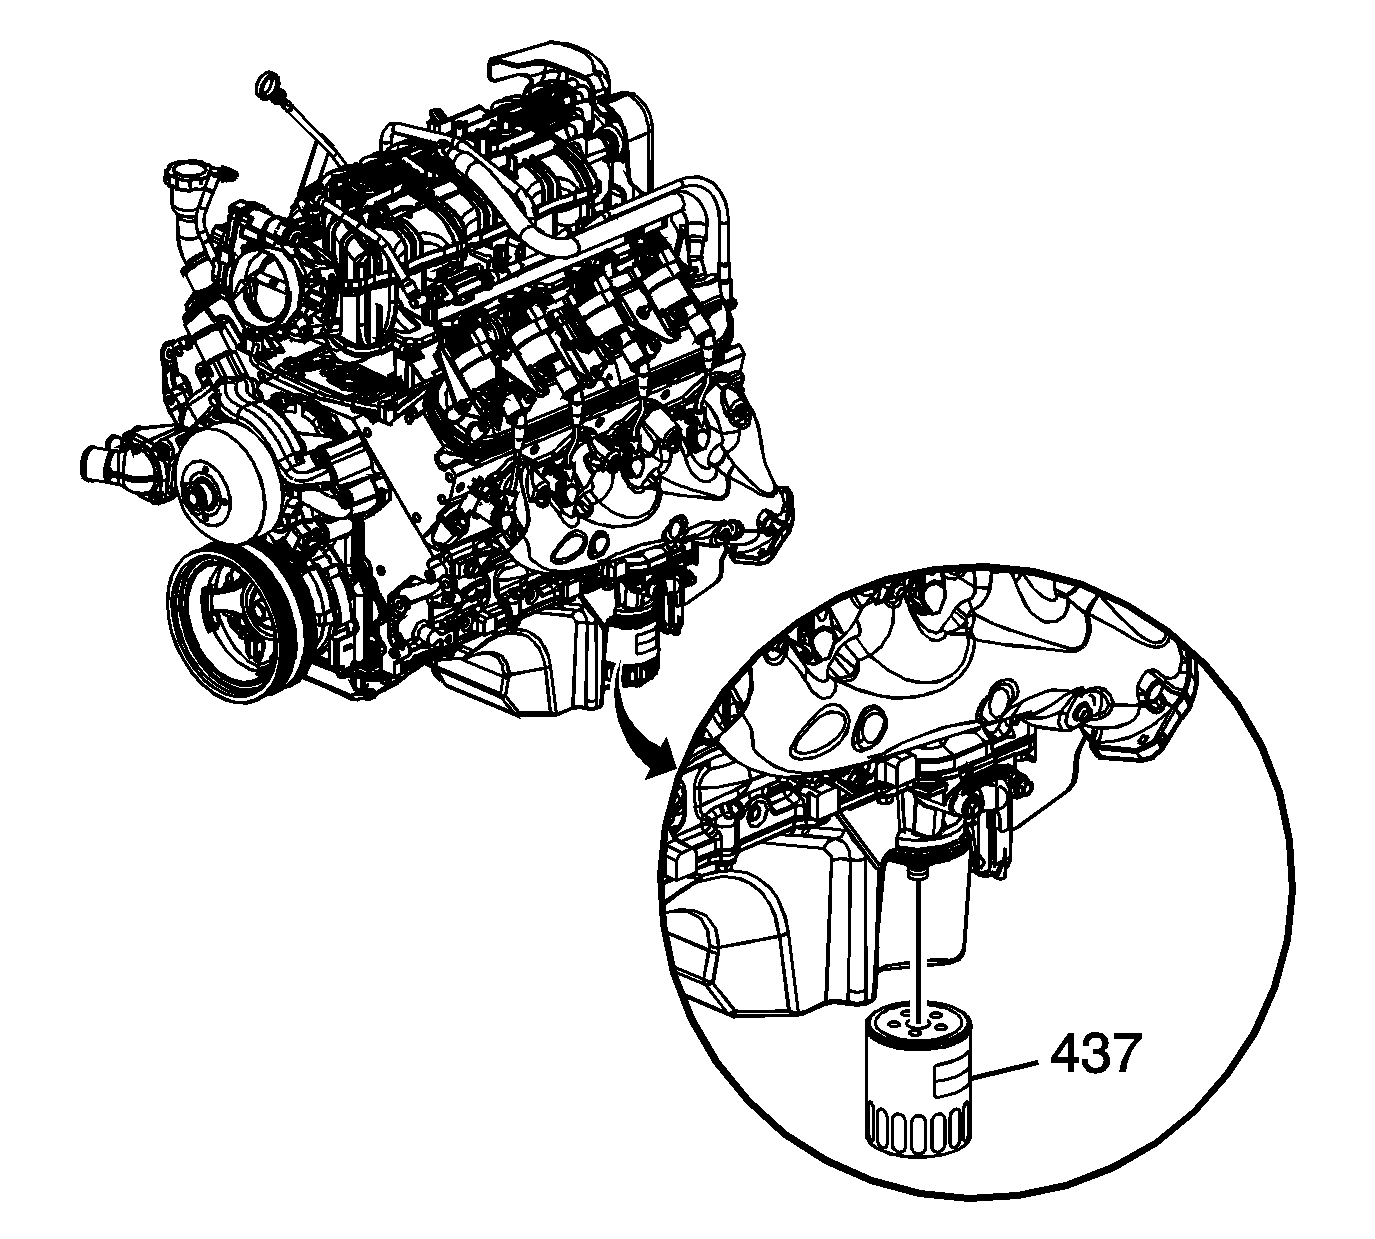
- Place the drain pan under the oil filter.
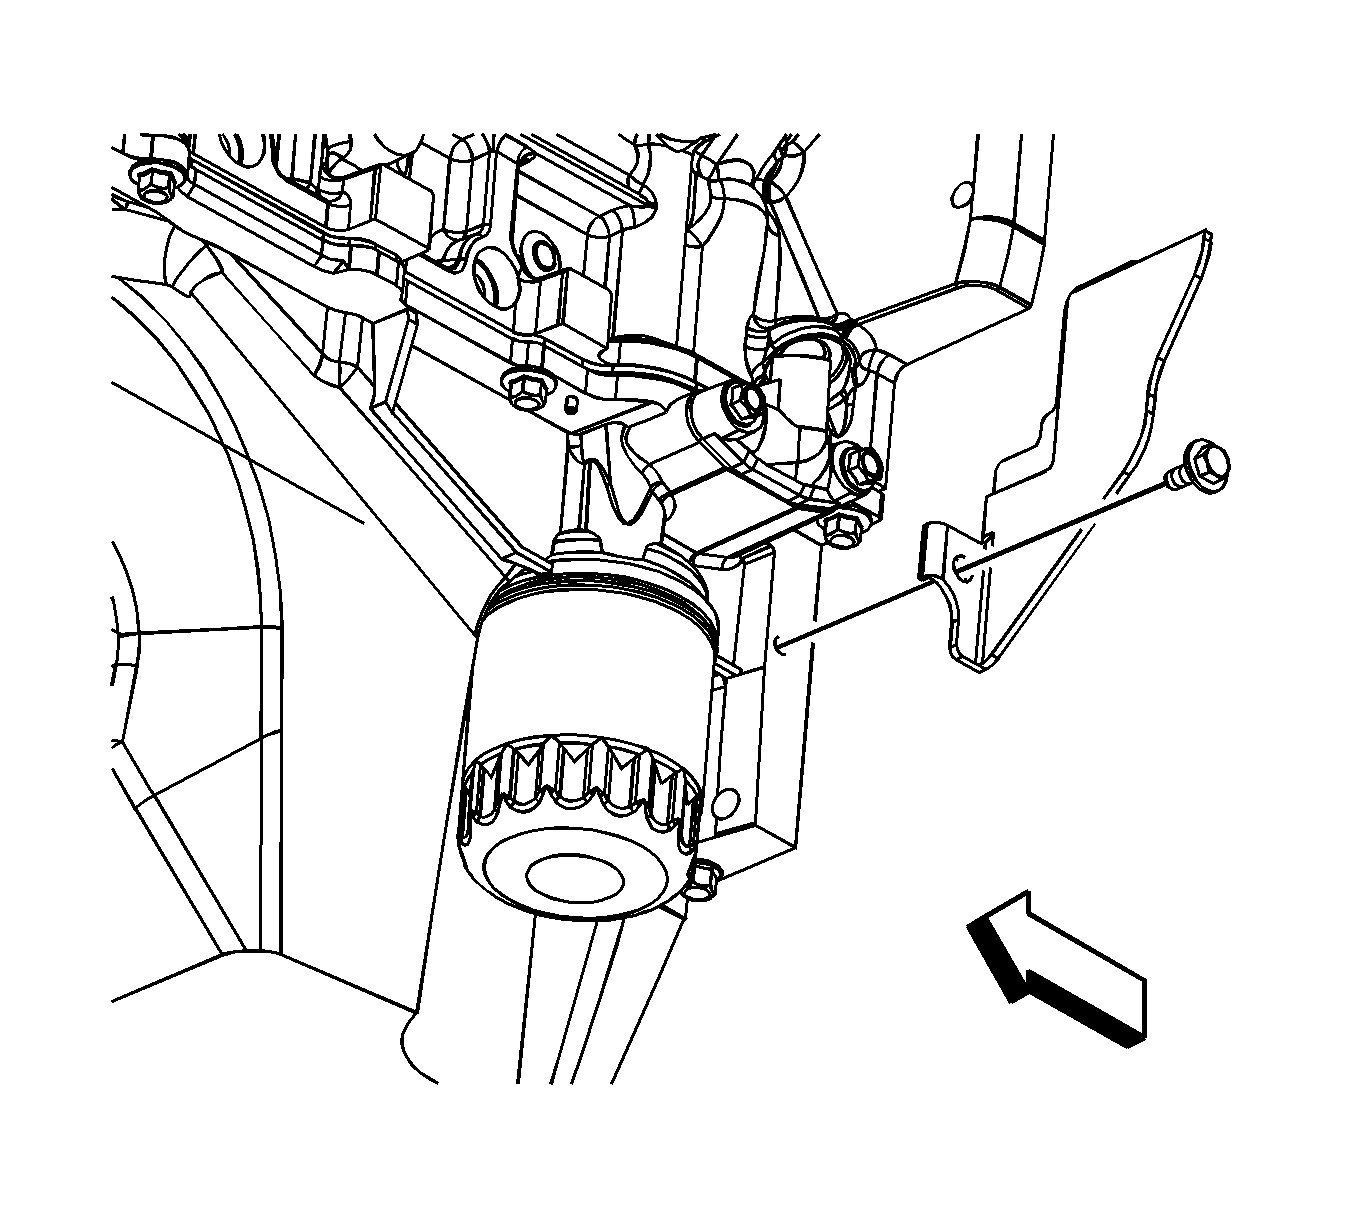
- Remove the oil filter (437).
- Allow the oil to drain completely.
- Re-install the oil filter.
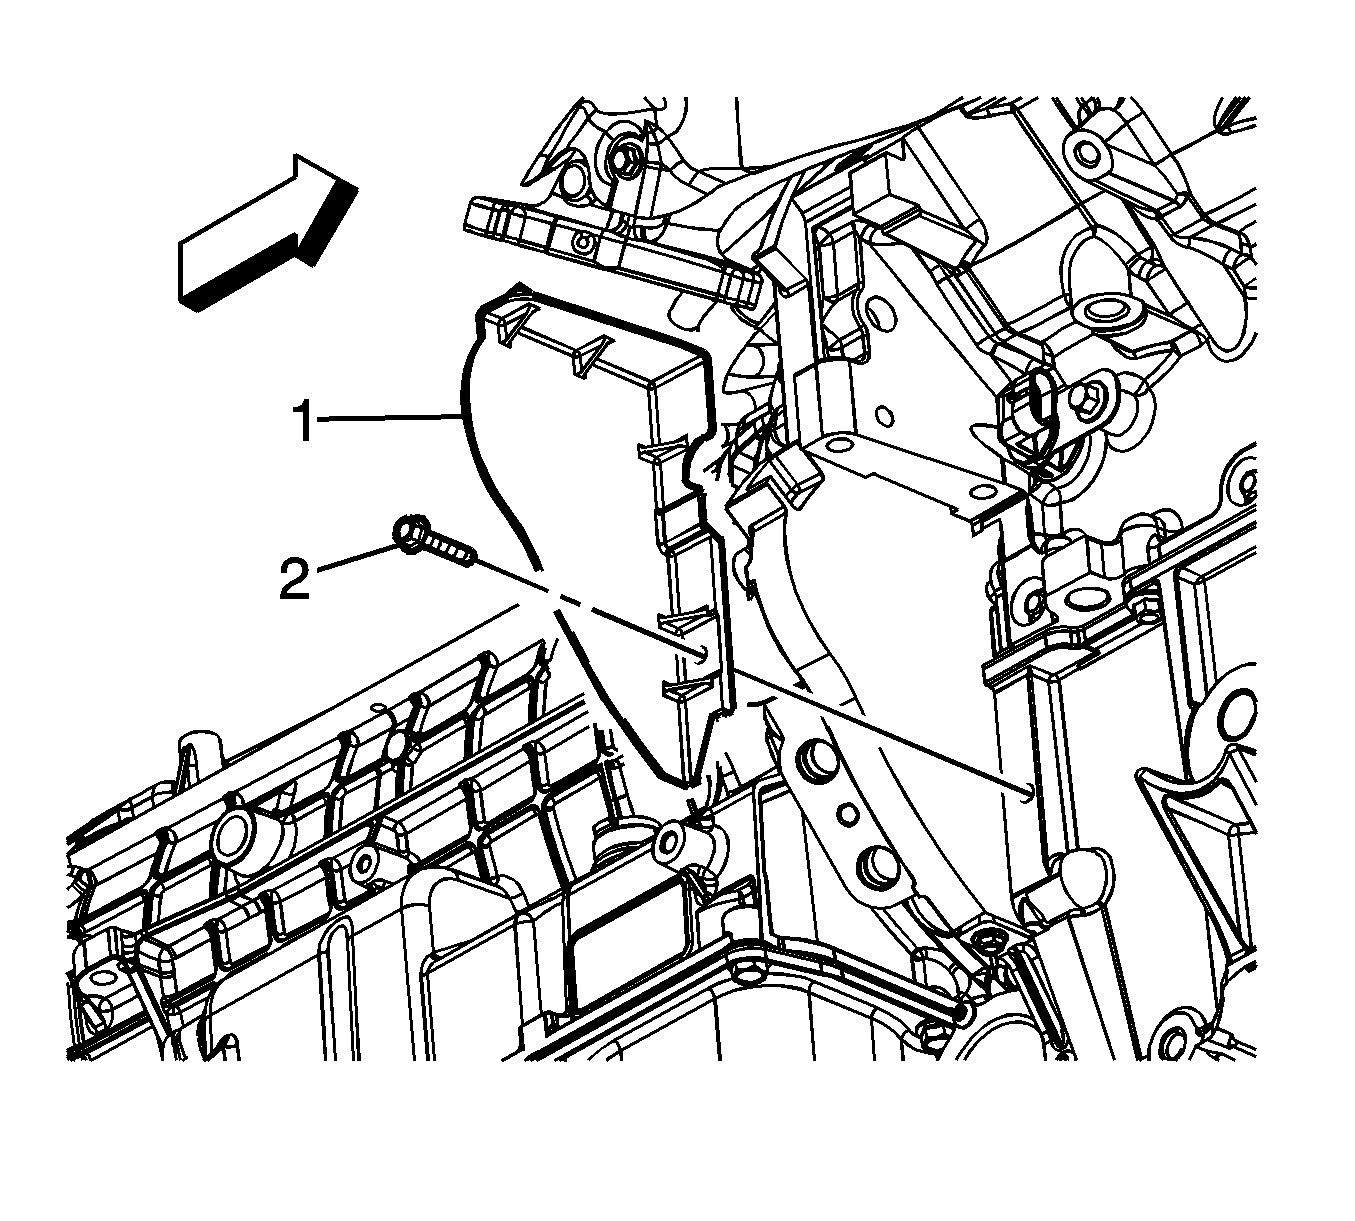
- Remove the right side transmission cover bolt (2).
- Remove the left side transmission cover bolt and cover.
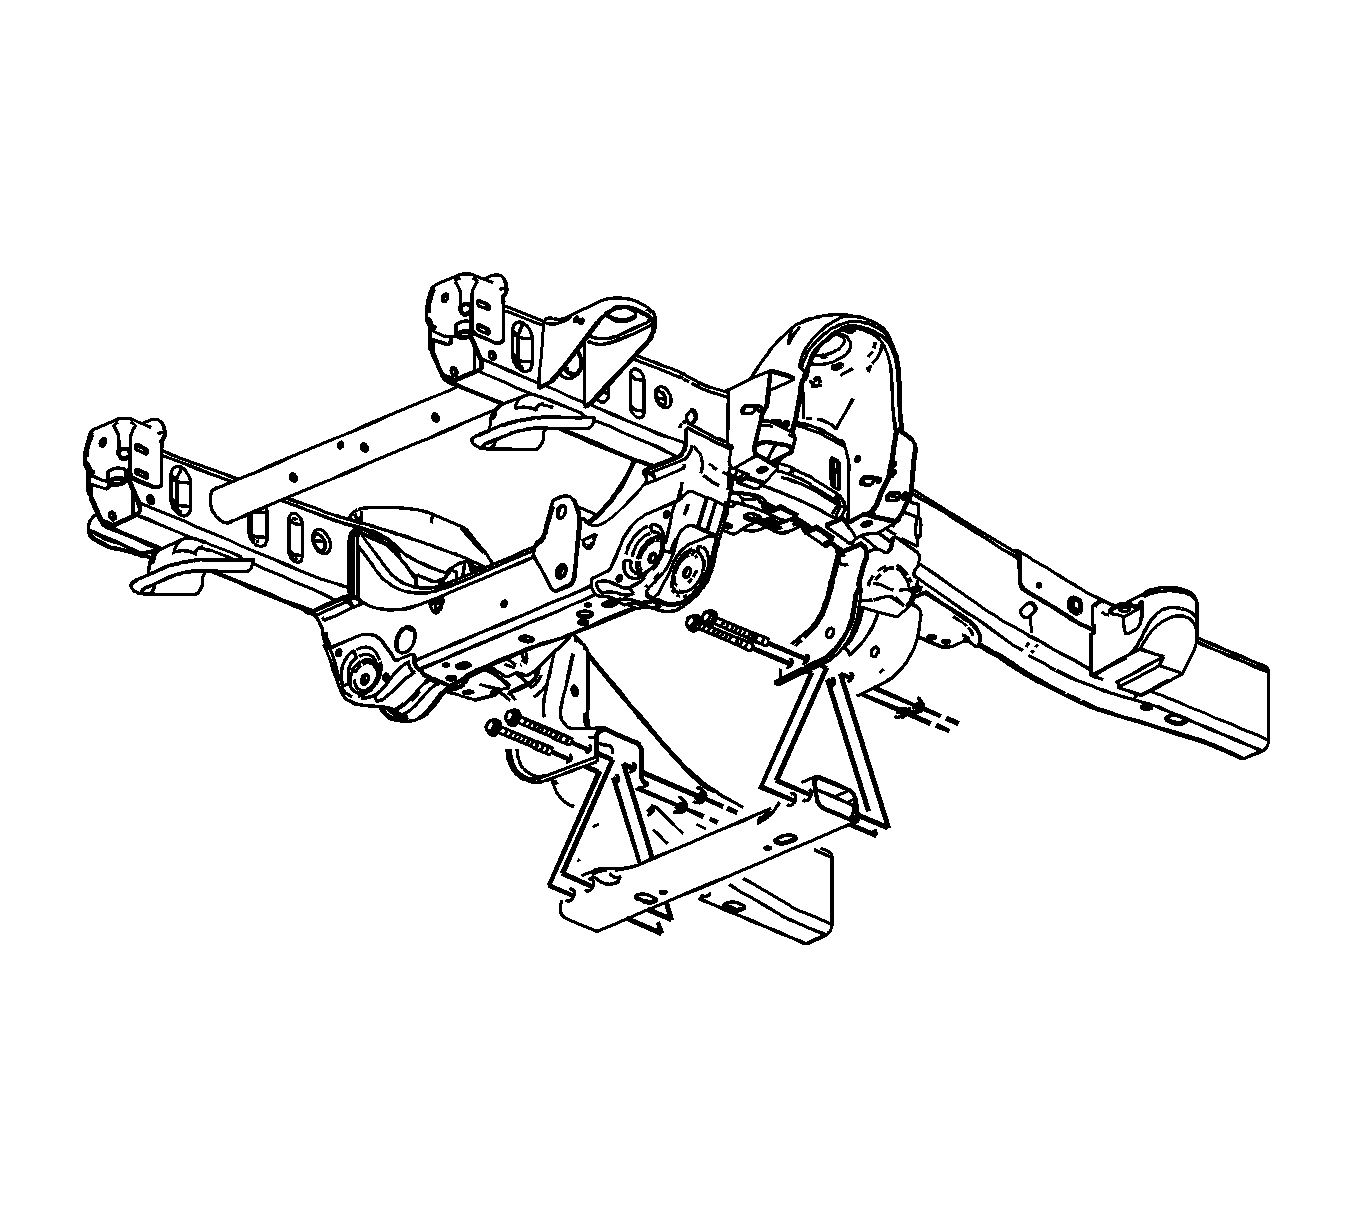
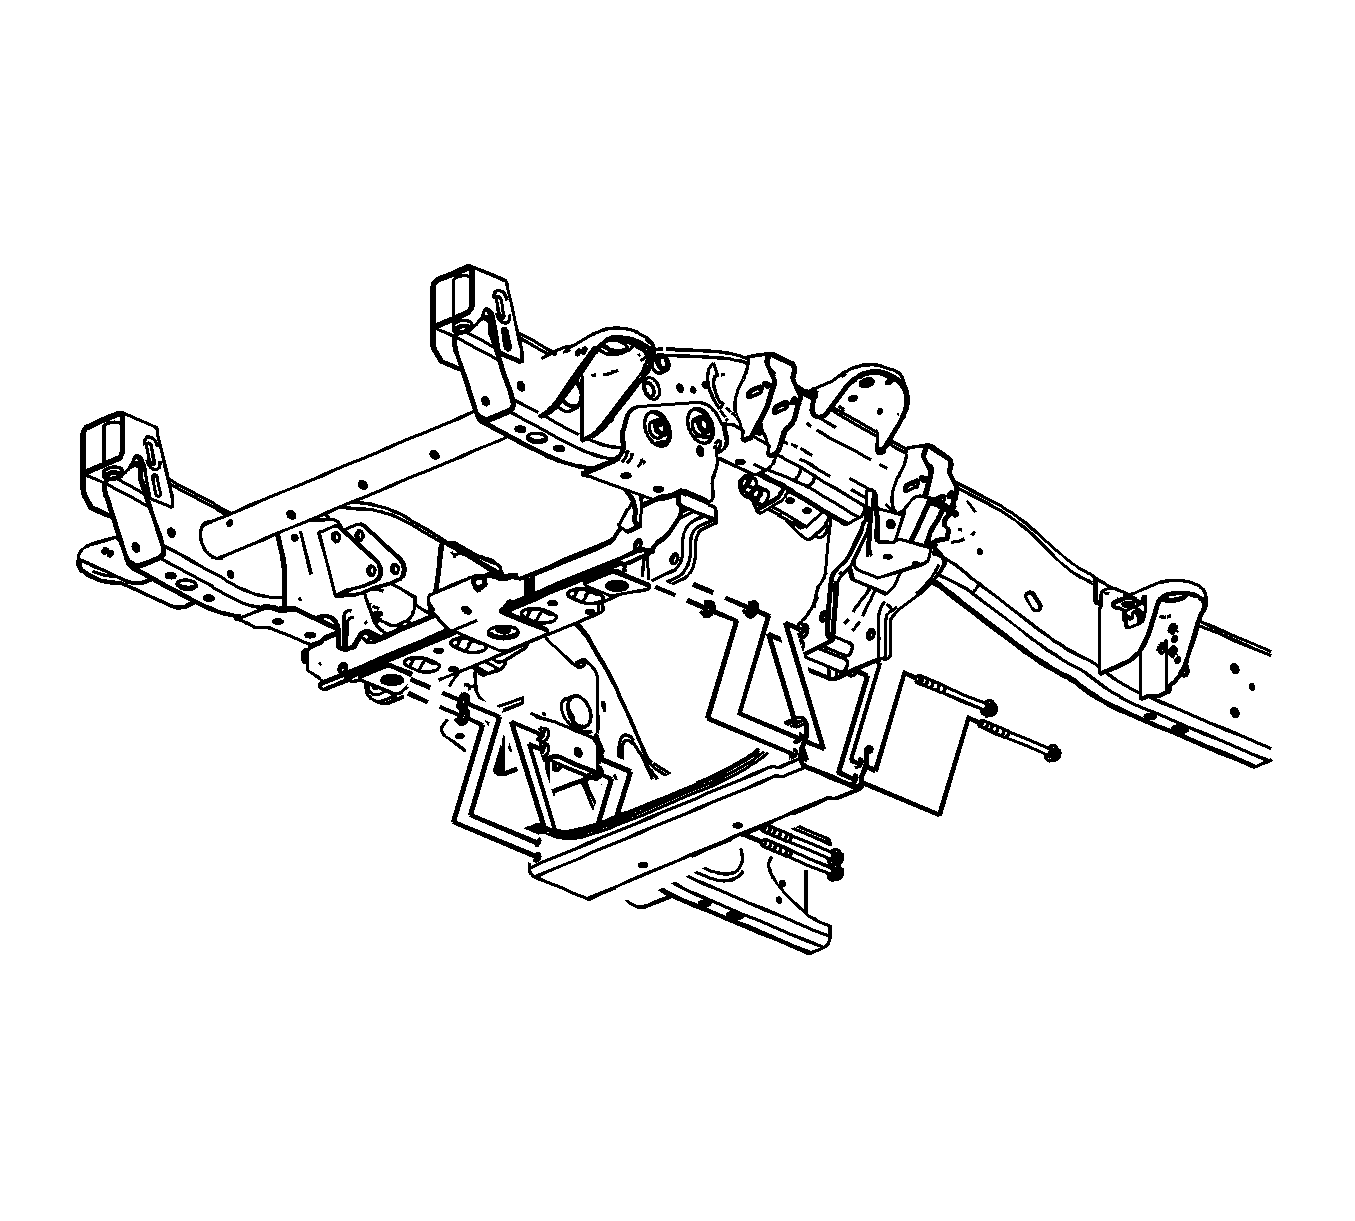
- For 1500 series vehicles, remove the crossbar bolts/nuts and crossbar.
- For 2500 series vehicles, remove the crossbar bolts/nuts and crossbar.
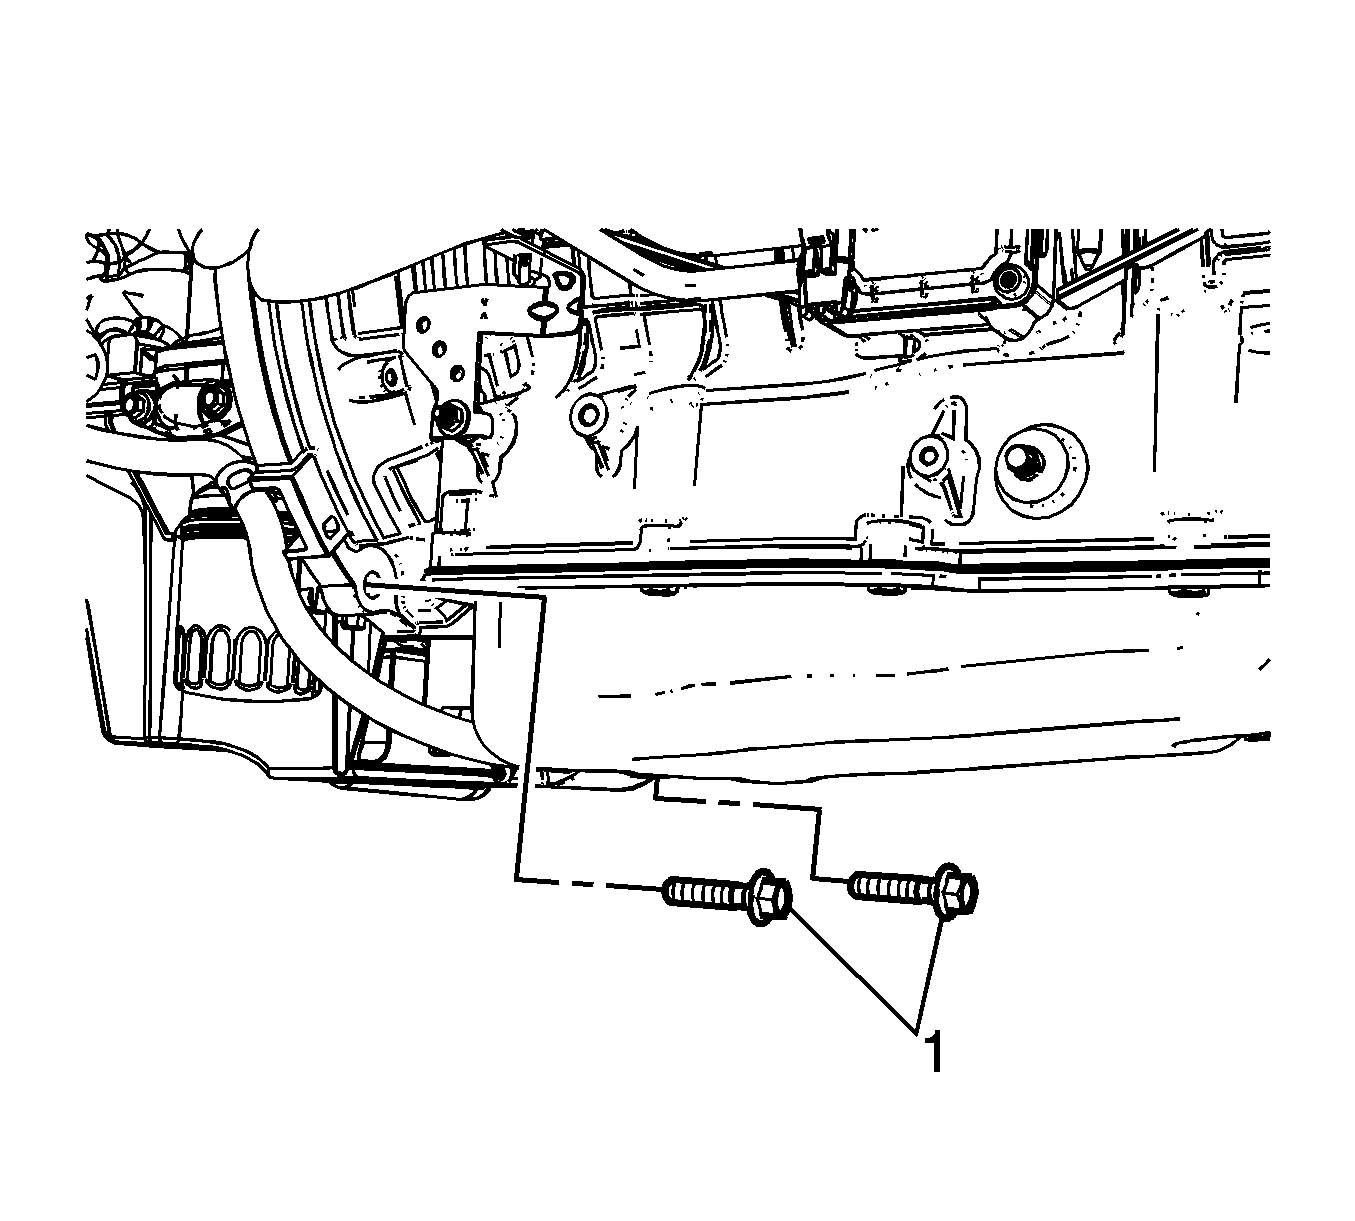
- Remove the 2 lower transmission bolts (1).
- Disconnect the engine harness electrical connector (1) from the oil level sensor.
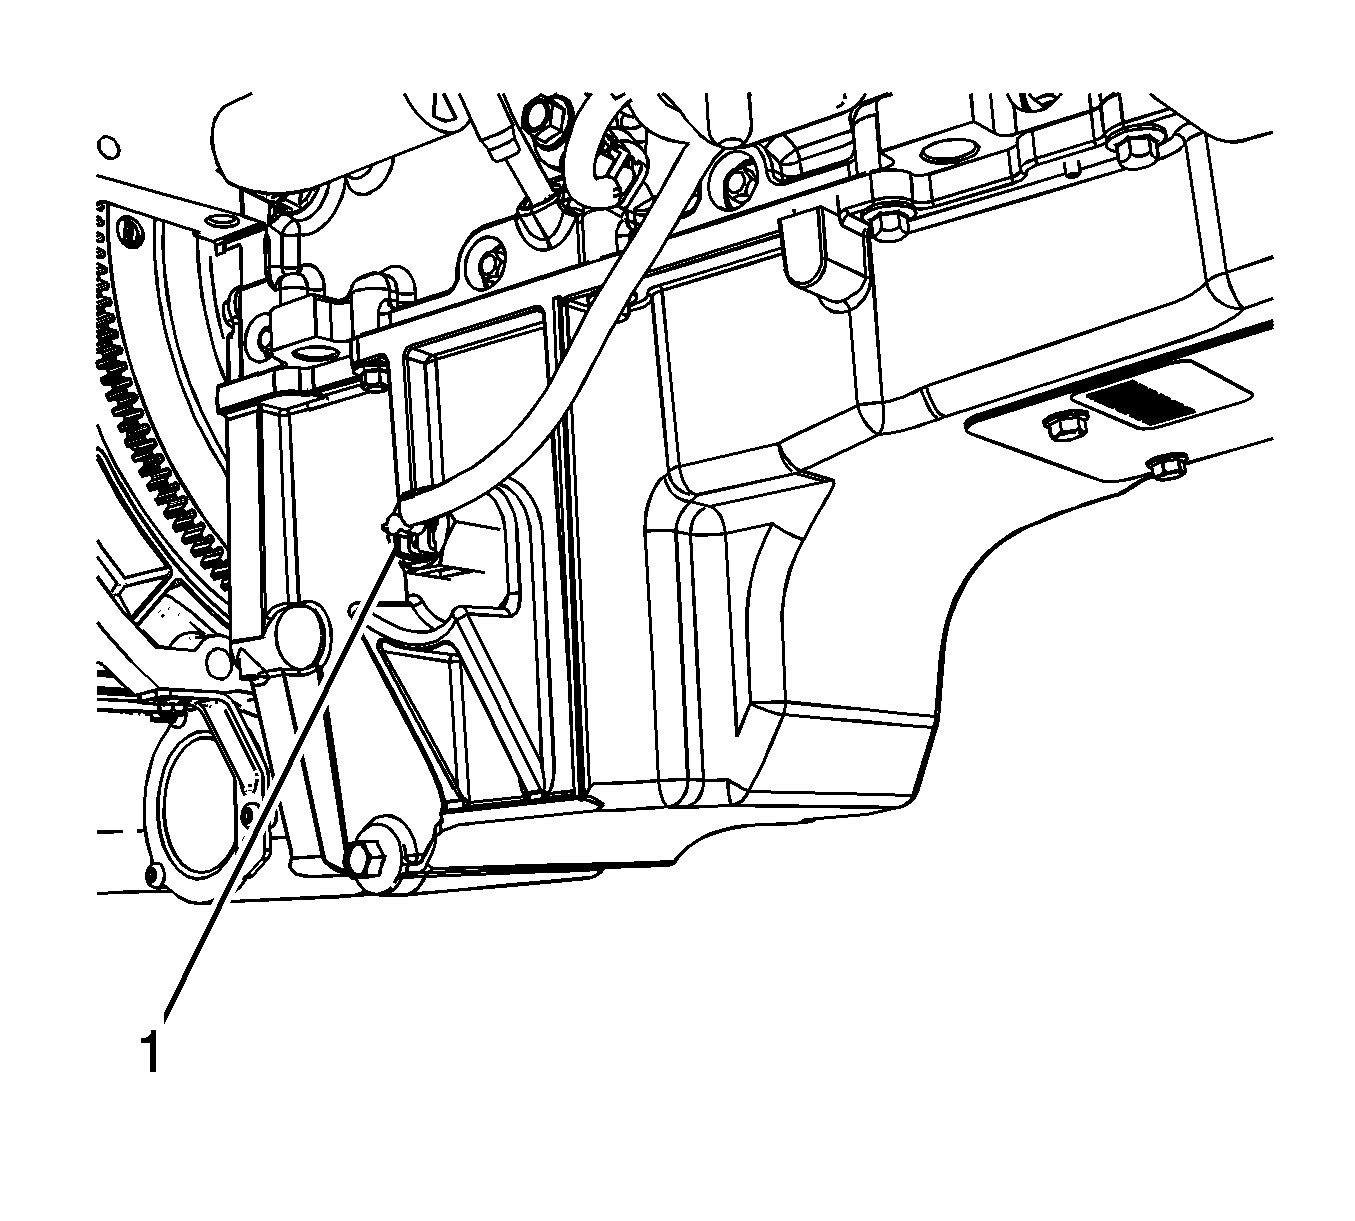
- Remove the air conditioning (A/C) compressor bracket bolts (1).
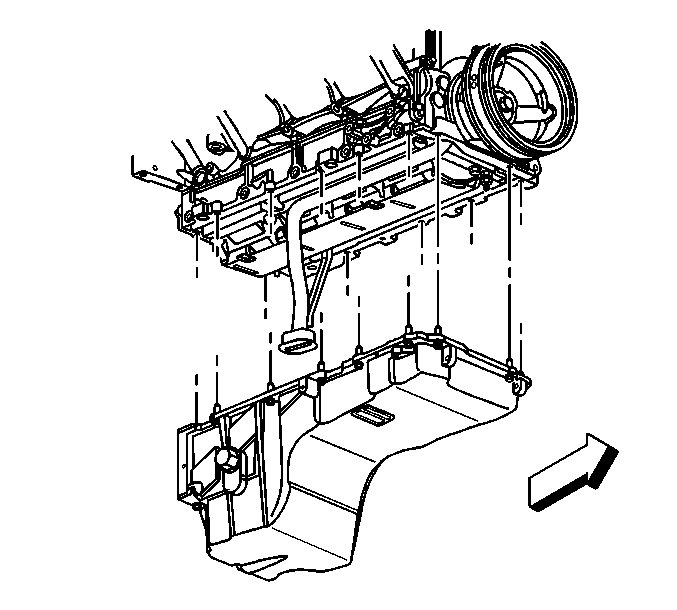
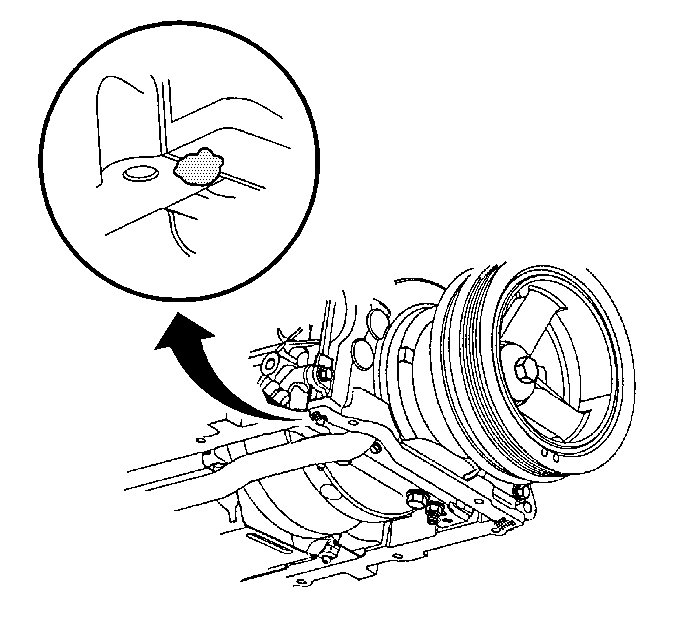
- Remove the oil pan bolts.
- Remove the oil pan.
- If reusing the oil pan perform the following steps, otherwise proceed to step 3 of the installation procedure.
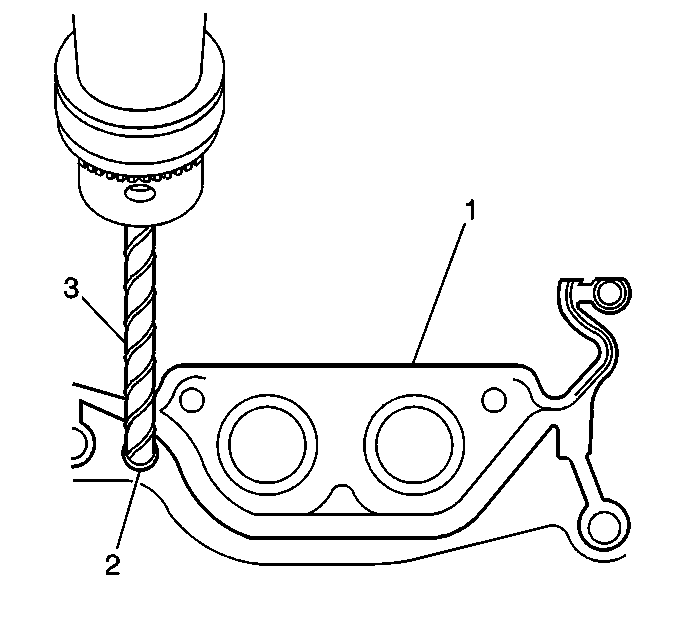
- Drill out the oil pan gasket rivets (2), if necessary.
- Remove the oil pan gasket (1) from the pan.
- Discard the oil pan gasket.
- Discard the rivets, if necessary.
Notice: Refer to Fastener Notice in the Preface section.
Tighten
Tighten the oil pan drain plug to 25 N·m (18 lb ft).
Tighten
Tighten the oil filter to 30 N·m (22 lb ft).

Important: DO NOT allow foreign material to enter the oil passages of the oil pan, cap or cover the openings as required.
Installation Procedure
Important:
• The alignment of the structural oil pan is critical. The rear bolt hole locations of the oil pan provide mounting points for the transmission bellhousing. To ensure the rigidity of the powertrain and correct transmission alignment, it is important
that the rear of the block and the rear of the oil pan must NEVER protrude beyond the engine block and transmission bellhousing plane. • Do not reuse the oil pan gasket. • It is not necessary to rivet the NEW gasket to the oil pan.
- If reusing the oil pan perform the following step, otherwise proceed to step 3.
- Place a NEW oil pan gasket onto the oil pan.
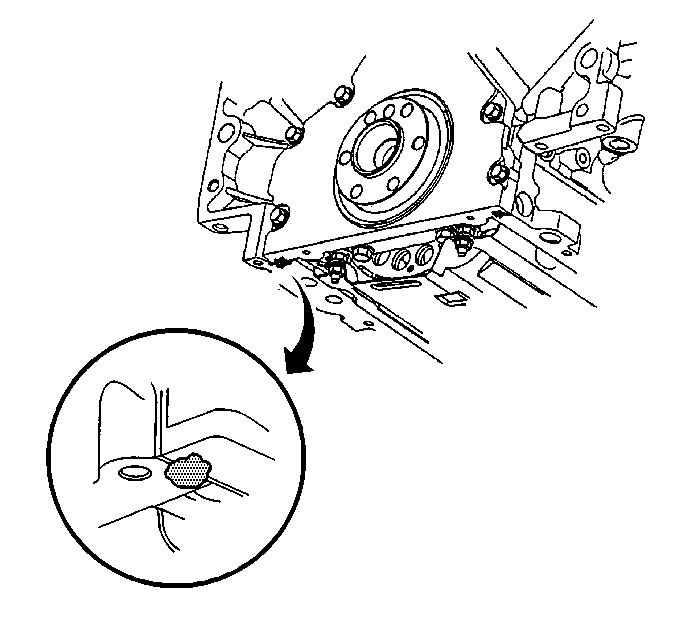
- Apply a 5 mm (0.20 in) bead of sealant, 20 mm (0.80 in) long to the engine block. Apply the sealant directly onto the tabs of the front cover gasket that protrudes into the oil pan surface. Refer to Adhesives, Fluids, Lubricants, and Sealers .
- Apply a 5 mm (0.20 in) bead of sealant, 20 mm (0.8 in) long to the engine block. Apply the sealant directly onto the tabs of the rear cover gasket that protrudes into the oil pan surface. Refer to Adhesives, Fluids, Lubricants, and Sealers .
- Install 1 oil pan bolt into a oil pan bolt hole and up through the gasket.
- Position and install the oil pan and the rest of the oil pan bolts.
- Tighten the oil pan bolts.
- Install the 2 lower transmission bolts.
- Install the air conditioning (A/C) compressor bracket bolts (1).
- Connect the engine harness electrical connector (1) to the oil level sensor.
- For both the 1500 and 2500 series, perform the following steps prior to installing the crossbar bolts:
- For 2500 series vehicles, install the crossbar and crossbar bolts/nuts.
- For 1500 series vehicles, install the crossbar and crossbar bolts/nuts.
- Position the left side transmission cover and install the cover bolt.
- Install the right side transmission cover bolt (2).
- If reusing the old oil pan remove the old oil filter and install a NEW oil filter.
- Lubricate the NEW oil filter seal with clean engine oil.
- Install the NEW oil filter (437).
- Install the oil pan drain plug (430).
- Raise the steering rack in place and install the steering rack bolts.
- For 2500 series vehicles, position the oil pan skid plate and tighten until snug the 2 rear oil pan skid plate bolts, install the 2 front oil pan skid plate bolts, if equipped.
- For 1500 series vehicles, position the oil pan skid plate and install the oil pan skid plate bolts, if equipped.
- Lower the vehicle.
- Fill the engine with NEW engine oil. Refer to Fluid and Lubricant Recommendations and Approximate Fluid Capacities .
- Start the engine and inspect for leaks.
Important: Be sure to align the oil gallery passages in the oil pan and engine block properly with the oil pan gasket.
Notice: Refer to Fastener Notice in the Preface section.
Tighten
| • | M6 Bolts--Tighten the bolt to 12 N·m 106 lb in). |
| • | M8 Bolts--Tighten the bolt to 25 N·m (18 lb ft). |
Tighten
Tighten the bolts to 50 N·m (37 lb ft).
Tighten
Tighten the bolt to 50 N·m (37 lb ft).
| 11.1. | Remove all traces of the original adhesive patch. |
| 11.2. | Clean the threads of the bolts with denatured alcohol or equivalent and allow to dry. |
| 11.3. | Apply threadlock GM P/N 12345493 (Canadian P/N 10953488) or equivalent to the bolt threads. |
Tighten
Tighten the nuts to 120 N·m (89 lb ft).
Tighten
Tighten the nuts to 100 N·m (74 lb ft).
Tighten
Tighten the bolt to 12 N·m (106 lb in).
Tighten
Tighten the bolt to 12 N·m (106 lb in).
Tighten
Tighten the oil filter to 30 N·m (22 lb ft).
Tighten
Tighten the drain plug to 25 N·m (18 lb ft).
Tighten
| • | Tighten the left side steering rack bolts to 200 N·m (148 lb ft). |
| • | Tighten the right side steering rack bolts to 100 N·m (74 lb ft). |
Tighten
Tighten the bolts to 28 N·m (21 lb ft).
Tighten
Tighten the bolts to 28 N·m (21 lb ft).
Oil Pan Replacement 4WD
Removal Procedure
- Raise and support the vehicle. Refer to Lifting and Jacking the Vehicle .
- For 1500 series vehicles, remove the oil pan skid plate bolts and skid plate, if equipped.
- For 2500 series vehicles, loosen the 2 rear oil pan skid plate bolts, remove the 2 front oil pan skid plate bolts and skid plate, if equipped.
- Remove the front differential carrier. Refer to Differential Carrier Assembly Replacement .
- Unbolt the steering rack and hang downward.
- Place a suitable drain pan under the oil pan drain plug.
- Remove the oil pan drain plug (430).
- Allow the oil pan to drain completely.
- Re-install the oil pan drain plug.
- Place the drain pan under the oil filter.
- Remove the oil filter (437).
- Allow the oil to drain completely.
- Re-install the oil filter.
- Remove the right side transmission cover bolt (2).
- Remove the left side transmission cover bolt and cover.
- For 1500 series vehicles, remove the crossbar bolts/nuts and crossbar.
- For 2500 series vehicles, remove the crossbar bolts/nuts and crossbar.
- Remove the 2 lower transmission bolts (1).
- Disconnect the engine harness electrical connector (1) from the oil level sensor.
- Remove the air conditioning (A/C) compressor bracket bolts (1).
- Remove the oil pan bolts.
- Remove the oil pan.
- If reusing the oil pan perform the following steps, otherwise proceed to step 3 of the installation procedure.
- Drill out the oil pan gasket rivets (2), if necessary.
- Remove the oil pan gasket (1) from the pan.
- Discard the oil pan gasket.
- Discard the rivets, if necessary.
Notice: Refer to Fastener Notice in the Preface section.
Tighten
Tighten the oil pan drain plug to 25 N·m (18 lb ft).
Tighten
Tighten the oil filter to 30 N·m (22 lb ft).
Important: DO NOT allow foreign material to enter the oil passages of the oil pan, cap or cover the openings as required.
Installation Procedure
Important:
• The alignment of the structural oil pan is critical. The rear bolt hole locations of the oil pan provide mounting points for the transmission bellhousing. To ensure the rigidity of the powertrain and correct transmission alignment, it is important
that the rear of the block and the rear of the oil pan must NEVER protrude beyond the engine block and transmission bellhousing plane. • Do not reuse the oil pan gasket. • It is not necessary to rivet the NEW gasket to the oil pan.
- If reusing the oil pan perform the following step, otherwise proceed to step 3.
- Place a NEW oil pan gasket onto the oil pan.
- Apply a 5 mm (0.20 in) bead of sealant, 20 mm (0.80 in) long to the engine block. Apply the sealant directly onto the tabs of the front cover gasket that protrudes into the oil pan surface. Refer to Adhesives, Fluids, Lubricants, and Sealers .
- Apply a 5 mm (0.20 in) bead of sealant, 20 mm (0.8 in) long to the engine block. Apply the sealant directly onto the tabs of the rear cover gasket that protrudes into the oil pan surface. Refer to Adhesives, Fluids, Lubricants, and Sealers .
- Install 1 oil pan bolt into a oil pan bolt hole and up through the gasket.
- Position and install the oil pan and the rest of the oil pan bolts.
- Tighten the oil pan bolts.
- Install the 2 lower transmission bolts (1) until snug.
- Install the air conditioning (A/C) compressor bracket bolts (1).
- Connect the engine harness electrical connector (1) to the oil level sensor.
- For both the 1500 and 2500 series, perform the following steps prior to installing the crossbar bolts.
- For 2500 series vehicles, install the crossbar and crossbar bolts/nuts.
- For 1500 series vehicles, install the crossbar and crossbar bolts/nuts.
- Position the left side transmission cover and install the cover bolt.
- Install the right side transmission cover bolt (2).
- If reusing the old oil pan remove the old oil filter and install a NEW oil filter.
- Lubricate the NEW oil filter seal with clean engine oil.
- Install the NEW oil filter (437).
- Install the oil pan drain plug (430).
- Install the front differential carrier. Refer to Differential Carrier Assembly Replacement .
- Raise the steering rack in place and install the steering rack bolts.
- For 2500 series vehicles, position the oil pan skid plate and tighten until snug the 2 rear oil pan skid plate bolts, install the 2 front oil pan skid plate bolts, if equipped.
- For 1500 series vehicles, position the oil pan skid plate and install the oil pan skid plate bolts, if equipped.
- Lower the vehicle.
- Fill the engine with NEW engine oil. Refer to Fluid and Lubricant Recommendations and Approximate Fluid Capacities .
- Start the engine and inspect for leaks.
Important: Be sure to align the oil gallery passages in the oil pan and engine block properly with the oil pan gasket.
Notice: Refer to Fastener Notice in the Preface section.
Tighten
| • | M6--Tighten the bolts to 12 N·m (106 lb in). |
| • | M8--Tighten the bolts to 25 N·m (18 lb ft). |
Tighten
Tighten the bolts to 50 N·m (37 lb ft).
Tighten
Tighten the bolt to 50 N·m (37 lb ft).
| 11.1. | Remove all traces of the original adhesive patch. |
| 11.2. | Clean the threads of the bolts with denatured alcohol or equivalent and allow to dry. |
| 11.3. | Apply threadlock GM P/N 12345493 (Canadian P/N 10953488) or equivalent to the bolt threads. |
Tighten
Tighten the nuts to 120 N·m (89 lb ft).
Tighten
Tighten the nuts to 100 N·m (74 lb ft).
Tighten
Tighten the bolt to 12 N·m (106 lb in).
Tighten
Tighten the bolt to 12 N·m (106 lb in).
Tighten
Tighten the oil filter to 30 N·m (22 lb ft).
Tighten
Tighten the drain plug to 25 N·m (18 lb ft).
Tighten
| • | Tighten the left side steering rack bolts to 200 N·m (148 lb ft). |
| • | Tighten the right side steering rack bolts to 100 N·m (74 lb ft). |
Tighten
Tighten the bolts to 28 N·m (21 lb ft).
Tighten
Tighten the bolts to 28 N·m (21 lb ft).
