Steering Linkage Inner Tie Rod Replacement Standard
Removal Procedure
- Remove the steering gear boot. Refer to Steering Gear Boot Replacement - On Vehicle.
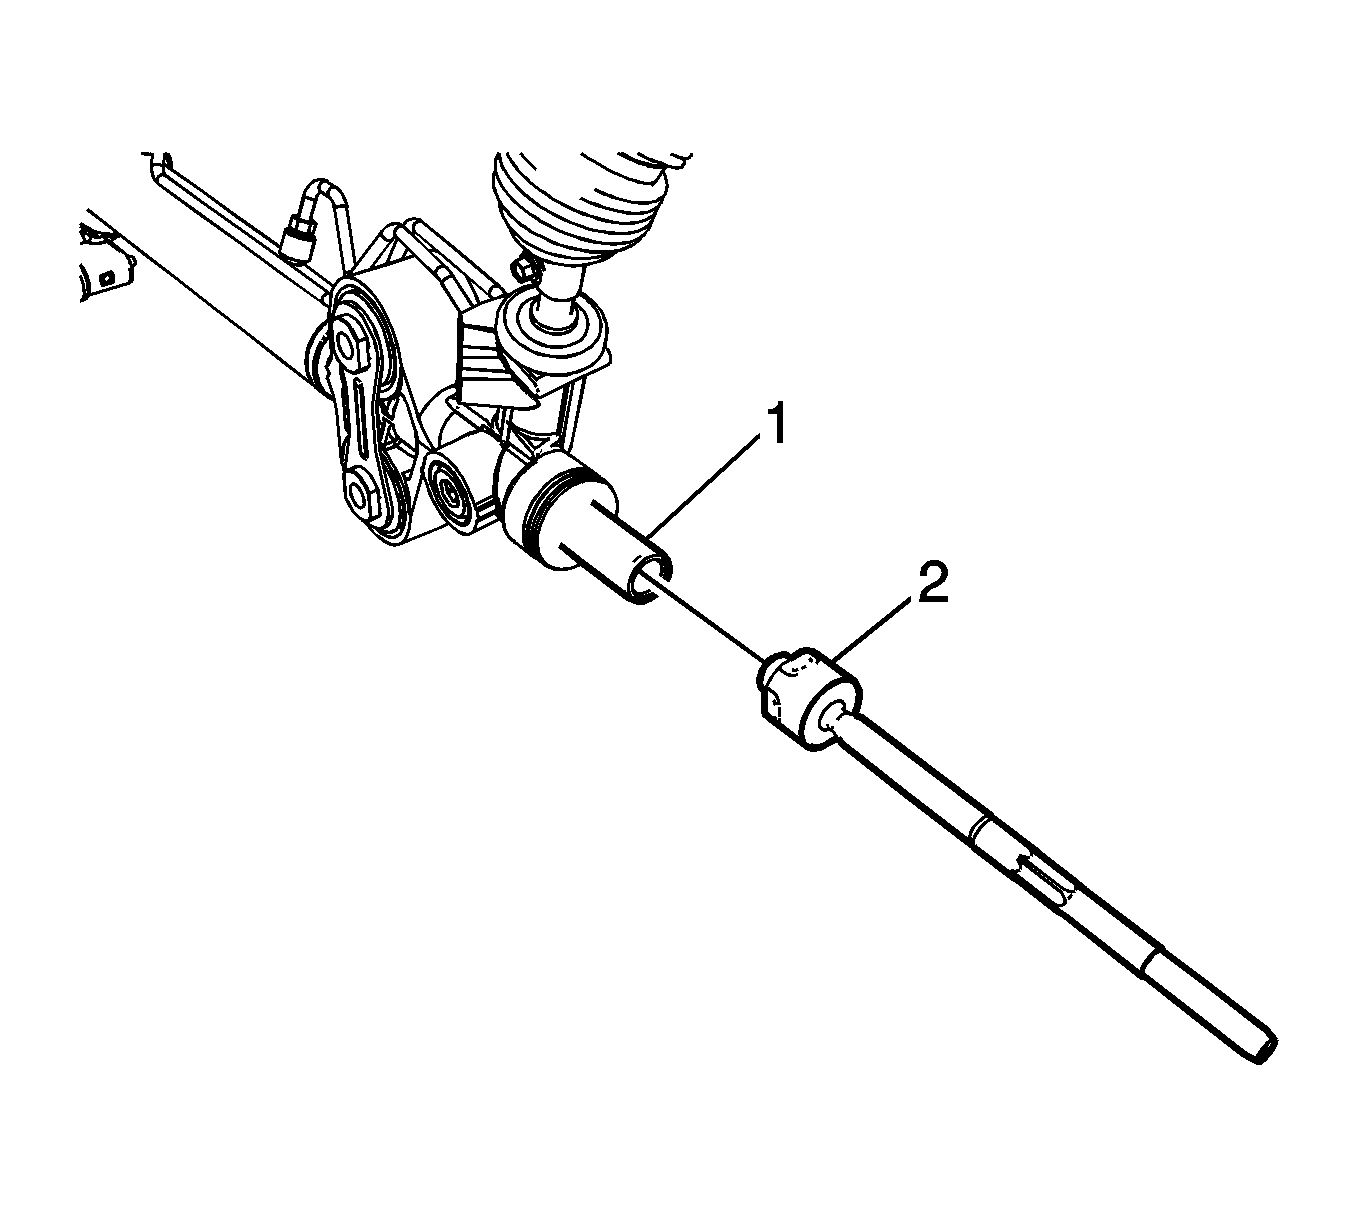
- Place a pipe wrench on the flats on the steering gear rack (1) next to the steering linkage inner tie rod (2).
- Place a wrench on the flats of the steering linkage inner tie rod (2).
- Rotate the steering linkage inner tie rod (2) counterclockwise, while holding the steering gear rack stationary, until the steering linkage inner tie rod separates from the steering gear rack (1).
Note: After removing the steering gear boot, inspect the steering linkage inner tie rod for evidence of corrosion or contamination. If none is evident, continue with the repair. If corrosion or contamination is evident, replace the steering gear.
Caution: Do not change the steering gear preload adjustment before moving the inner tie rod from the steering gear. Changing the steering gear preload adjustment before moving the inner tie rod could result in damage to the pinion and the steering gear.
Caution: The pipe wrench must be placed at the valve end of the steering gear and positioned up against the inner tie rod housing. Placing the pipe wrench in any other location will cause damage to the steering gear.
Installation Procedure
- Apply LOCTITE® 262, or equivalent, to the steering gear inner tie rod threads.
- Attach the steering linkage inner tie rod onto the steering gear rack.
- Place a pipe wrench on the flats on the steering gear rack (1) next to the steering linkage inner tie rod (2).
- Tighten the steering linkage inner tie rod (2).
- Install the steering gear boot. Refer to Steering Gear Boot Replacement - On Vehicle.
Note: All threads must be clean prior to LOCTITE® application. Check the LOCTITE®, or equivalent, container for the expiration date. Use only enough LOCTITE® to evenly coat the threads.

Caution: Refer to Fastener Caution in the Preface section.
Tighten
Tighten the steering linkage inner tie rod to 150 N·m (111 lb ft).
Steering Linkage Inner Tie Rod Replacement Two Mode Hybrid
Special Tools
CH-49009 Inner Tie Rod Wrench
Removal Procedure
- Remove the steering gear boot. Refer to Steering Gear Boot Replacement - On Vehicle.
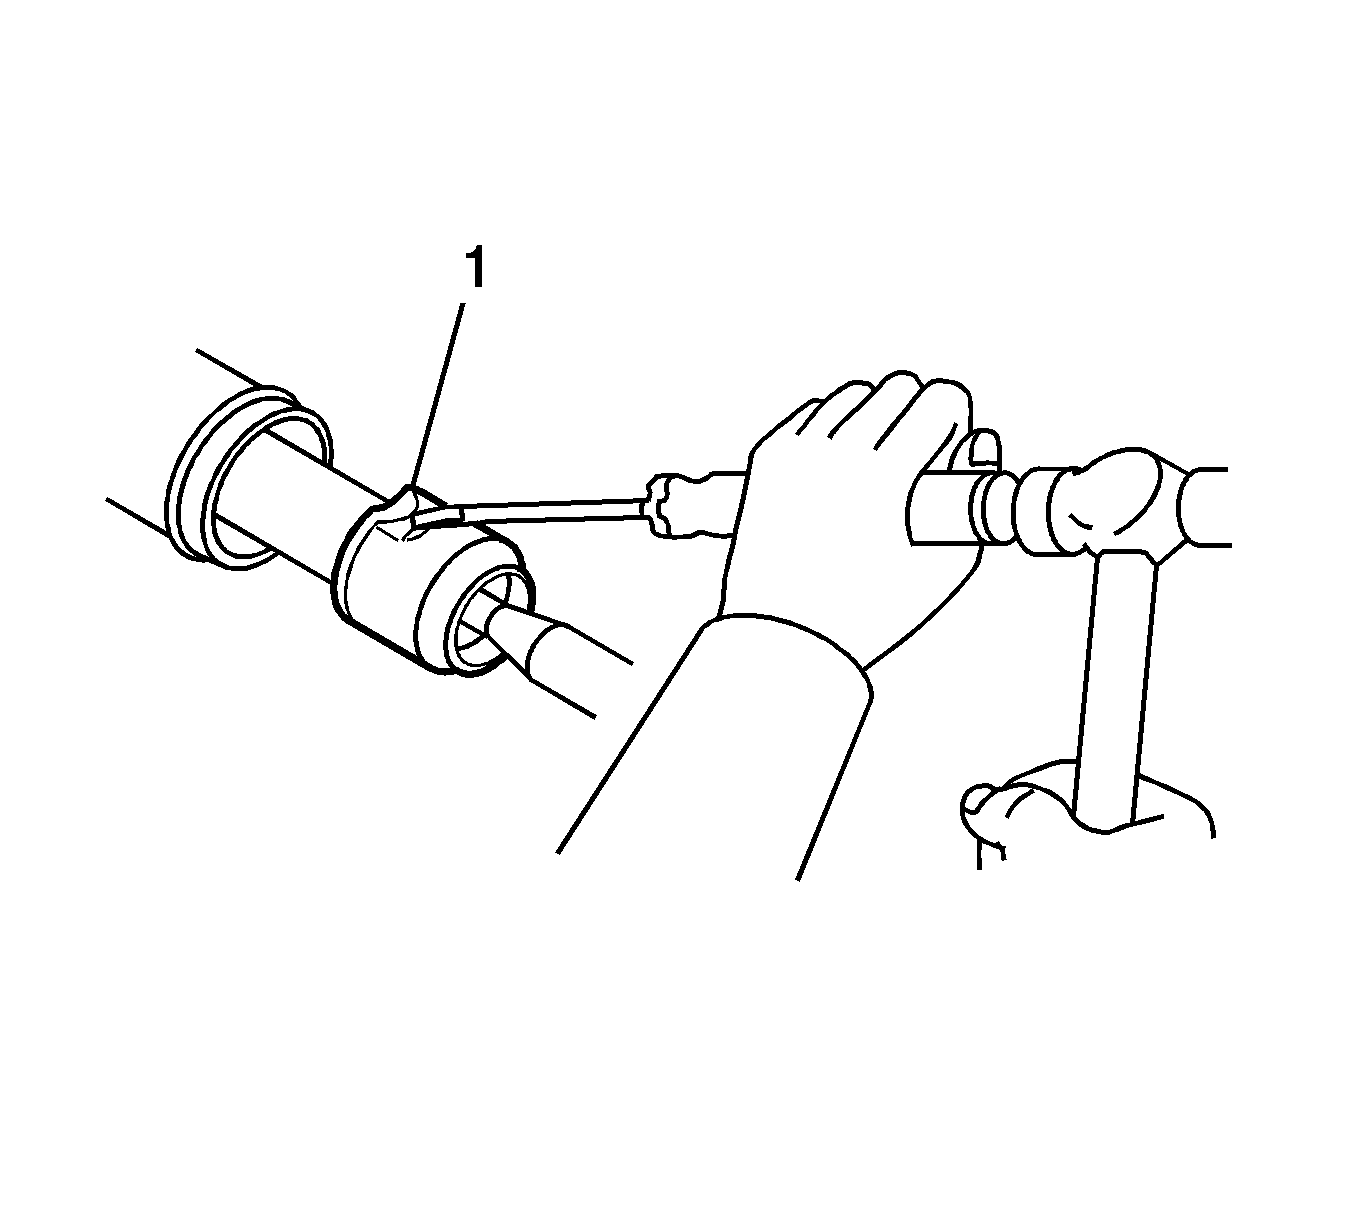
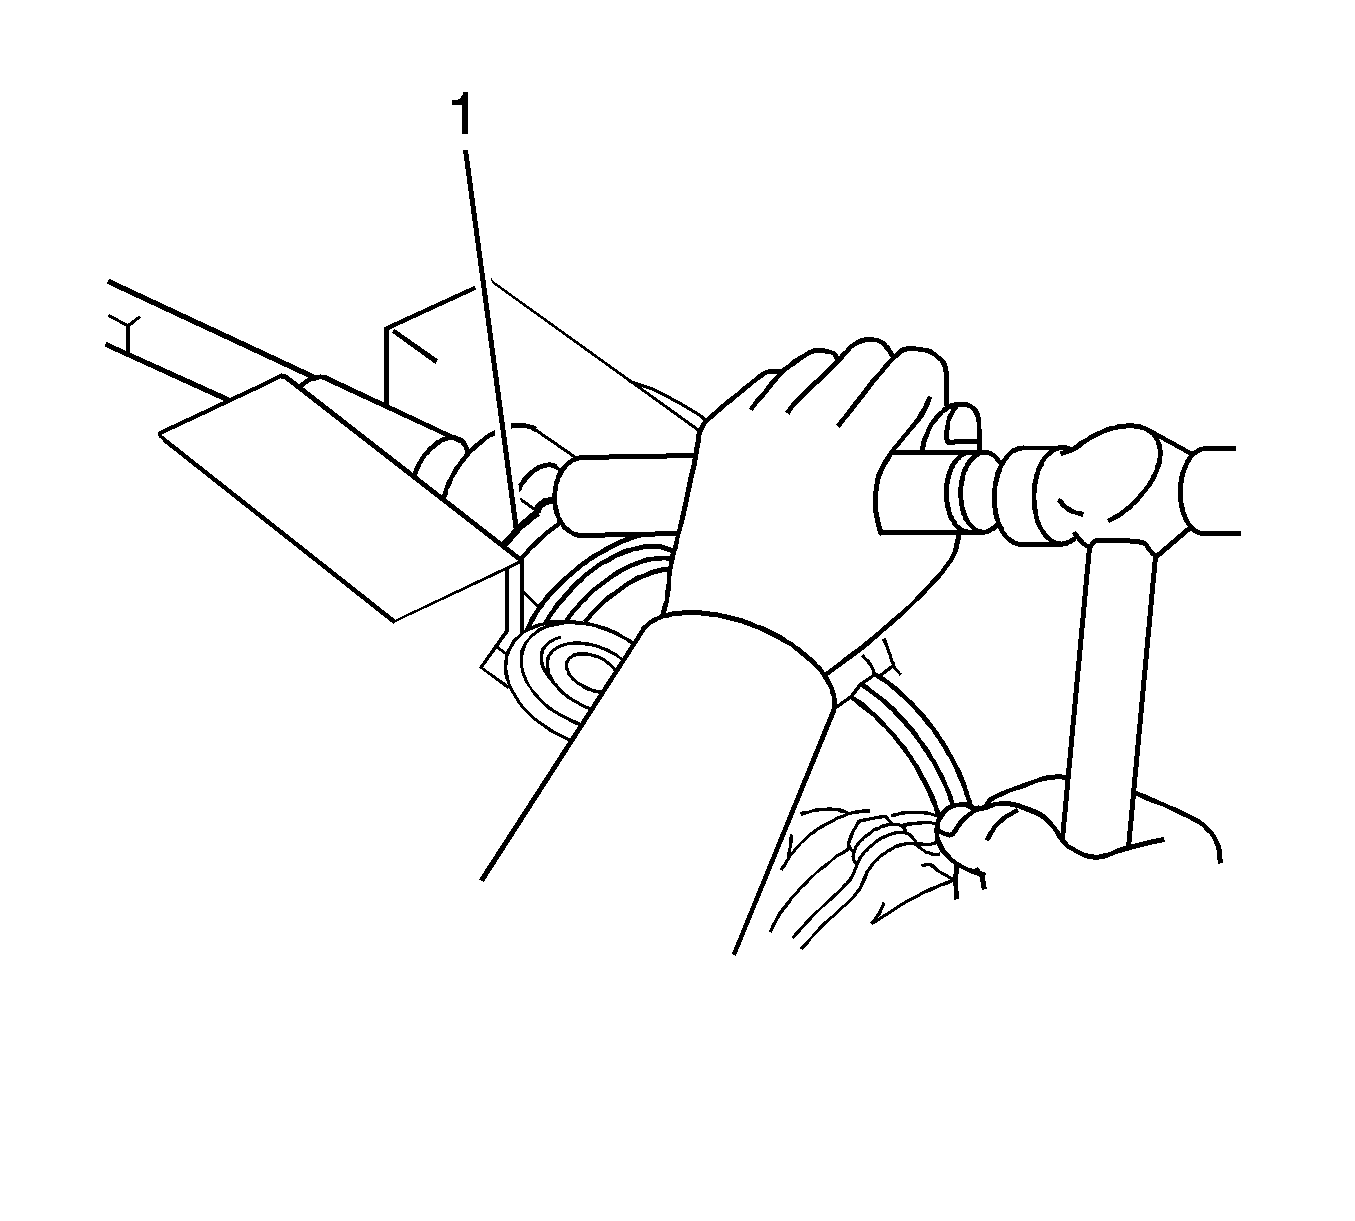
- Disengage the steering linkage inner tie rod washer (1) from the steering linkage inner tie rod.
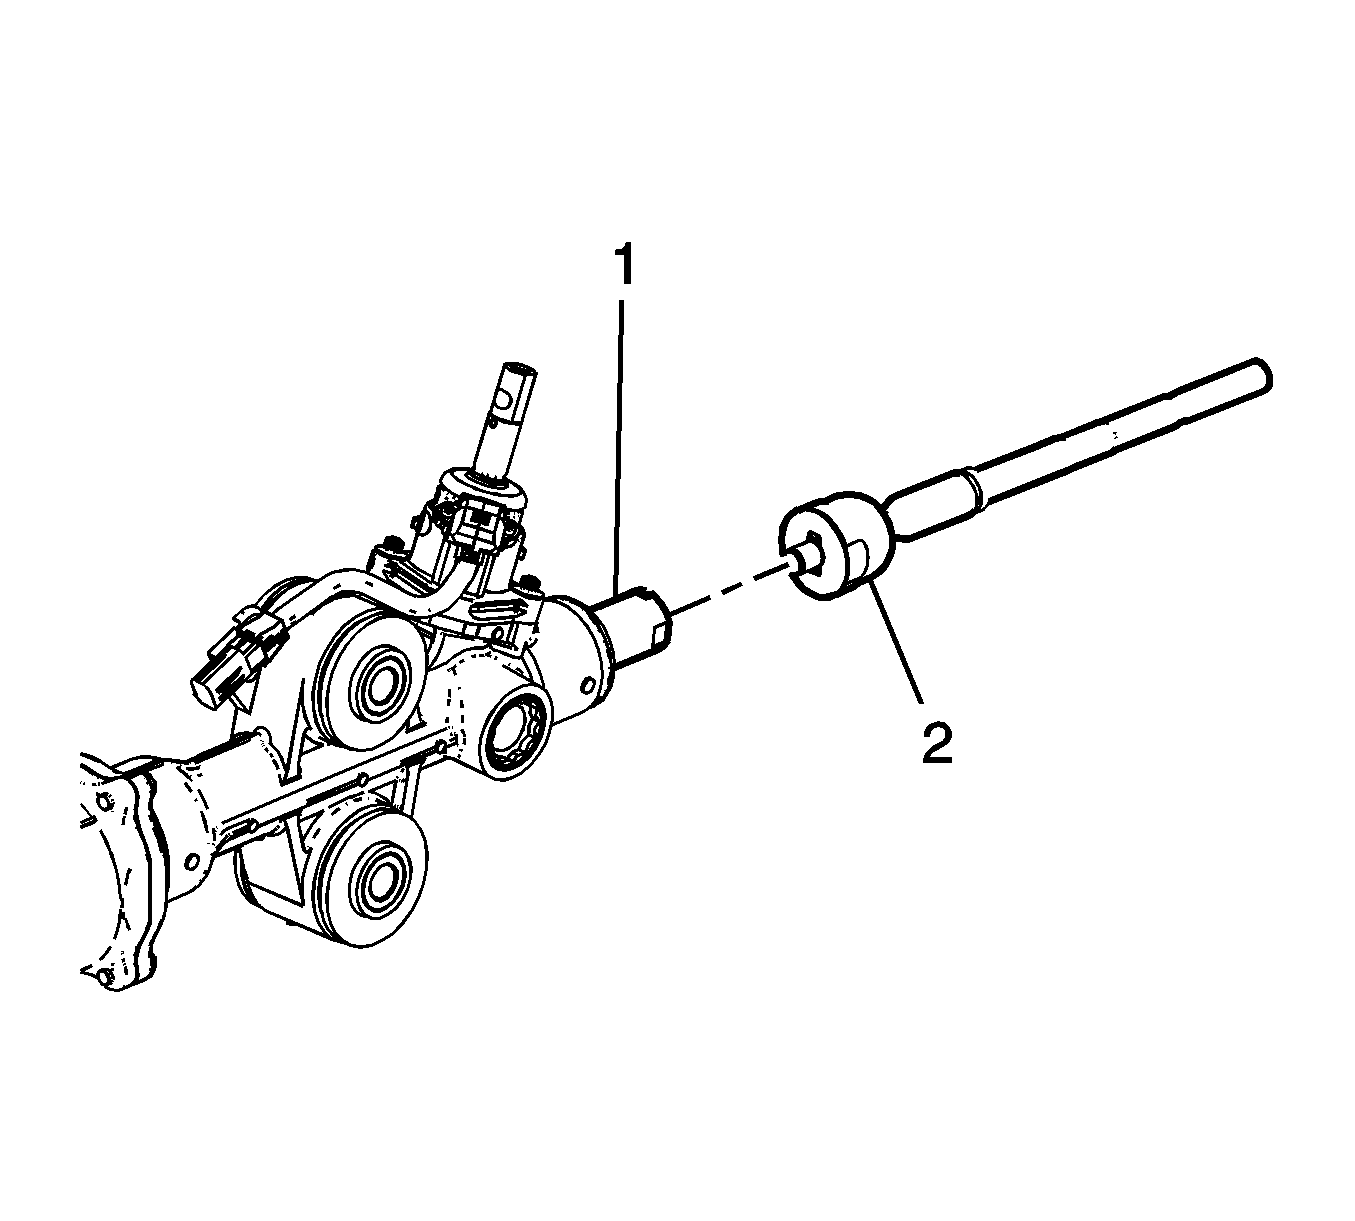
- Rotate the steering linkage inner tie rod (2) counterclockwise while holding the steering gear rack stationary until the steering linkage inner tie rod separates from the steering gear rack (1).
- Discard the steering linkage inner tie rod washer.
Note: After removing the steering gear boot, inspect the steering linkage inner tie rod for evidence of corrosion or contamination. If none is evident, continue with the repair. If corrosion or contamination is evident, replace the steering gear.
Note: The appropriate flats on the steering gear rack are only present on the driver side of the vehicle. If the passenger side steering linkage inner tie rod must be replaced then the steering gear boot must be removed from the driver's side as well in order to hold the steering gear rack from rotating. Replacing the passenger side steering linkage inner tie rod will require two people, one to hold the steering gear rack and one to install the steering linkage inner tie rod.
Caution: Do not change the steering gear preload adjustment before moving the inner tie rod from the steering gear. Changing the steering gear preload adjustment before moving the inner tie rod could result in damage to the pinion and the steering gear.
Note: Note the direction the steering linkage inner tie rod washer is installed. This will be important when installing the new washer.
Installation Procedure
- Install the new steering linkage inner tie rod washer on the steering gear rack.
- Apply LOCTITE® 262 or equivalent to the steering linkage inner tie rod threads.
- Attach the steering linkage inner tie rod to the steering gear rack and hand tighten it.
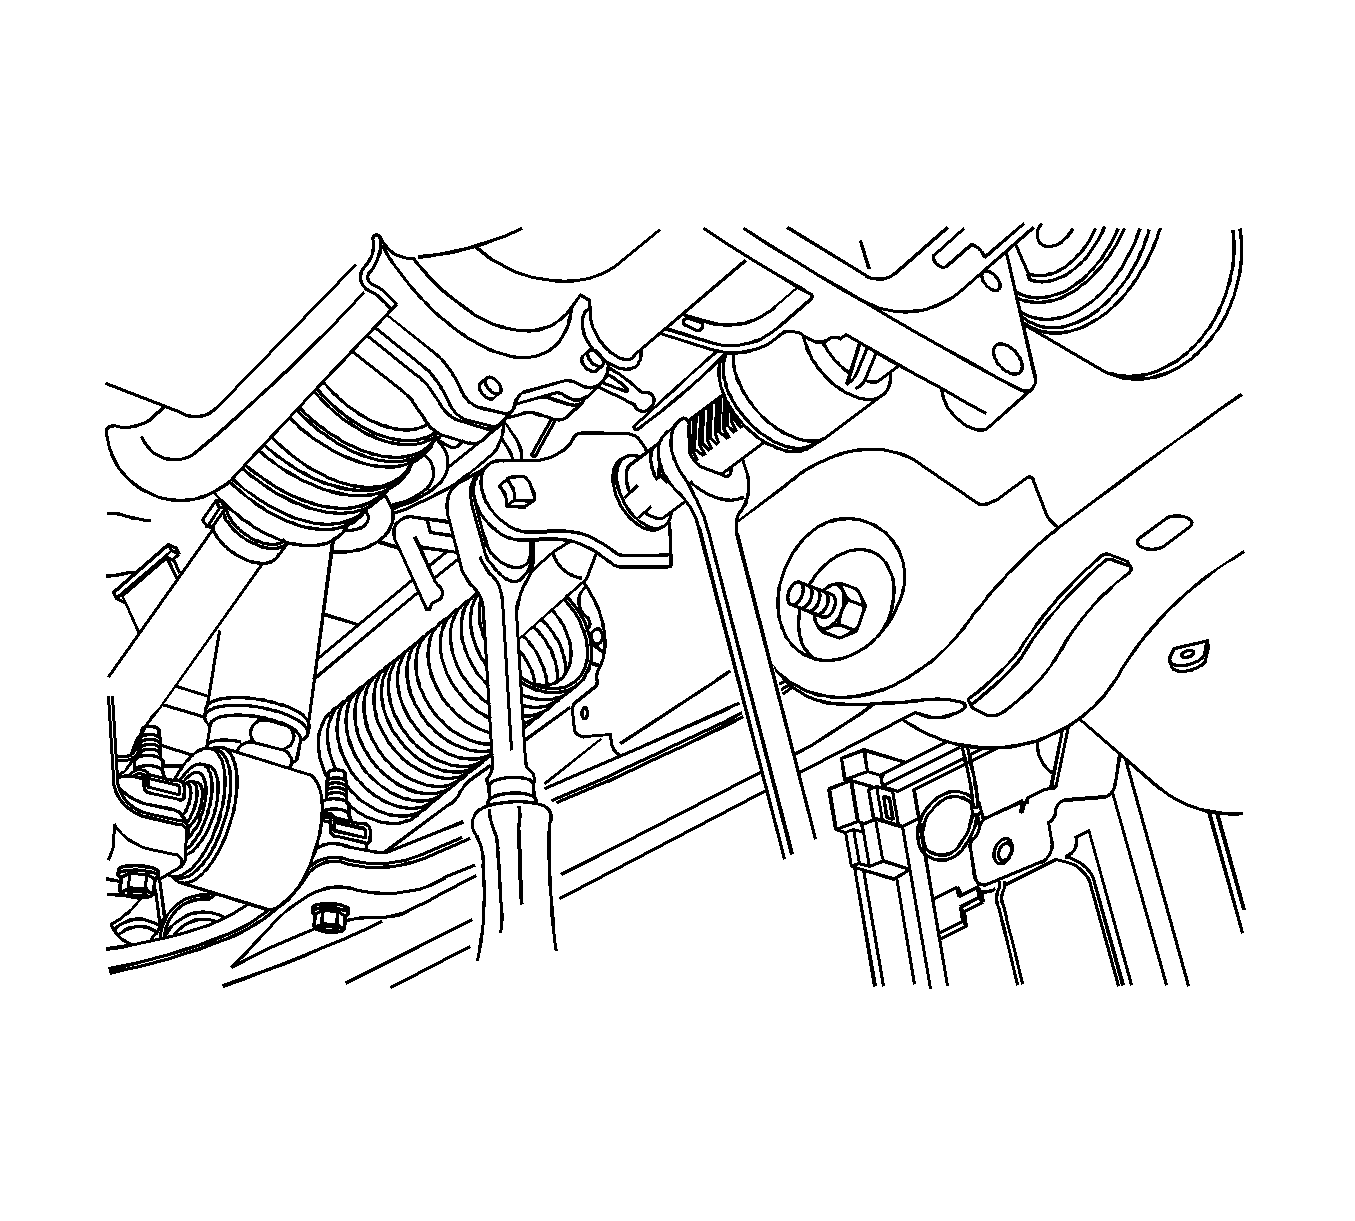
- Tighten the steering linkage inner tie rod using wrench CH-49009 .
- Align the new steering linkage inner tie rod washer (1) to the flats on the steering linkage inner tie rod and bend the tabs over the flats.
- Install the steering gear boot. Refer to Steering Gear Boot Replacement - On Vehicle.
Note: Install the new steering linkage inner tie rod washer in the same direction as noted previously.
Note: All threads must be clean prior to LOCTITE® application. Check the LOCTITE®, or equivalent, container for the expiration date. Use only enough LOCTITE® to evenly coat the threads.
Tighten
Tighten the steering linkage inner tie rod to 145 N·m (107 lb ft).
Note: The appropriate grease must be applied to the small end of the steering gear boot before installation.
