GM Service Manual Online
For 1990-2009 cars only

Rear Floor Panel Carpet Replacement Extended Wheelbase
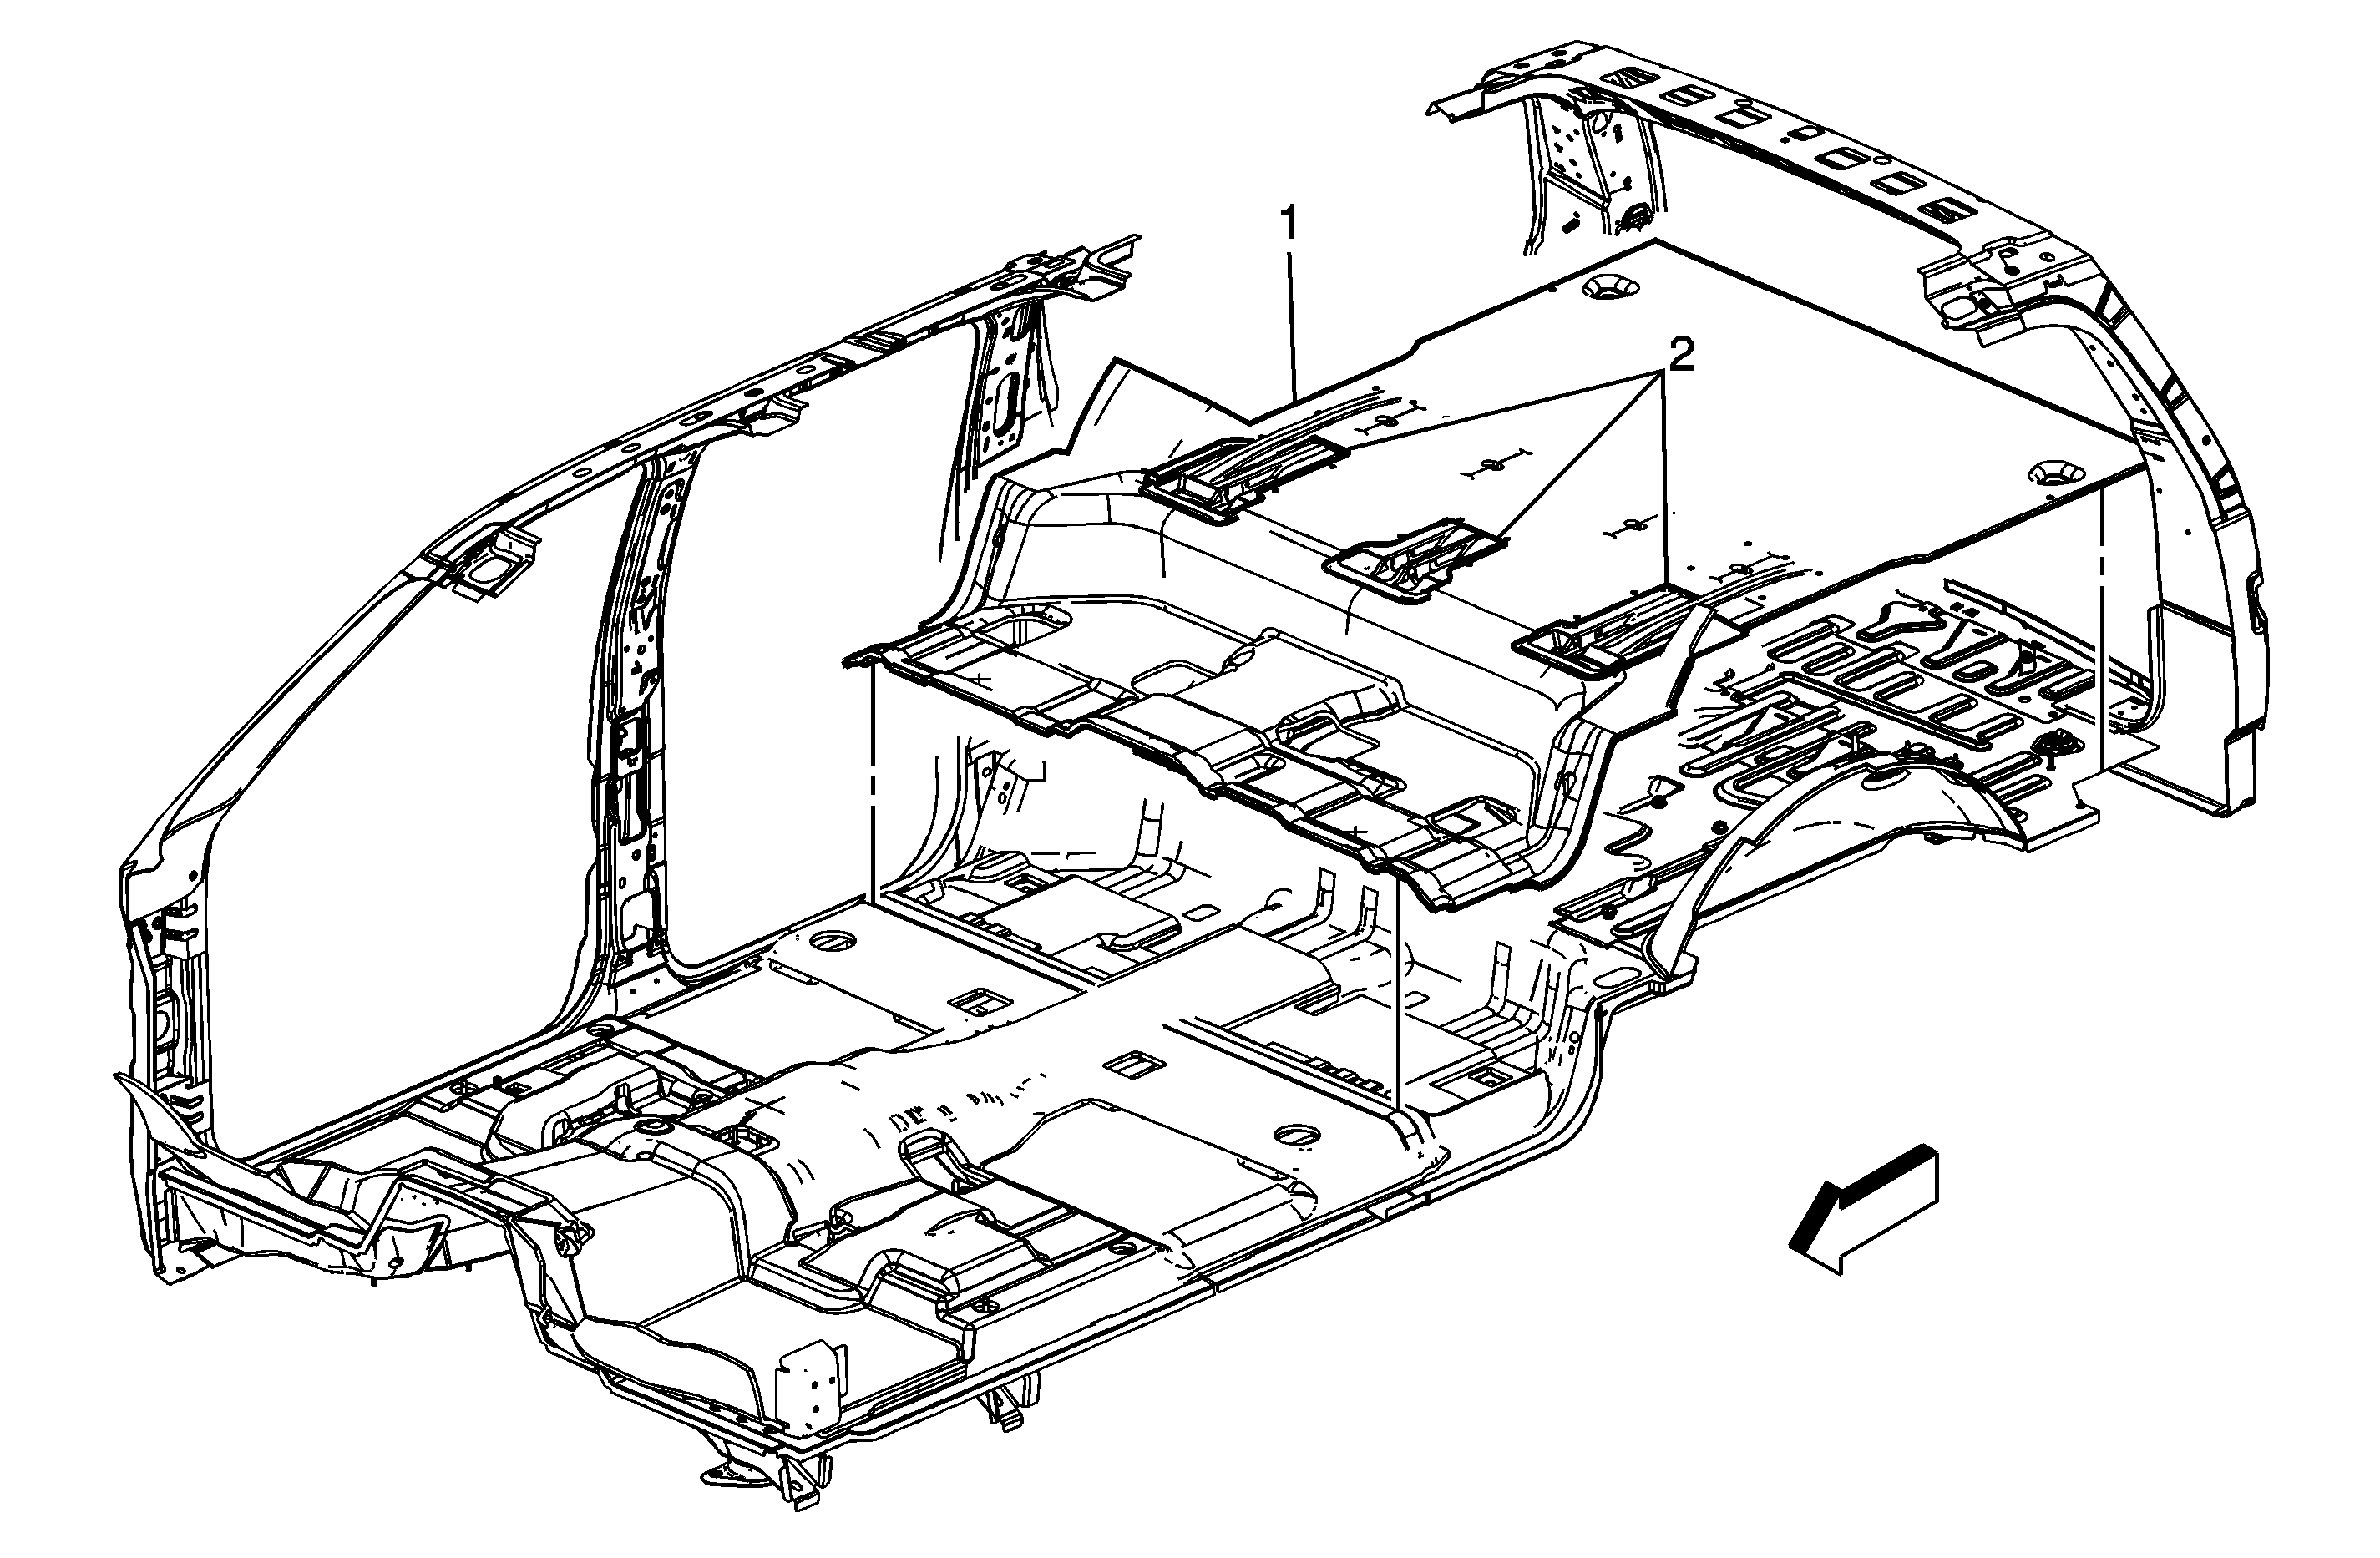

Object Number: 1694599  Size: MF

Callout

Component Name

Preliminary Procedures

  1. Disable the roof rail SIR system. Refer to SIR Disabling and Enabling .
  2. Remove the rear seats. Refer to Rear Seat Replacement and Rear Number 2 Seat Replacement .
  3. Remove the rear seat belt buckles. Refer to Rear Seat Belt Buckle Replacement .
  4. Remove the back body opening molding. Refer to Rear Door Upper Garnish Molding Replacement .
  5. Remove the back rear corner upper molding. Refer to Body Rear Corner Garnish Molding Replacement - Right Side and Body Rear Corner Garnish Molding Replacement - Left Side .
  6. Remove the rear door sill plate. Refer to Rear Side Door Sill Plate Replacement .
  7. Remove the lock pillar molding. Refer to Body Lock Pillar Garnish Molding Replacement .
  8. Remove the body side trim panel. Refer to Rear Quarter Trim Panel Replacement - Left Side and Rear Quarter Trim Panel Replacement - Right Side .

1

Rear Floor Panel Carpet Assembly

2

Rear Floor Panel Carpet Escutcheon

Tip
Escutcheon to be installed prior to locating carpet to floor studs.

Rear Floor Panel Carpet Replacement Standard Wheelbase w/AS3 and AW2
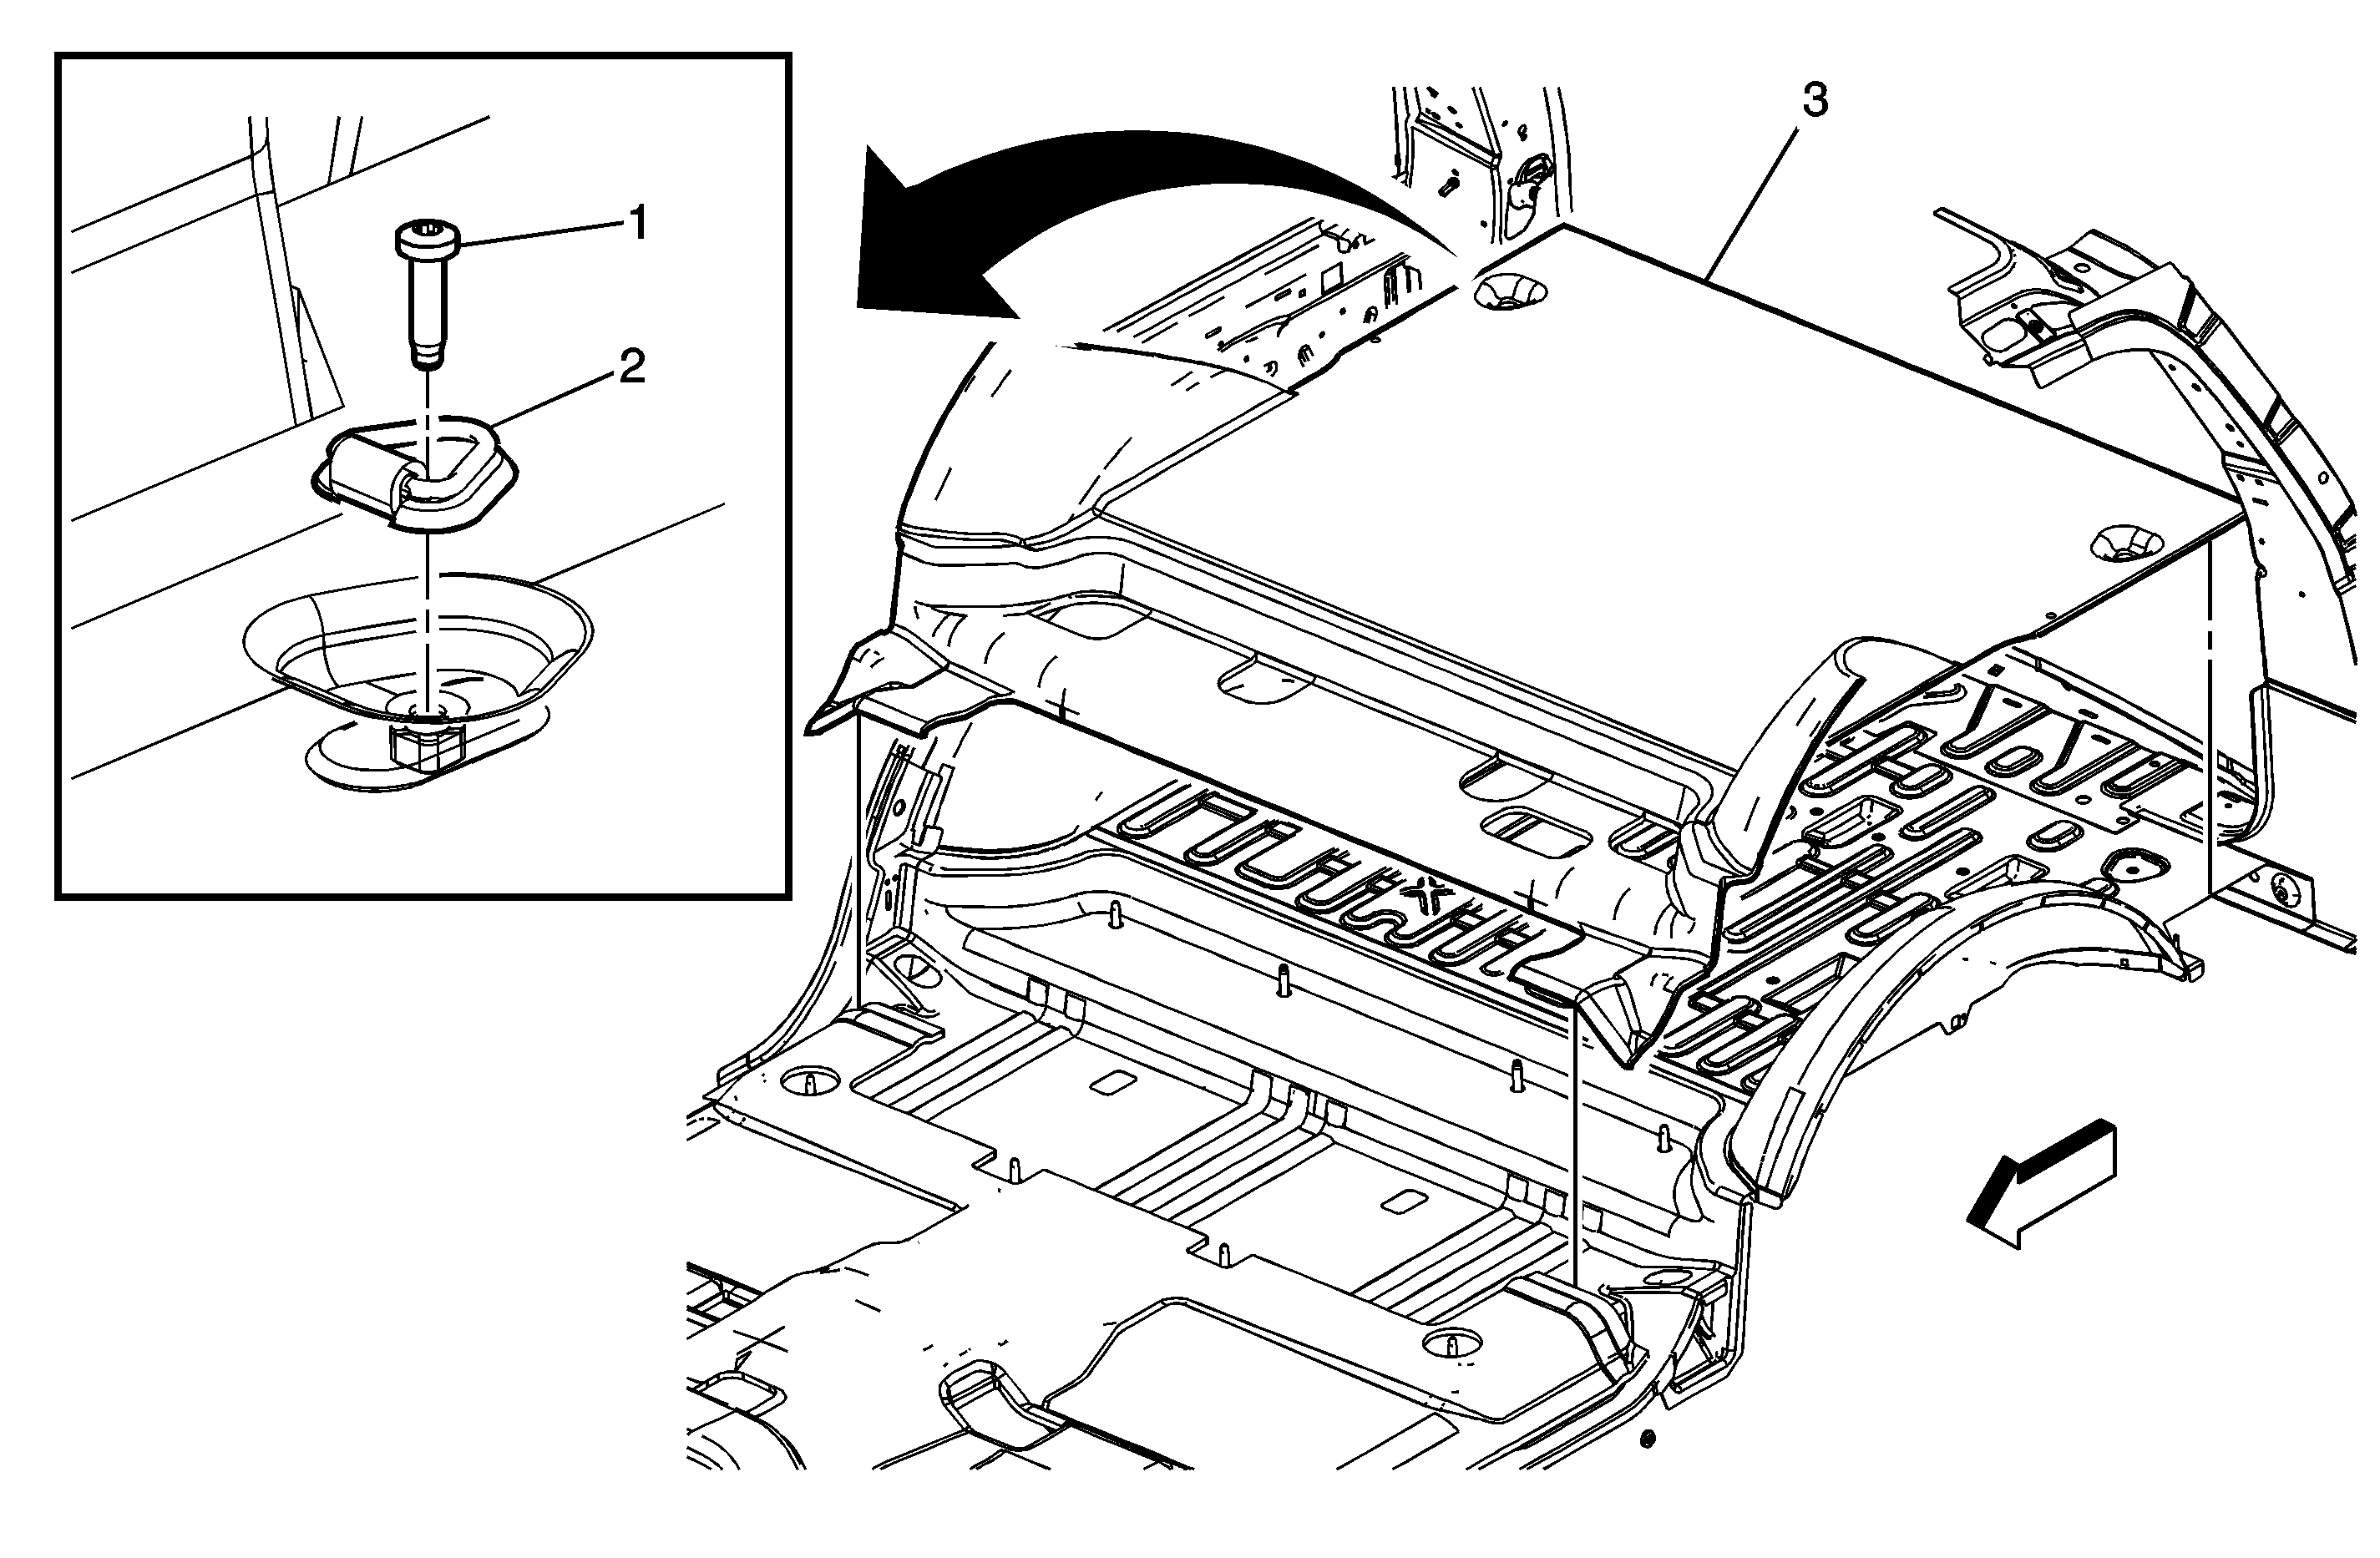

Object Number: 1671343  Size: MF

Callout

Component Name

Preliminary Procedures

  1. Disable the roof rail SIR system. Refer to SIR Disabling and Enabling .
  2. Remove the rear seats. Refer to Rear Seat Replacement and Rear Number 2 Seat Replacement .
  3. Remove the rear seat belt buckles. Refer to Rear Seat Belt Buckle Replacement .
  4. Remove the back body opening molding. Refer to Rear Door Upper Garnish Molding Replacement .
  5. Remove the back rear corner upper molding. Refer to Body Rear Corner Garnish Molding Replacement - Right Side and Body Rear Corner Garnish Molding Replacement - Left Side .
  6. Remove the rear door sill plate. Refer to Rear Side Door Sill Plate Replacement .
  7. Remove the lock pillar molding. Refer to Body Lock Pillar Garnish Molding Replacement .
  8. Remove the body side trim panel. Refer to Rear Quarter Trim Panel Replacement - Left Side and Rear Quarter Trim Panel Replacement - Right Side .

1

Cargo Tie Down Loop Bolt

Notice: Refer to Fastener Notice in the Preface section.

Tighten
35 N·m(25 lb ft)

2

Cargo Tie Down Loop Assembly

3

Rear Floor Panel Carpet Assembly

Rear Floor Panel Carpet Replacement Standard Wheelbase w/o AS3 and AW2
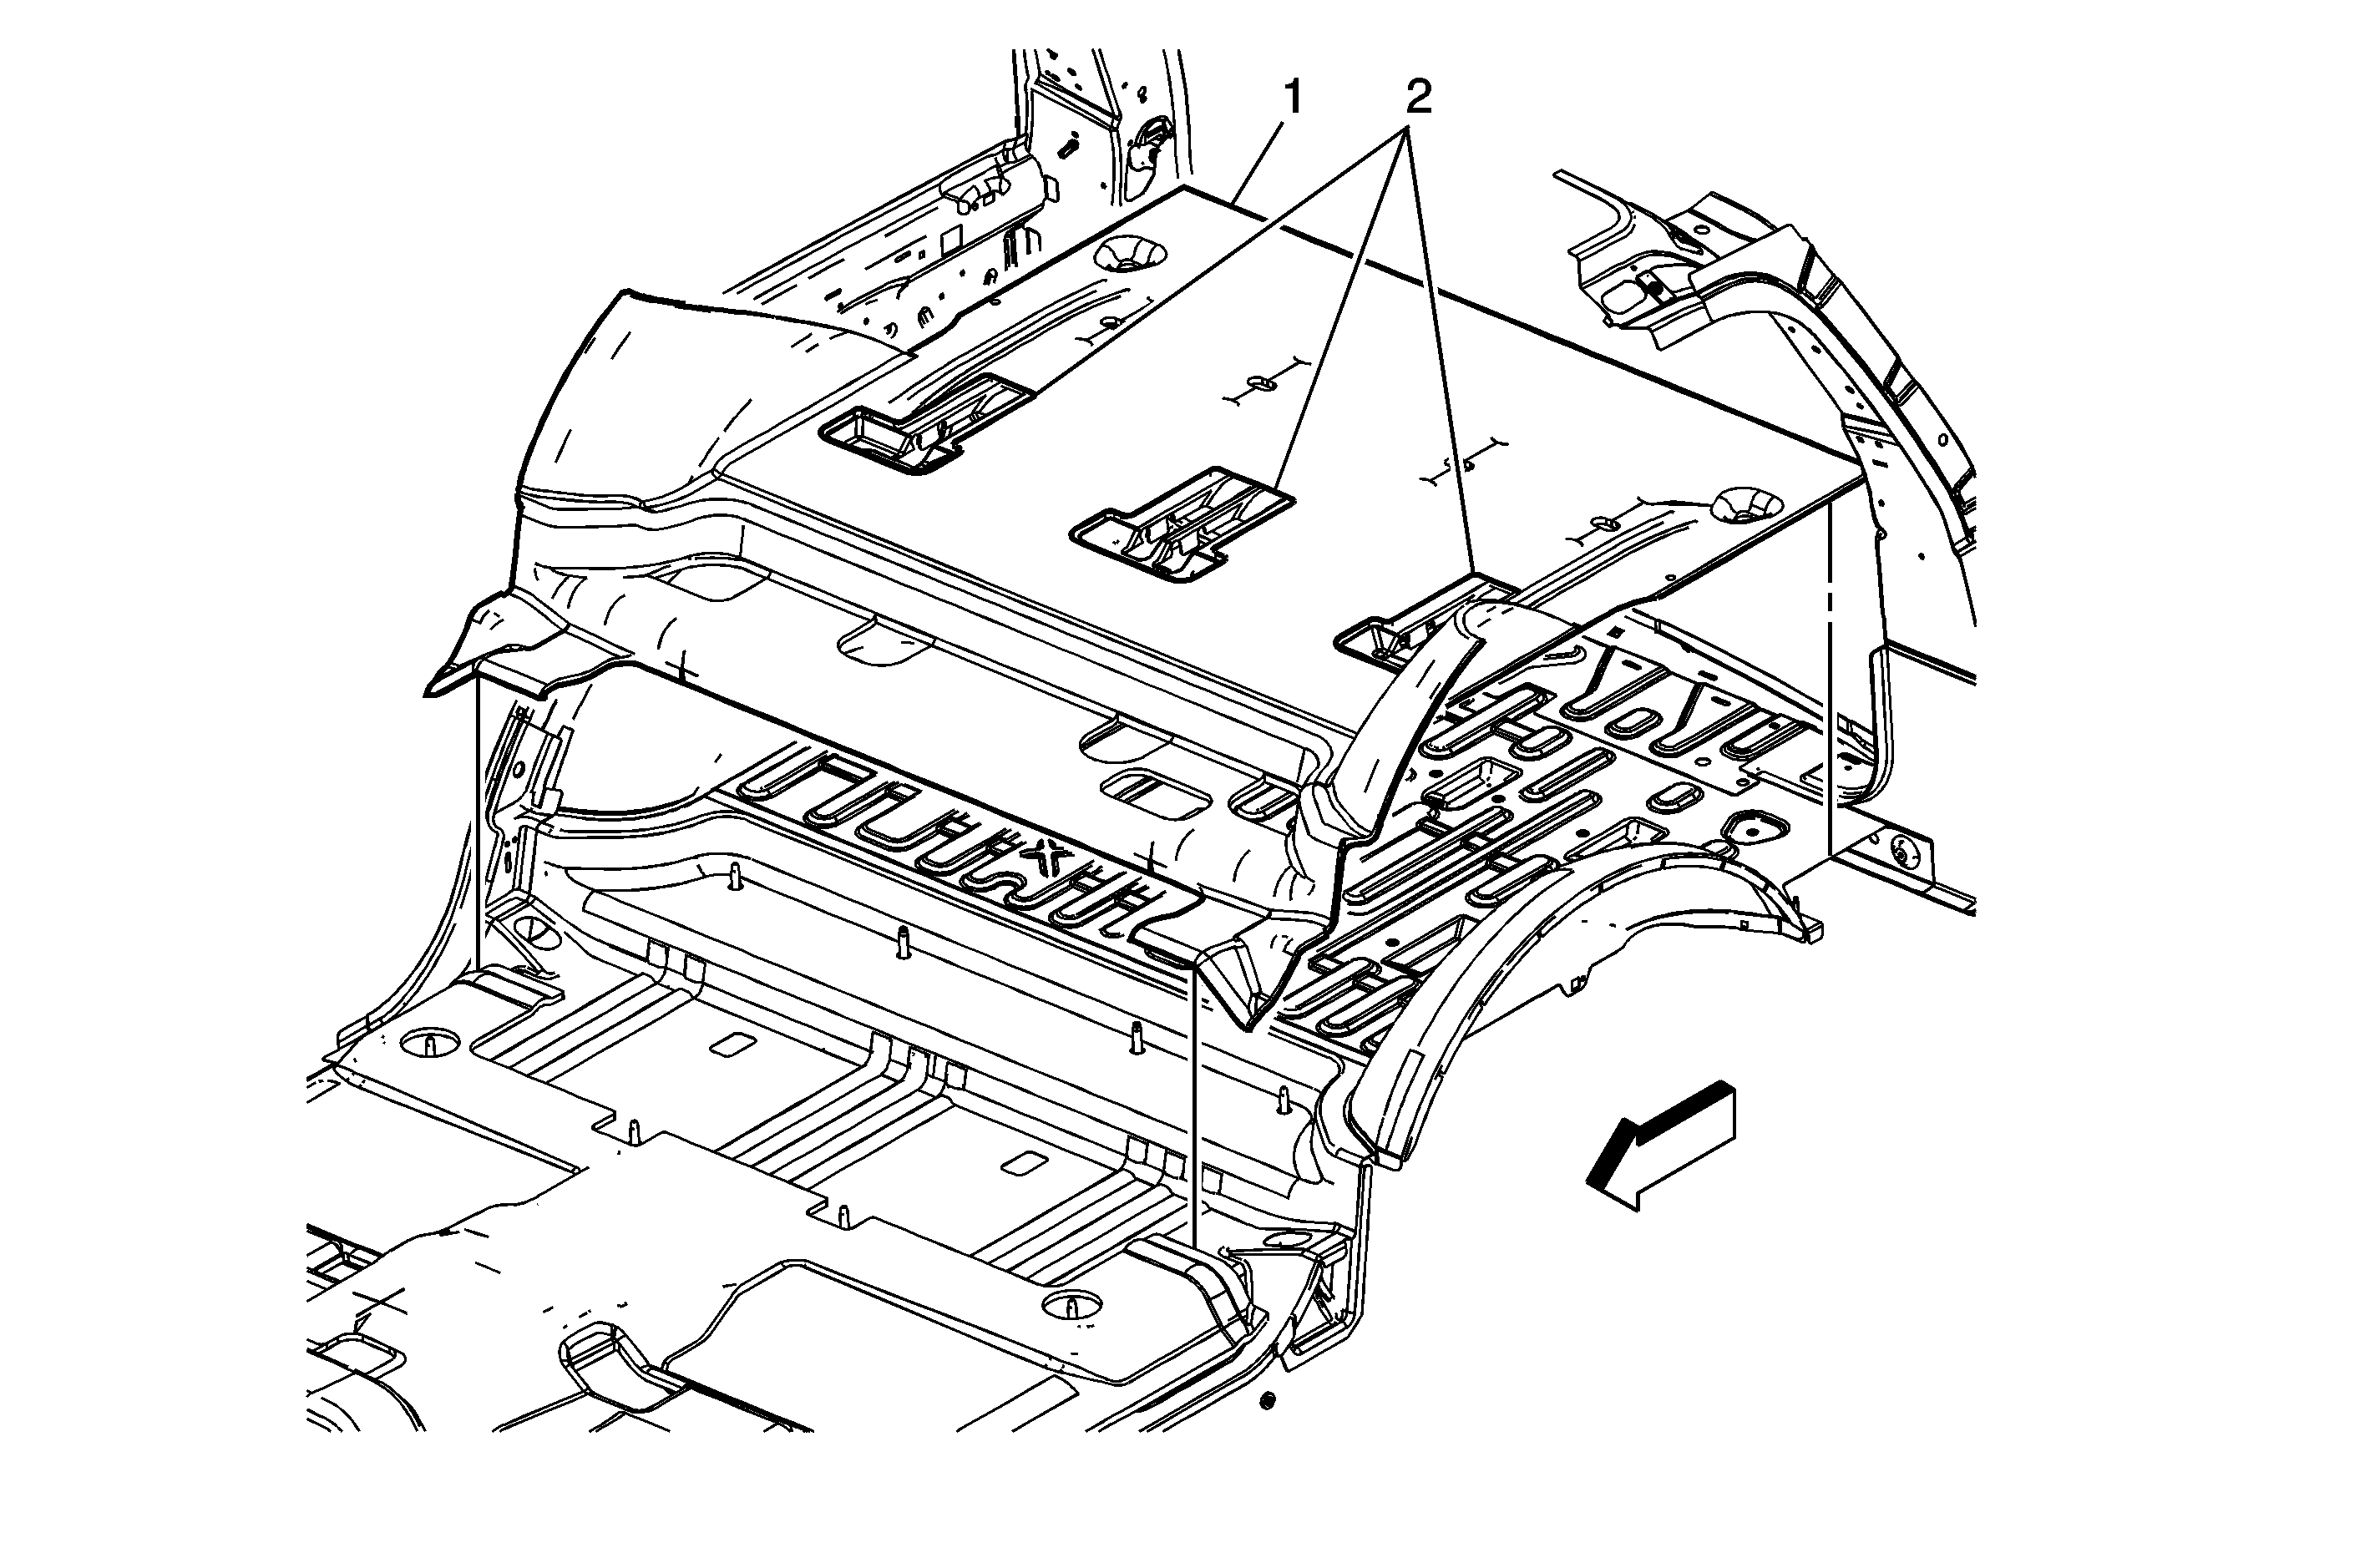

Object Number: 1671388  Size: MF

Callout

Component Name

Preliminary Procedures

  1. Disable the roof rail SIR system. Refer to SIR Disabling and Enabling .
  2. Remove the rear seats. Refer to Rear Seat Replacement and Rear Number 2 Seat Replacement .
  3. Remove the rear seat belt buckles. Refer to Rear Seat Belt Buckle Replacement .
  4. Remove the back body opening molding. Refer to Rear Door Upper Garnish Molding Replacement .
  5. Remove the back rear corner upper molding. Refer to Body Rear Corner Garnish Molding Replacement - Right Side and Body Rear Corner Garnish Molding Replacement - Left Side .
  6. Remove the rear door sill plate. Refer to Rear Side Door Sill Plate Replacement .
  7. Remove the lock pillar molding. Refer to Body Lock Pillar Garnish Molding Replacement .
  8. Remove the body side trim panel. Refer to Rear Quarter Trim Panel Replacement - Left Side and Rear Quarter Trim Panel Replacement - Right Side .

1

Rear Floor Panel Carpet Assembly

2

Rear Floor Panel Carpet Escutcheon

Tip
Escutcheon to be installed prior to locating carpet to floor studs.