For 1990-2009 cars only
Removal Procedure
- Raise and support the vehicle. Refer to Lifting and Jacking the Vehicle.
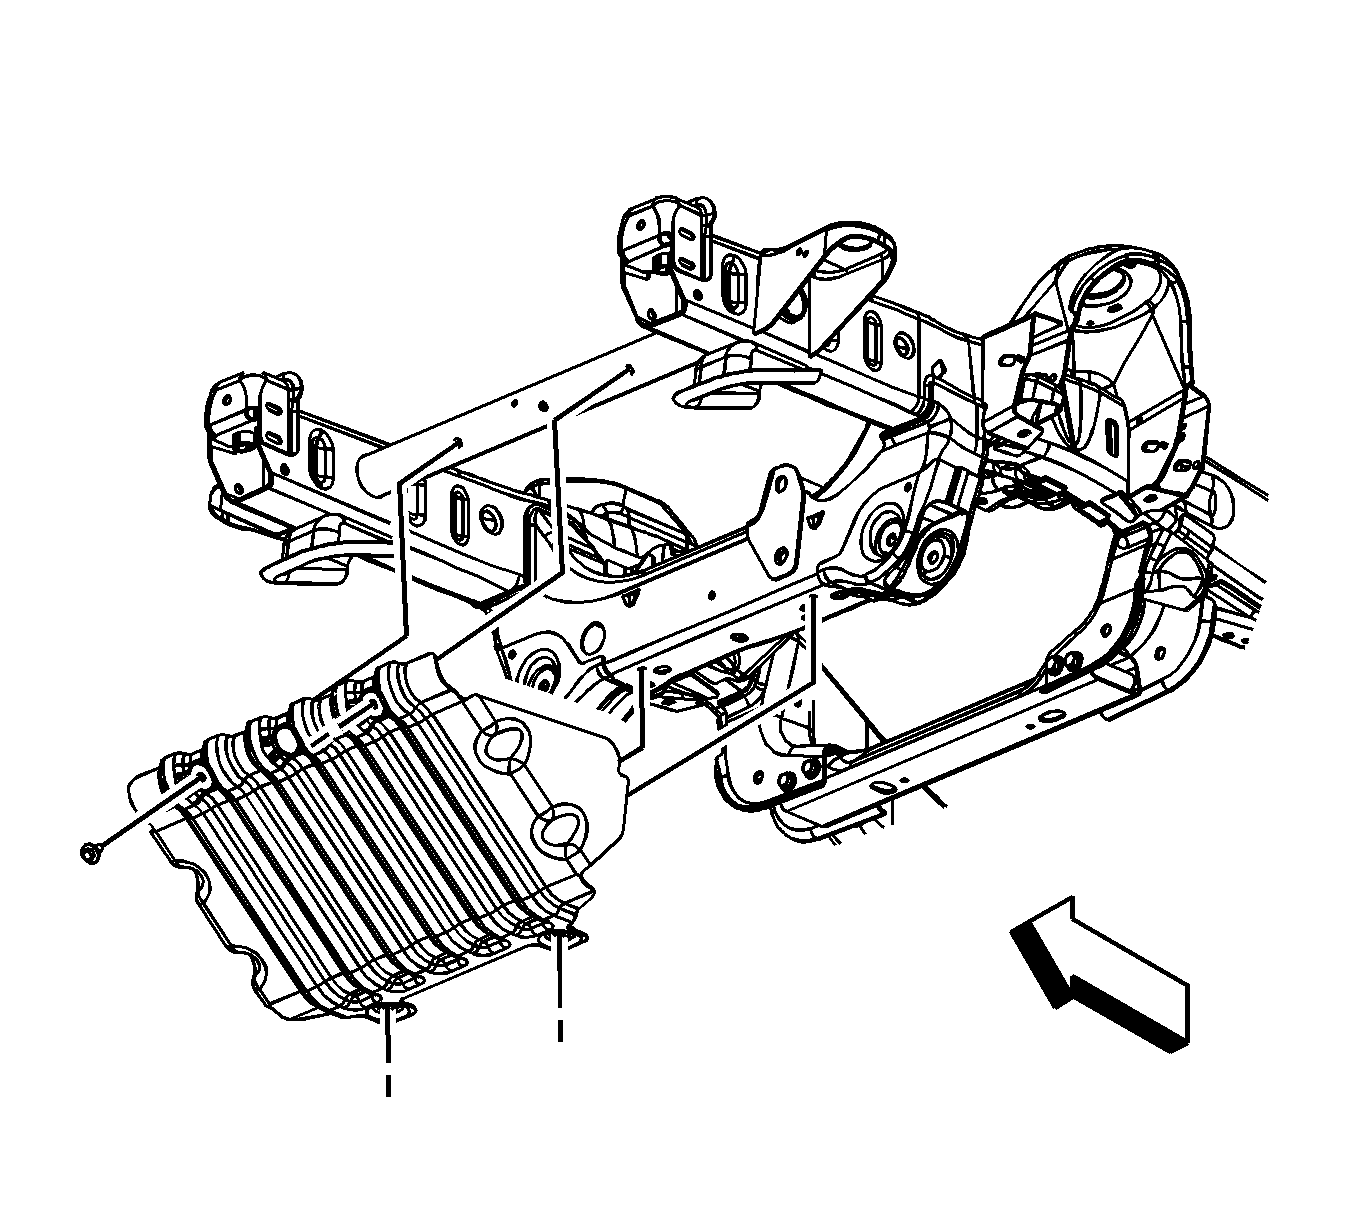
- Remove the engine shield bolts and shield, if necessary.
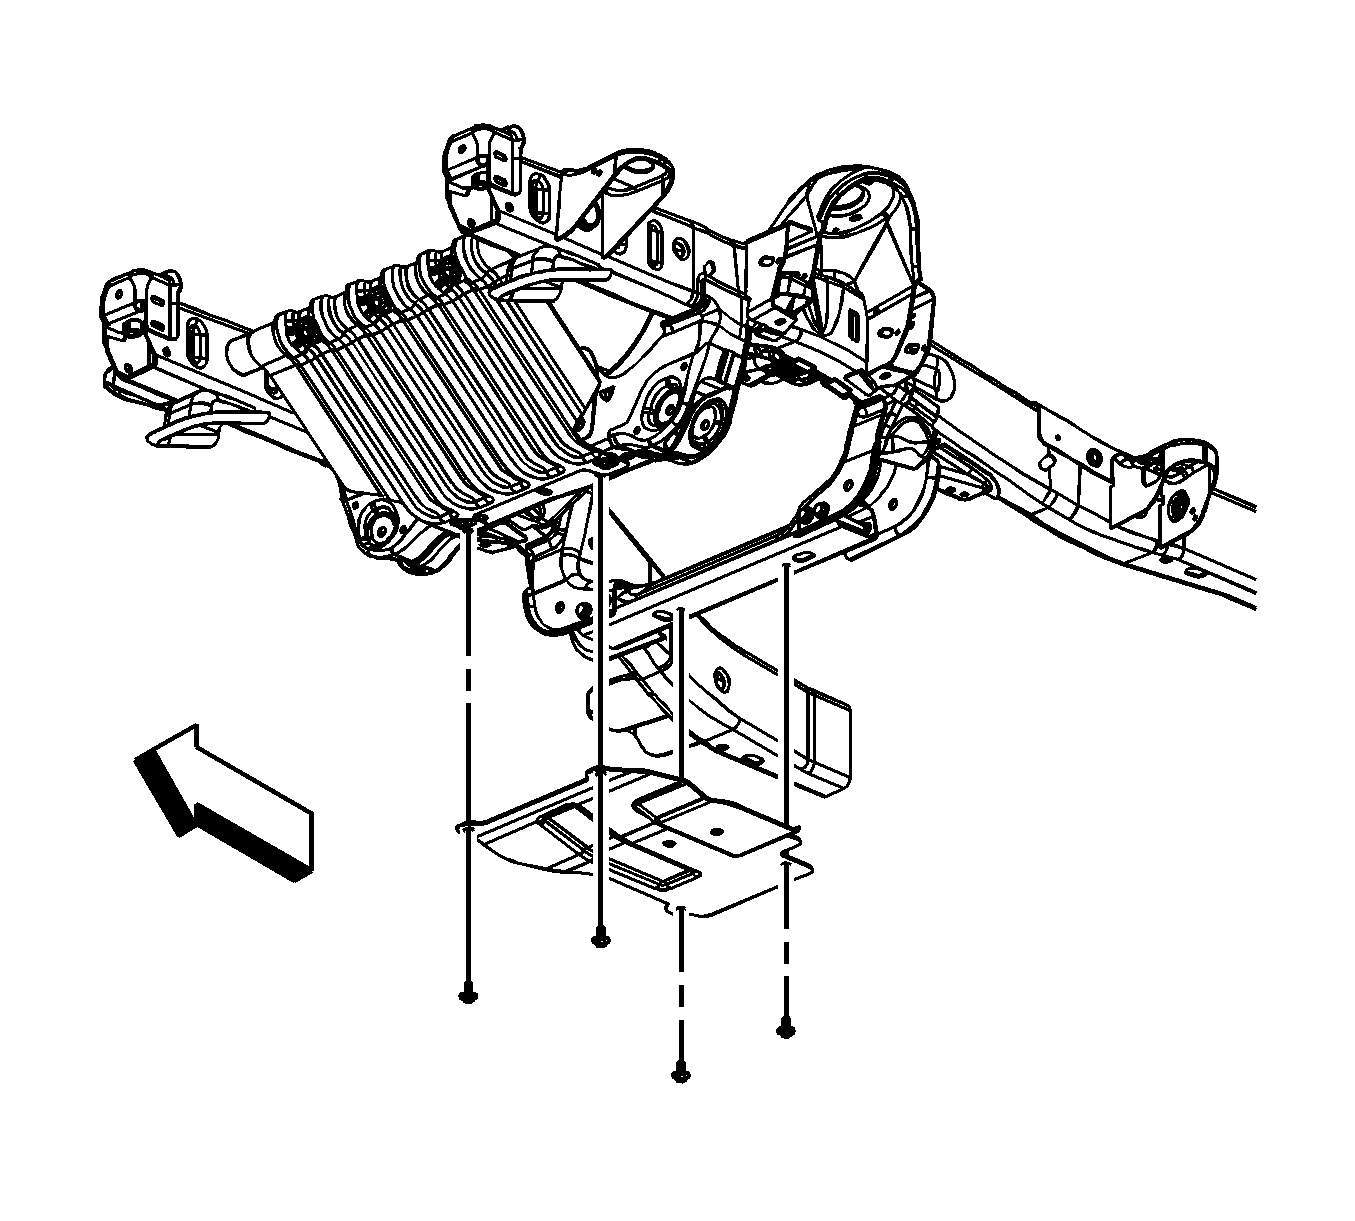
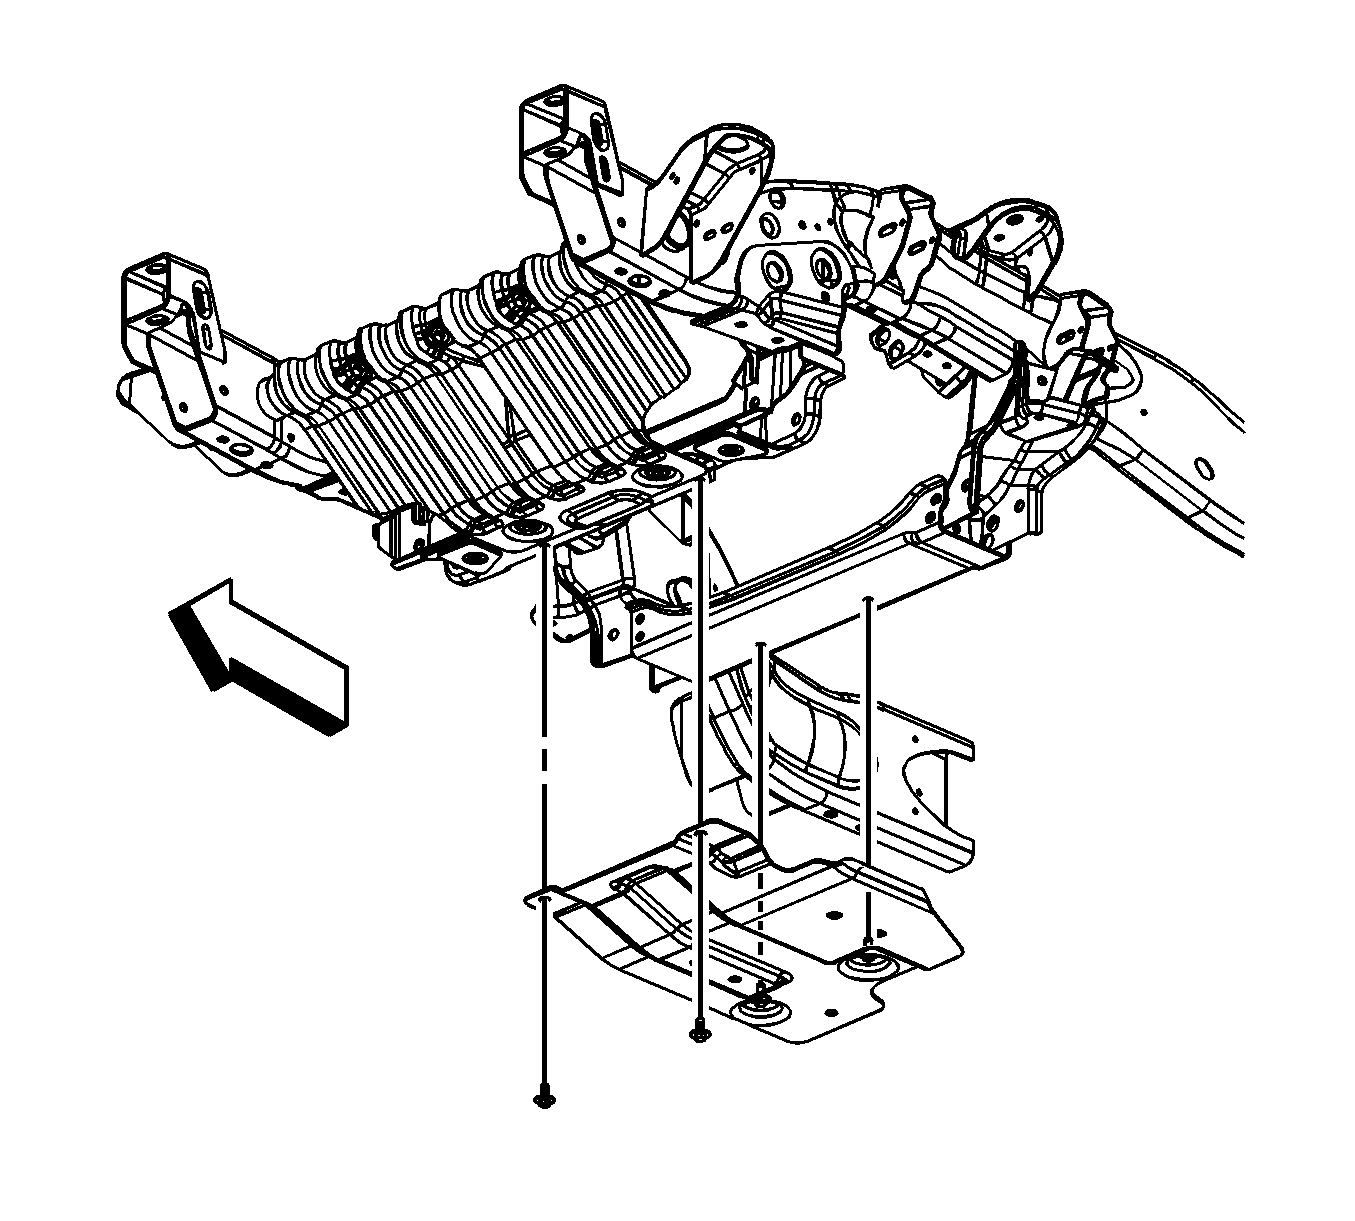
- For 1500 series vehicles, remove the oil pan skid plate bolts and skid plate, if equipped.
- For 2500 series vehicles, loosen the 2 rear oil pan skid plate bolts, remove the 2 front oil pan skid plate bolts and skid plate, if equipped.
- Remove the catalytic converter, if required. Refer to one of the following:
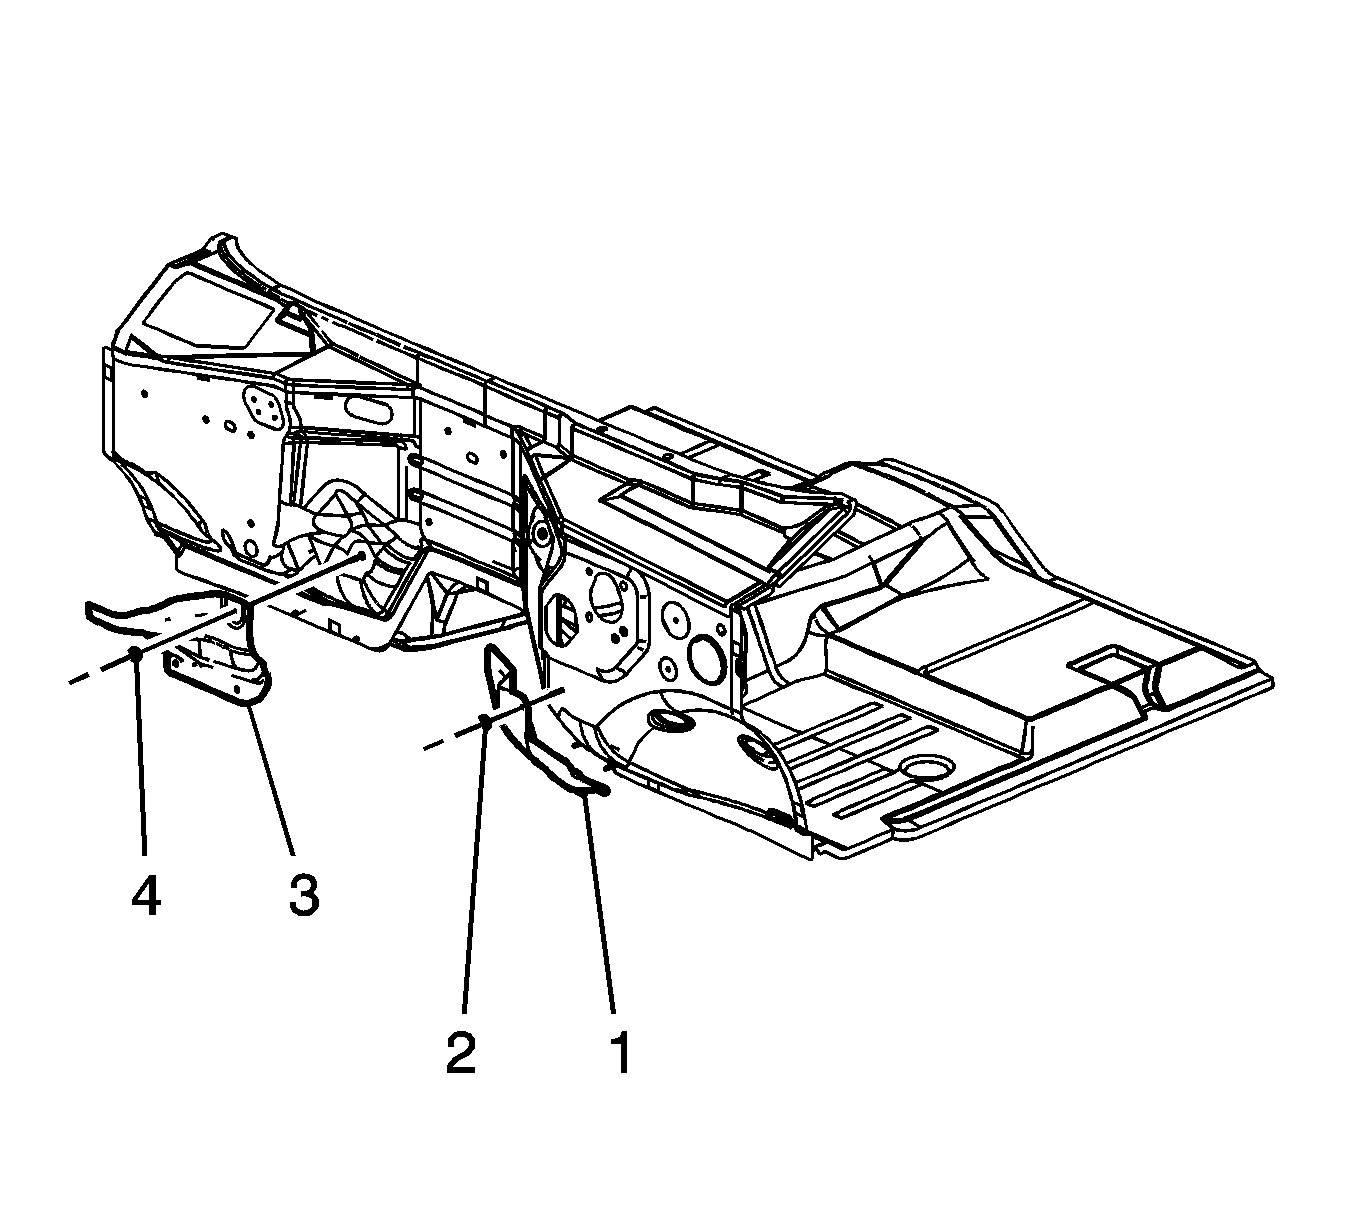
- Remove the dash panel exhaust heat shield nuts (2 or 4).
- Remove the dash panel exhaust heat shield (1 or 3) from the dash panel studs.


Installation Procedure
- Install the dash panel exhaust heat shield (1 or 3) to the dash panel studs.
- Install the dash panel exhaust heat shield nuts (2 or 4) and tighten to 9 N·m (80 lb in).
- Install the catalytic converter, if required. Refer to one of the following:
- For 2500 series vehicles, position the oil pan skid plate and tighten until snug the 2 rear oil pan skid plate bolts. Install the 2 front oil pan skid plate bolts, if equipped and tighten the bolts to 28 N·m (21 lb ft)
- For 1500 series vehicles, position the oil pan skid plate and install the oil pan skid plate bolts, if equipped and tighten to 28 N·m (21 lb ft).
- Position the engine shield to the frame.
- Install and tighten the engine shield bolts and tighten to 20 N·m (15 lb ft).
- Lower the vehicle.

Caution: Refer to Fastener Caution in the Preface section.


