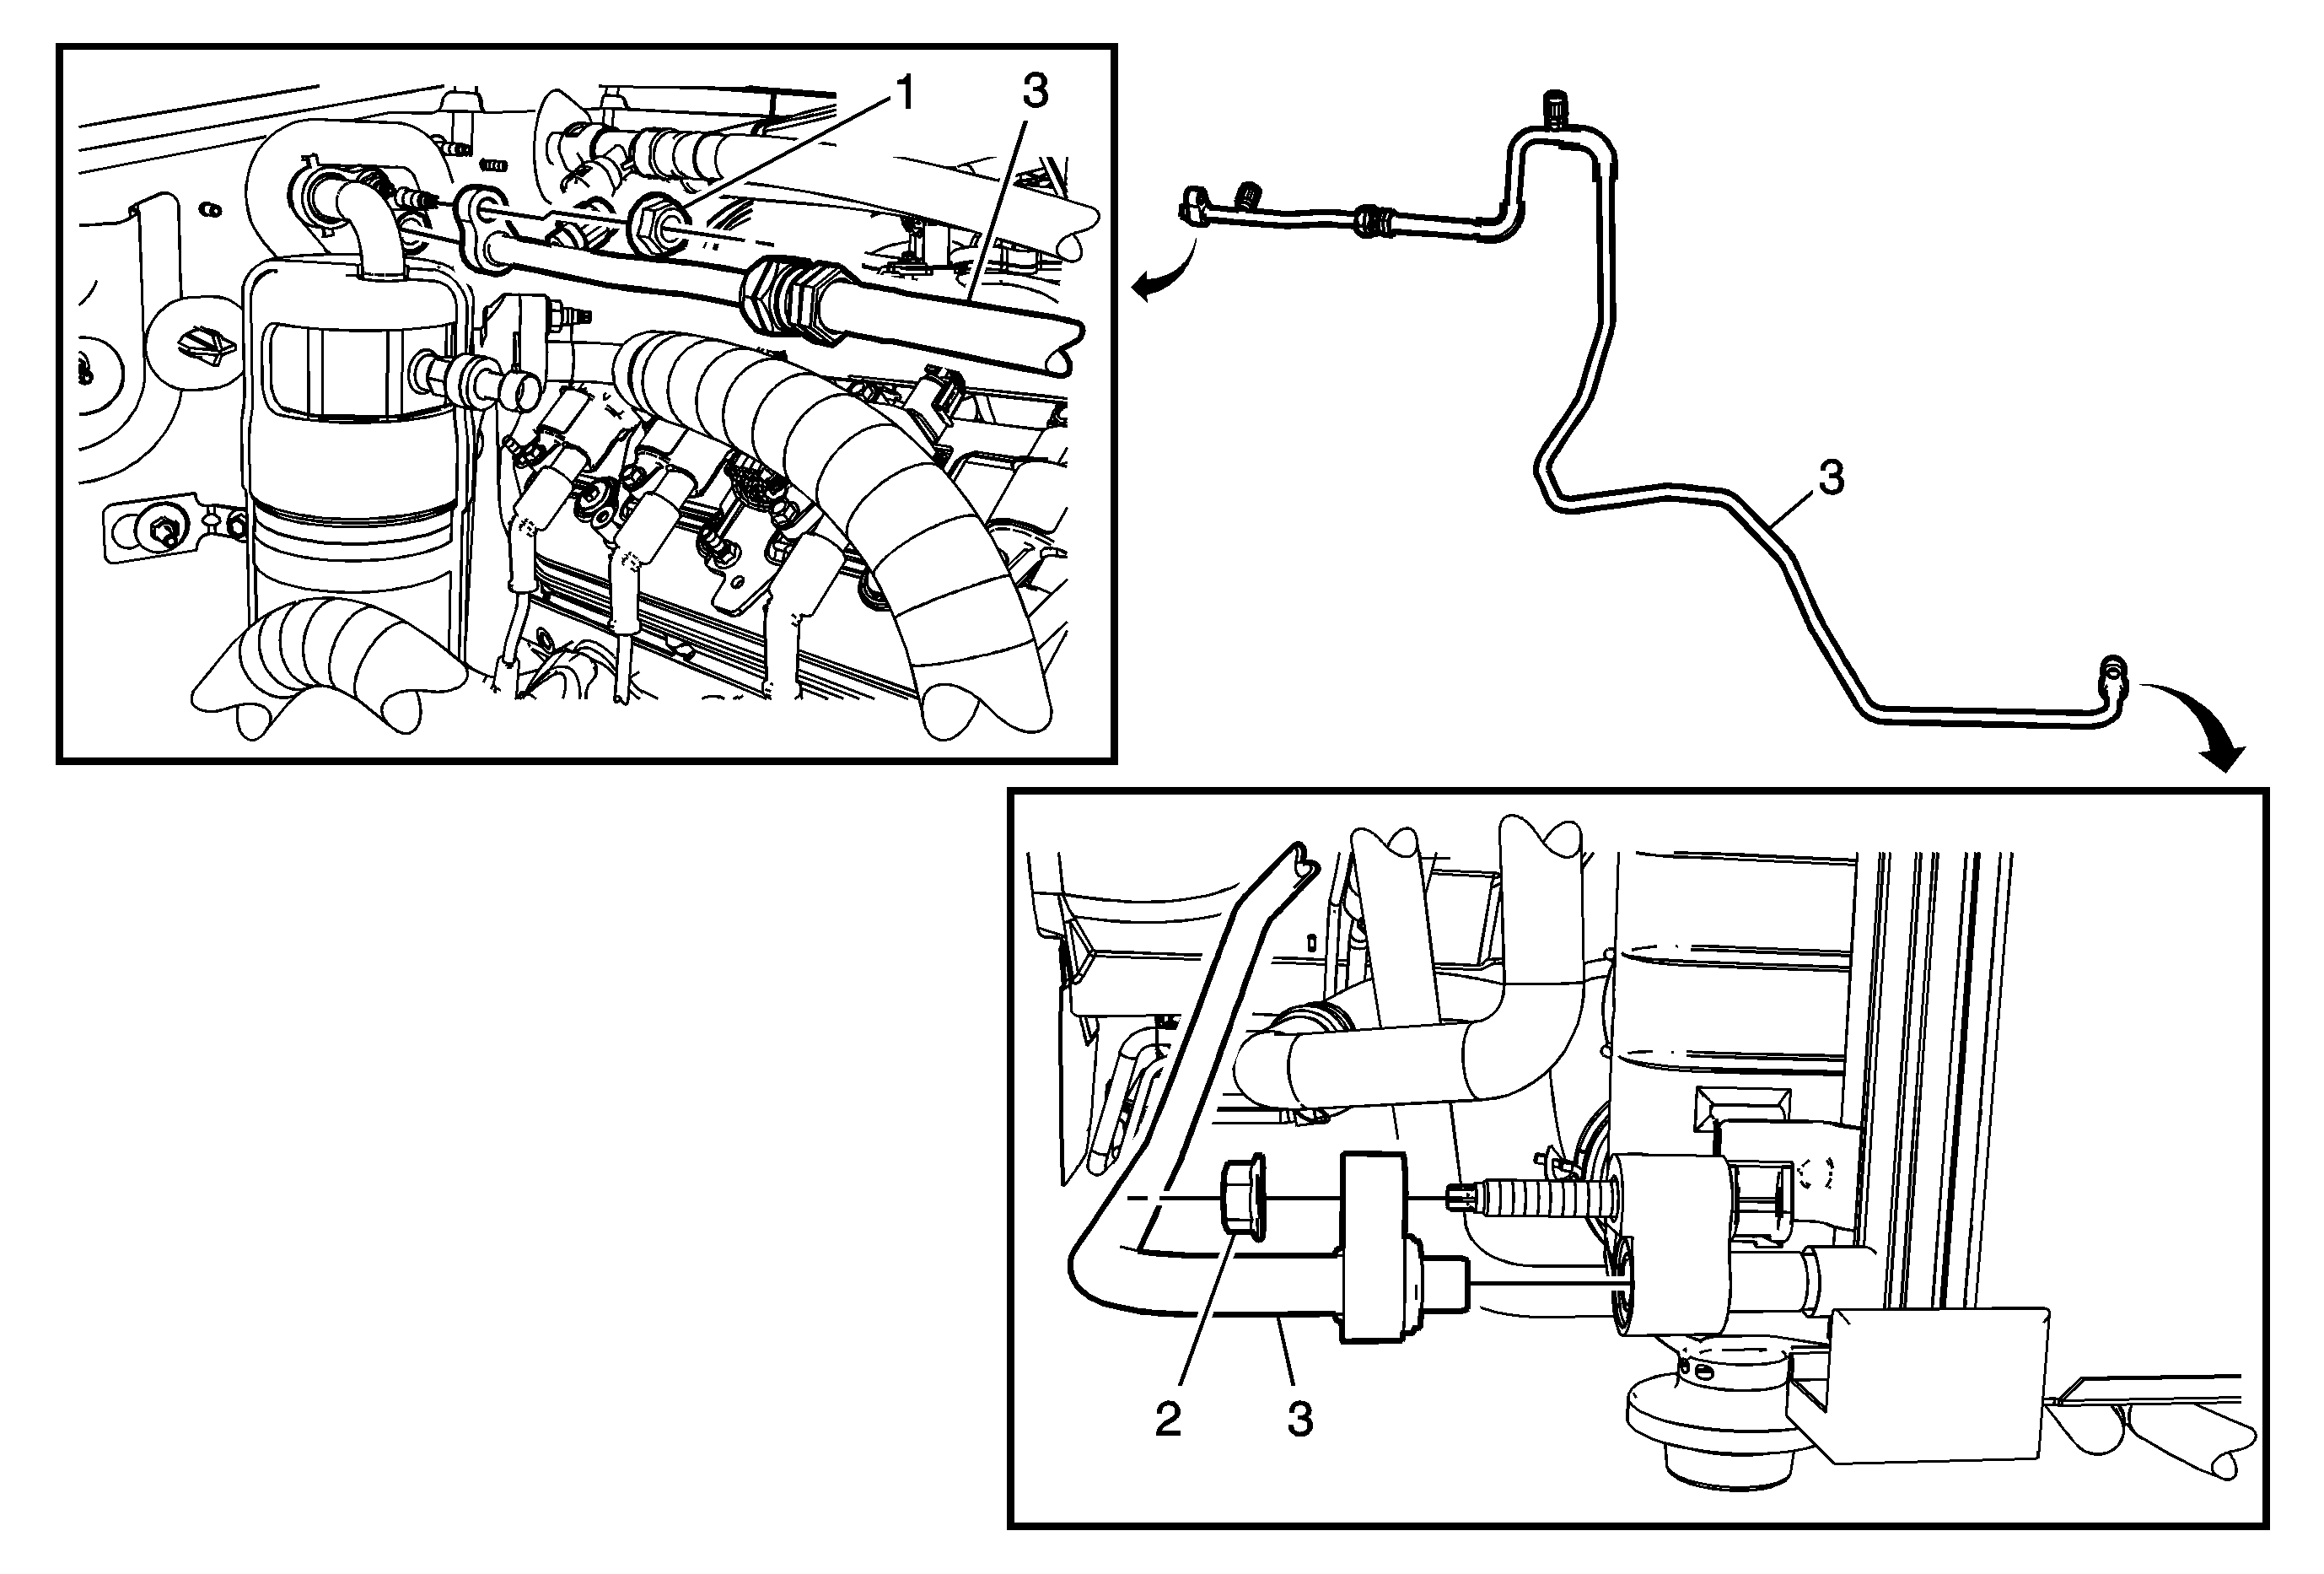
Evaporator Tube Replacement W/O C69 HP2
Callout | Component Name | ||||||
|---|---|---|---|---|---|---|---|
|
Danger: Always perform the High Voltage Disabling procedure prior to servicing any High Voltage component or connection. Personal Protection Equipment (PPE) and proper procedures must be followed. The High Voltage Disabling procedure will perform the following tasks:
Preliminary Procedures
| |||||||
1 | Evaporator Tube to TXV Nut Caution: Refer to Fastener Caution in the Preface section. Tighten | ||||||
2 | Evaporator Tube to Condenser Nut Tighten | ||||||
3 | Evaporator Tube Procedure
| ||||||
Evaporator Tube Replacement Non-HP2
Special Tools
J 39400-A Halogen Leak Detector
Removal Procedure
- Recover the refrigerant. Refer to Refrigerant Recovery and Recharging.
- Remove the upper radiator air baffle and deflector. Refer to Radiator Air Upper Baffle and Deflector Replacement.
- Remove the air cleaner assembly. Refer to Air Cleaner Assembly Replacement.
- Remove the surge tank hold down nut and bolt and position aside.
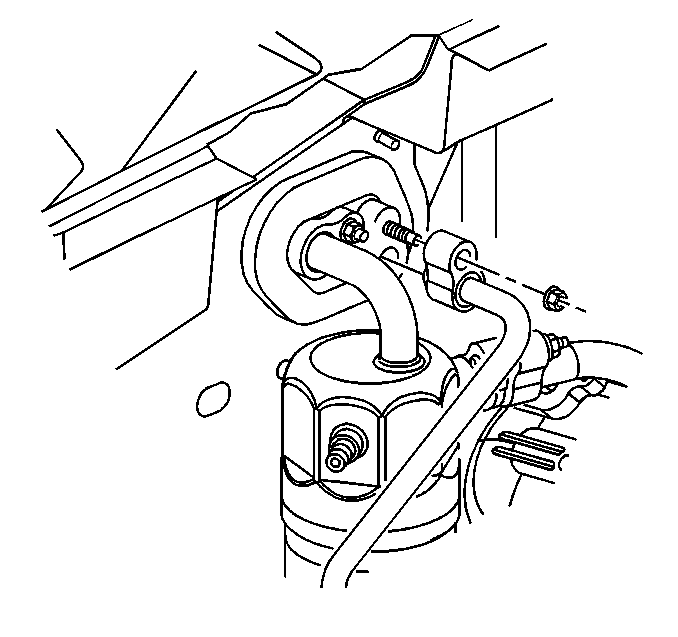
- Remove the evaporator tube nut from the evaporator.
- Disconnect the evaporator tube from the evaporator.
- Remove the evaporator tube nut from the auxiliary A/C tube, if equipped.
- Disconnect the evaporator tube from the auxiliary A/C tube, if equipped.
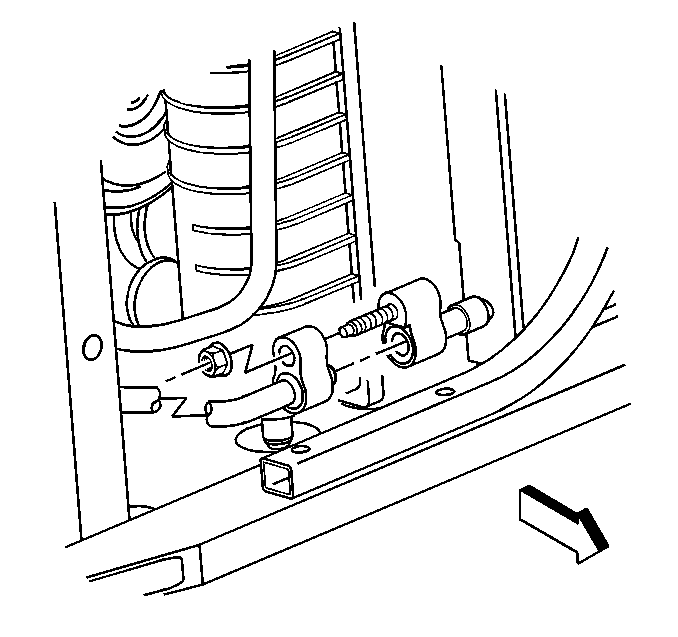
- Remove the evaporator tube nut from the condenser.
- Disconnect the evaporator tube from the condenser.
- Remove the evaporator tube from the vehicle.
- Discard all of the used sealing washers. Cap all of the open connections.
Note: Do not open cooling system.
Installation Procedure
- Connect the evaporator tube to the condenser using new sealing washers. Refer to Sealing Washer Replacement.
- Install the evaporator tube nut to the condenser and tighten to 16 N·m (12 lb ft).
- Connect the evaporator tube to the auxiliary A/C tube using new sealing washers, if equipped. Refer to Sealing Washer Replacement.
- Install the evaporator tube nut to the auxiliary A/C tube, if equipped, and tighten to 16 N·m (12 lb ft).
- Install the evaporator tube to the evaporator.
- Install the evaporator tube nut to the evaporator and tighten to 16 N·m (12 lb ft).
- Install the surge tank hold down nut and bolt and position aside.
- Install the air cleaner assembly. Refer to Air Cleaner Assembly Replacement.
- Install the upper radiator air baffle and deflector. Refer to Radiator Air Upper Baffle and Deflector Replacement.
- Evacuate and recharge the system. Refer to Refrigerant Recovery and Recharging.
- Leak test the fittings of the components using the J 39400-A .
Caution: Refer to Fastener Caution in the Preface section.
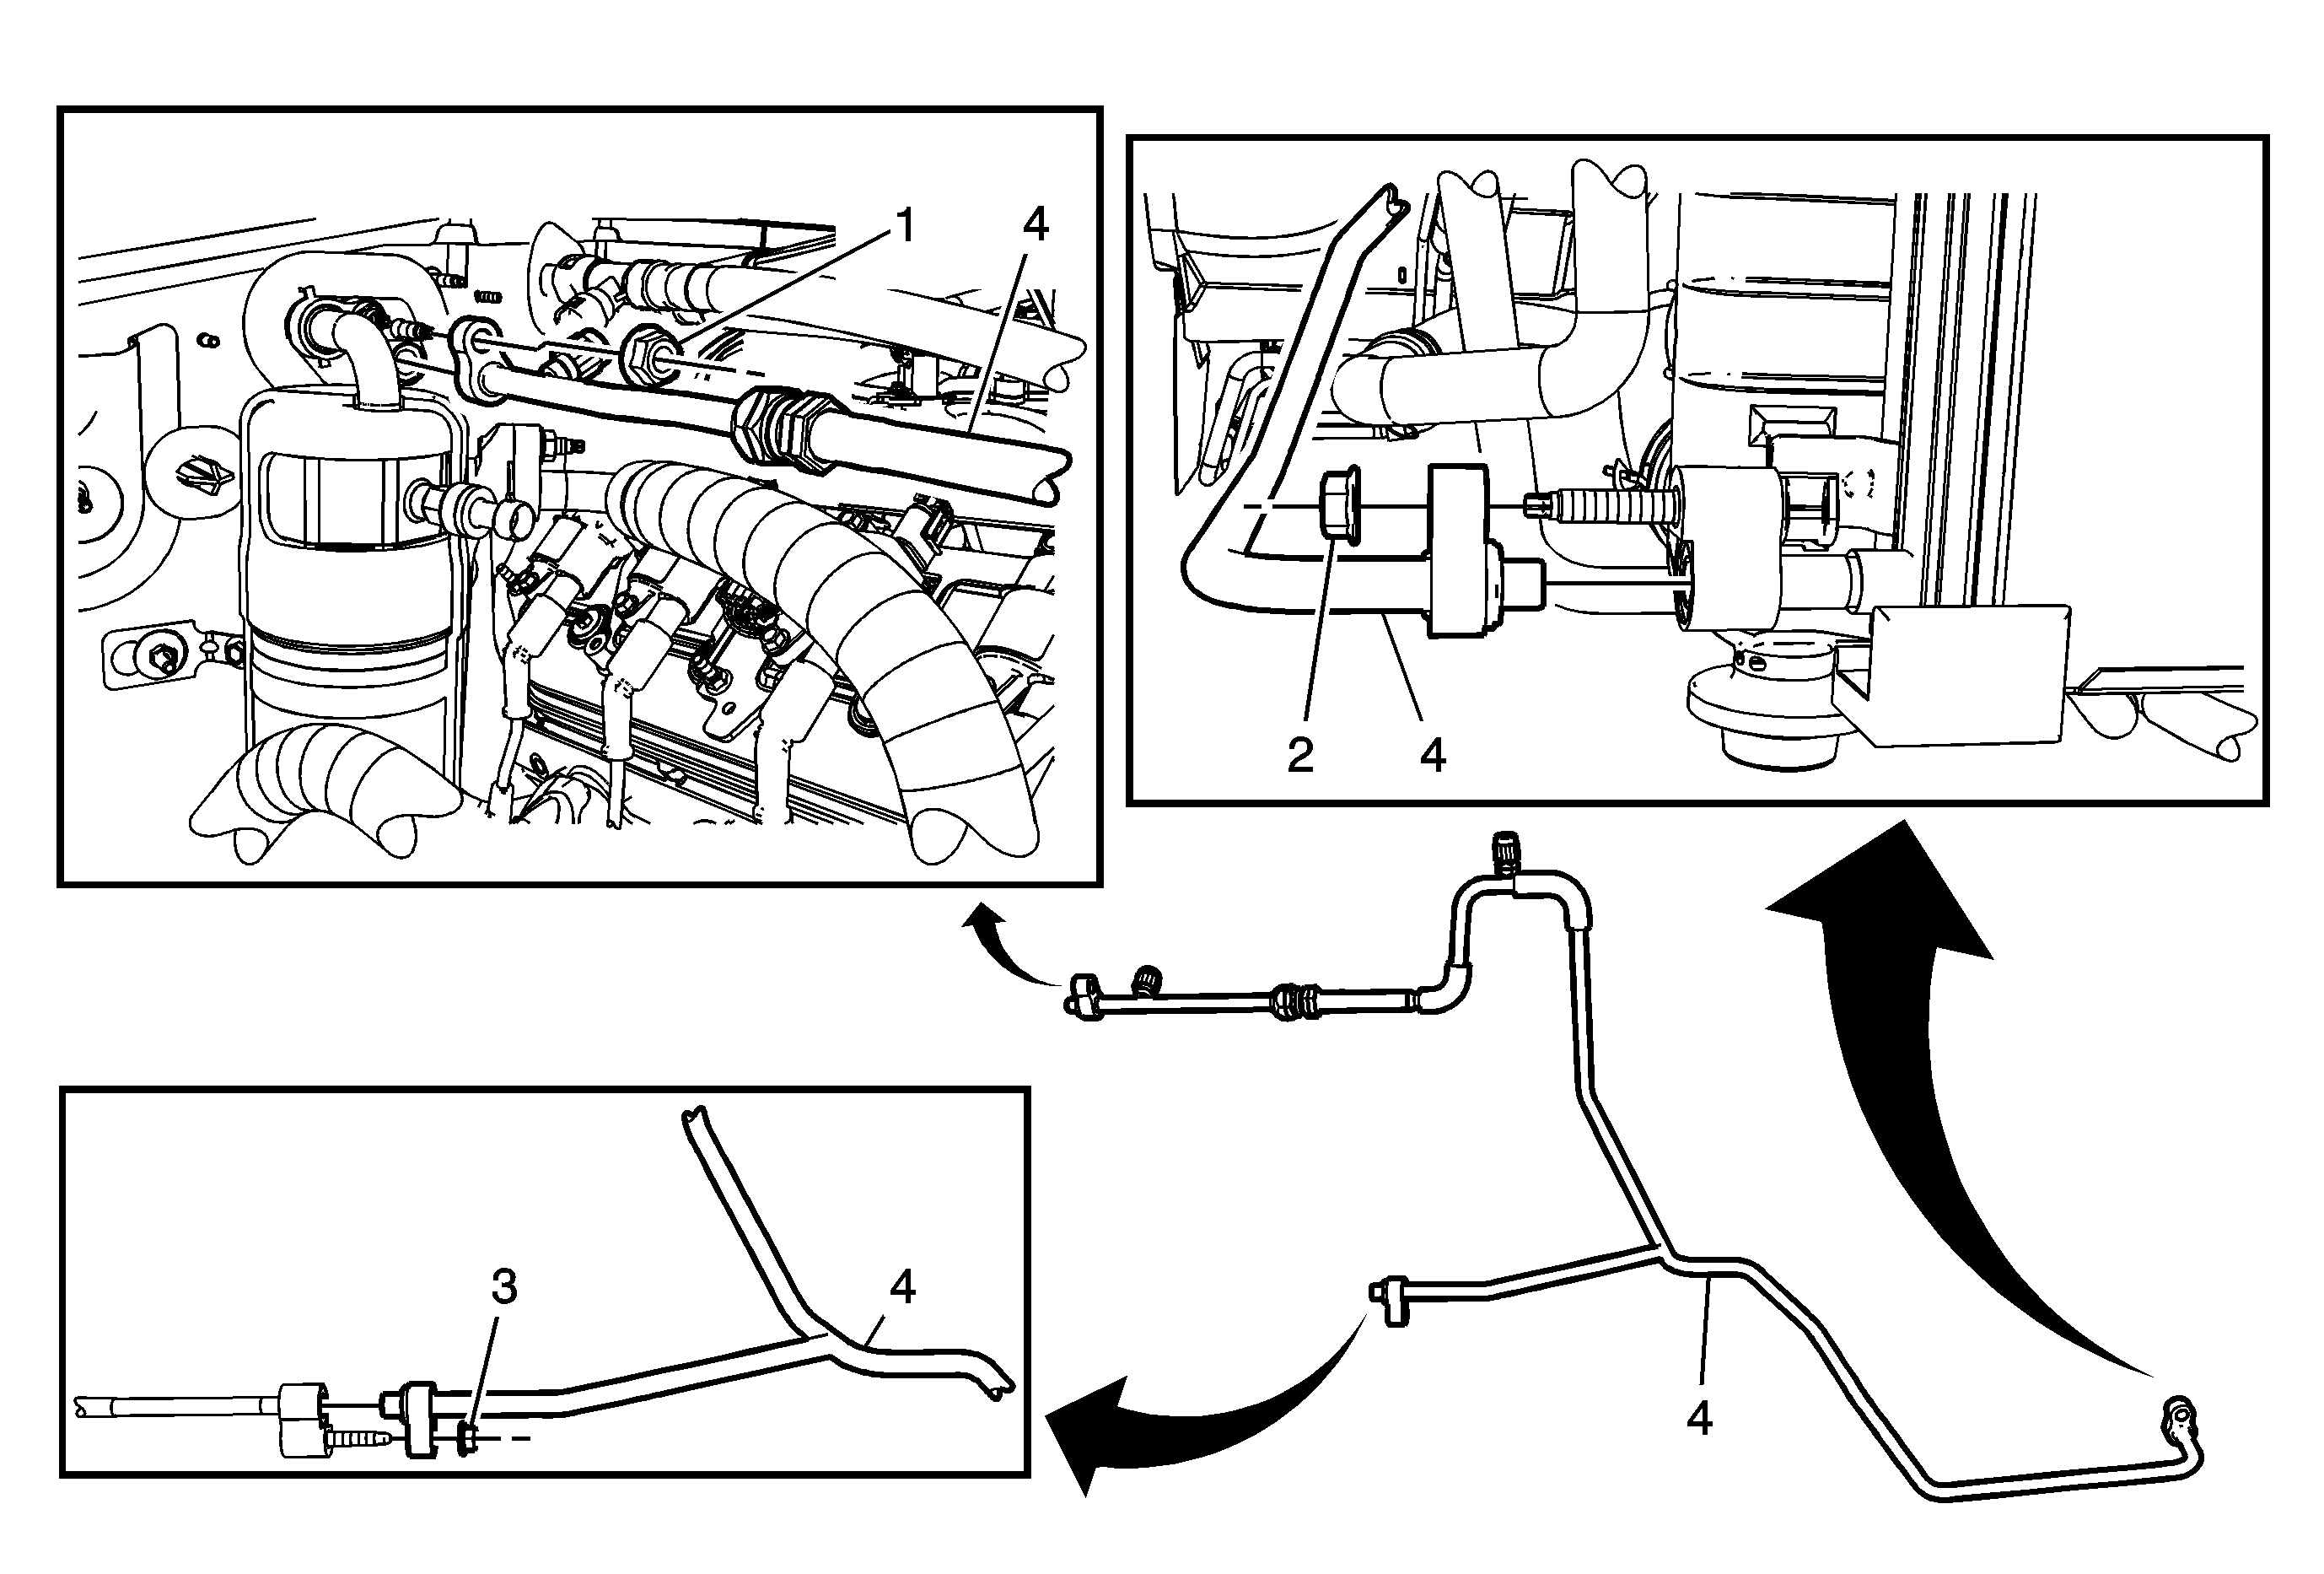
Evaporator Tube Replacement W/C69 HP2
Callout | Component Name | ||||||
|---|---|---|---|---|---|---|---|
|
Danger: Always perform the High Voltage Disabling procedure prior to servicing any High Voltage component or connection. Personal Protection Equipment (PPE) and proper procedures must be followed. The High Voltage Disabling procedure will perform the following tasks:
Preliminary Procedures
| |||||||
1 | Evaporator Tube to TXV Nut Caution: Refer to Fastener Caution in the Preface section. Tip Tighten | ||||||
2 | Evaporator Tube to Condenser Nut. Tighten | ||||||
3 | Evaporator Tube to Rear A/C Nut Tighten | ||||||
4 | Evaporator Tube Procedure
| ||||||
