For 1990-2009 cars only
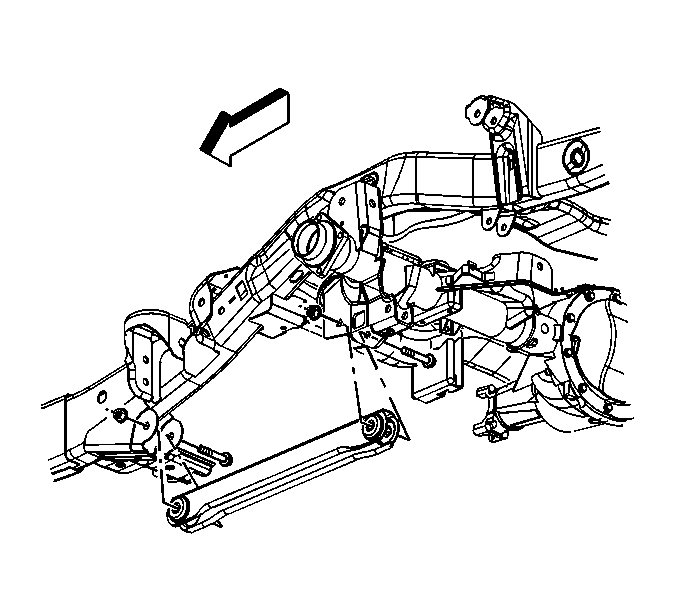
Removal Procedure
- Raise and support the vehicle. Refer to Lifting and Jacking the Vehicle.
- Support the vehicle at curb height.
- Remove the lower control arm retaining nuts.
- Remove the lower control arm retaining bolt.
- Remove the lower control arm.
Installation Procedure
- Install the lower control arm.
- Install the lower control arm retaining bolts.
- Install the lower control arm retaining nut and tighten.
- Remove the rear axle support.
- Lower the vehicle.
Caution: Refer to Fastener Caution in the Preface section.
Note: Do not tighten the bolts unless the suspension is at the ride height.
| • | The lower control arm to frame bolts to 100 N·m (74 lb ft) plus 55 degrees. |
| • | The lower control arm to axle bolts to 100 N·m (74 lb ft) plus 55 degrees. |
