Notice: When replacing the door lock striker, only use the manufactures replacement
part. Do not use a replacement part of a lesser quality or a substitute design. The
use of a lesser quality part could lead to an improperly operating door retention
system.
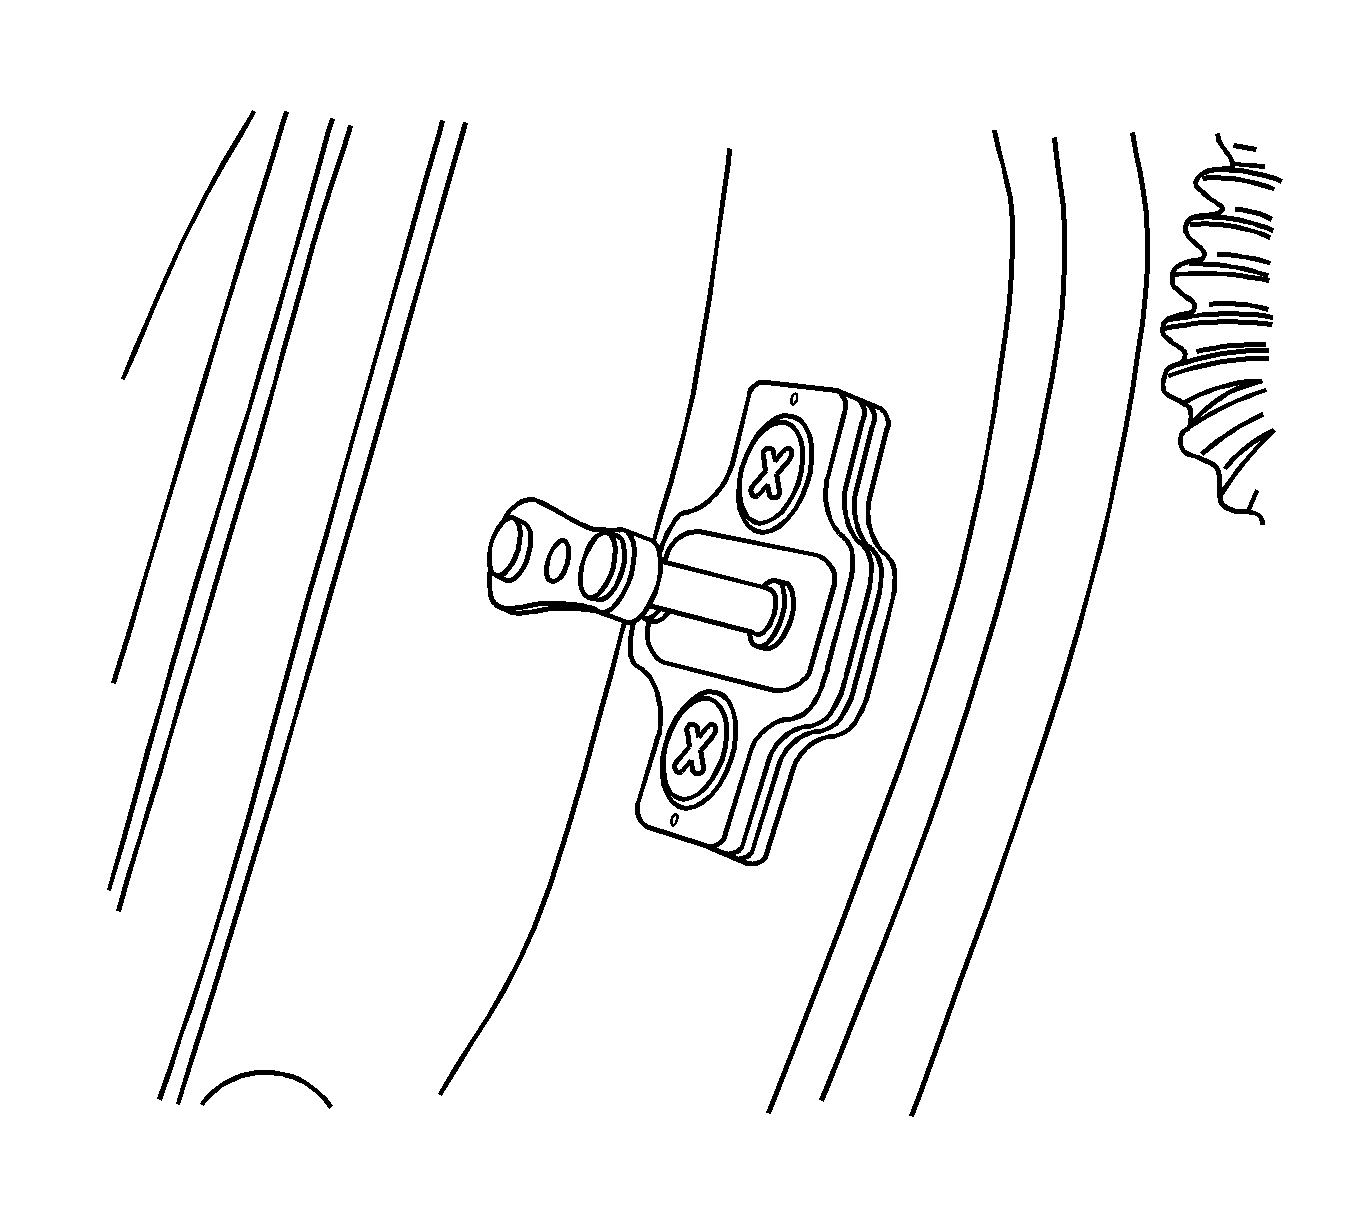
The door lock striker consists of a striker with 2 screws that are threaded into a tapped, floating cage plate located in the appropriate body pillar. This floating cage plate allows the striker to be easily adjusted in or out and up or down. The
door is secured in the closed position when the door lock fork snaps over and engages the striker.
Fore/Aft Adjustment Procedure
- The door must be properly aligned.
- Close the door until the lock fork contacts the striker.
- Stand next to the door opening and move the door slowly in and out, just touching the striker each time.
- The alignment of the lock fork and the striker can be easily seen. The lock fork should be perpendicular to and fall near the middle of the striker between the B-pillar and the end of the striker.
- If a fore or aft adjustment is required, use the following steps:
| 5.1. | Remove the striker screws. |
| 5.2. | Remove the spacer in order to move the striker toward the rear of the vehicle. |
| 5.3. | Add a 2 mm (0.08 in) spacer in order to move the striker toward the front of the vehicle. |
| 5.4. | Install the striker screws. |
- Perform the following up/down or the in/out adjustment.
Up/Down or In/Out Adjustment Procedure
An adjustment of the striker in the up/down or in/out directions may be necessary for a number of reasons:
| • | Vehicle frame damage as the result of a collision |
| • | Installation of new door weatherstripping |
| • | Customer complaints of excessive windnoise |
| • | Difficulty in opening or closing the door |
In order to adjust the door striker in an up/down or in/out direction, perform the following procedure:
- The door must be properly aligned.
- Loosen the striker screws.
- The floating cage plate can be moved slightly using the ends of the striker screws. Move the floating cage plate to the desired position.
Notice: In order to oblong the striker mounting hole to assist in further striker adjustment,
use a die grinder with a flat-headed grinding bit. This type of bit will help to prevent
damage to the tapered floating cage plate. The striker and the tapped floating cage
plate are important attaching parts that could affect operation of the door closing
and latching systems.
- If proper adjustment requires that the floating cage plate be moved more than is possible, use an electric hand drill and a 3/8 inch rotary file with a flat head in order to enlarge the body opening in the direction required.
Notice: Refer to Fastener Notice in the Preface section.
- Tighten the striker screws to the correct position.
Tighten
Tighten the door lock striker screws to 24 N·m (18 lb ft).
