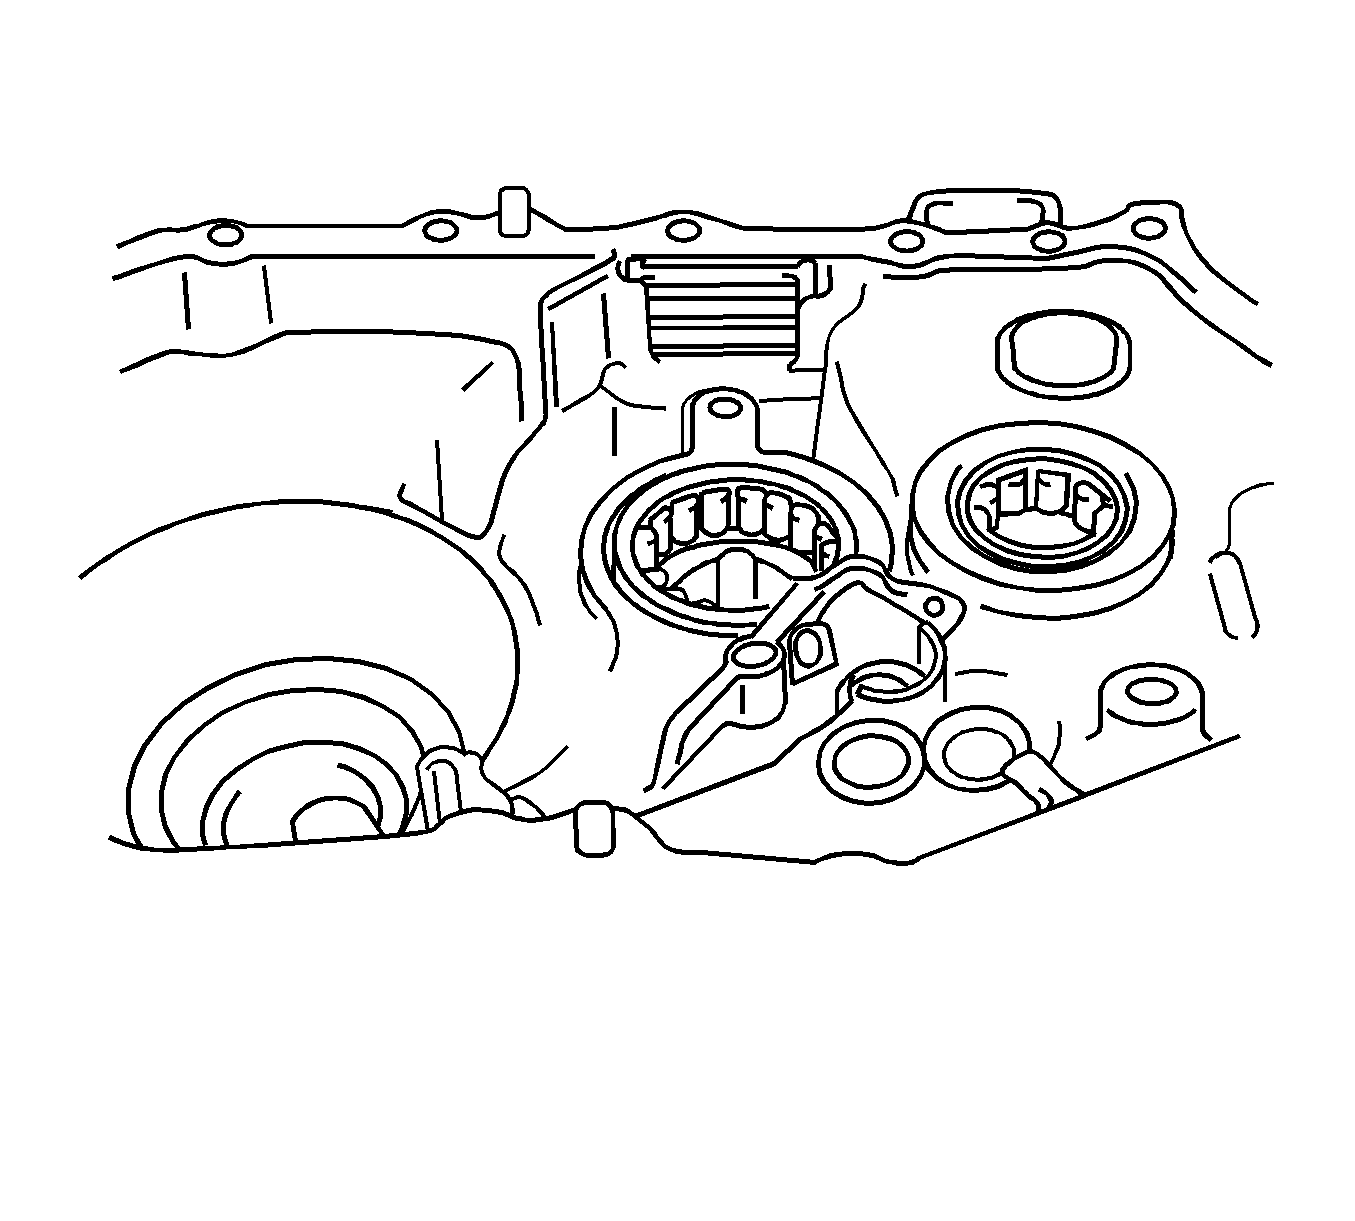
- Remove the filler plug and gasket.
- Remove the drain plug and gasket.
- Remove the bolt and speedometer drive hole cover.
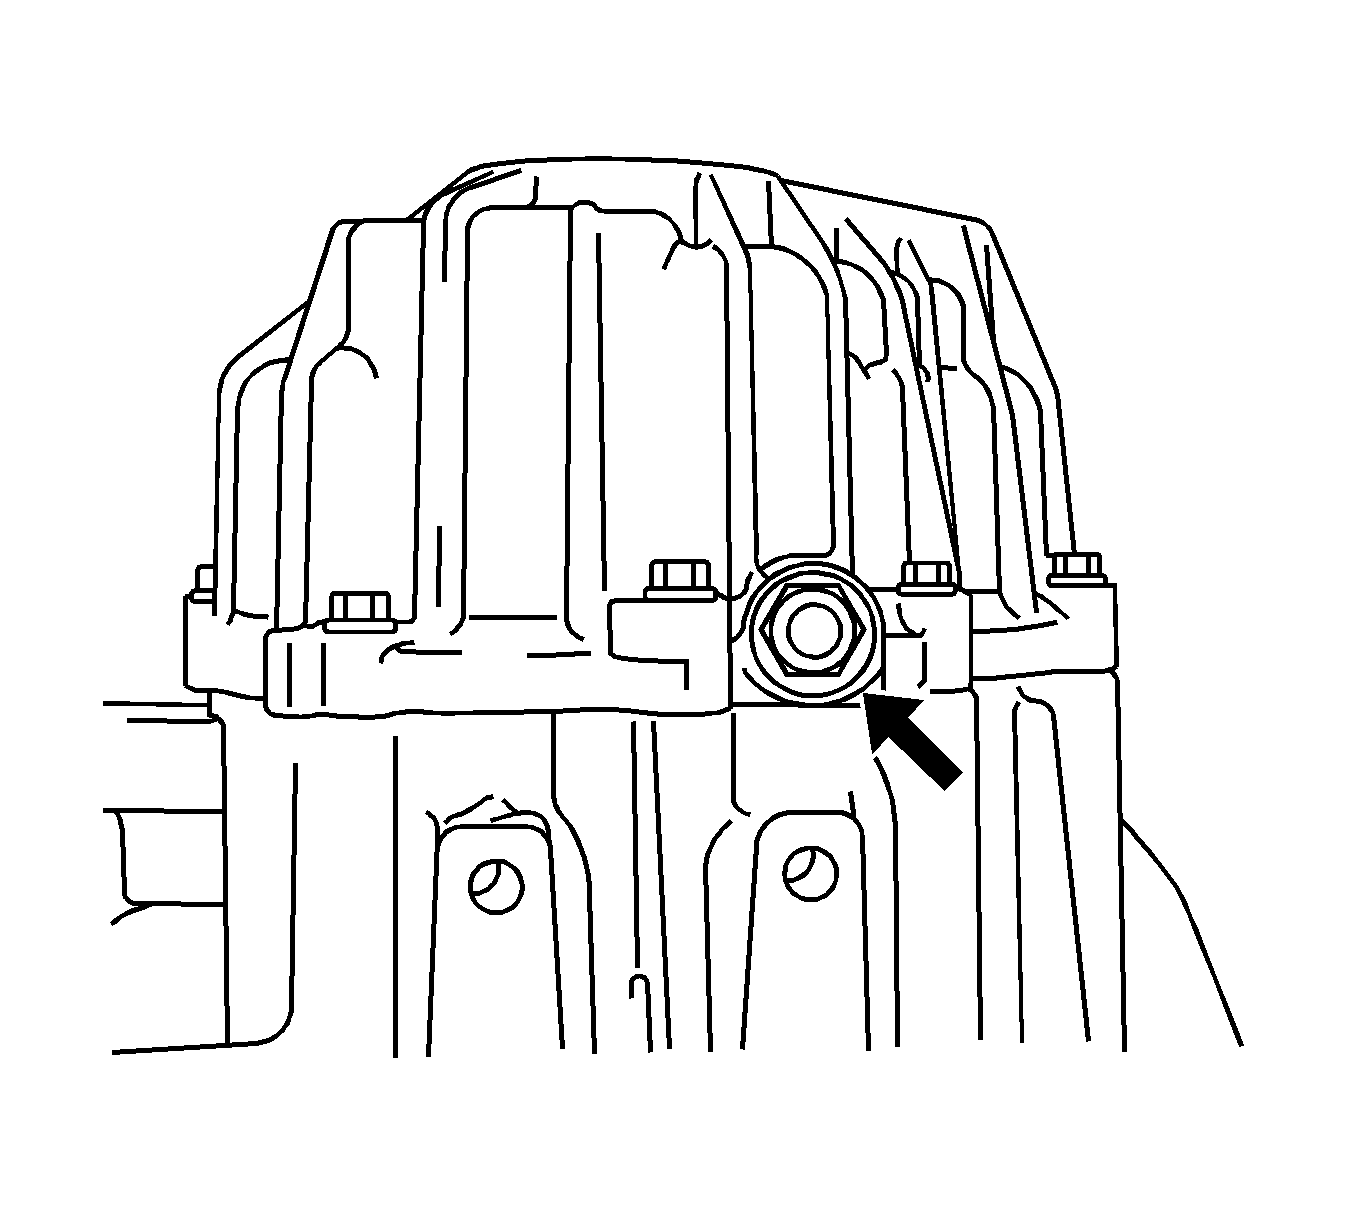
- Remove the backup light switch and gasket from the transaxle case.
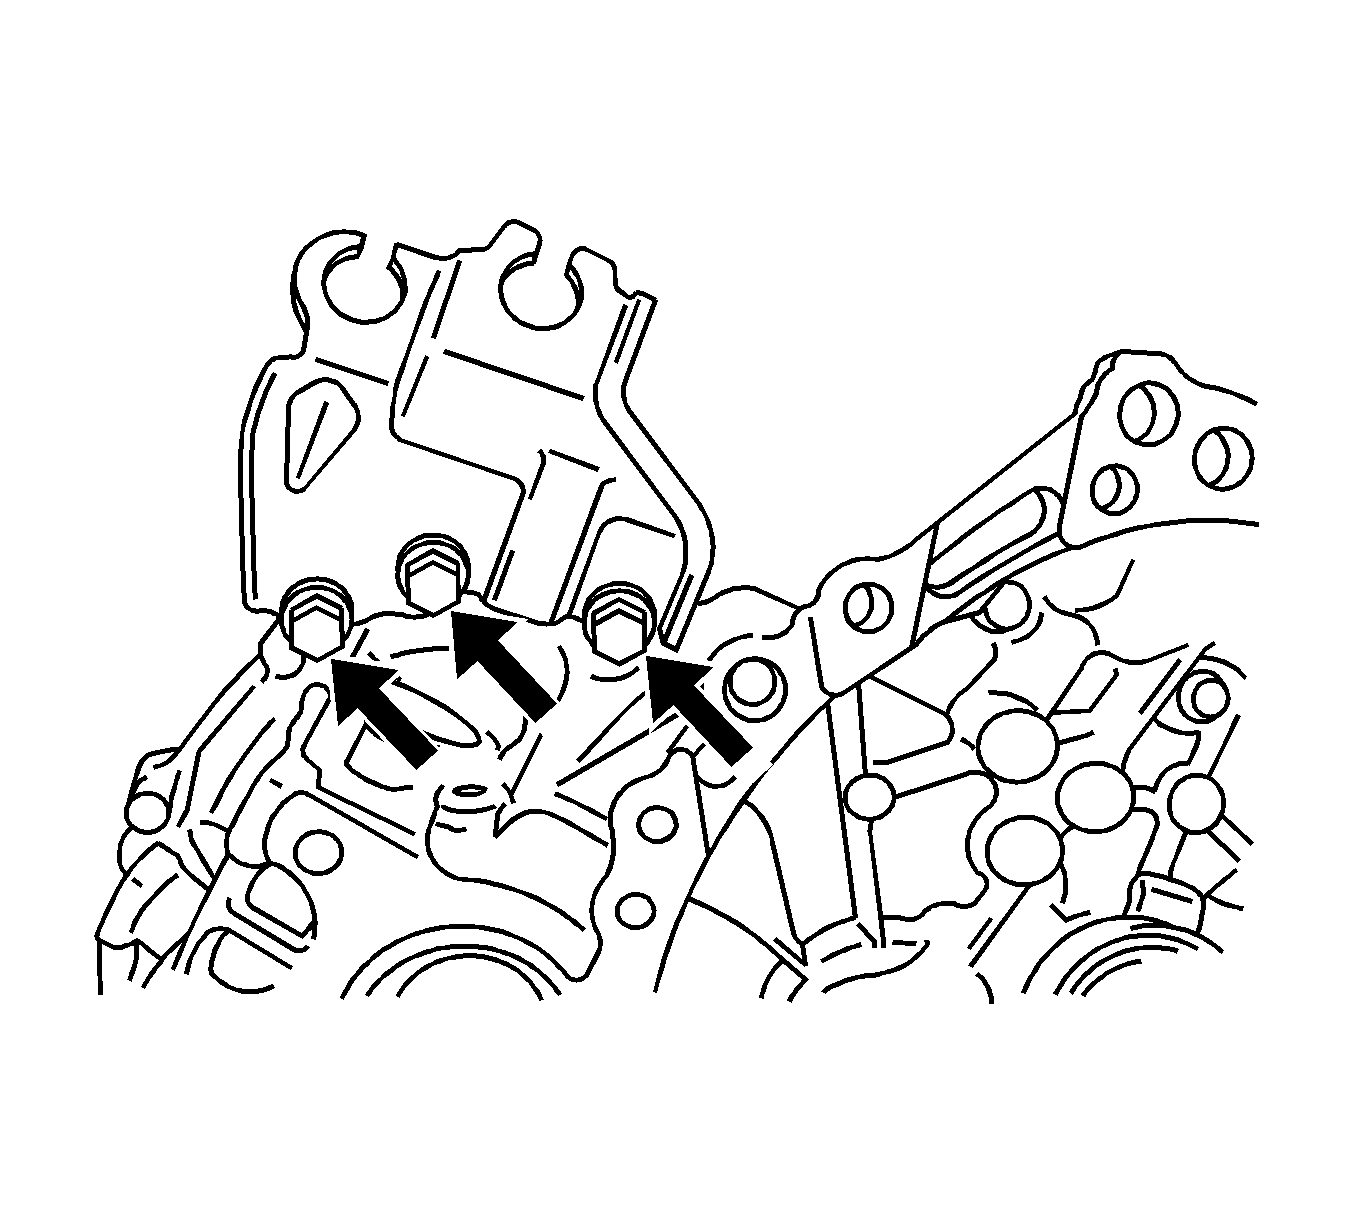
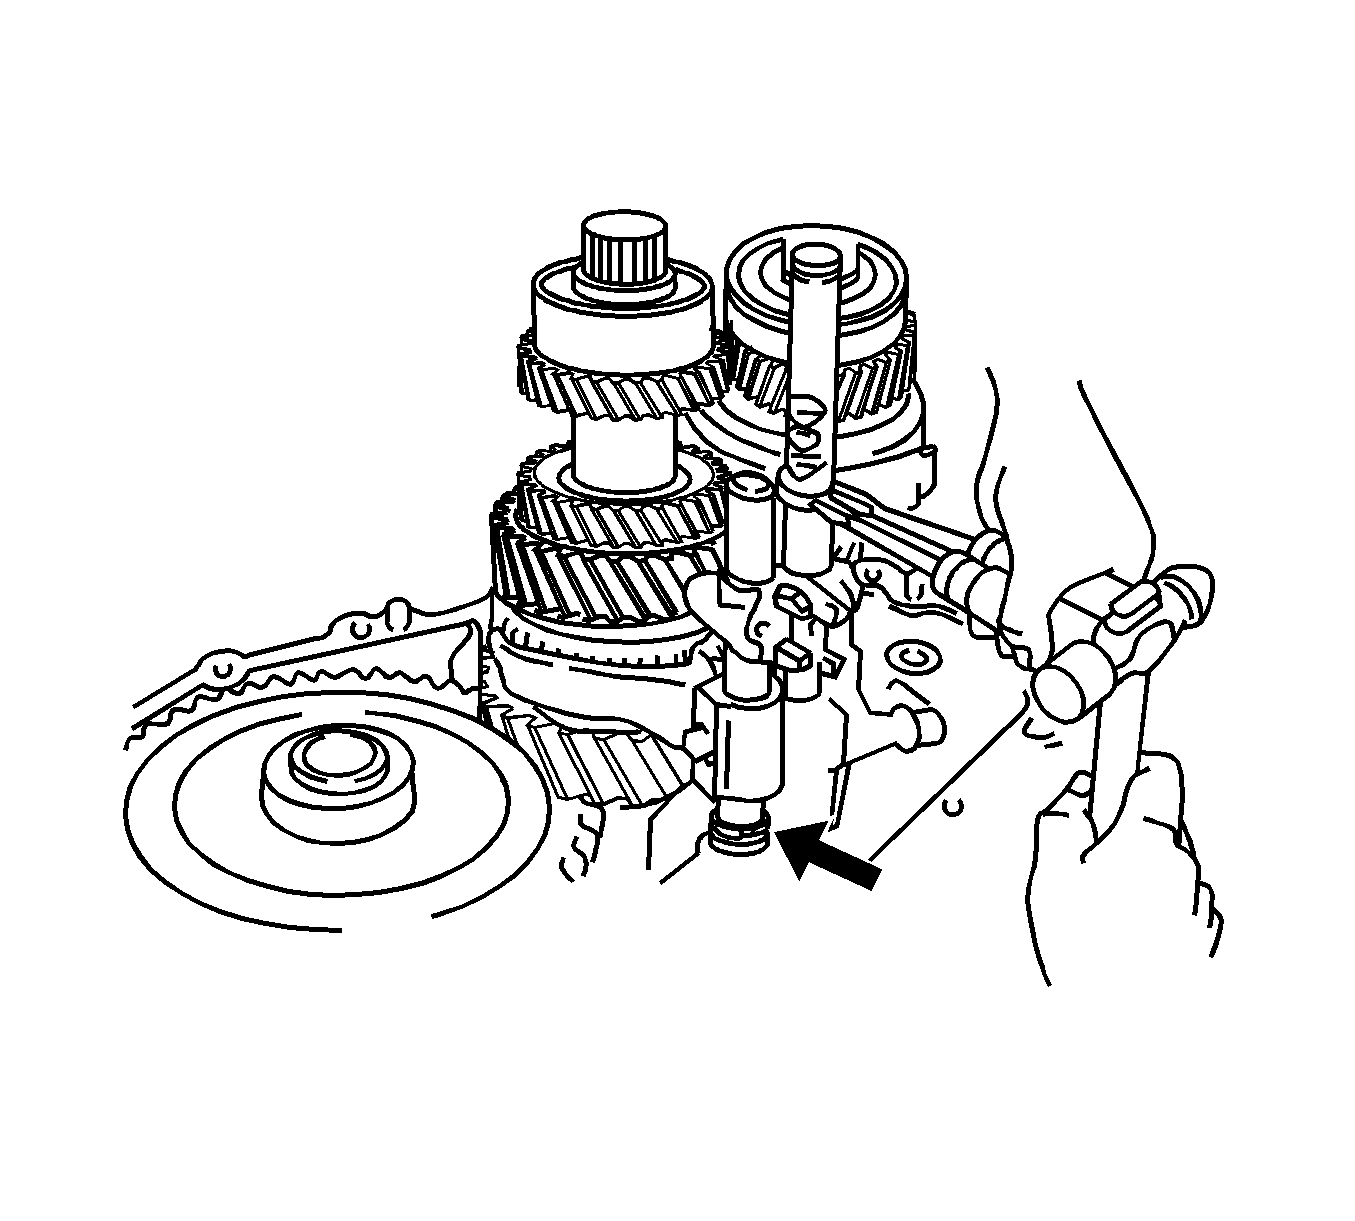
- Remove the 3 bolts and the control cable bracket.
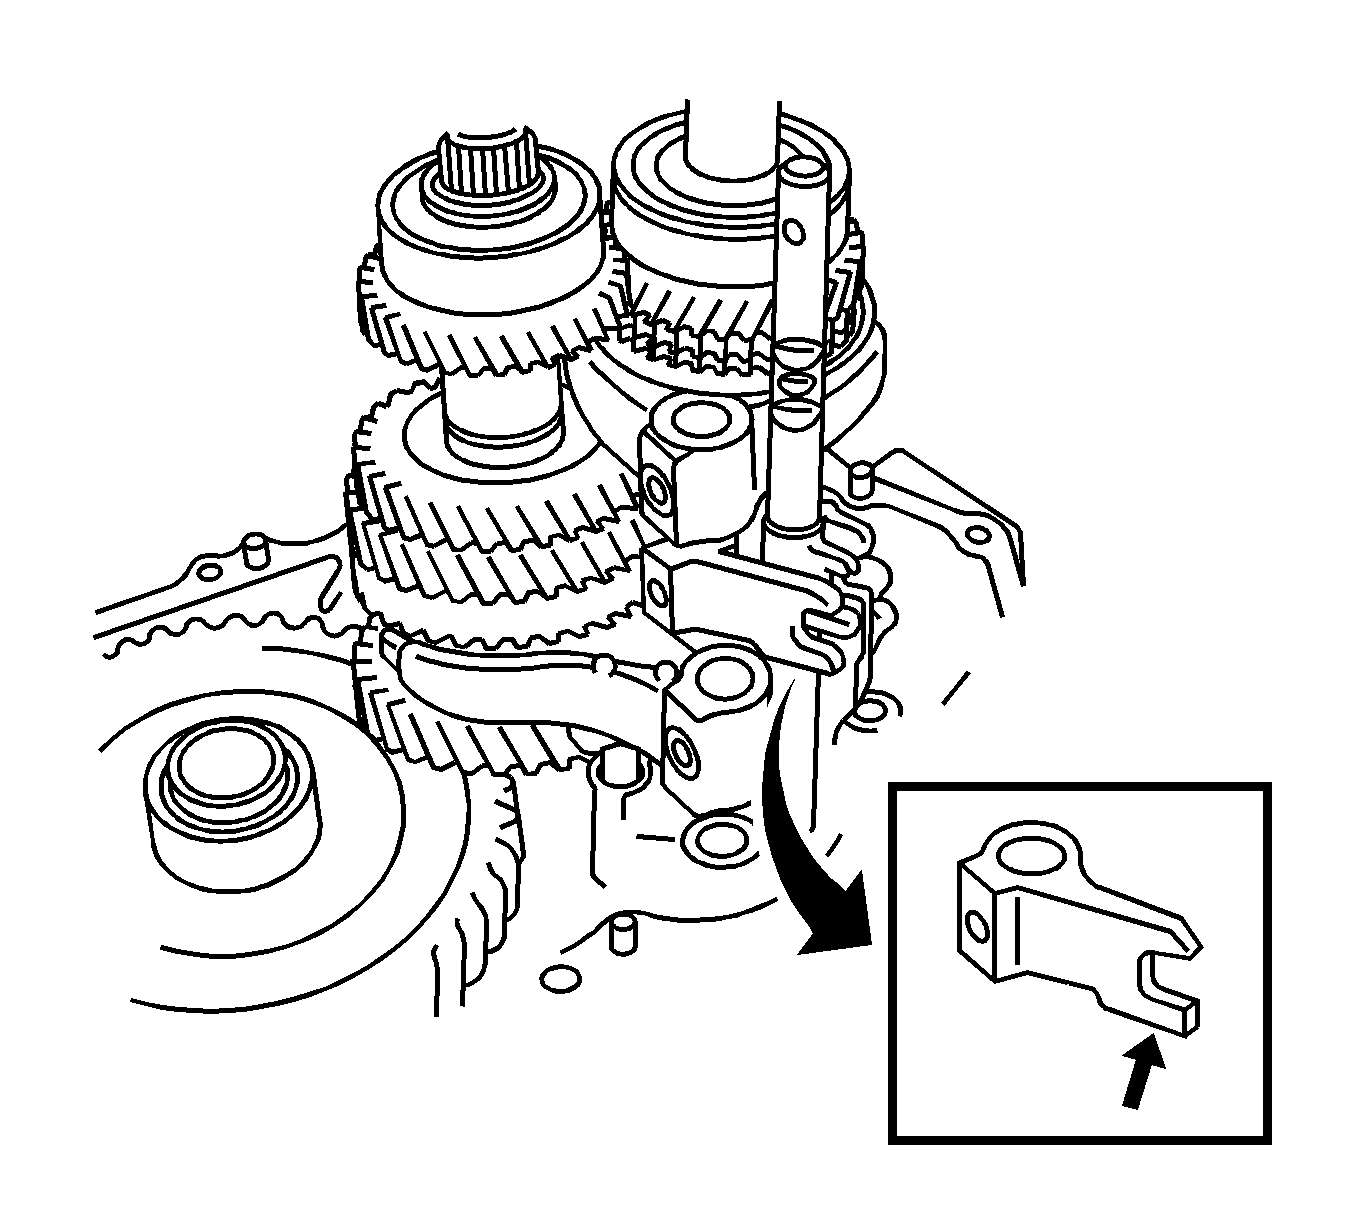
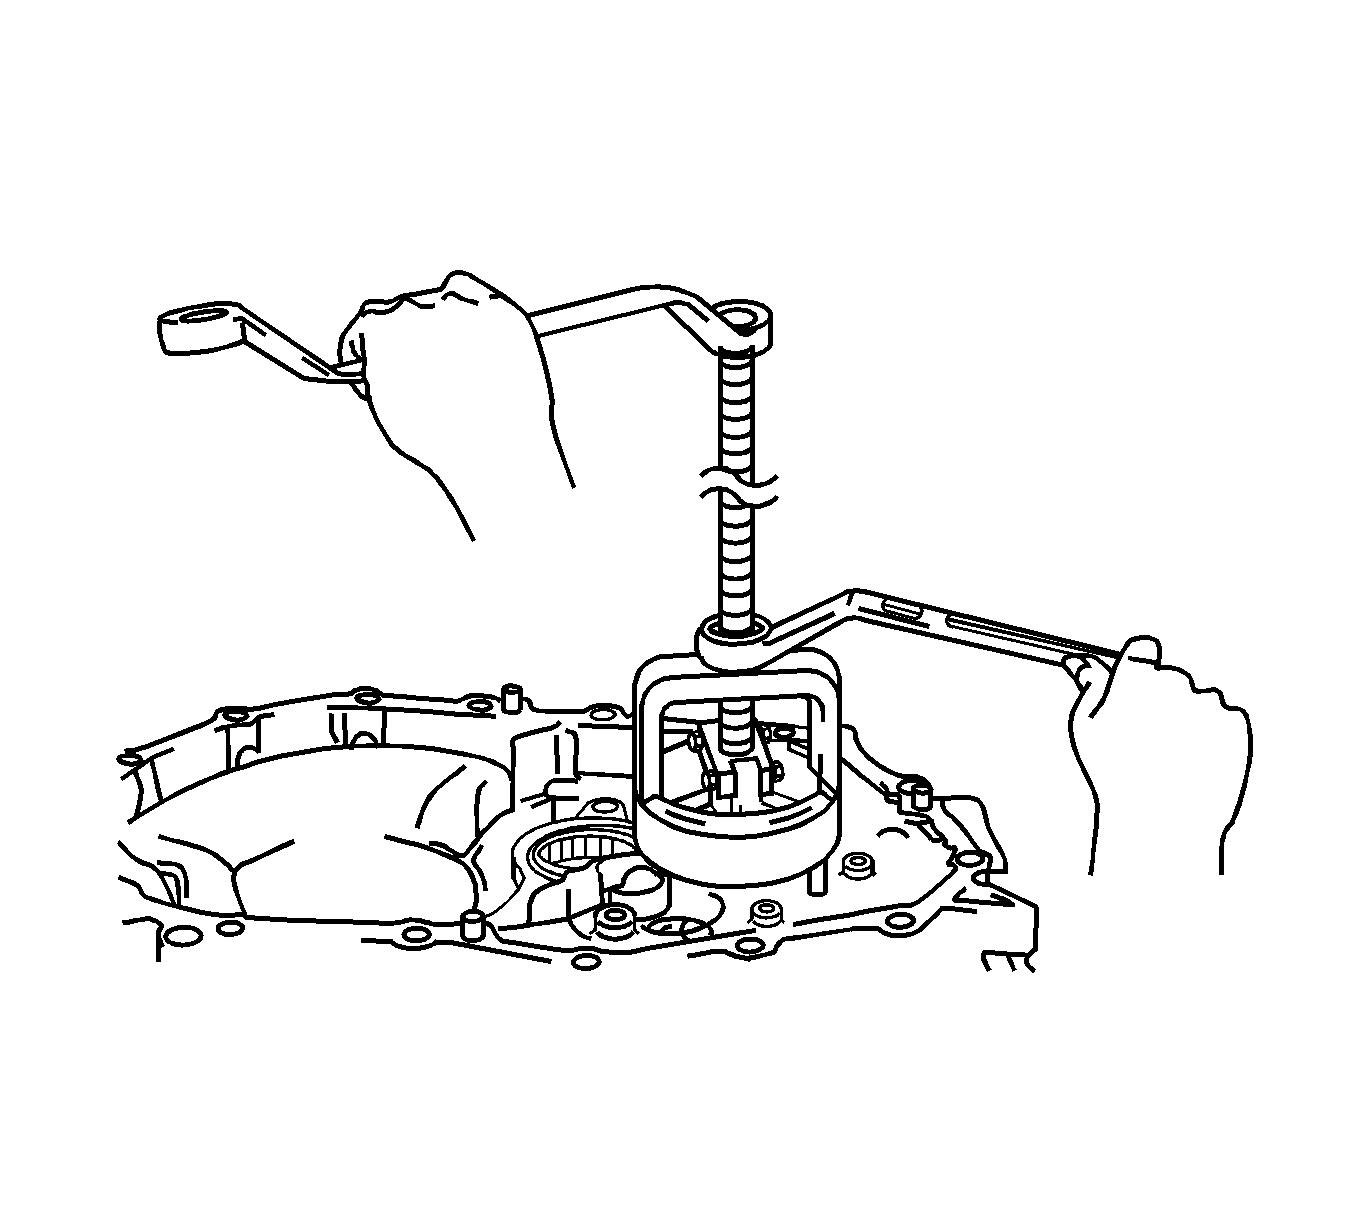
- Remove the 2 bolts and the selecting bellcrank assembly.
- Install the guide bushing (1) in the shift lever.
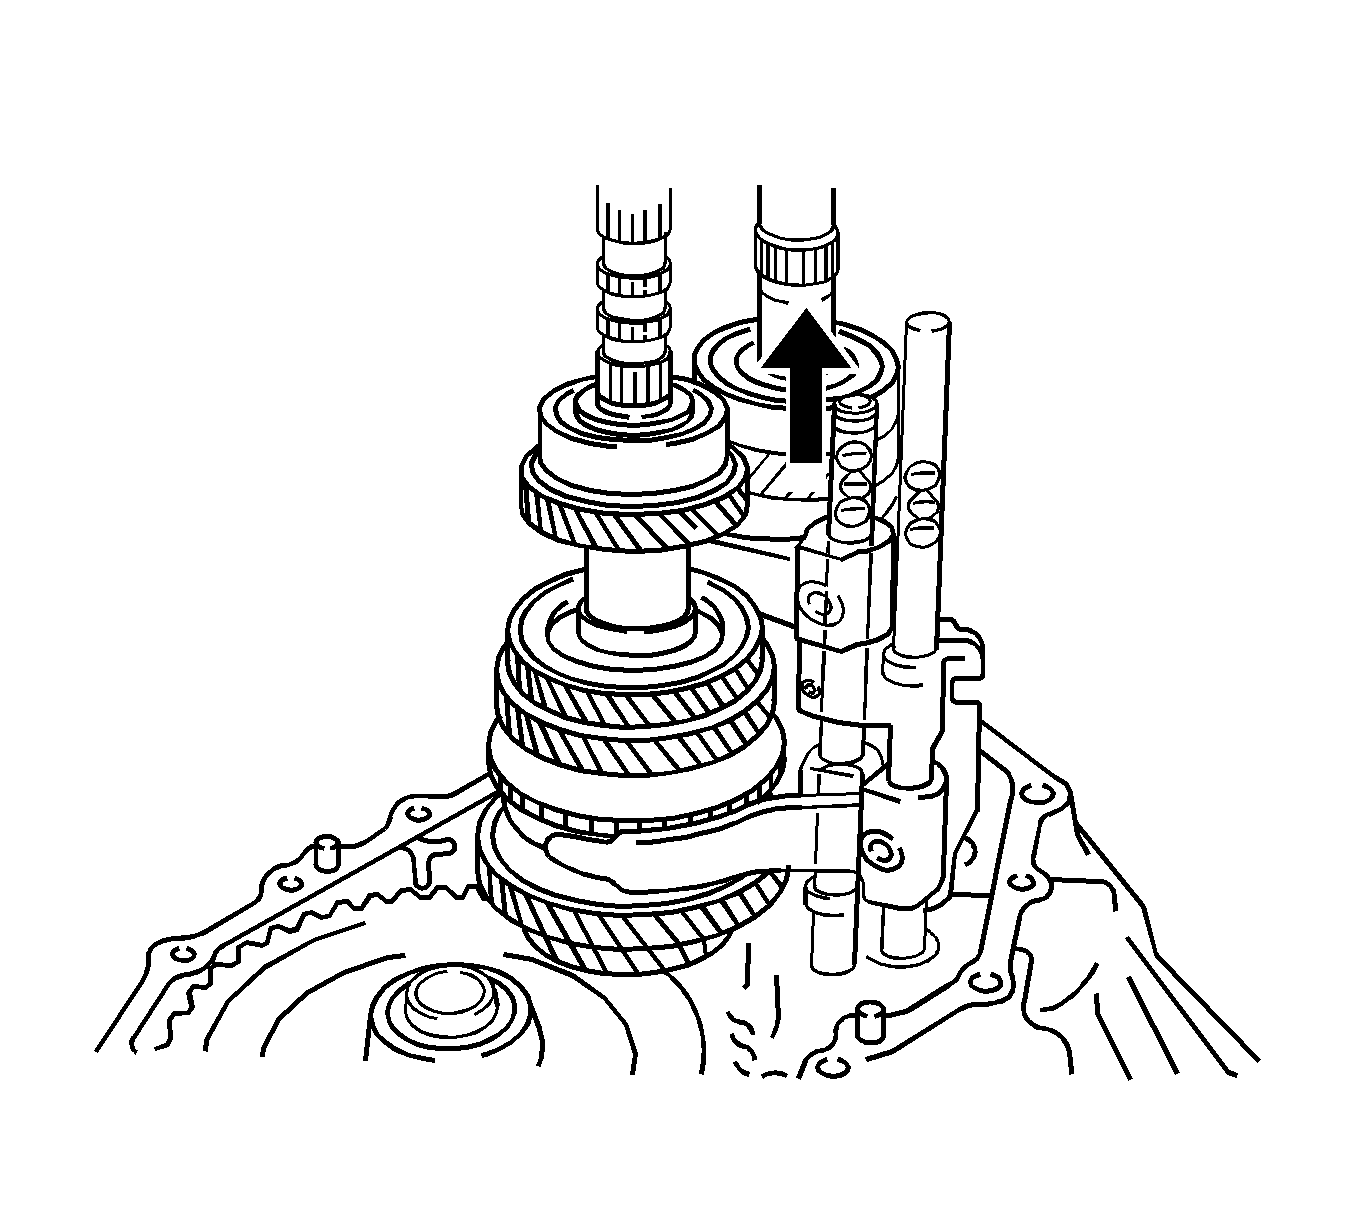
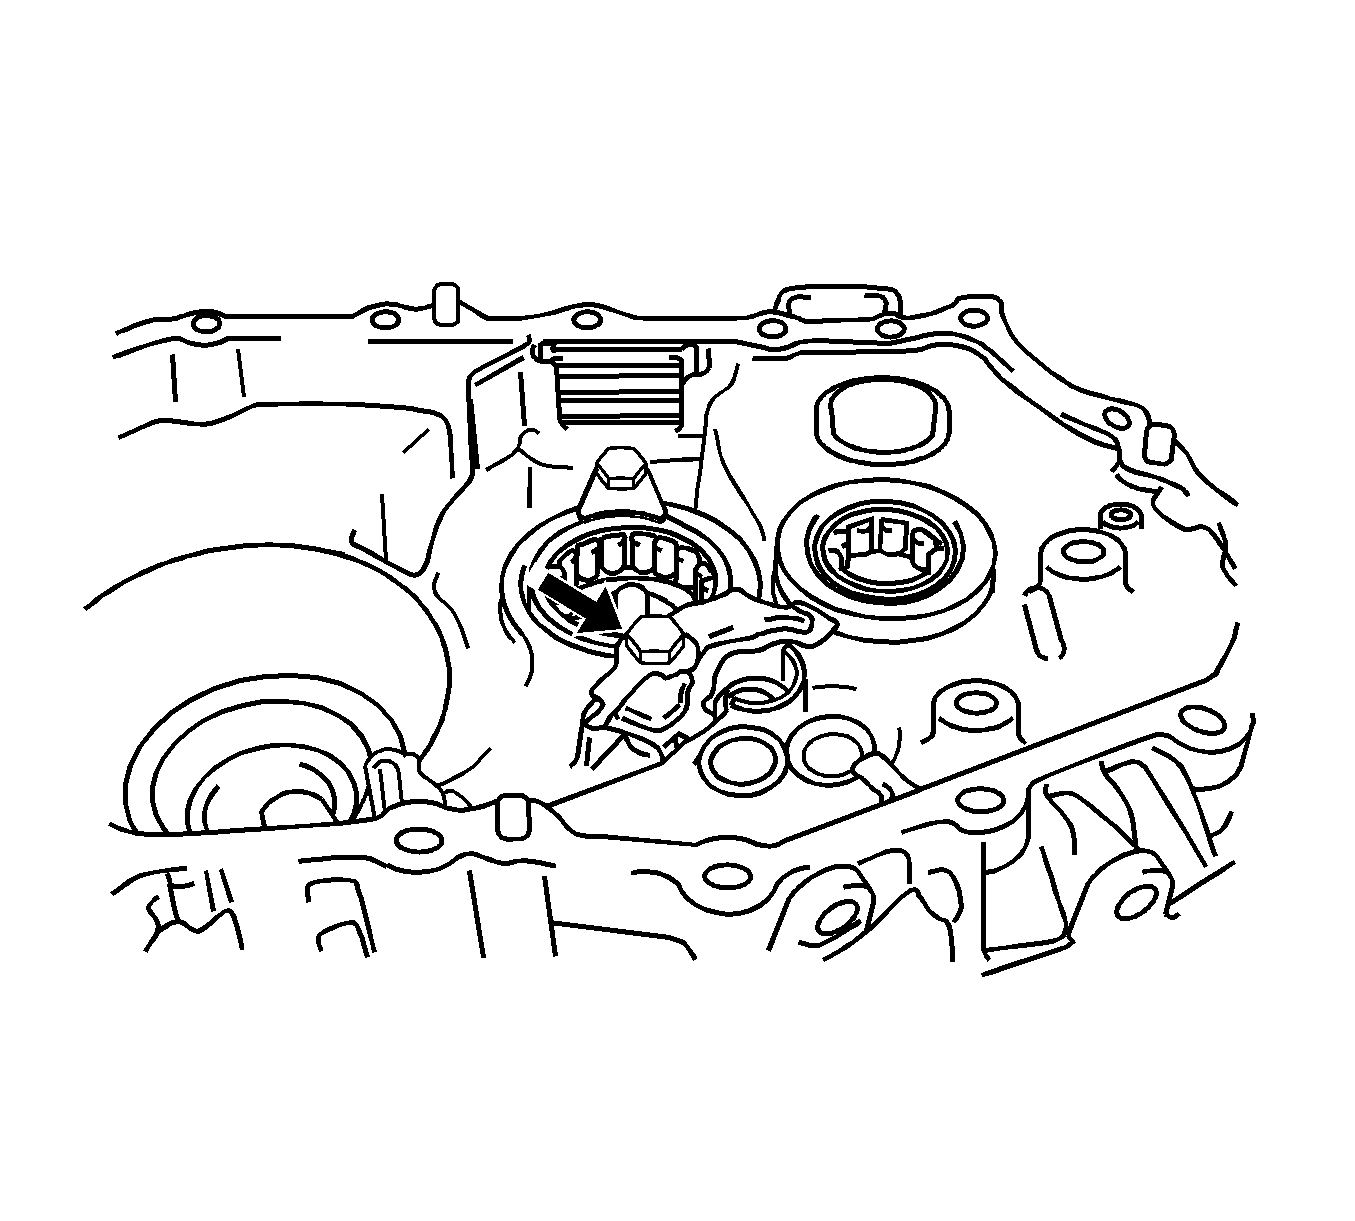
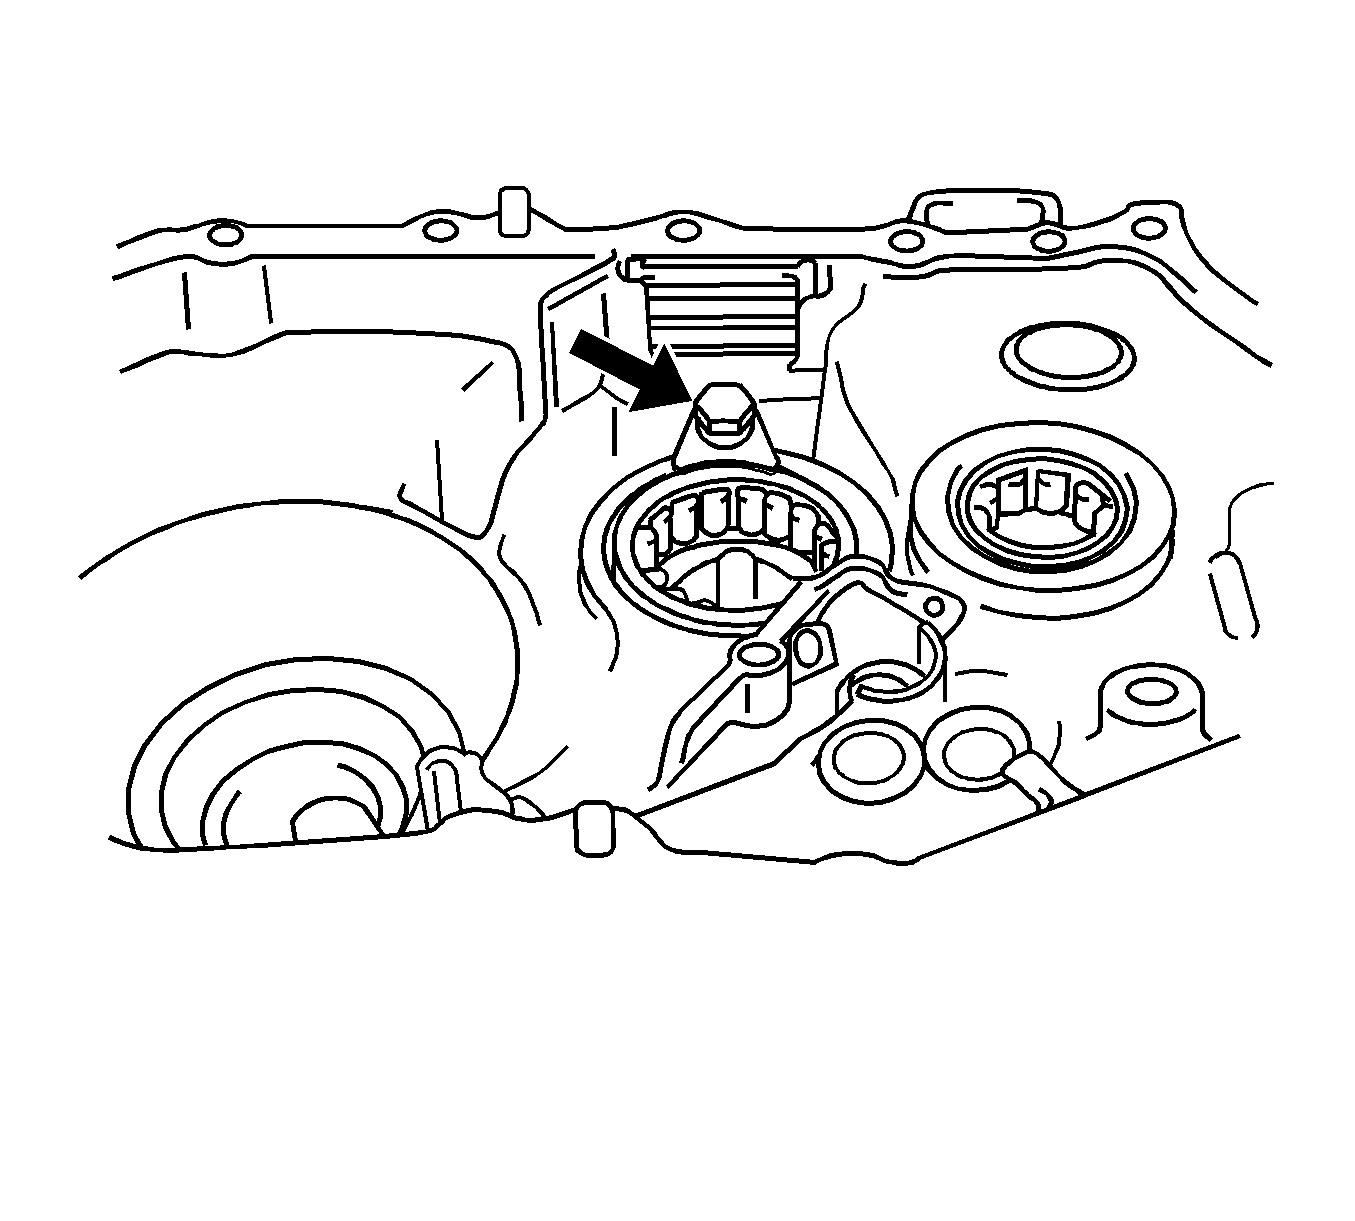
- Remove the lock ball assembly from the transaxle case.
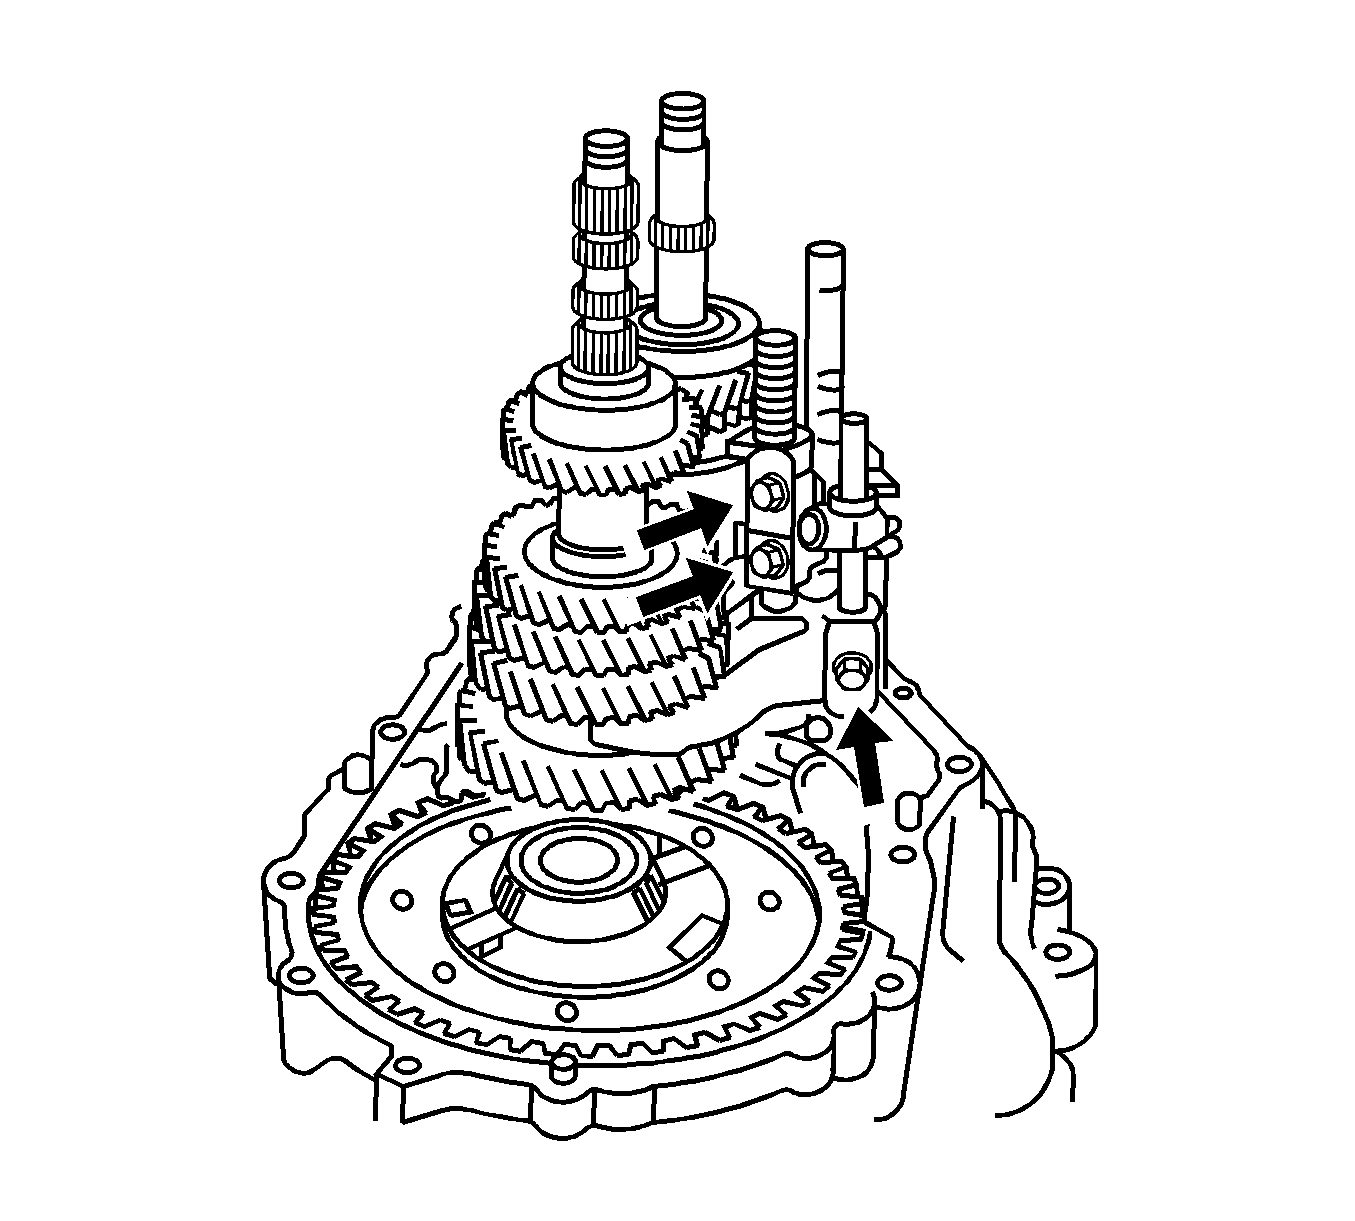
- Remove the 4 bolts (1) and the select lever shaft assembly from the transaxle case.
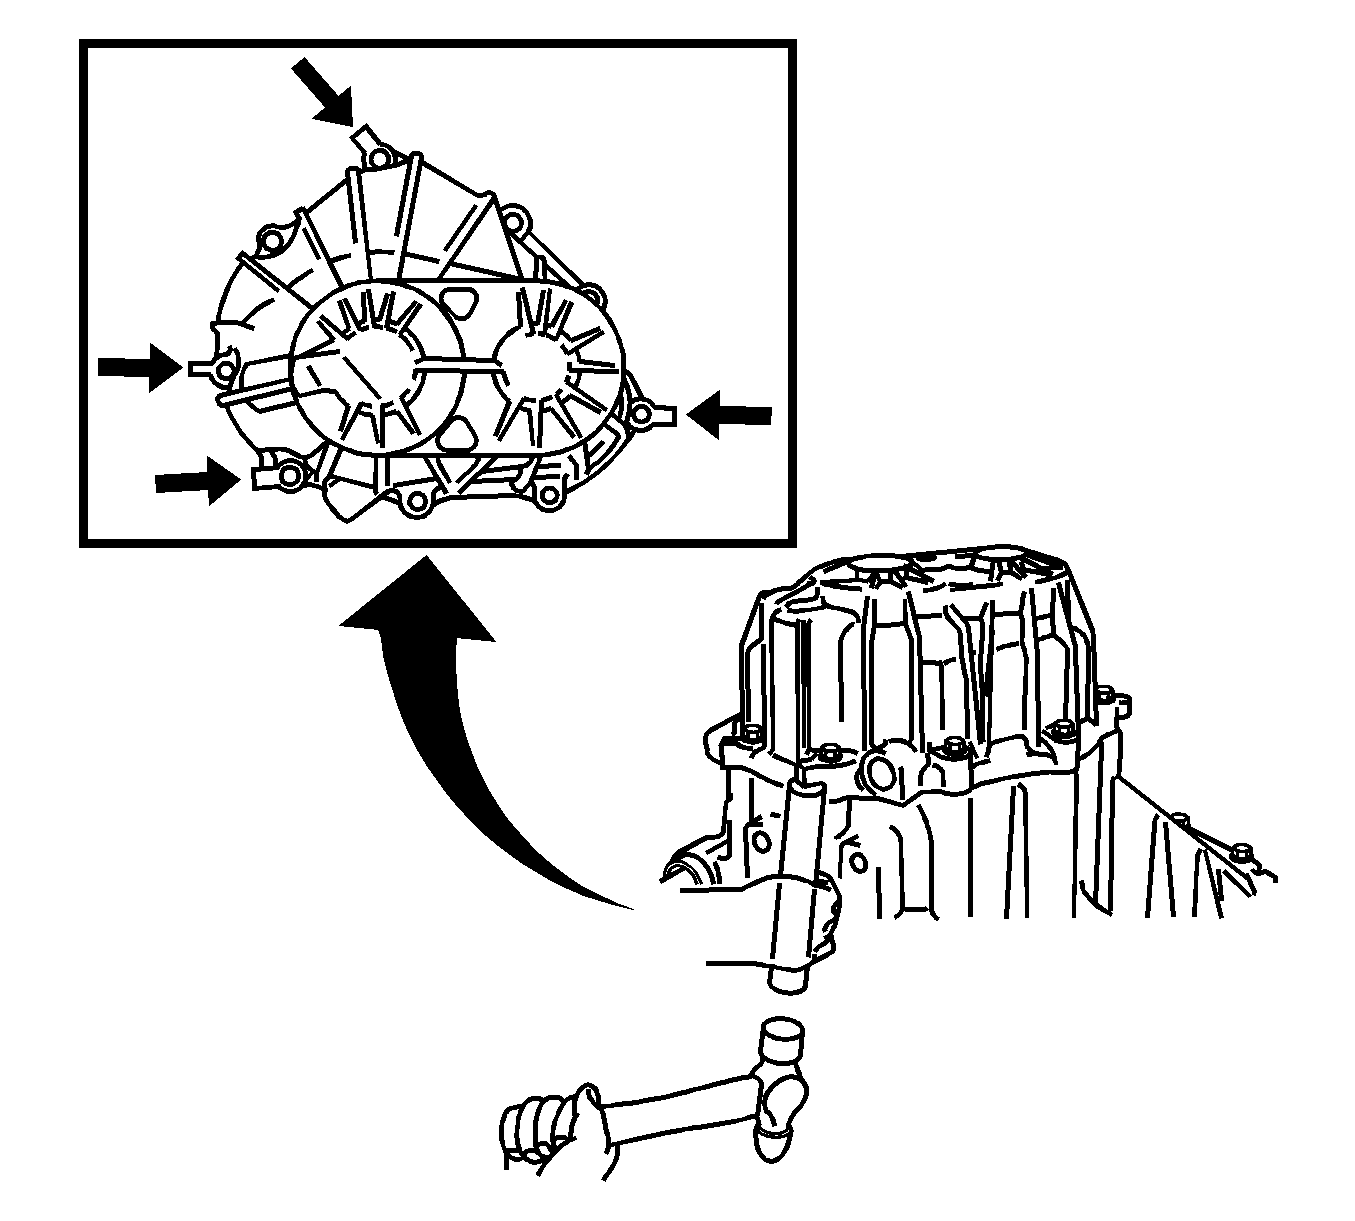
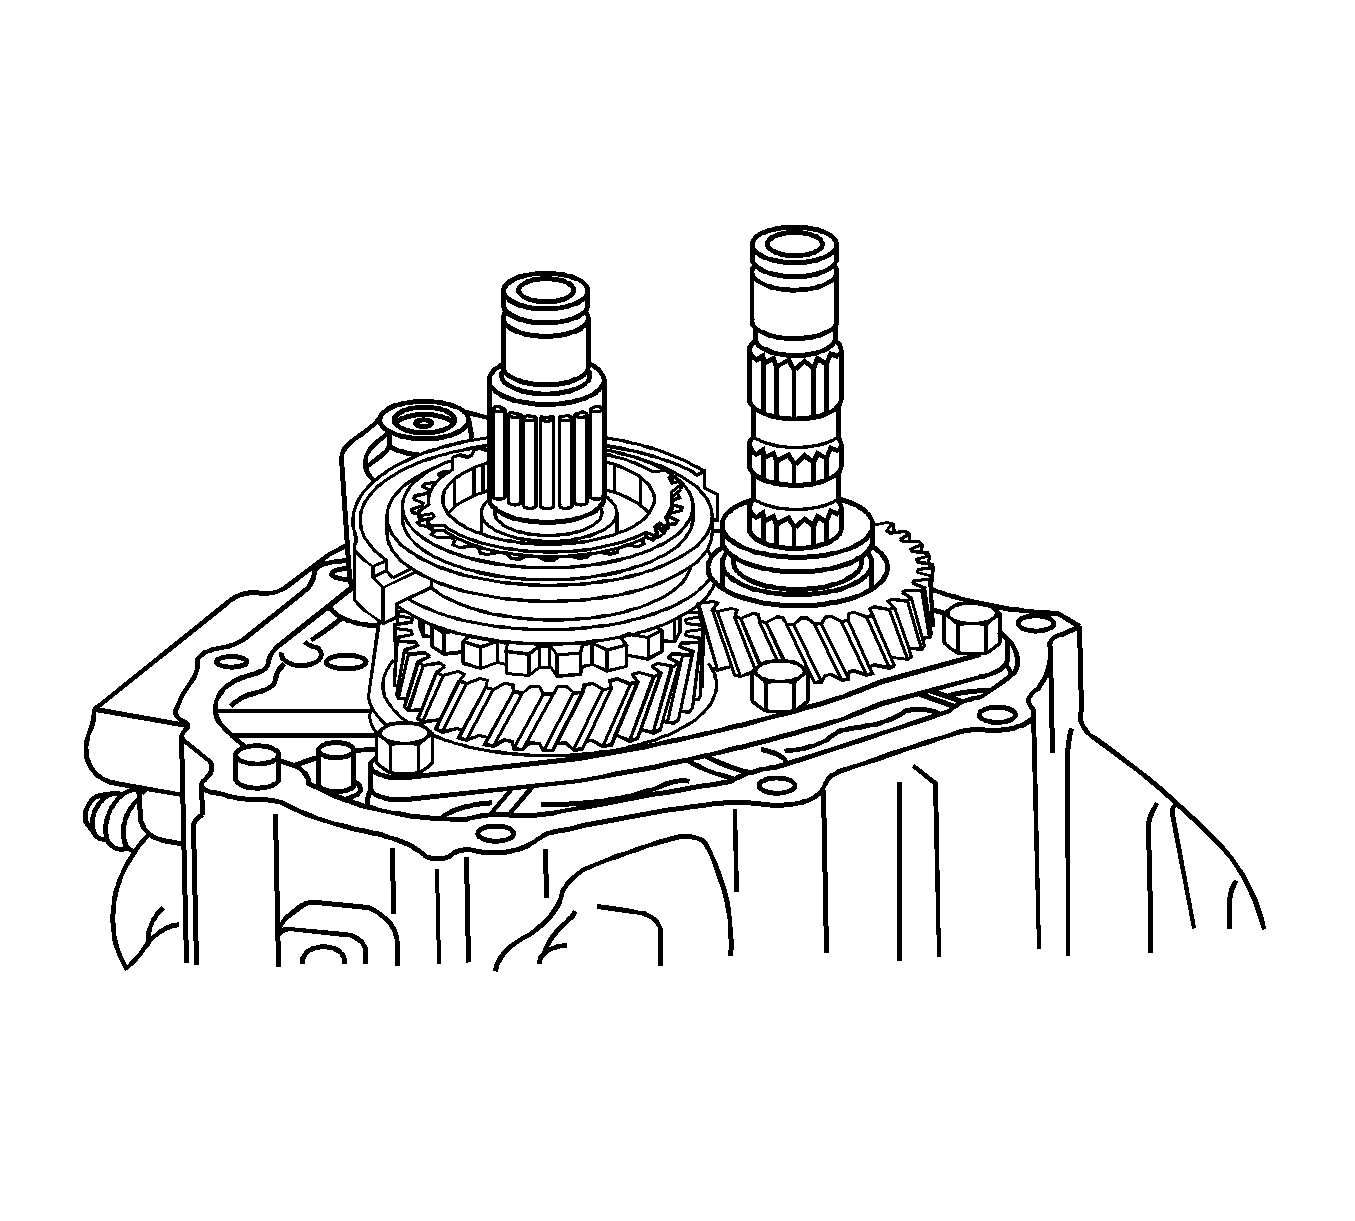
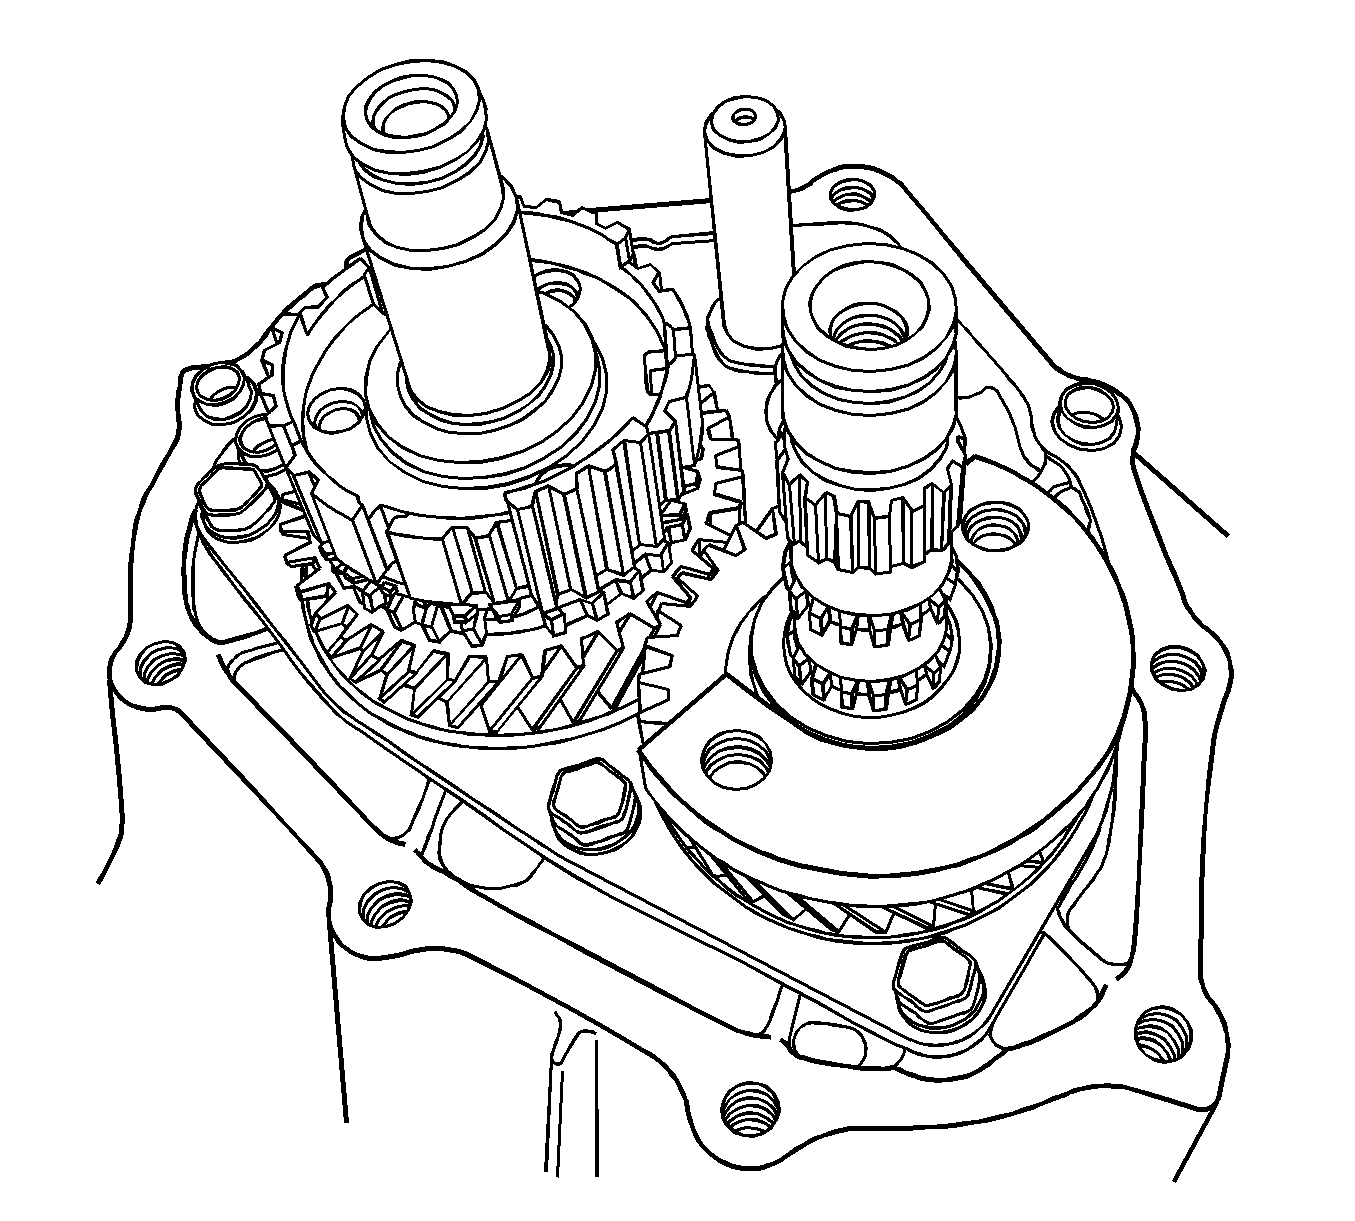
- Remove the 9 transmission case cover bolts.
- Using a brass bar and hammer, carefully tap on the tabs of the transmission case cover to remove the cover from the transmission case.
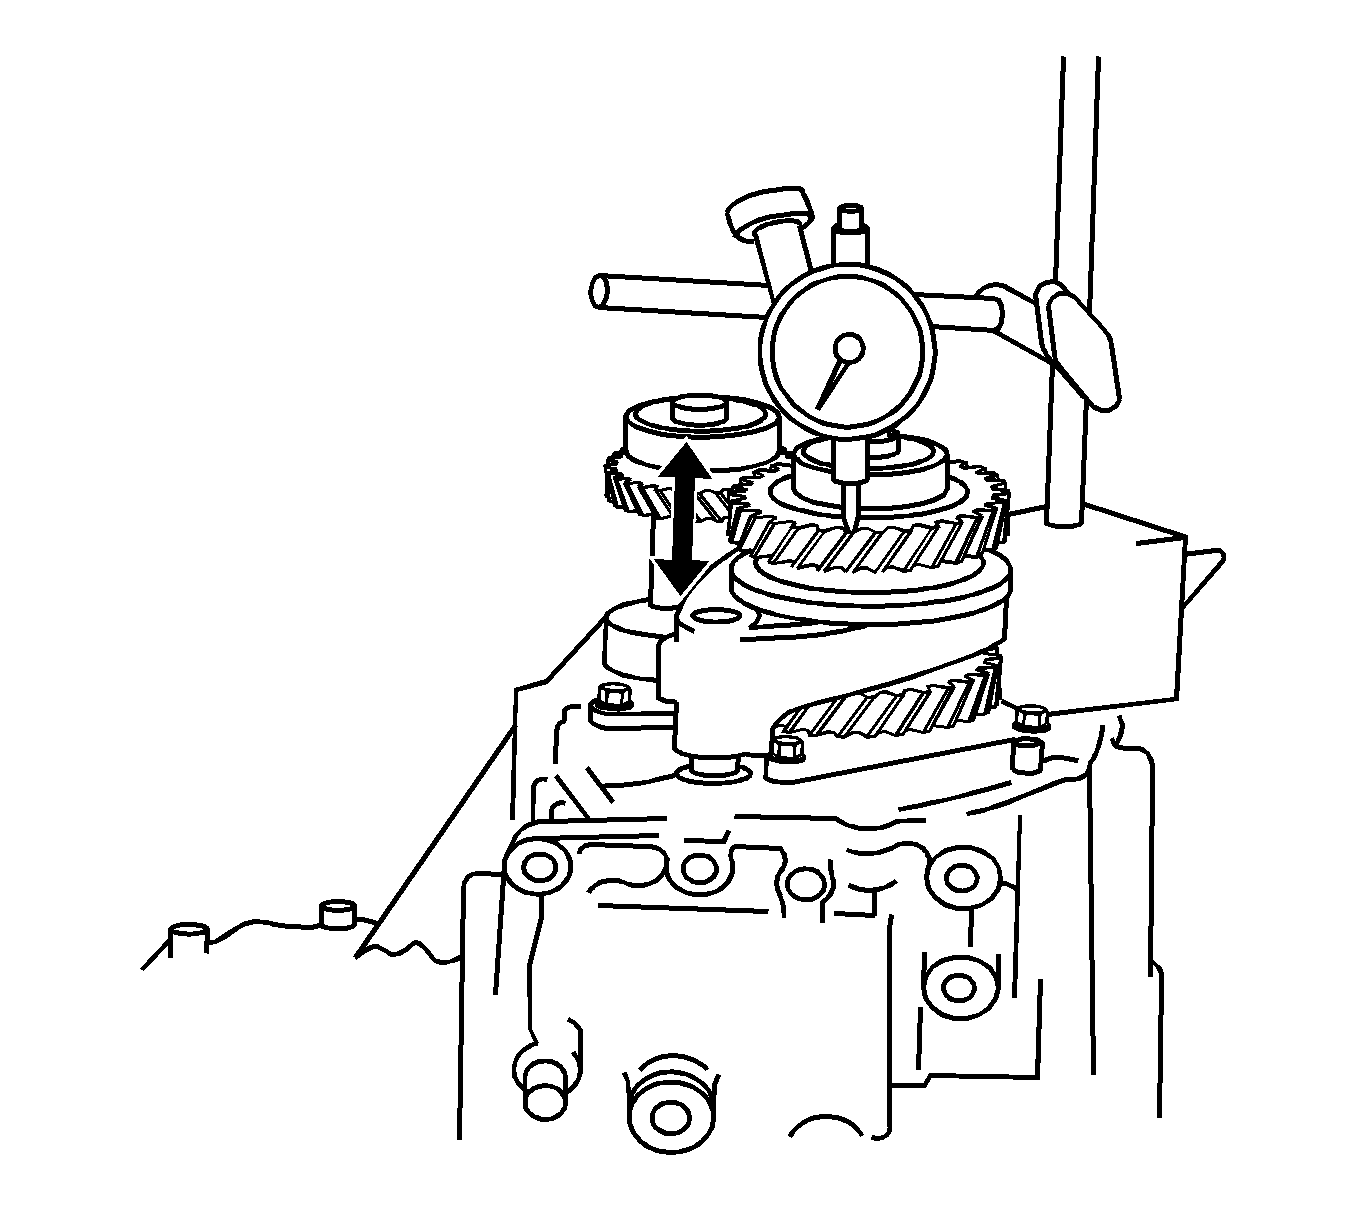
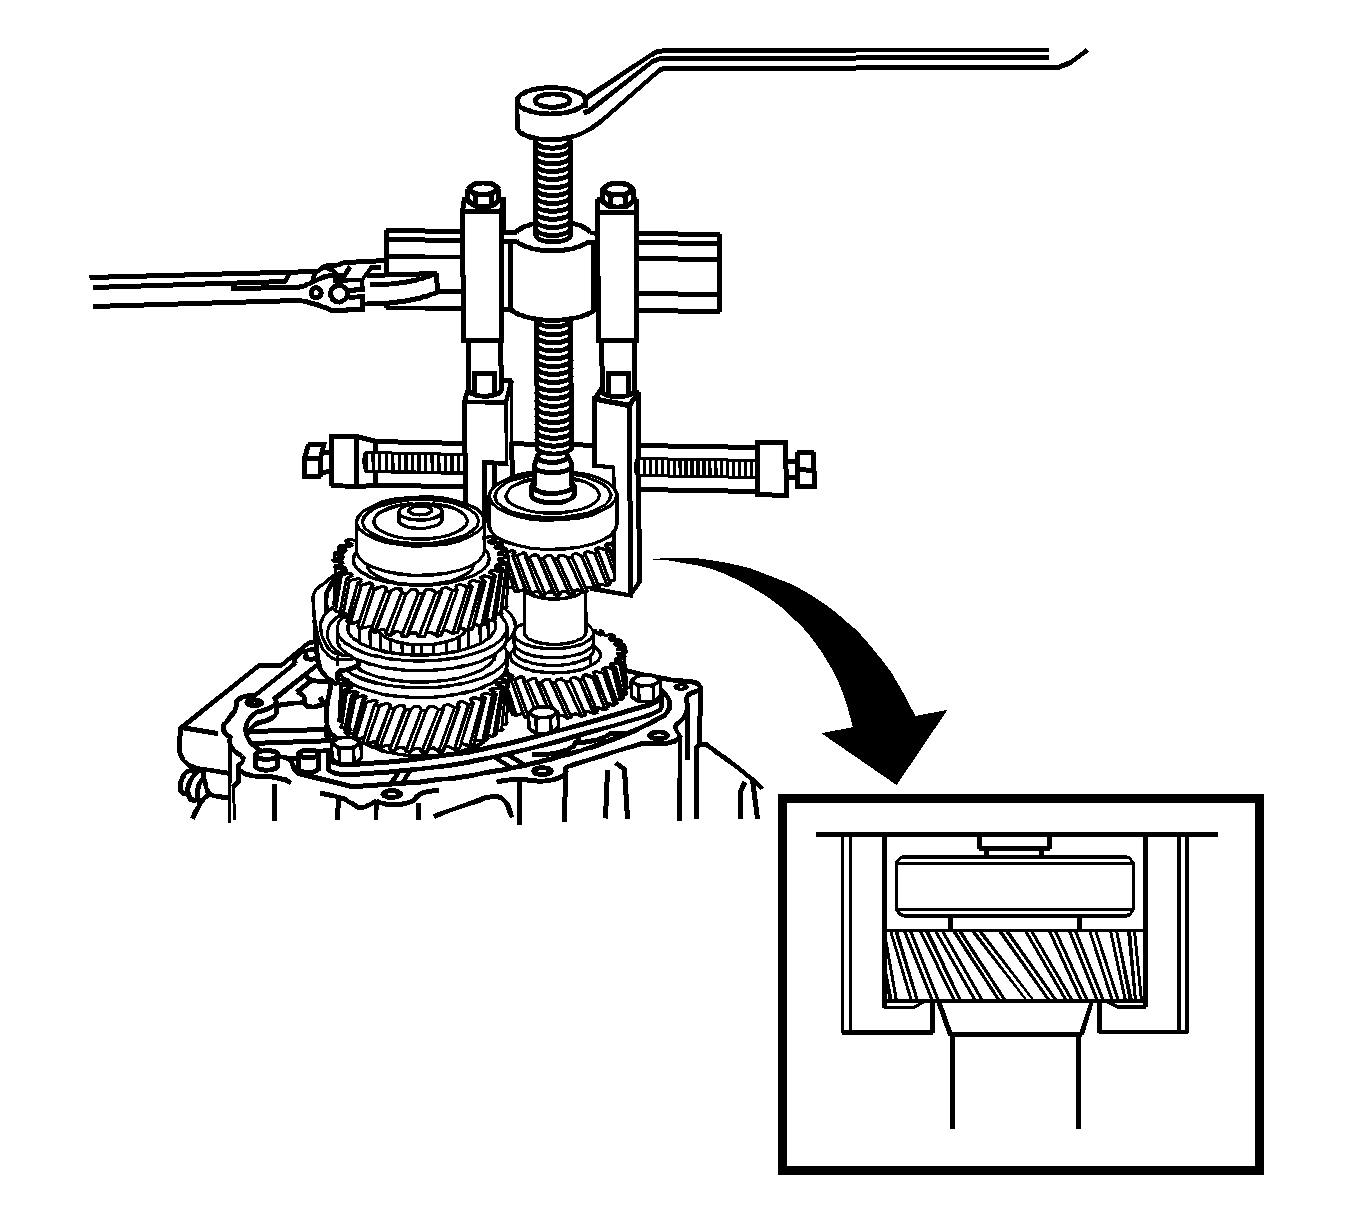
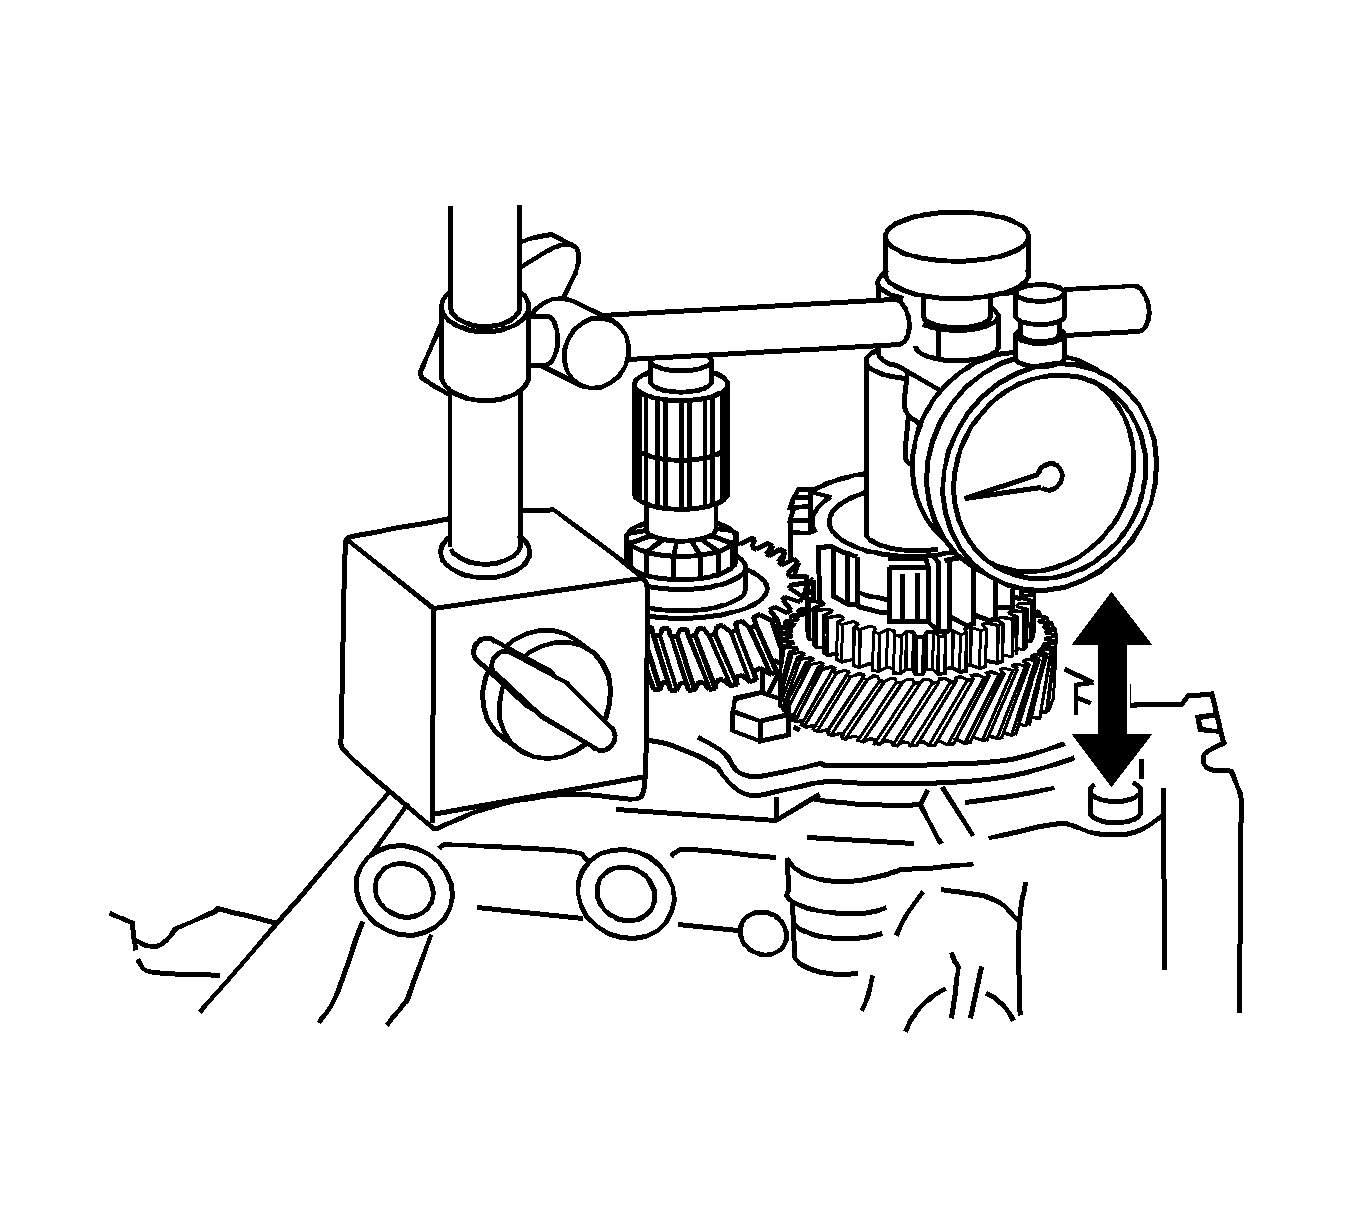
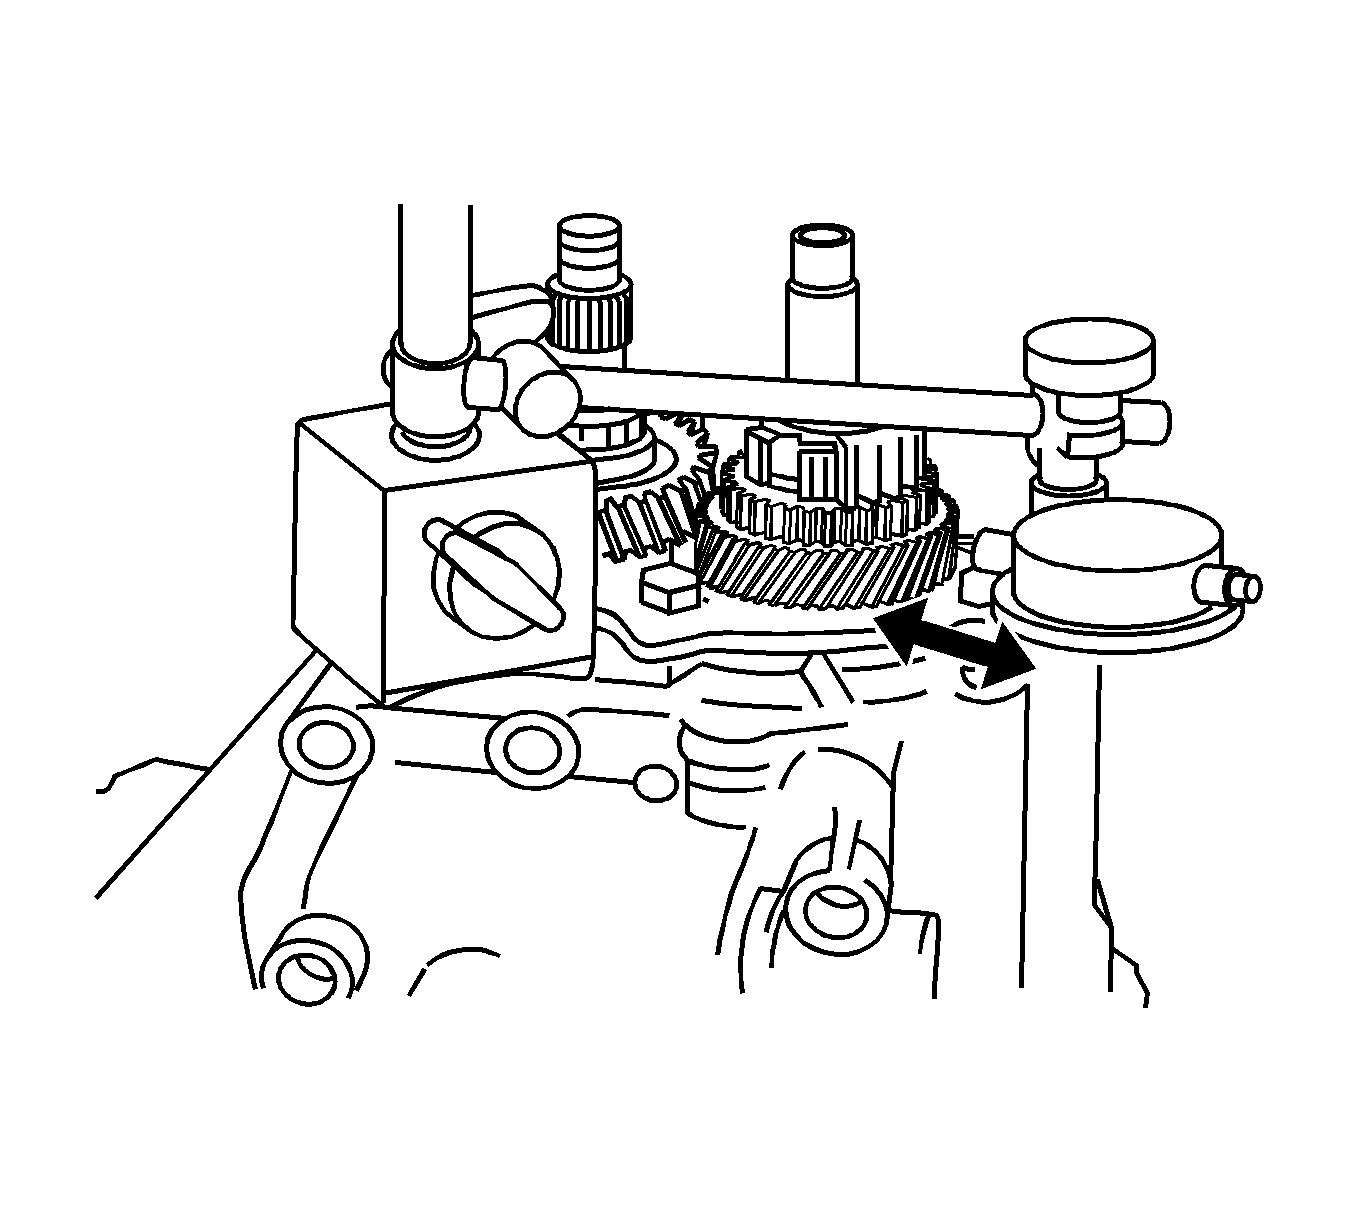
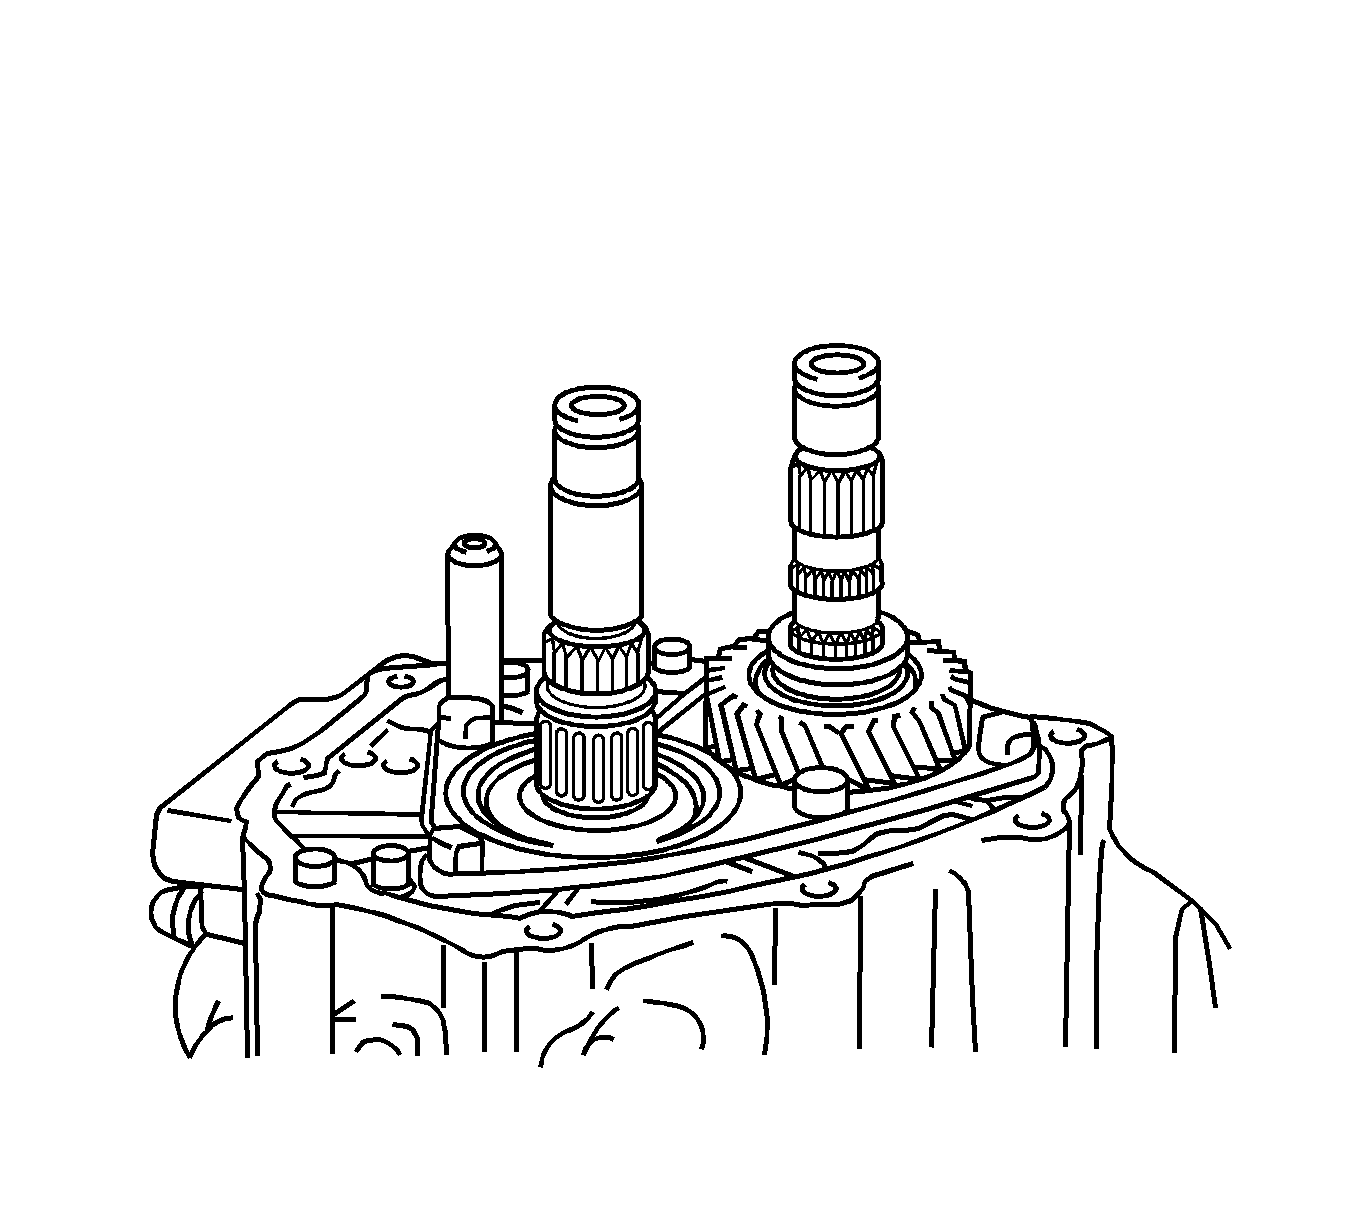
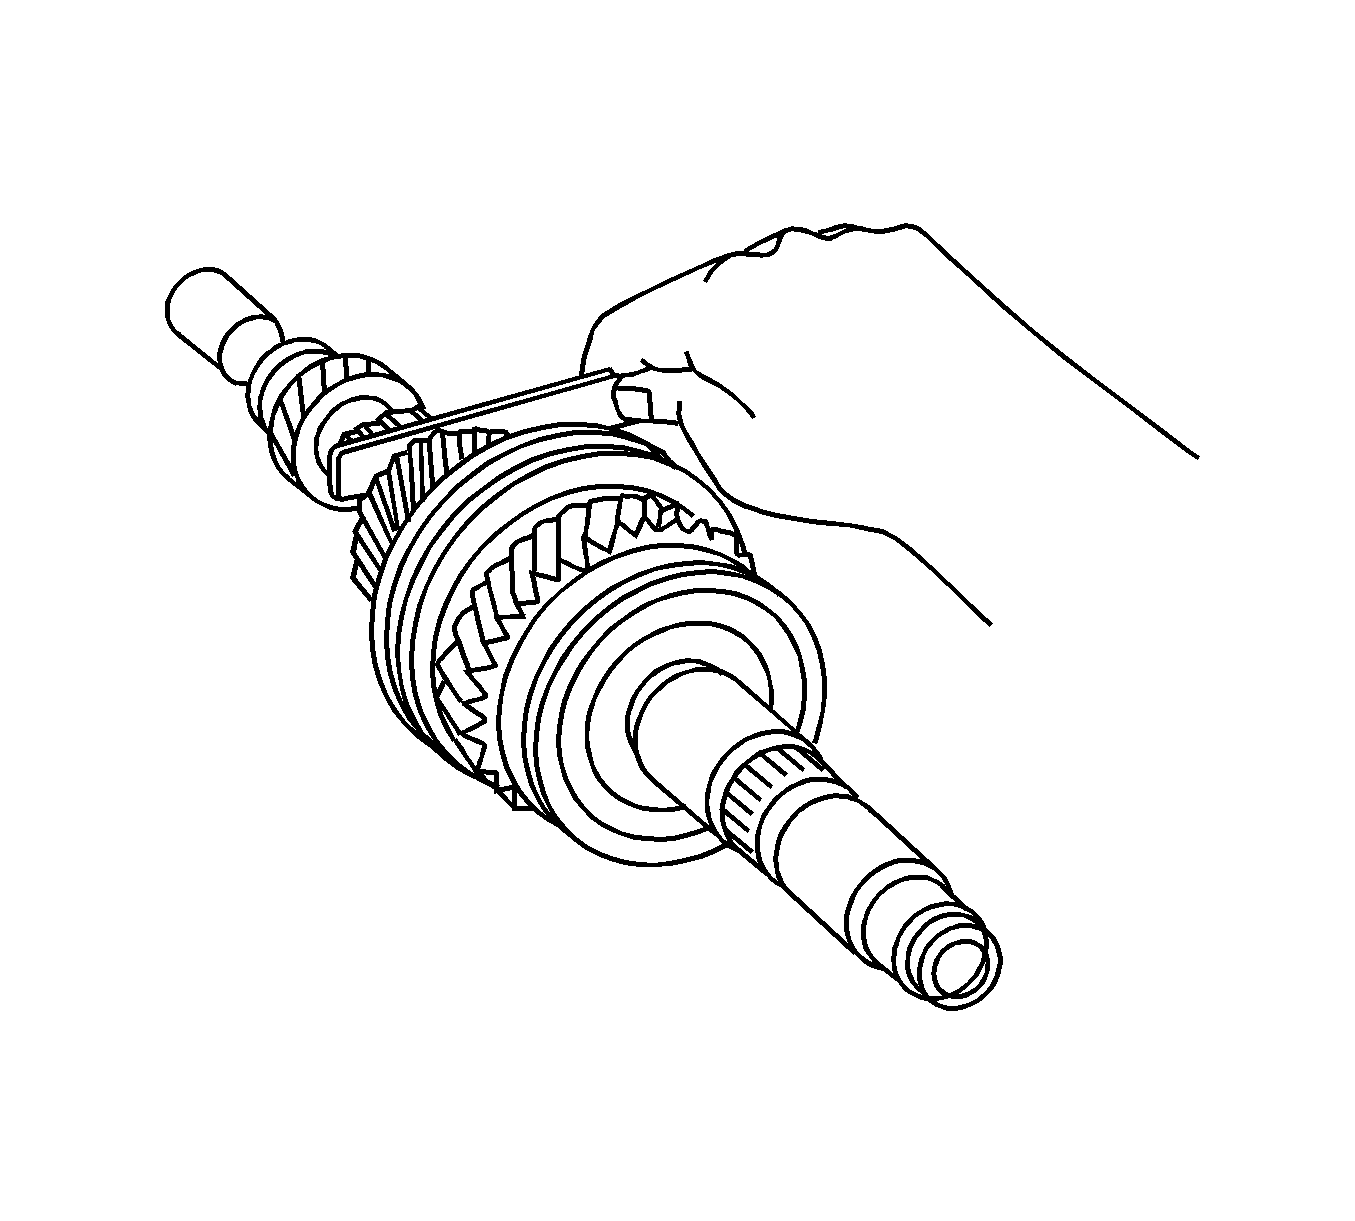
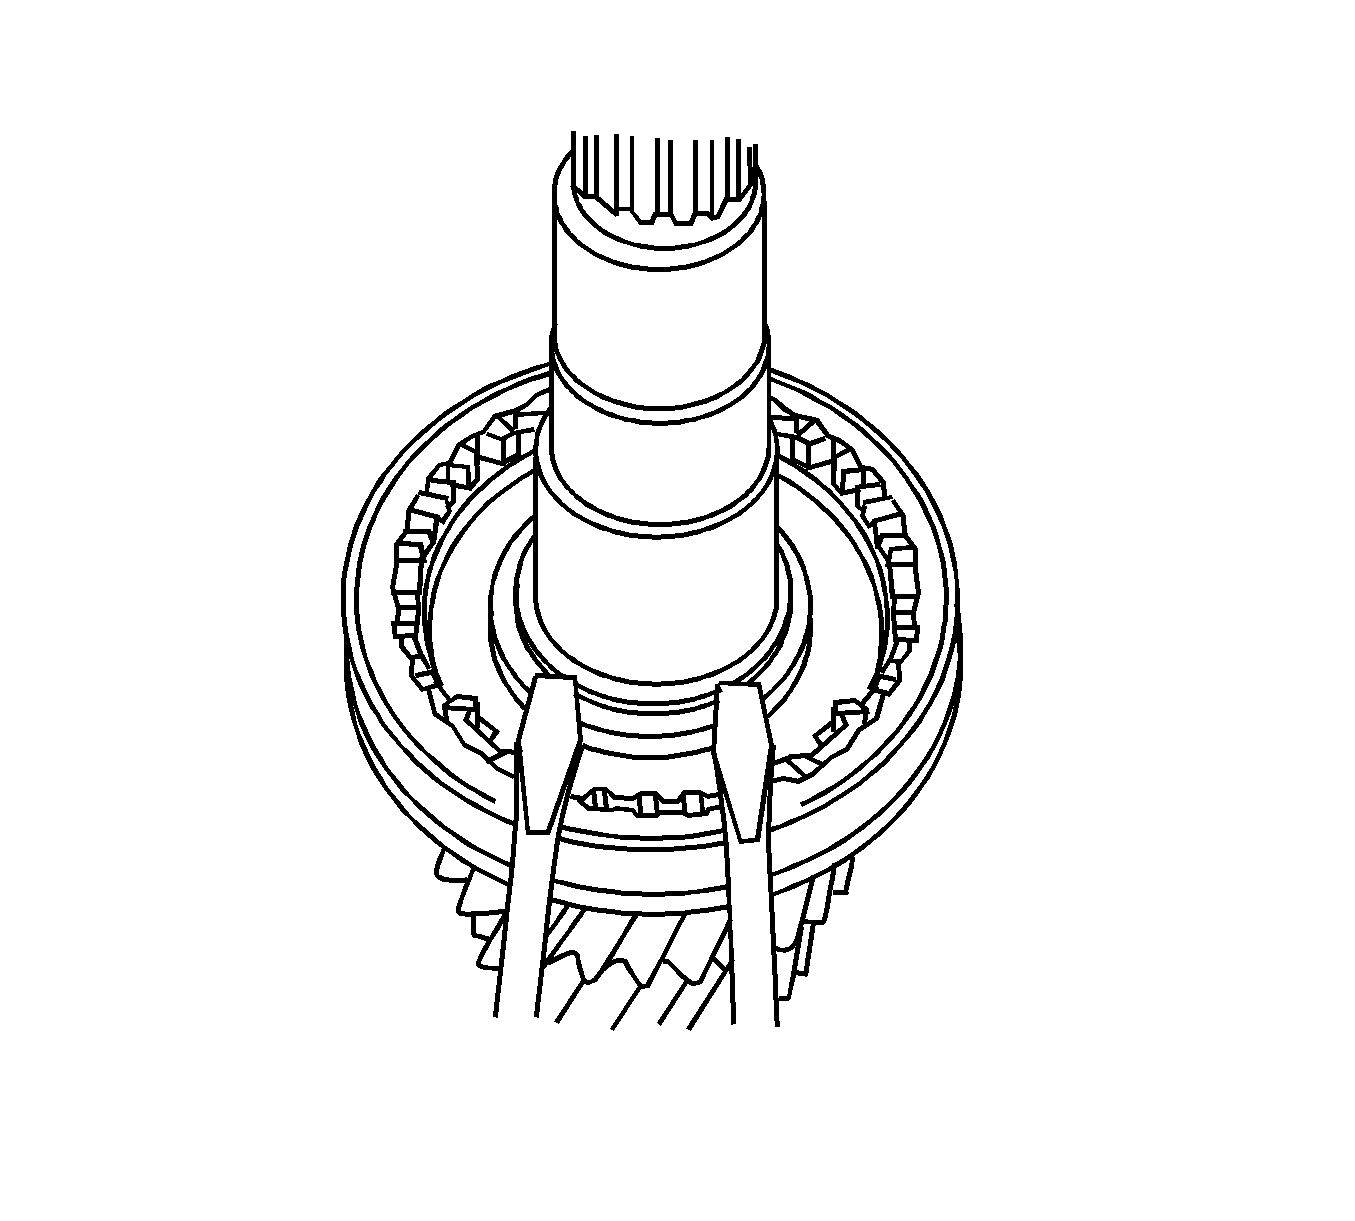
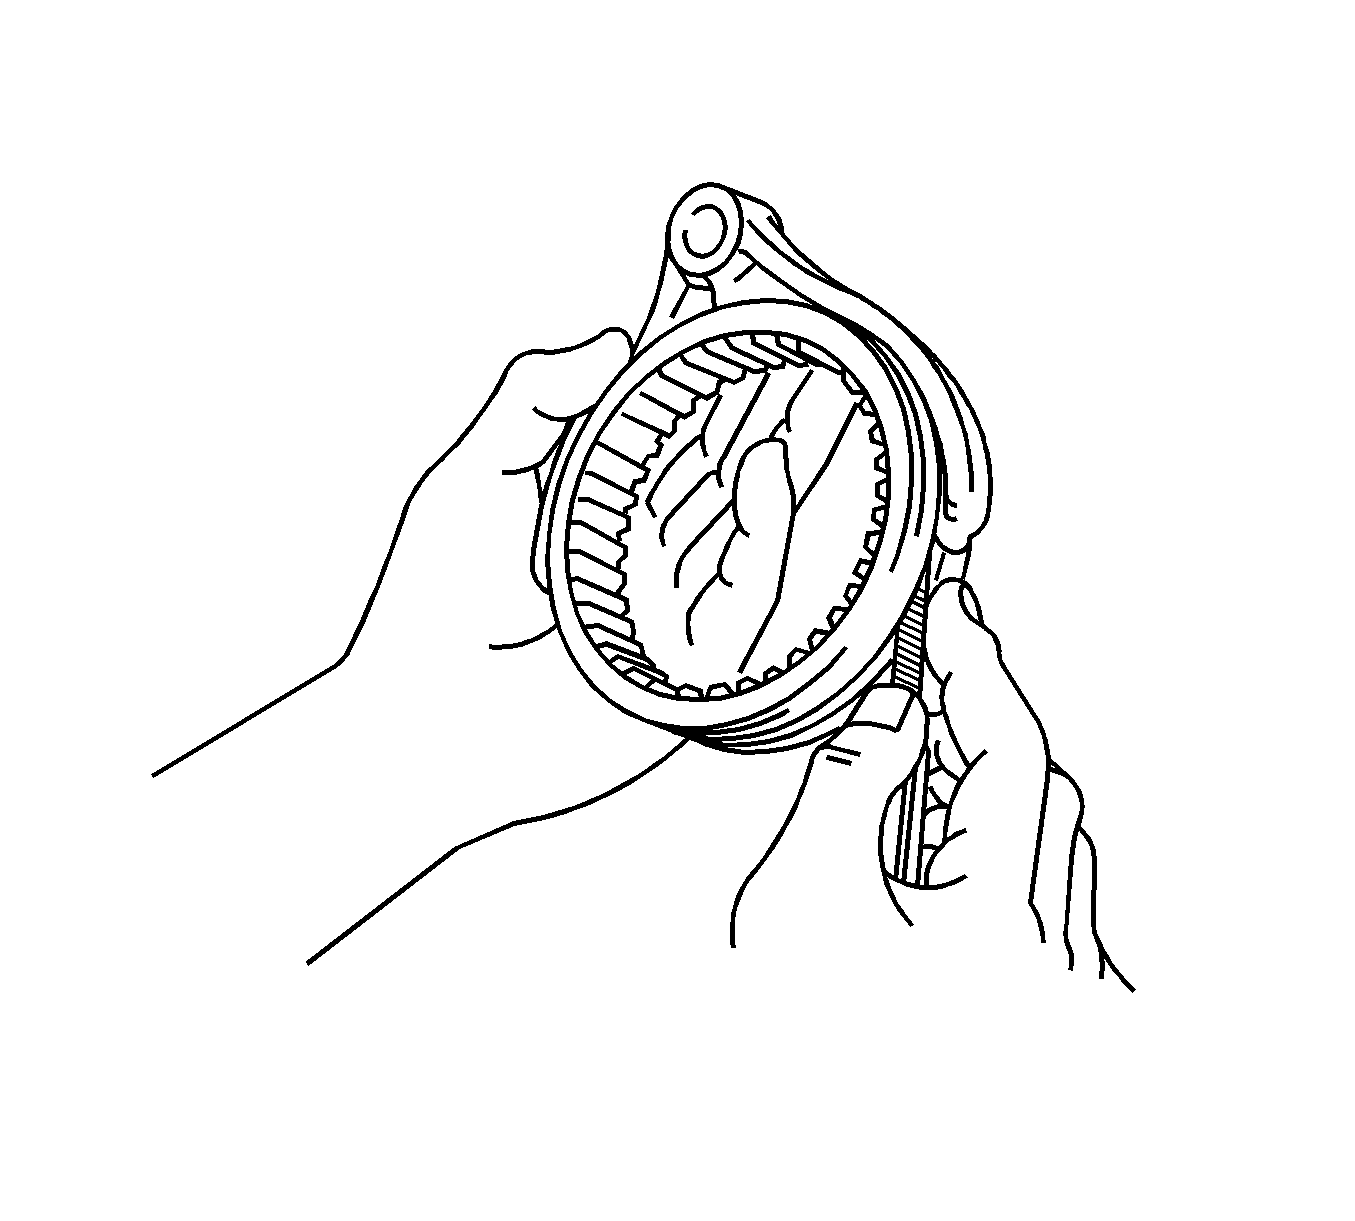
- Using a dial indicator, measure the thrust clearance of 6th gear.
- Using a dial indicator, measure the radial runout of 6th gear.
- If the gear exceeds any of the maximum measurements, replace the gear, roller bearing or shaft.
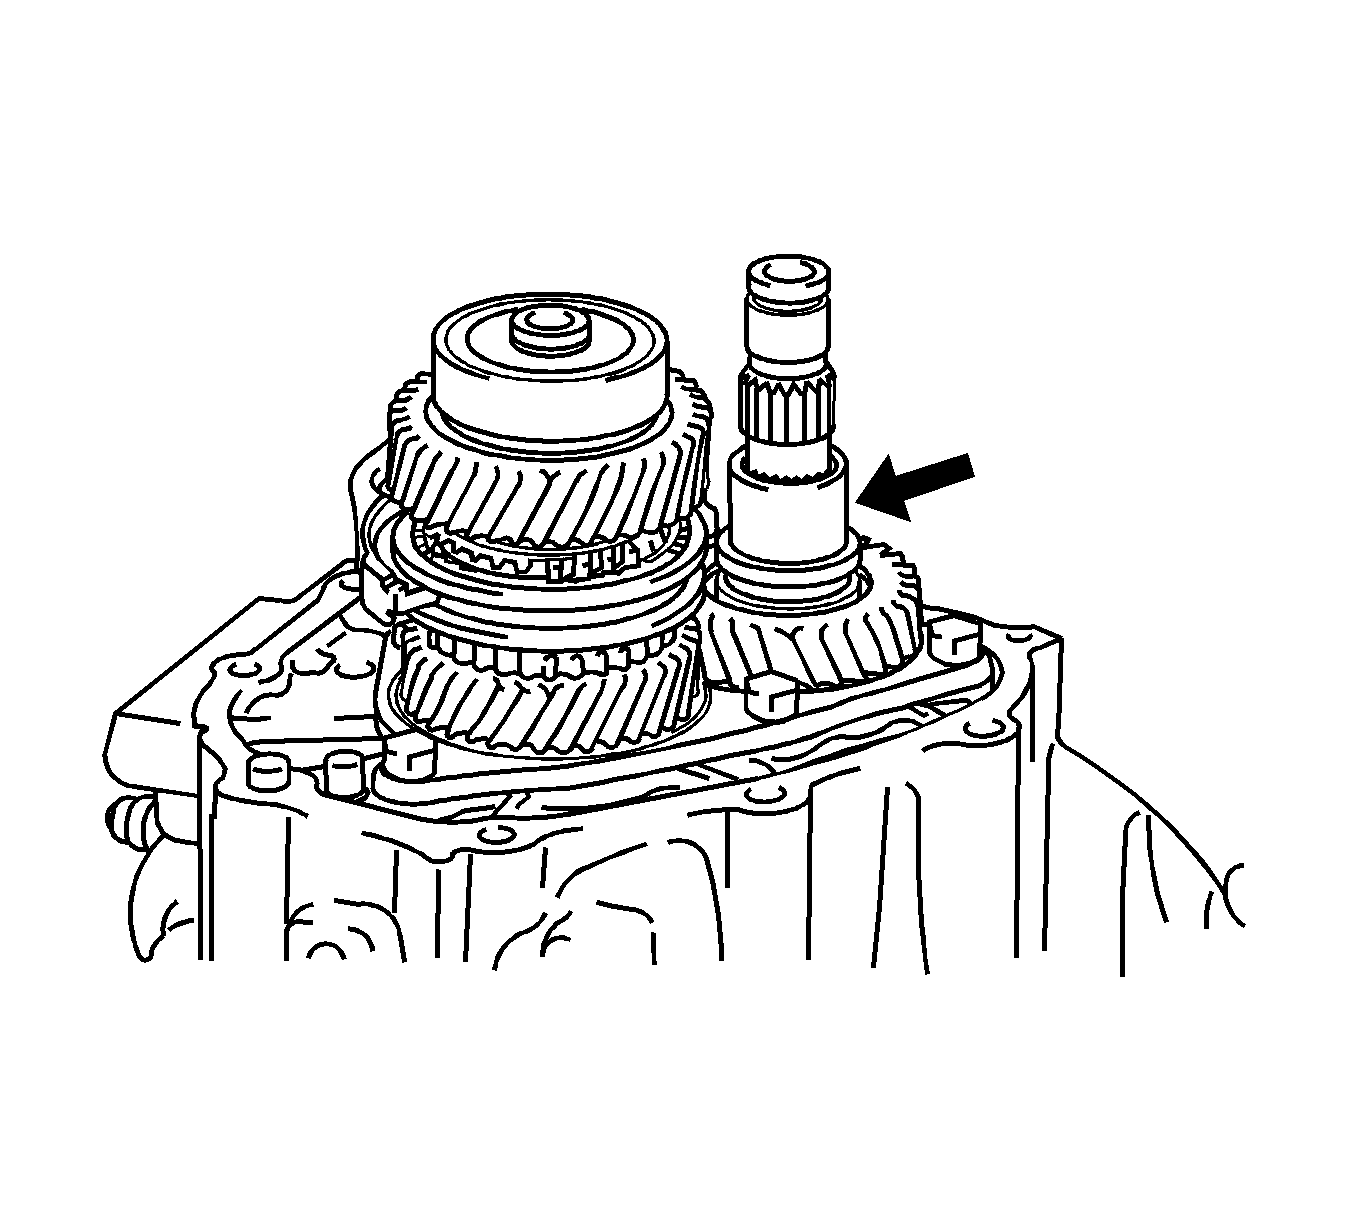
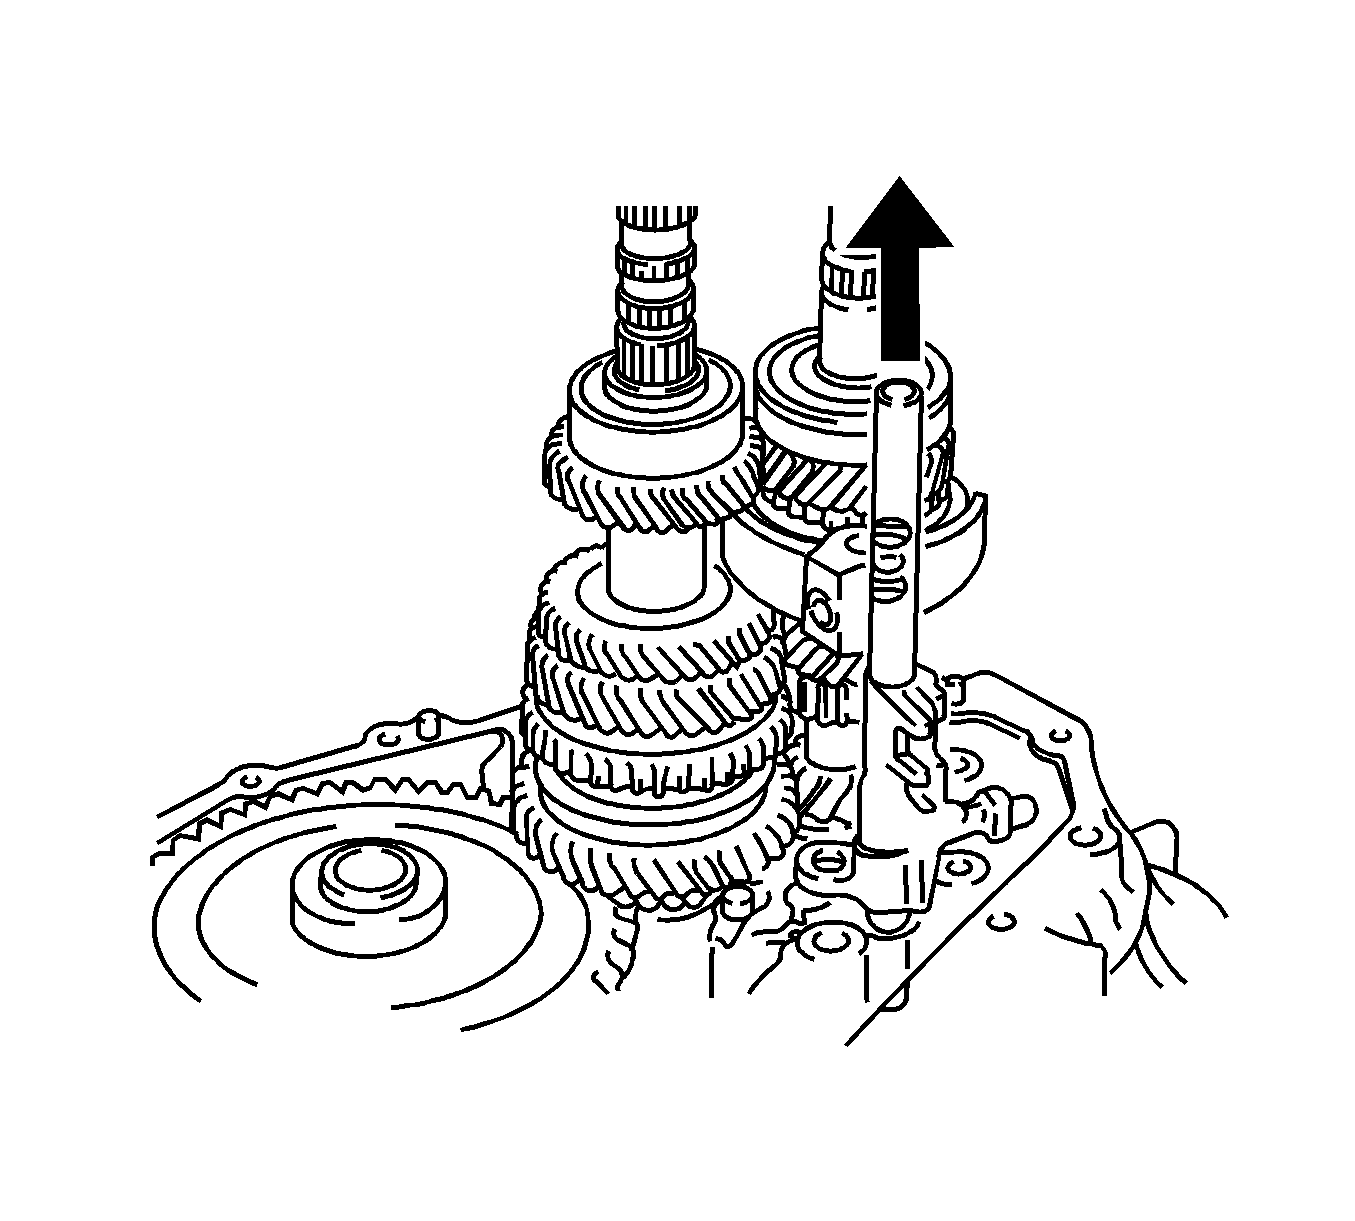
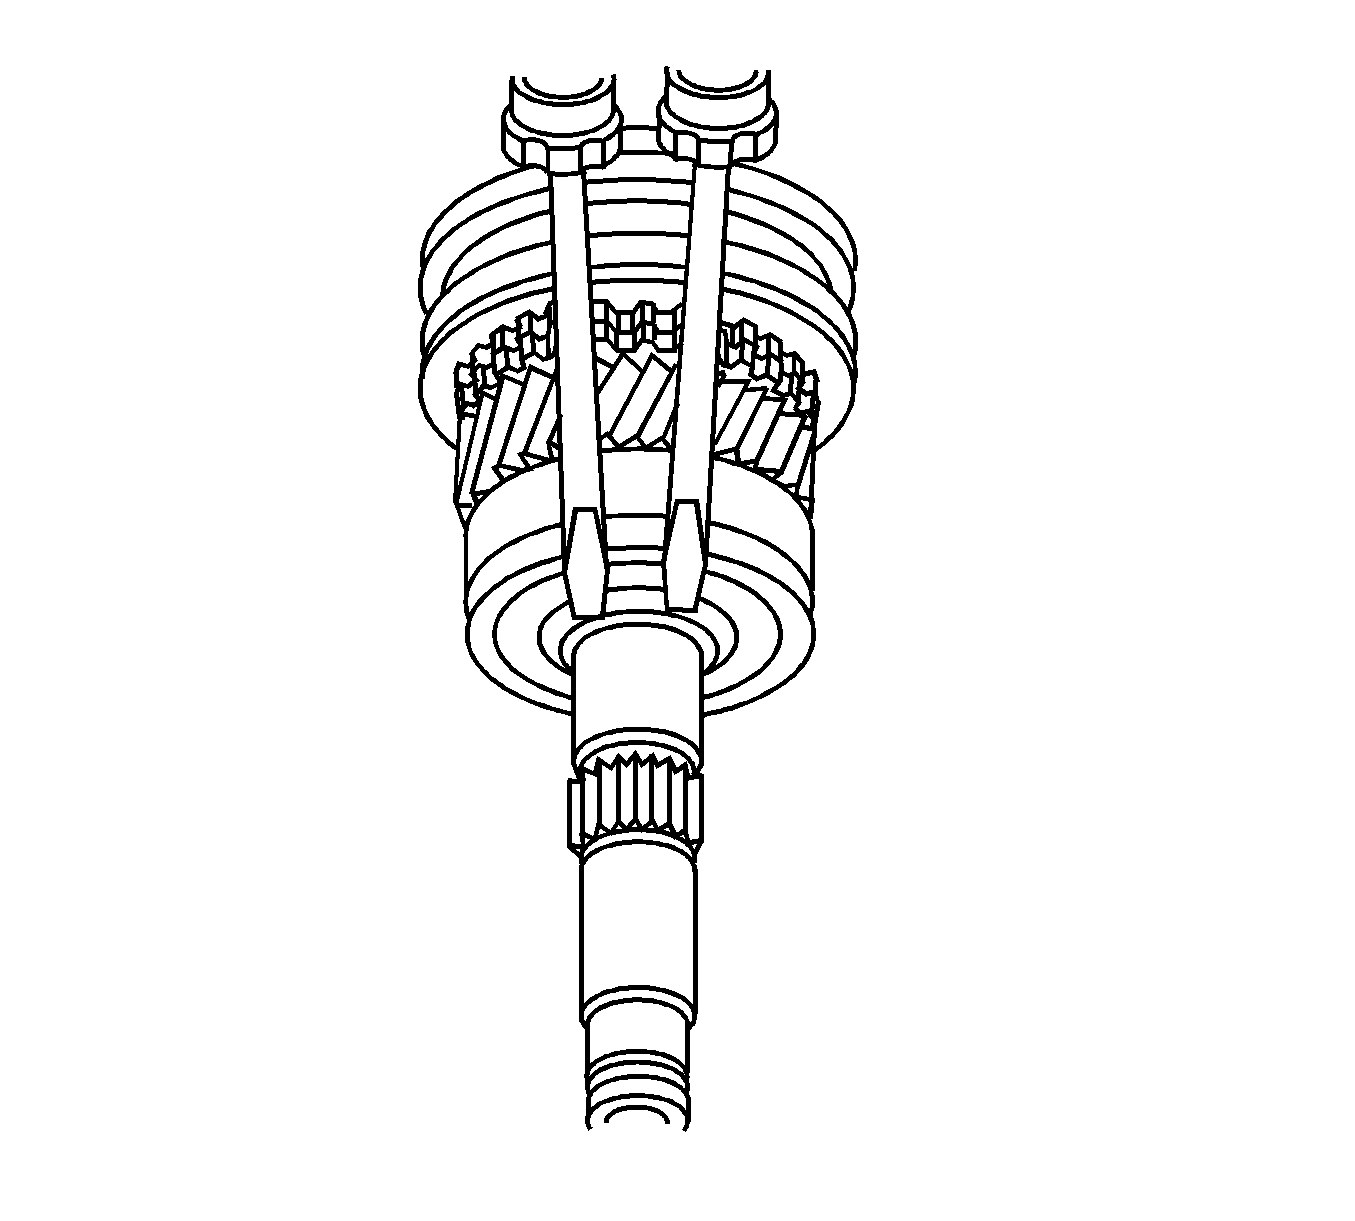
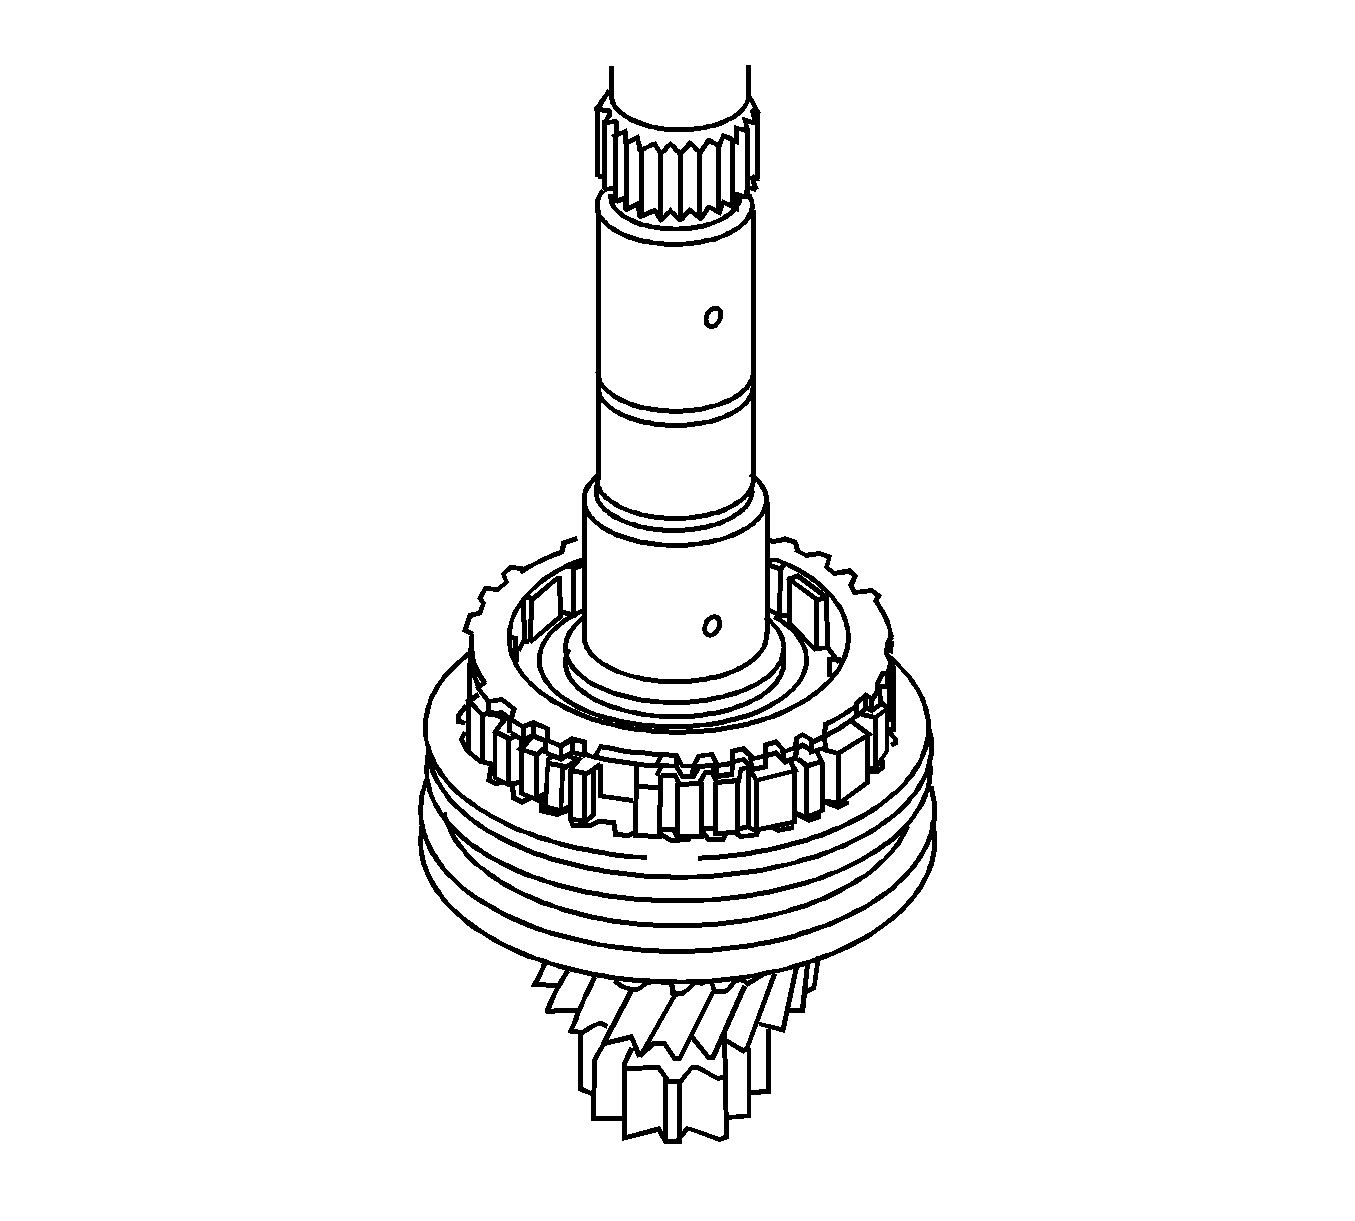
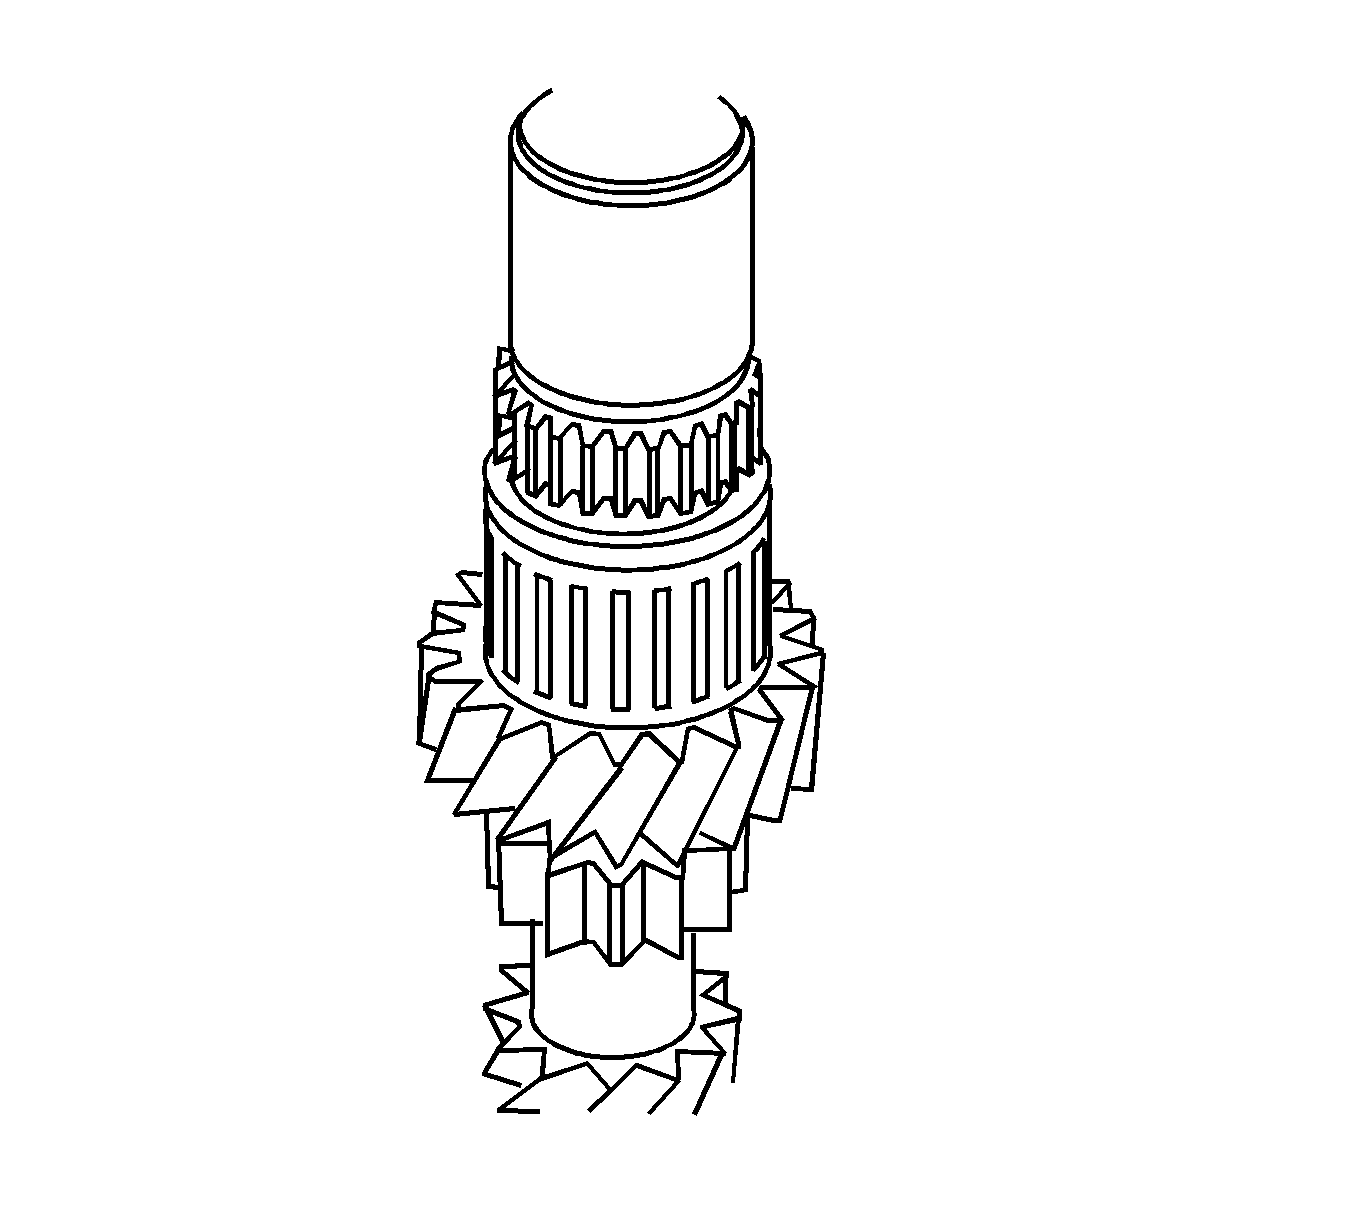
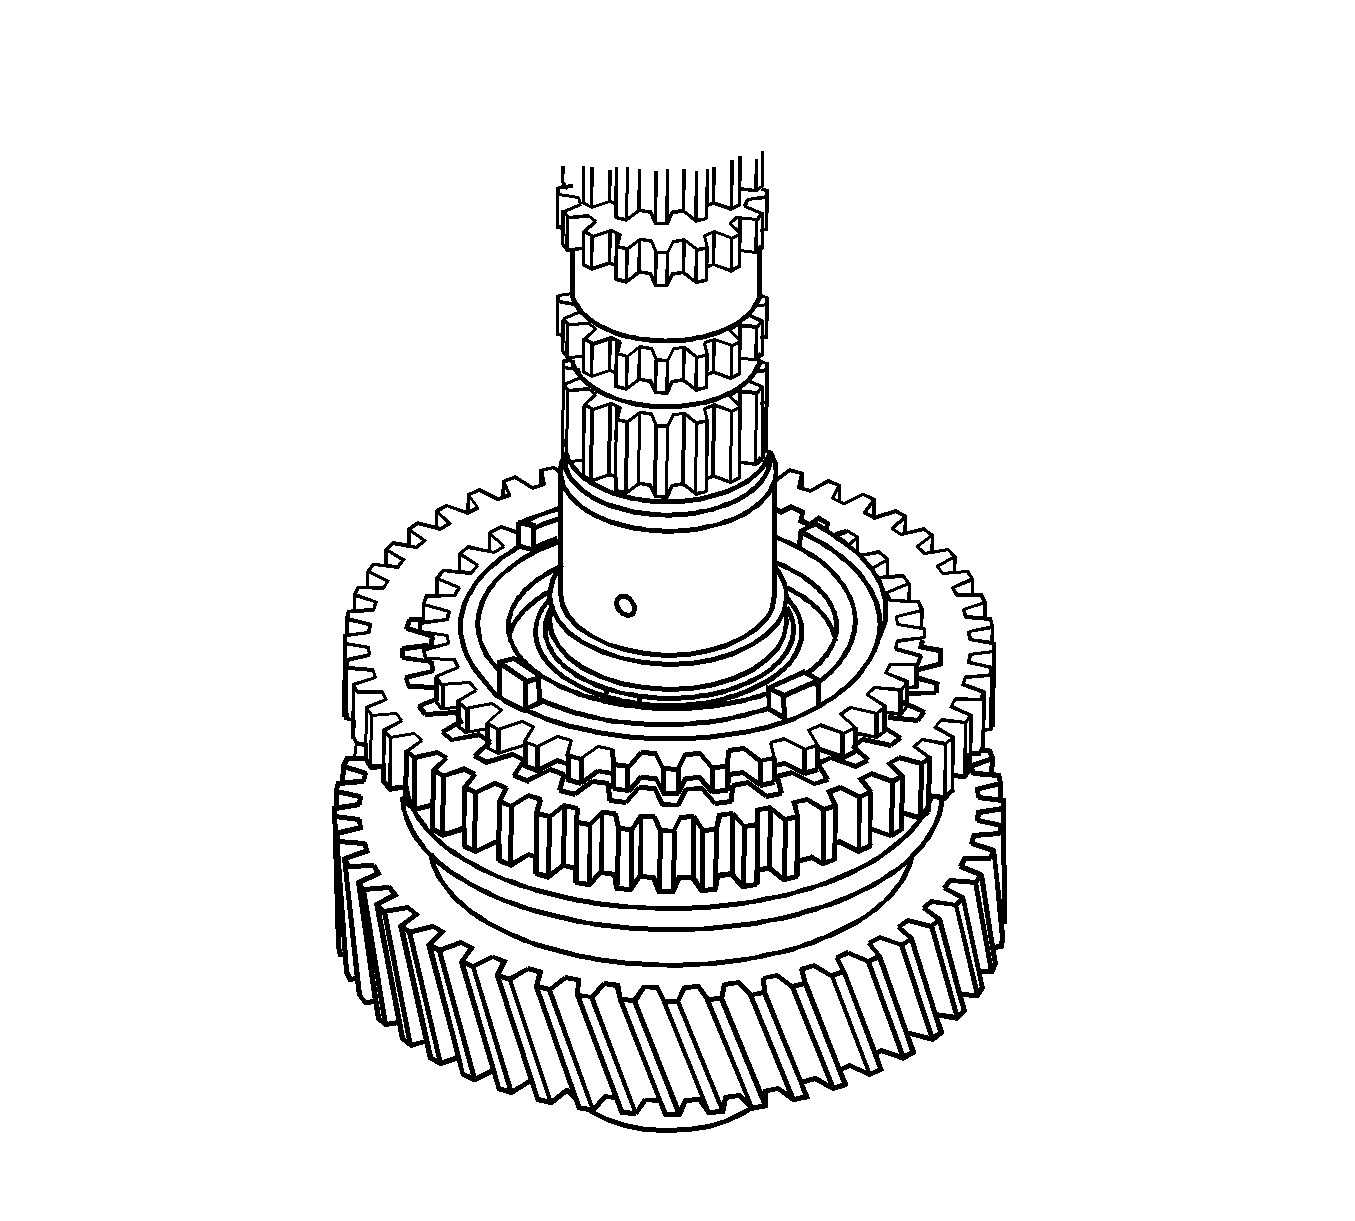
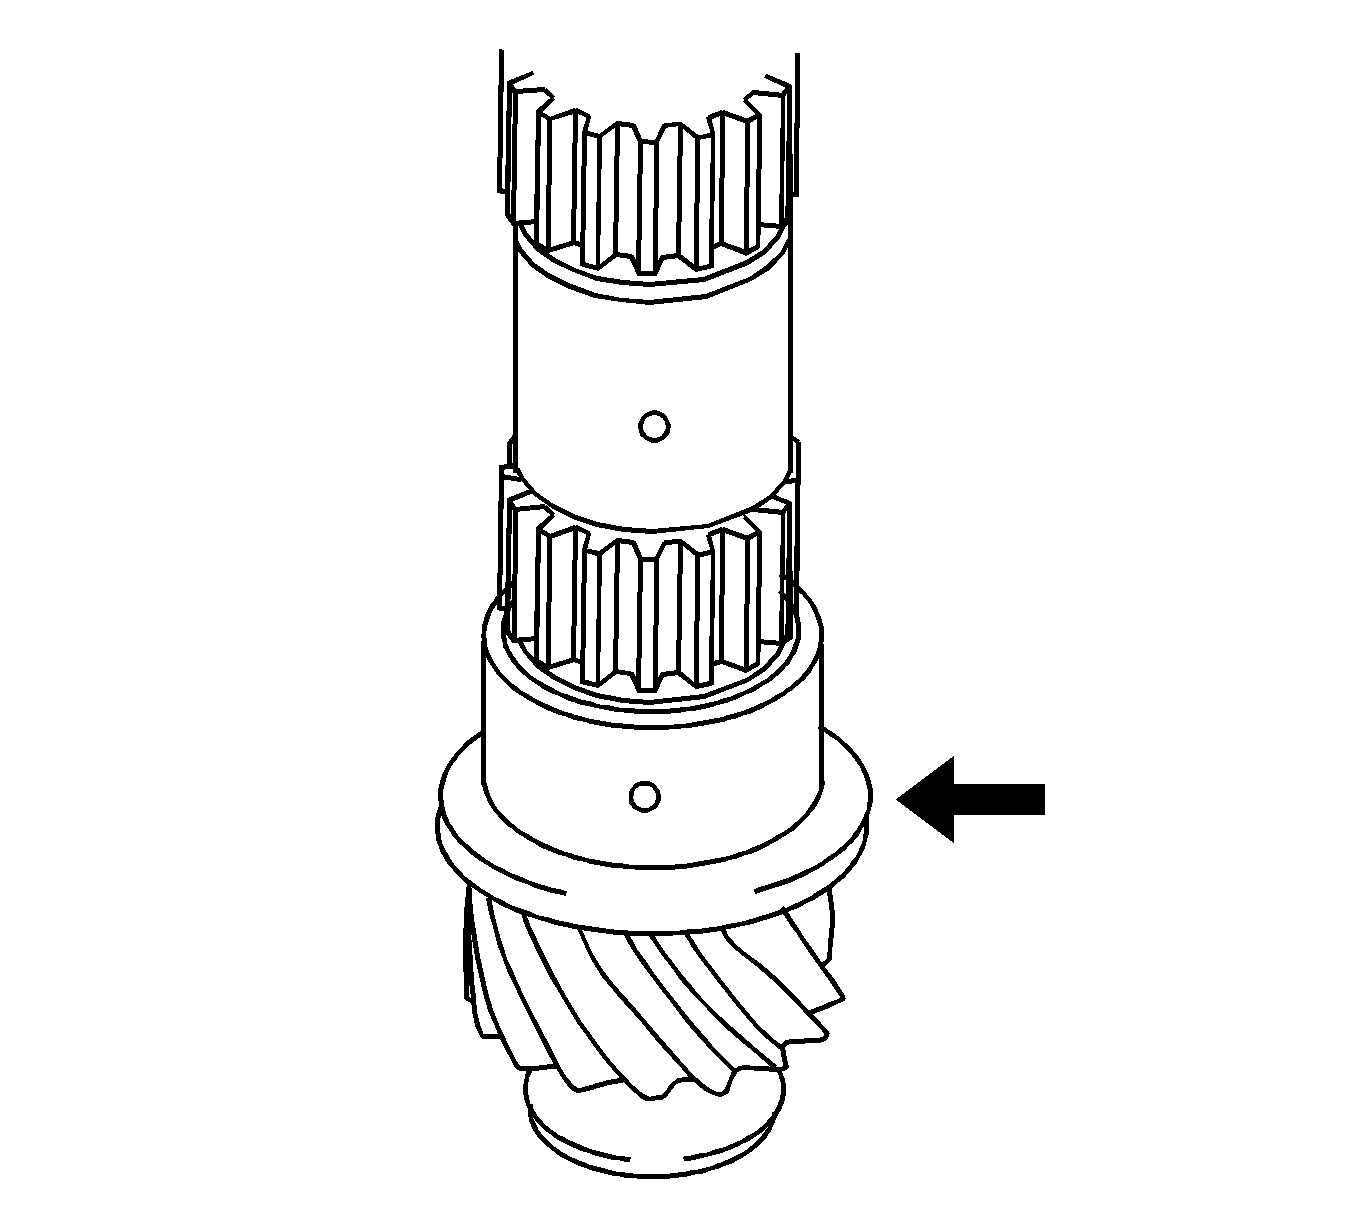
- Remove the 6th driven gear snap ring from the output shaft.
- Using a 2 jaw puller or equivalent, remove the rear bearing assembly, 6th driven gear from the output shaft.
- Remove the spacer from the output shaft.
- Remove the input shaft snap ring.
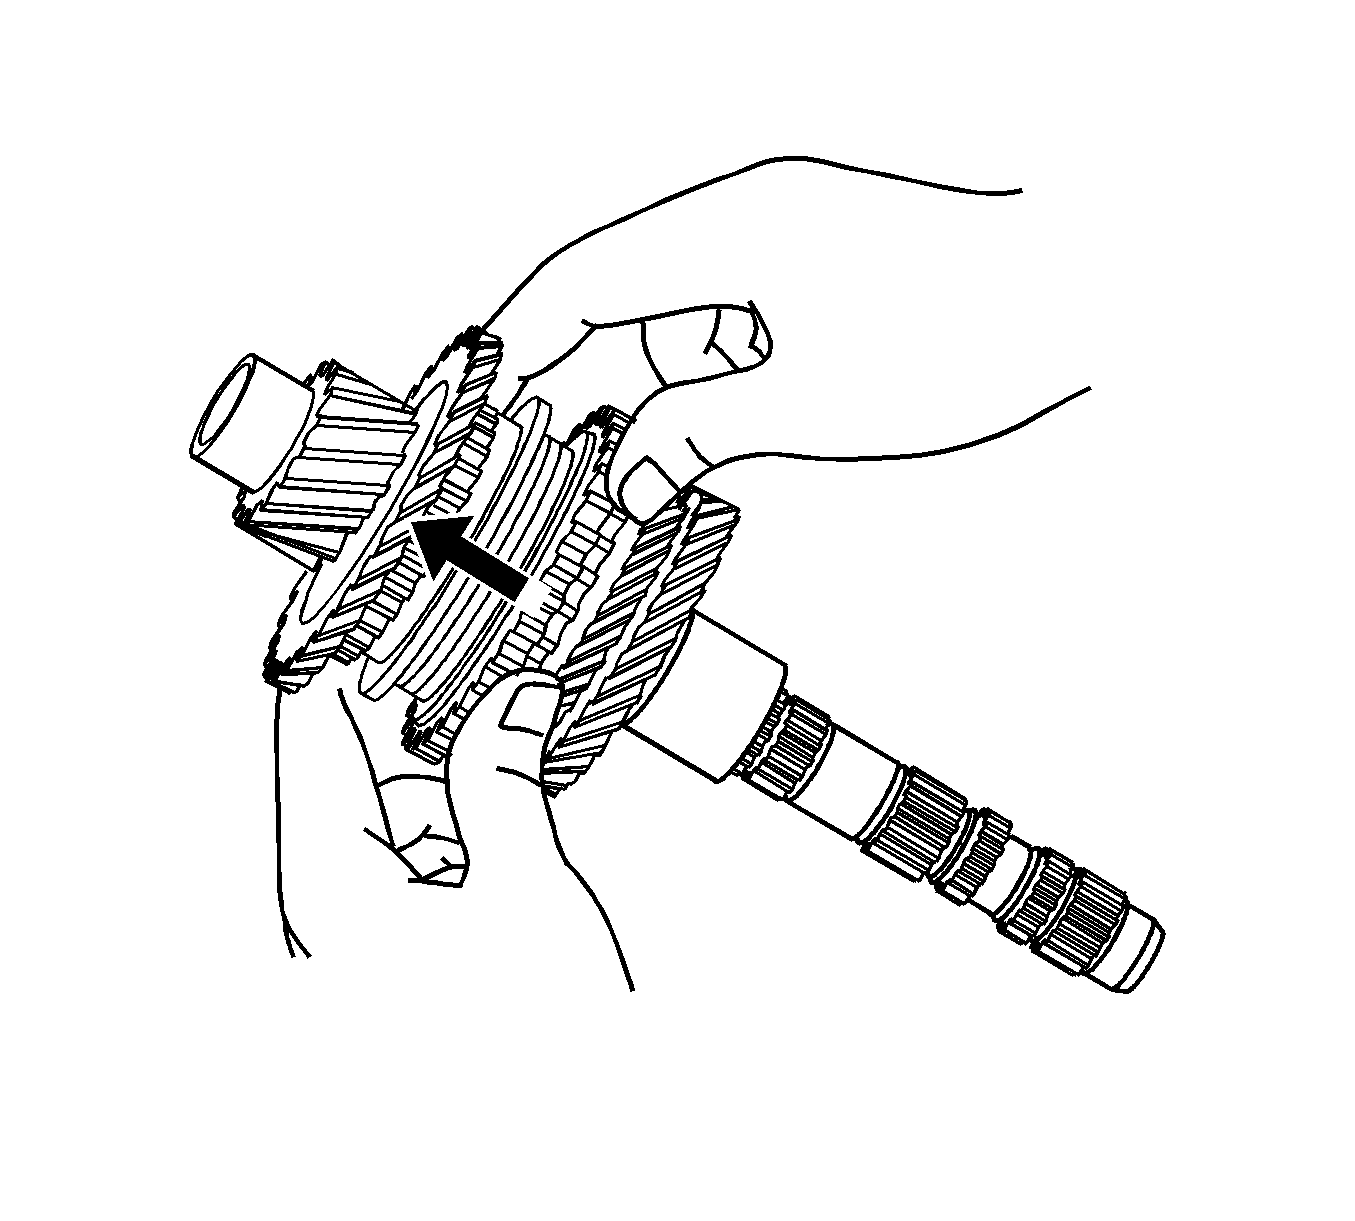
- Using a 2 jaw puller or equivalent, remove the rear bearing assembly, 6th driven gear from the input shaft.
- Remove the roller bearing and spacer from the input shaft.
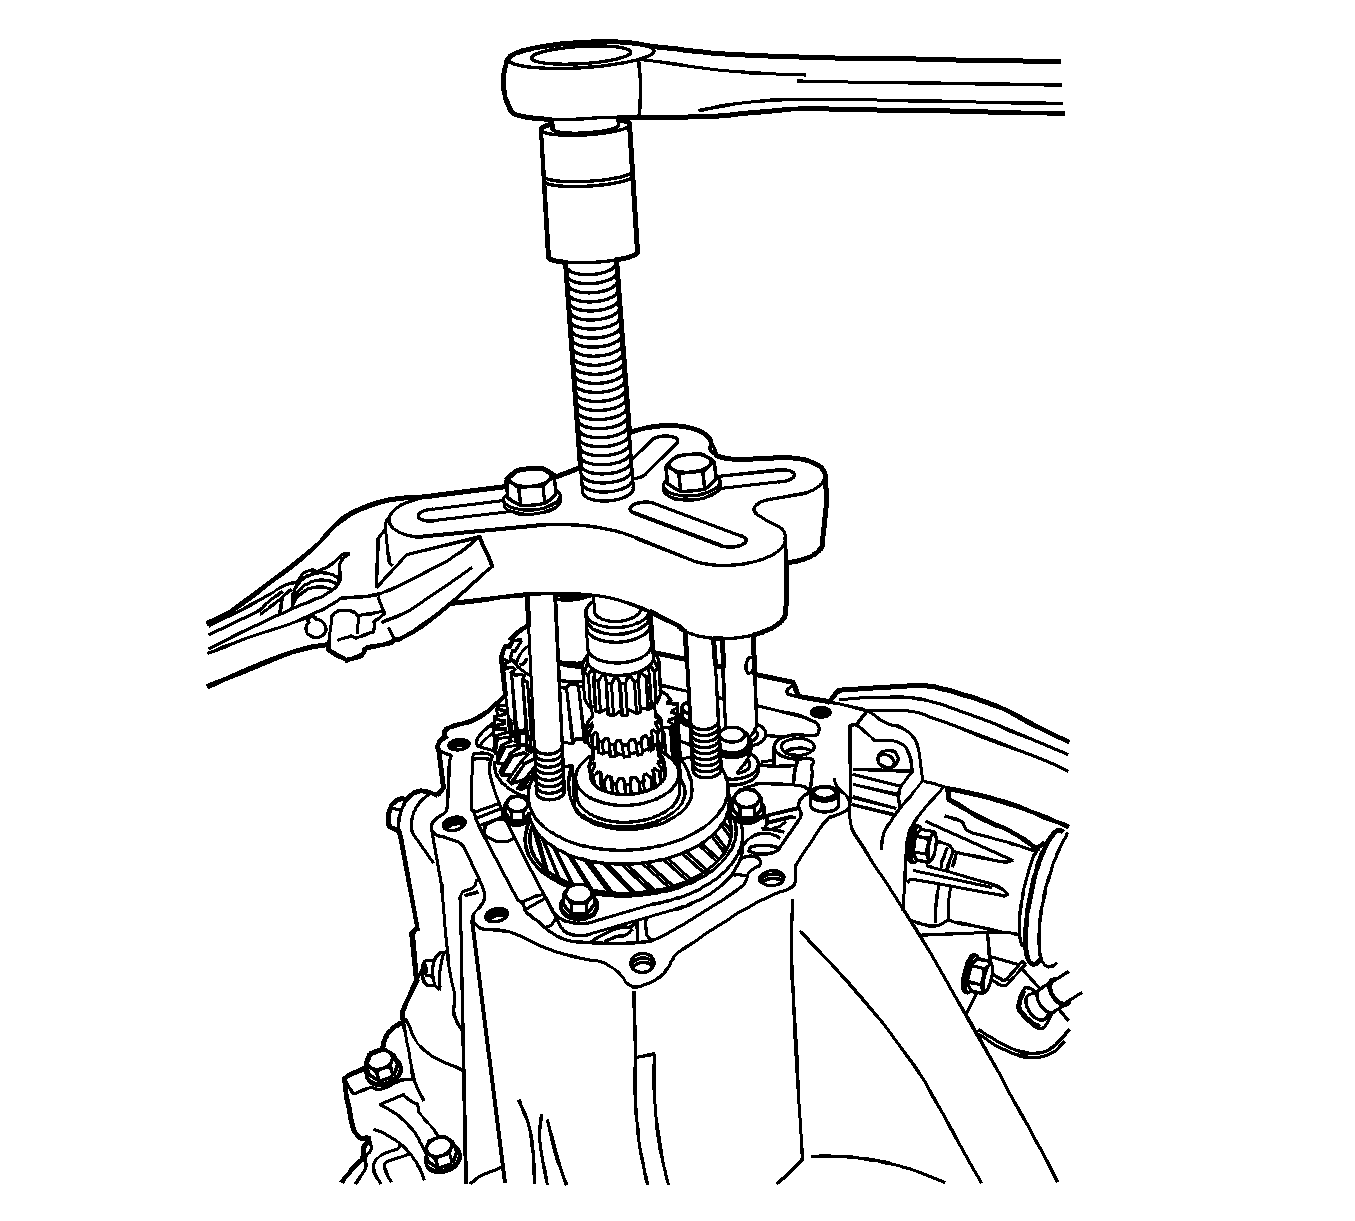
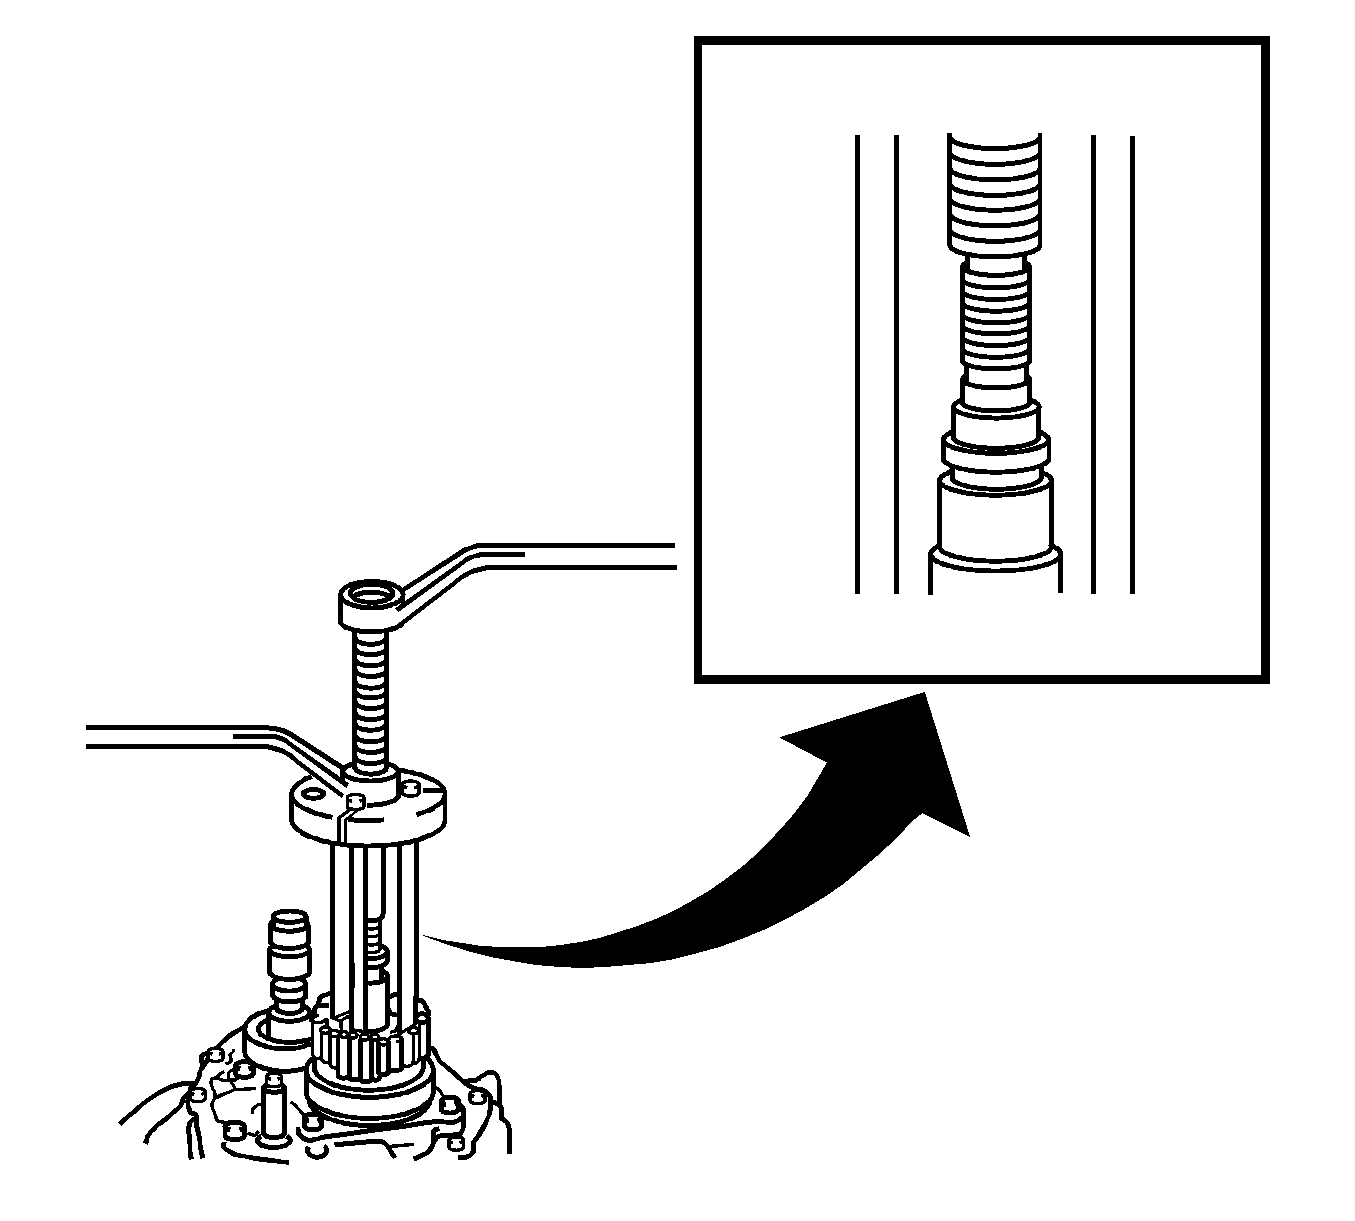
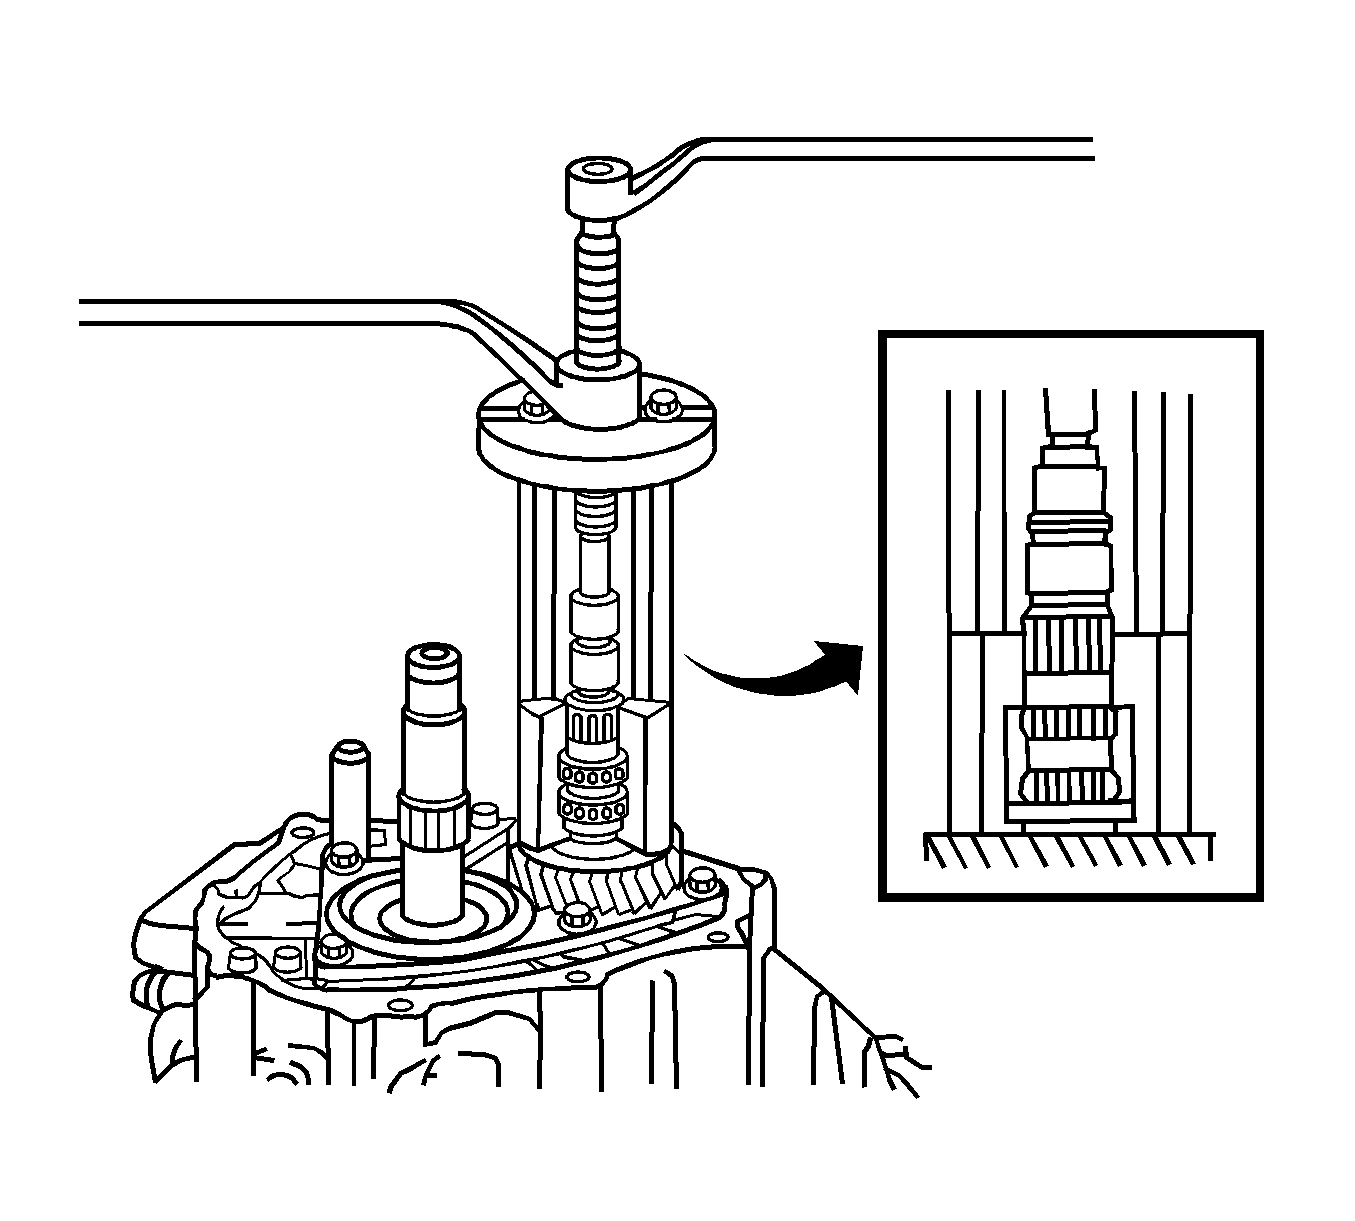
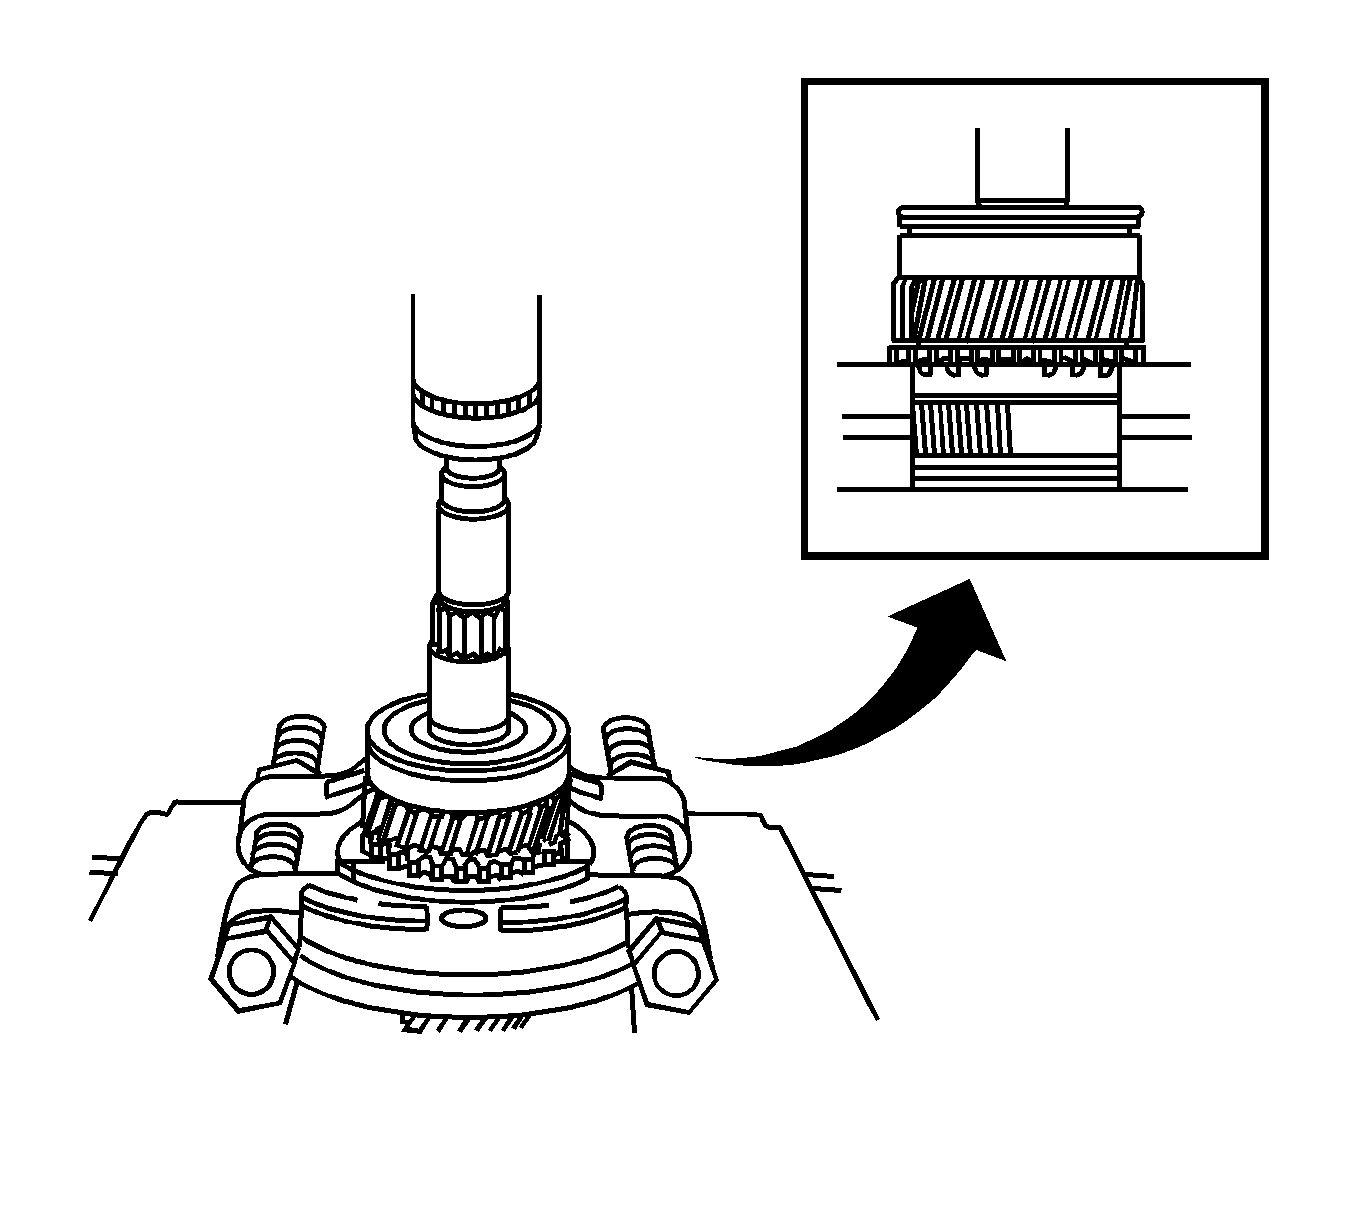
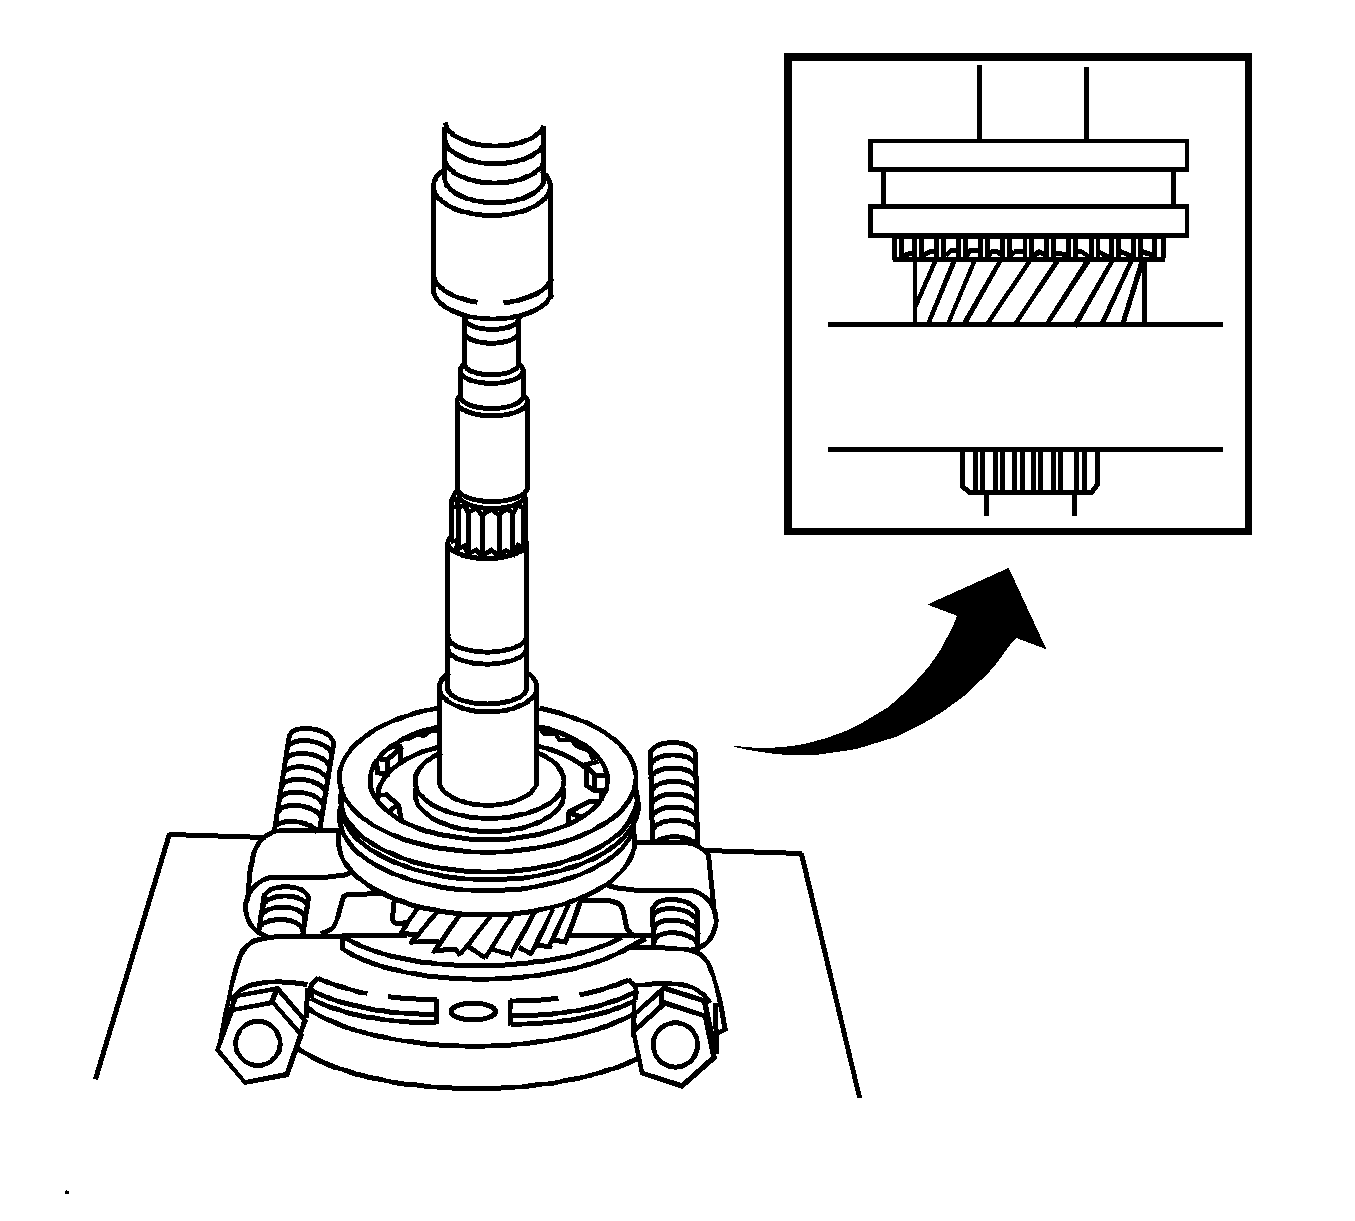
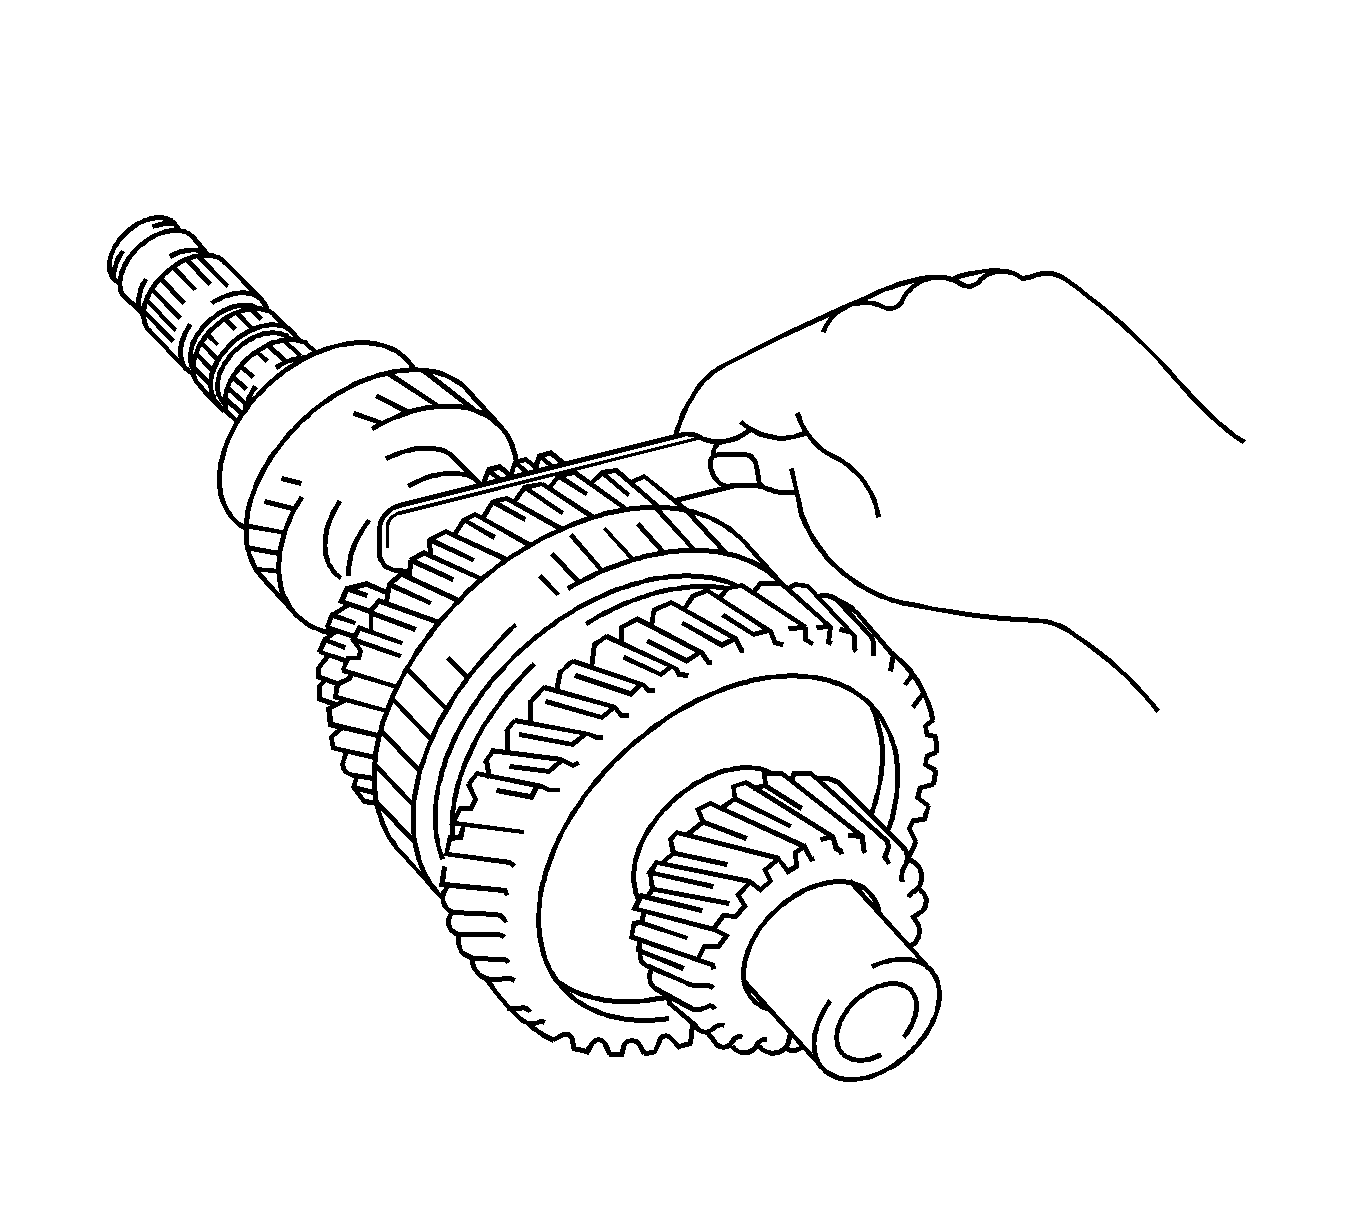
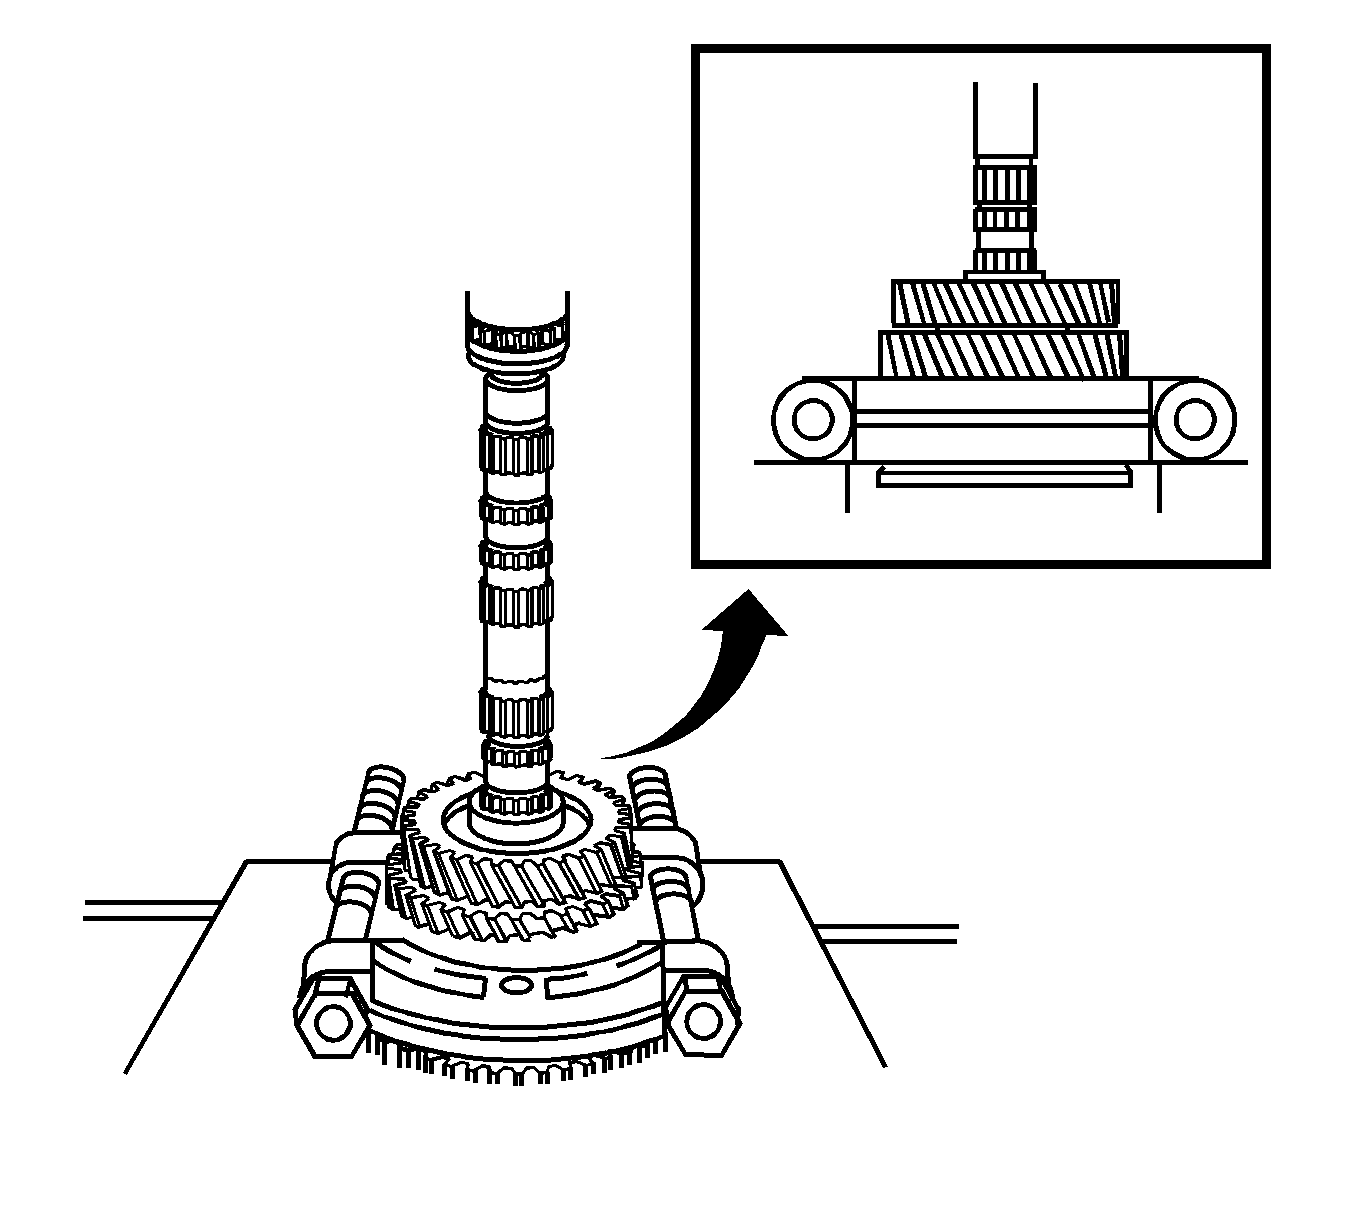
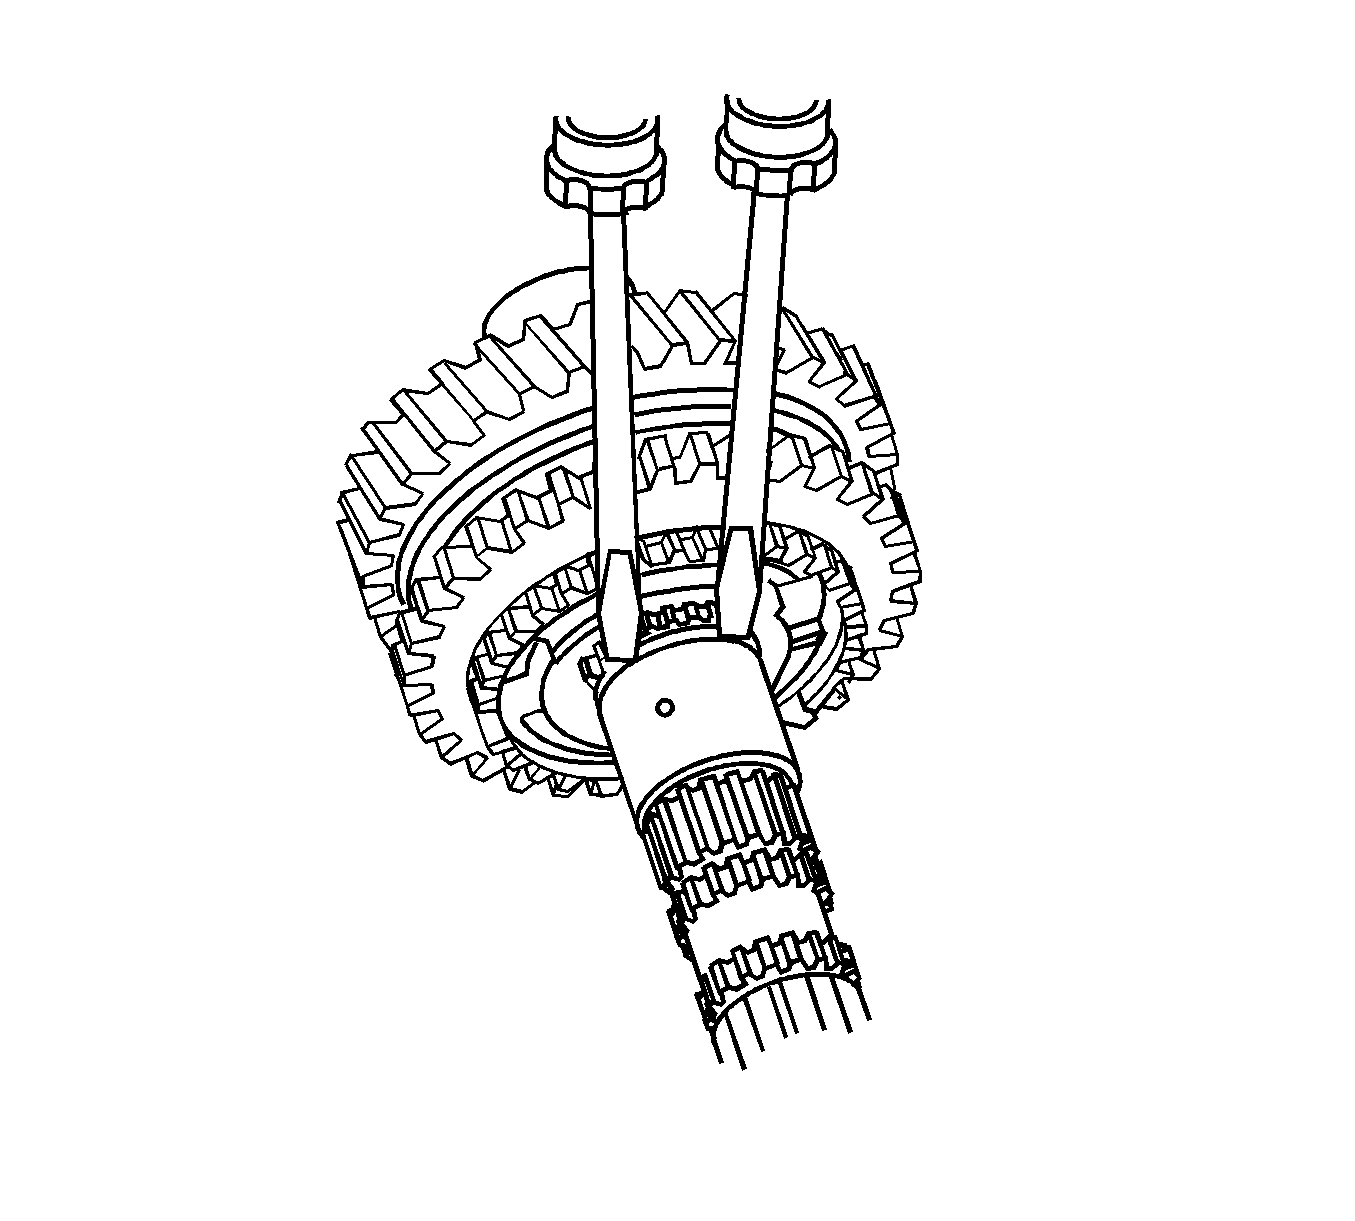
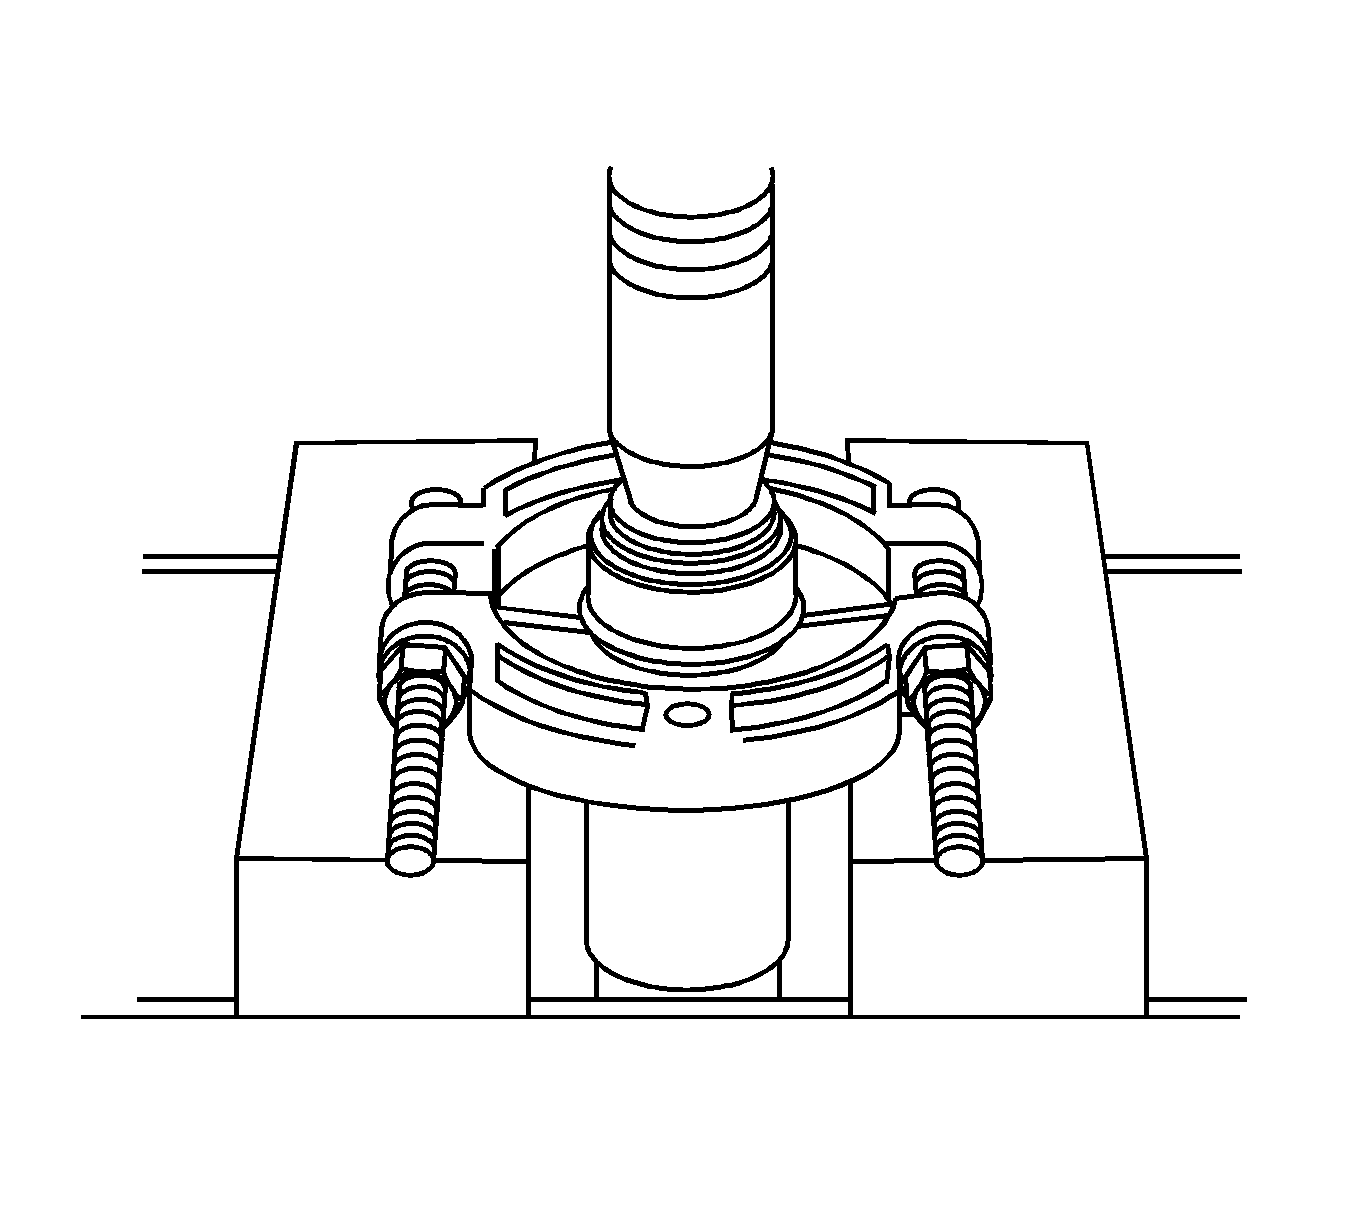
- Install the 5th driven gear puller DT-47947 as shown.
- Install the harmonic balancer puller J-24420-C to DT-47947, then remove the 5th driven gear from the transaxle assembly.
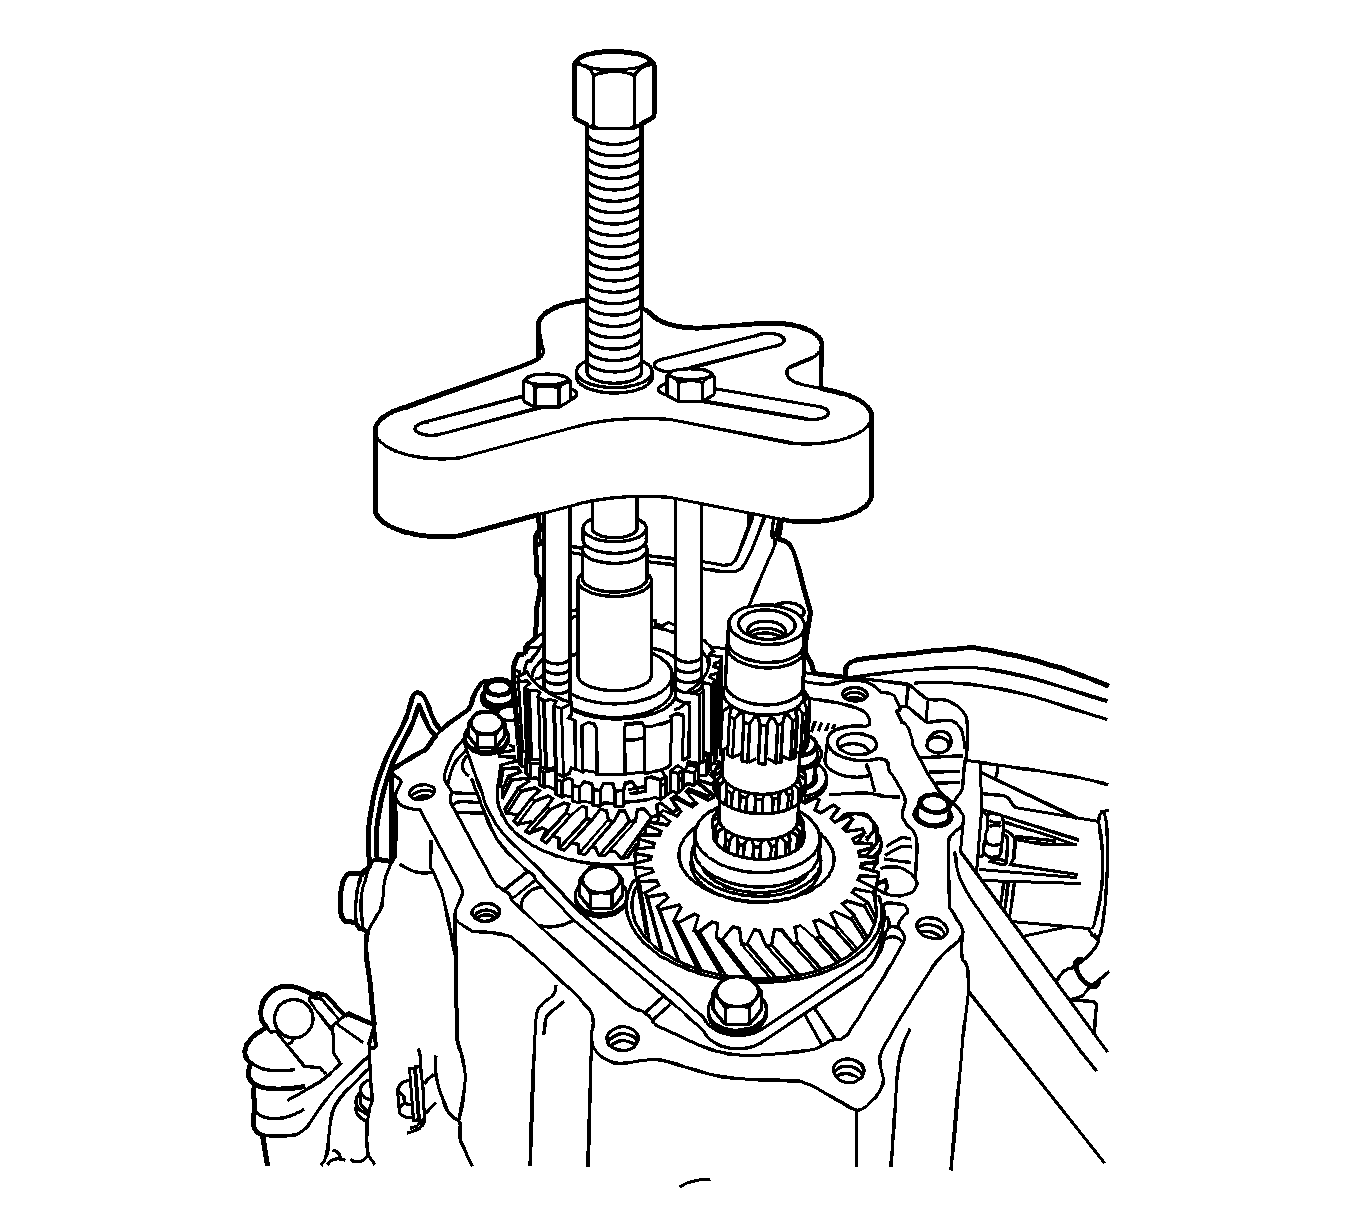
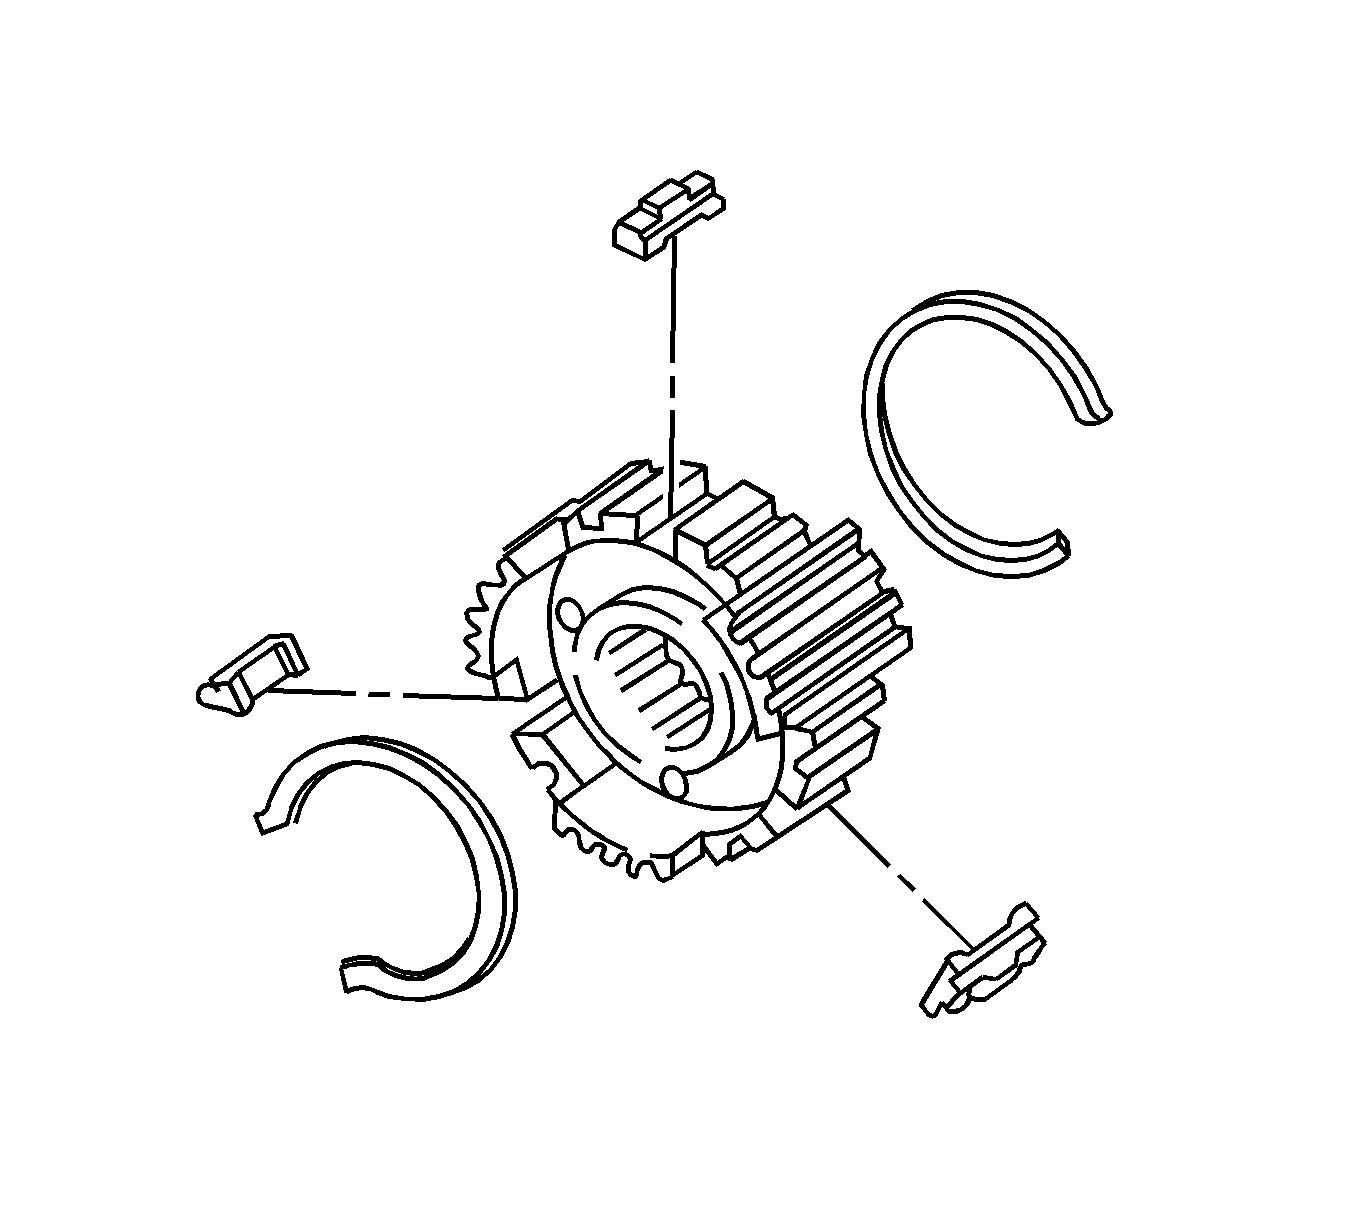
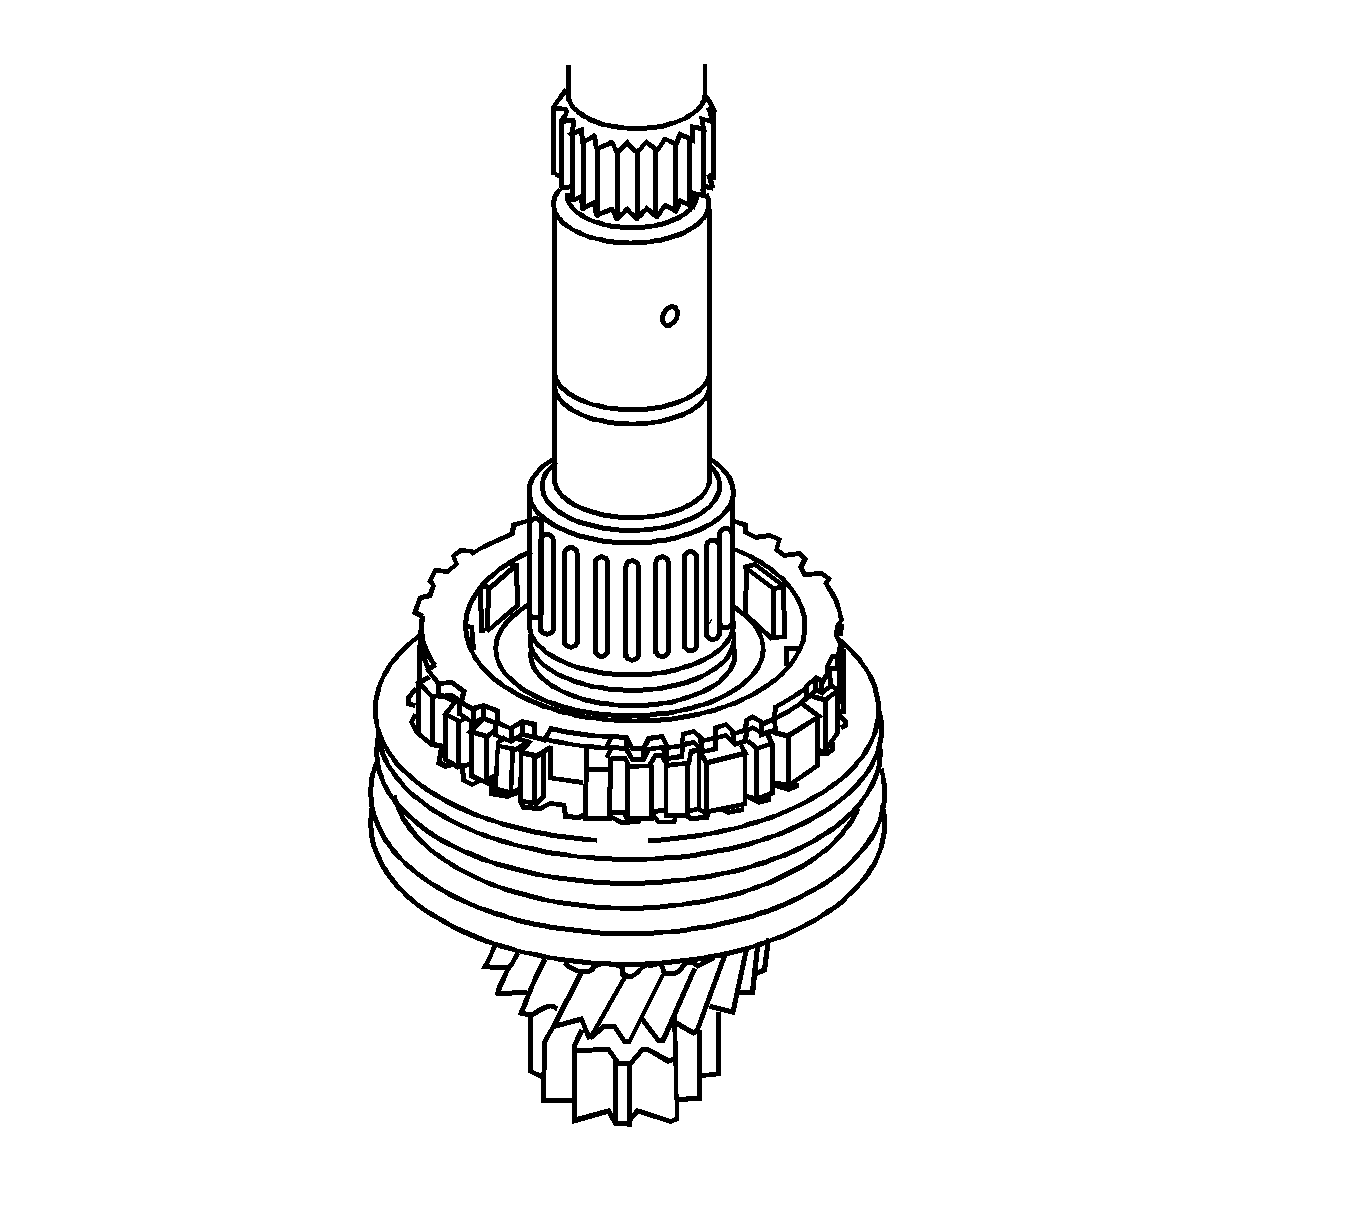
- Using the bolts from DT-47947 and harmonic balancer puller J-24420-C, remove the synchronizer hub from the transaxle assembly.
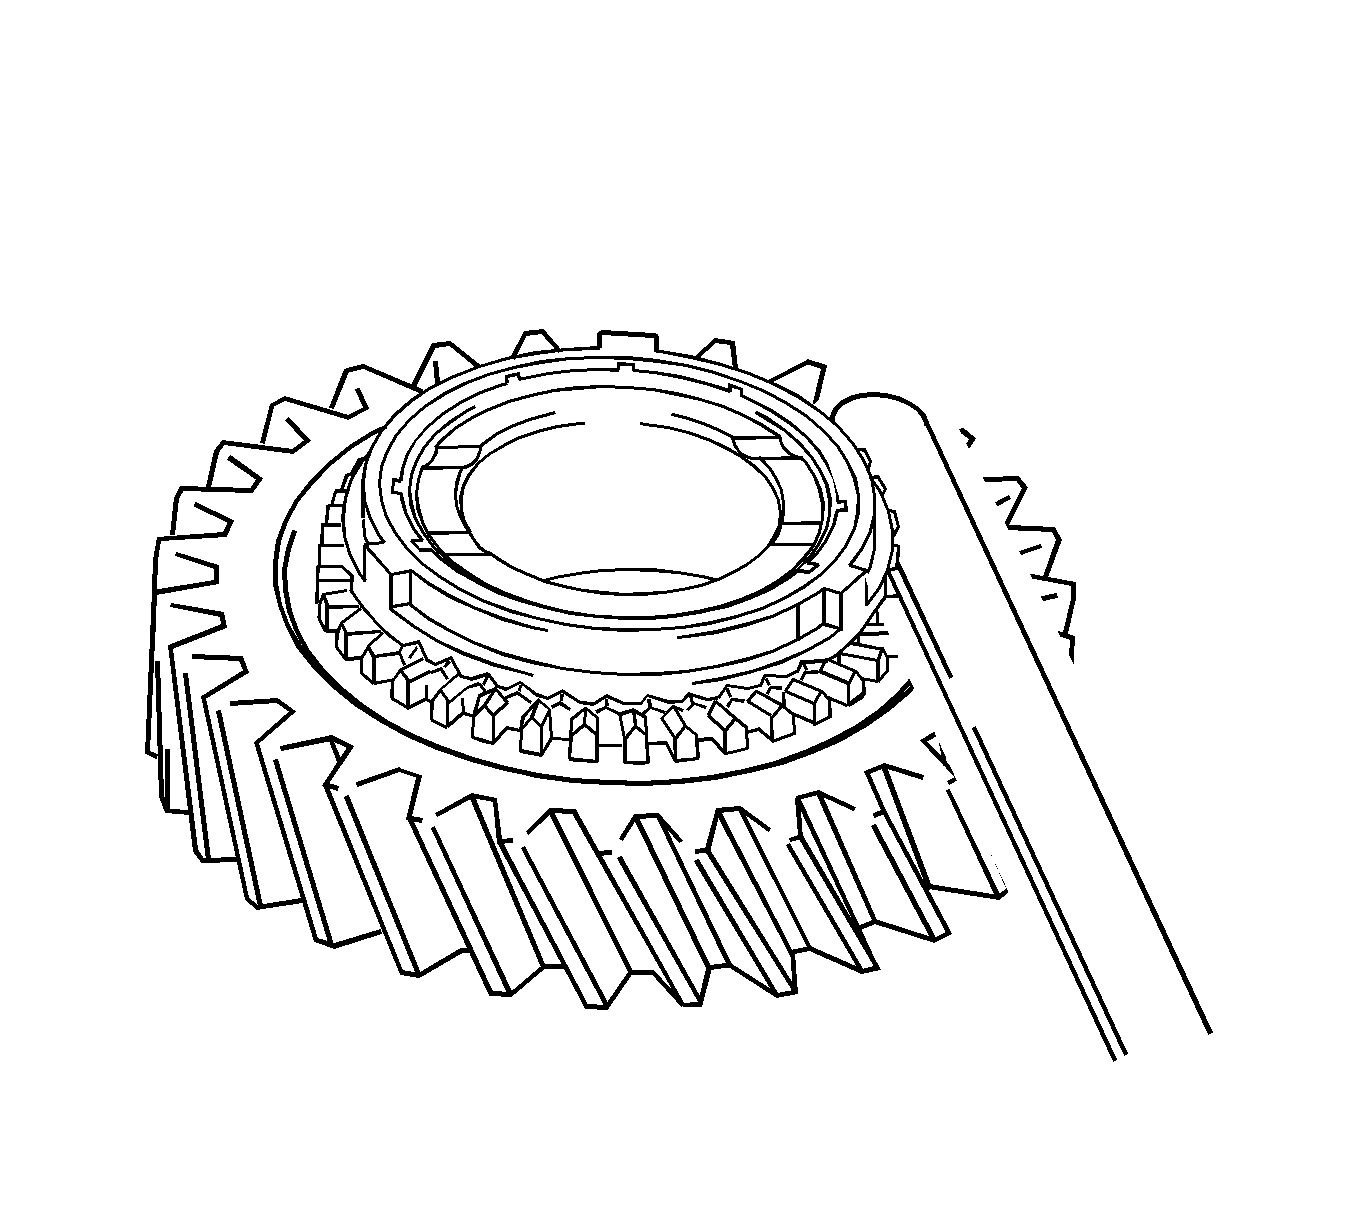
- Remove the 6th gear synchronizer ring.
- Remove the bolt, No.3 gear shift fork and No.3 hub sleeve.
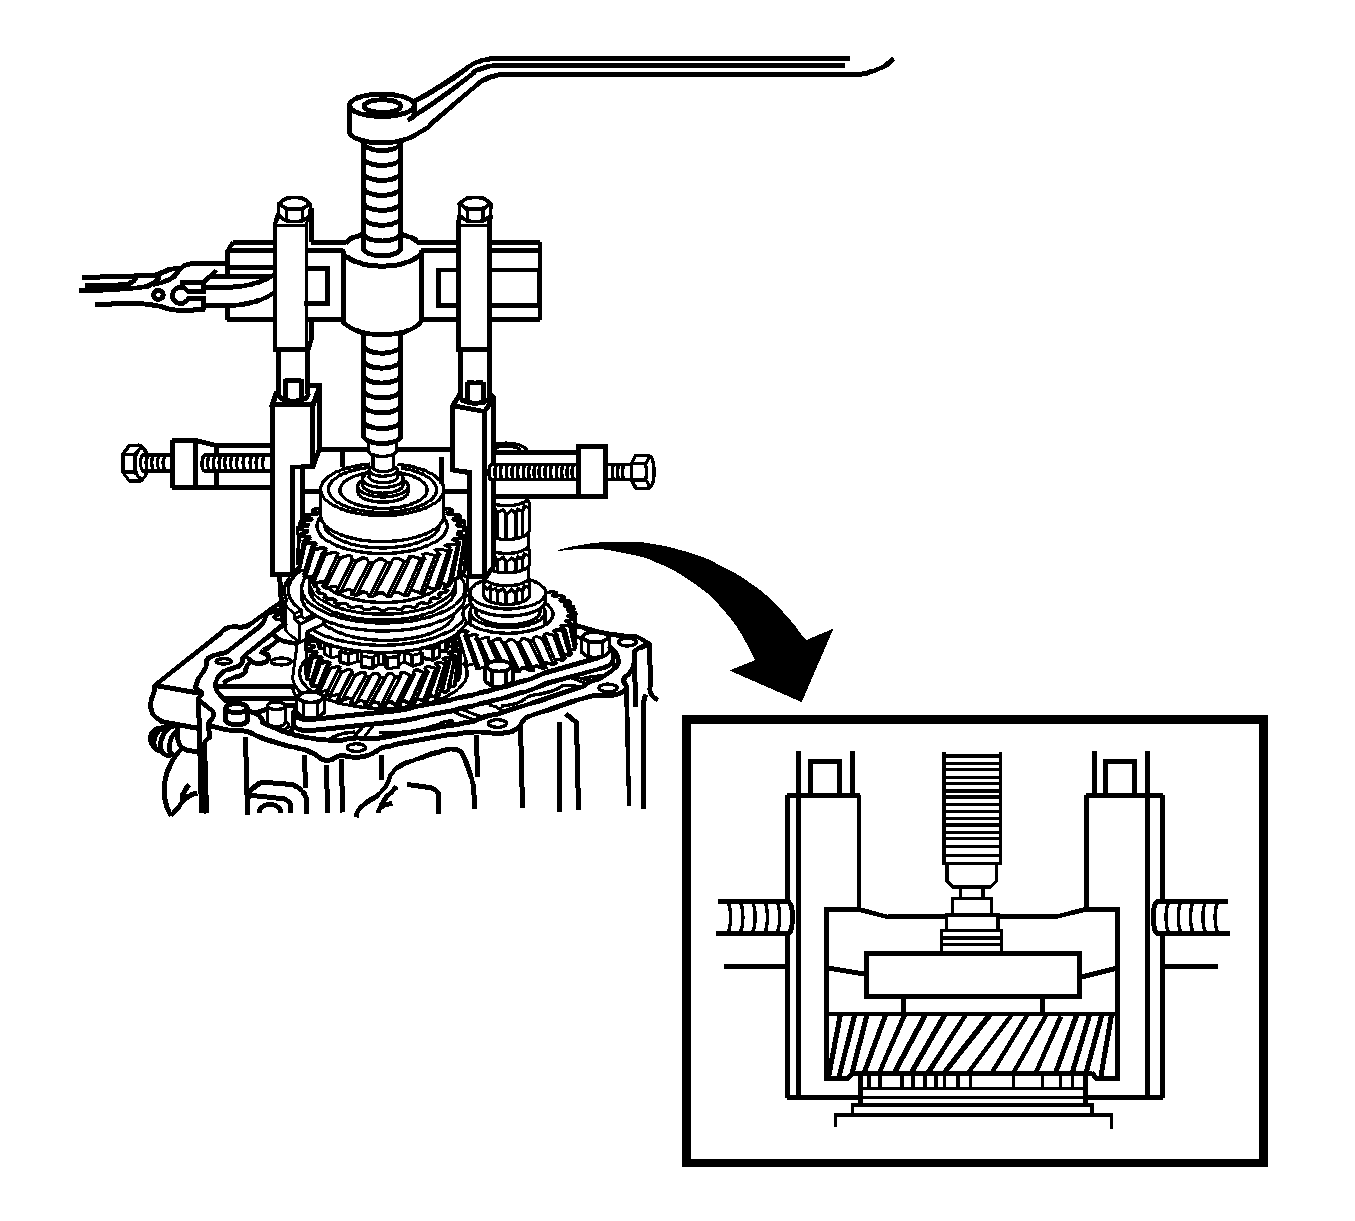
- Using a dial indicator, measure the thrust clearance of 5th gear.
- Using a dial indicator, measure the radial runout of 6th gear.
- If the gear exceeds any of the maximum measurements, replace the gear, roller bearing or shaft.
- Remove the 5th gear snap ring from the shaft.
- Using a puller, remove the No.3 clutch hub assembly.
- Remove 5th gear and the 5th gear synchronizer ring from the input shaft.
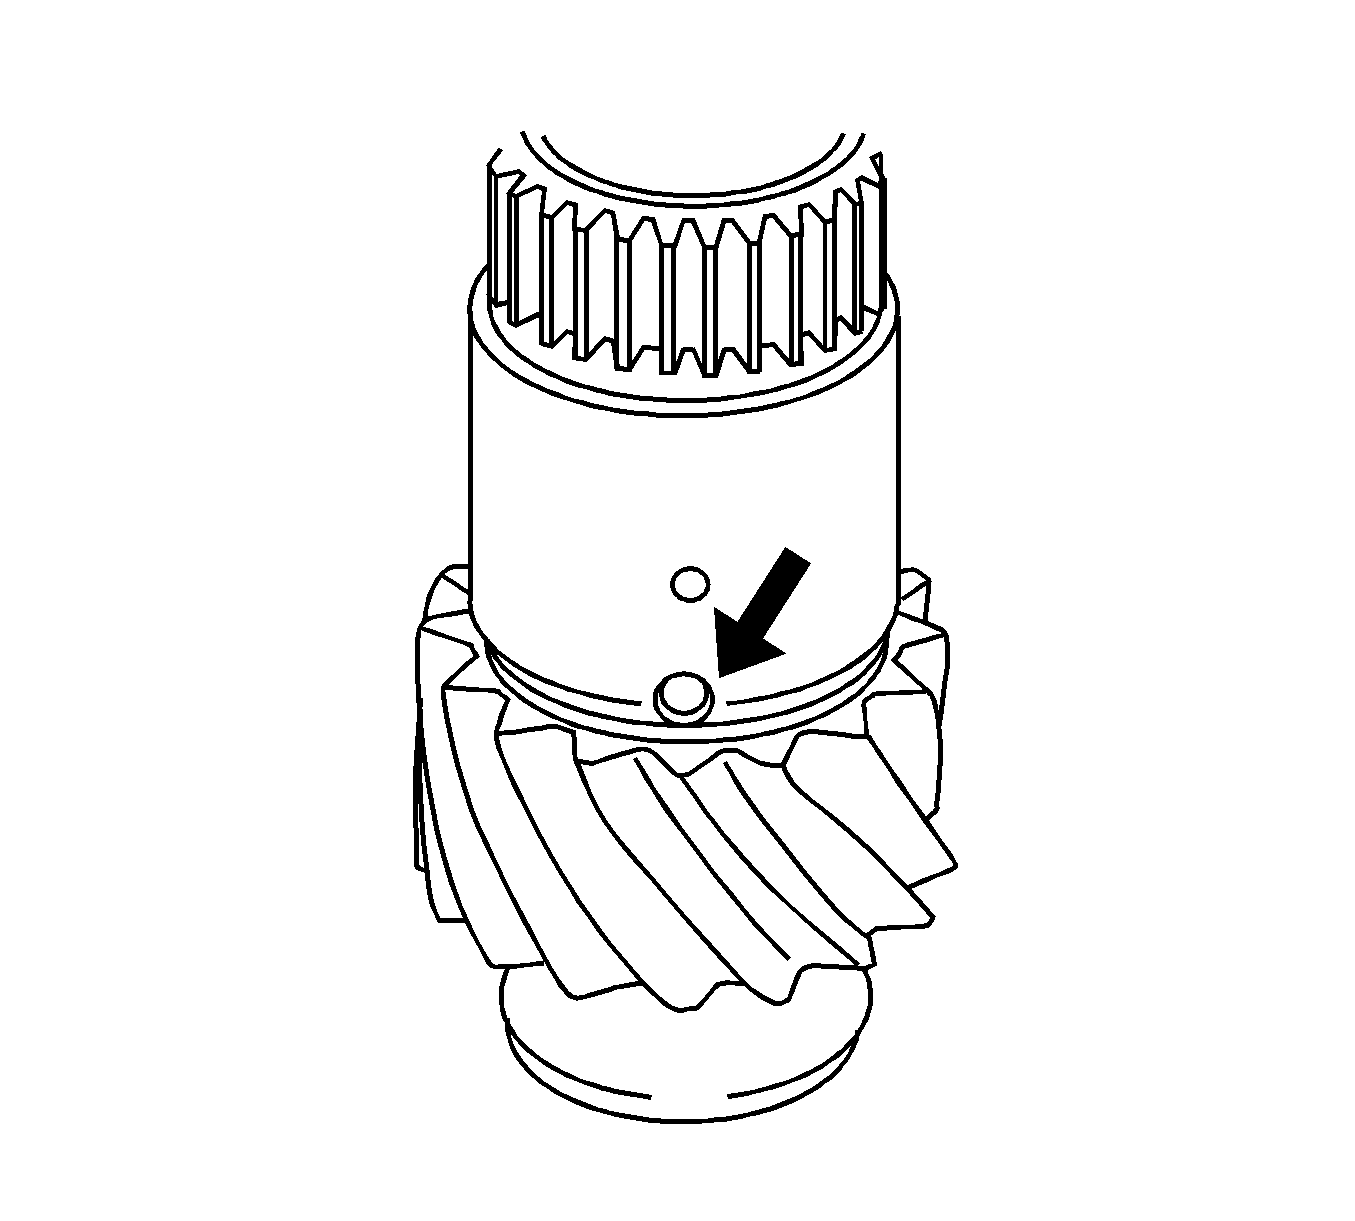
- Remove the snap ring from the output shaft.
- Remove the roller bearing and 2 spacers.
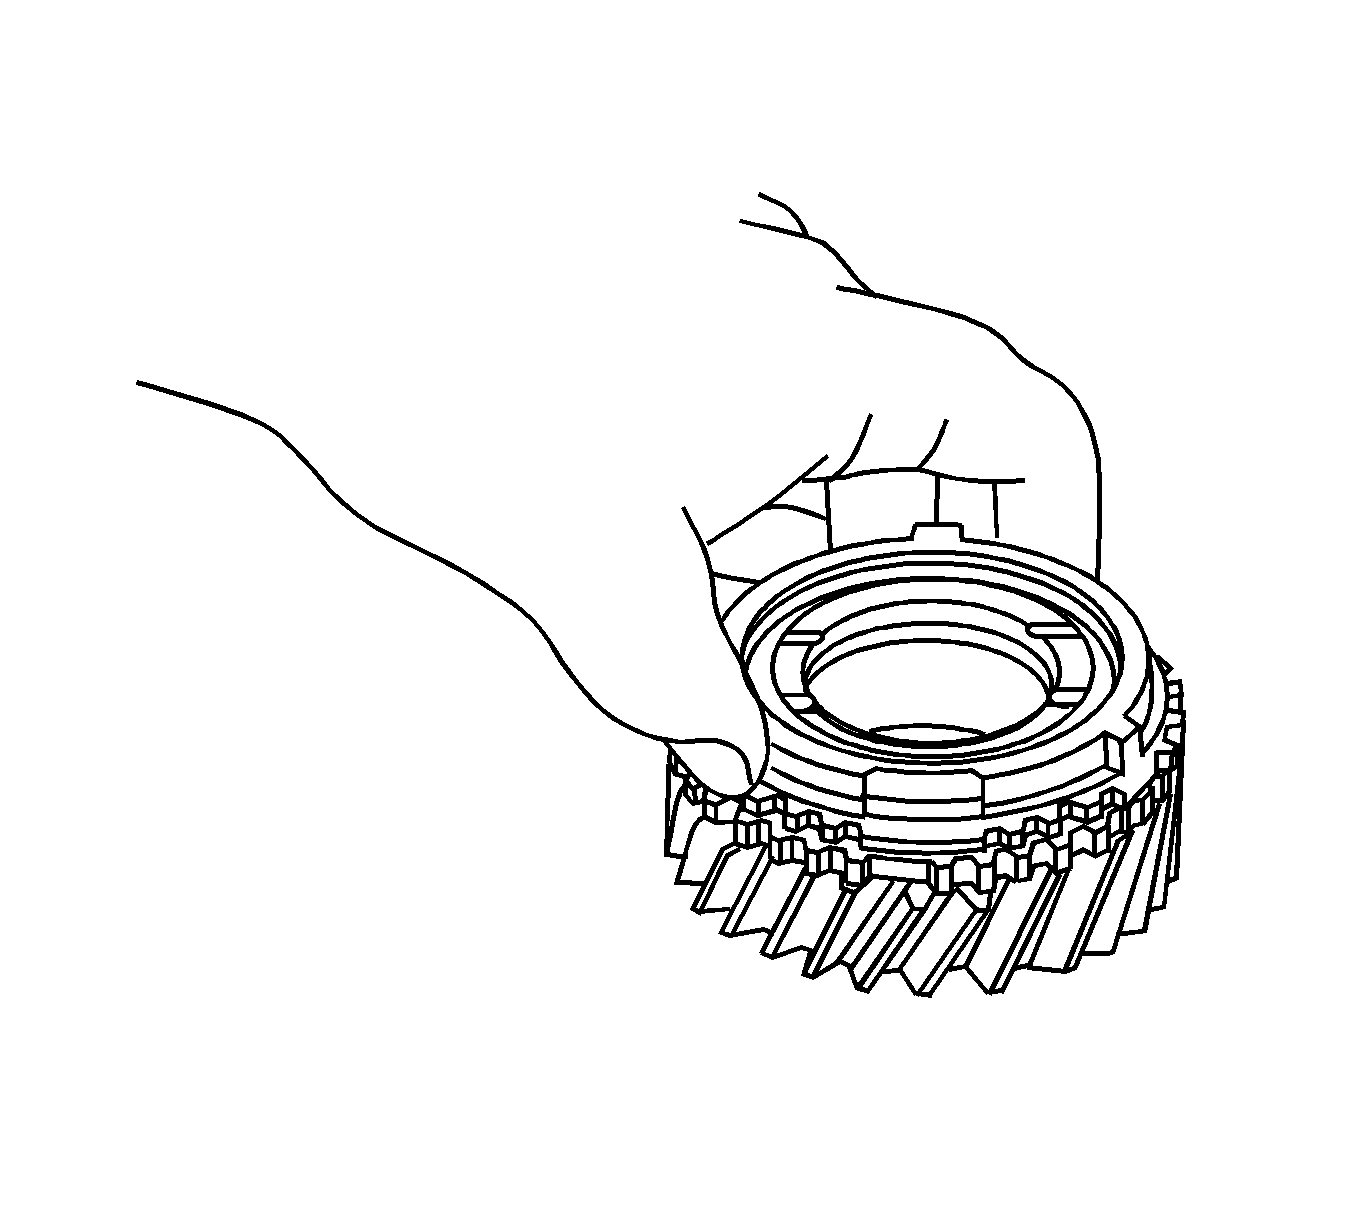
- Using a puller, remove the 5th driven gear.
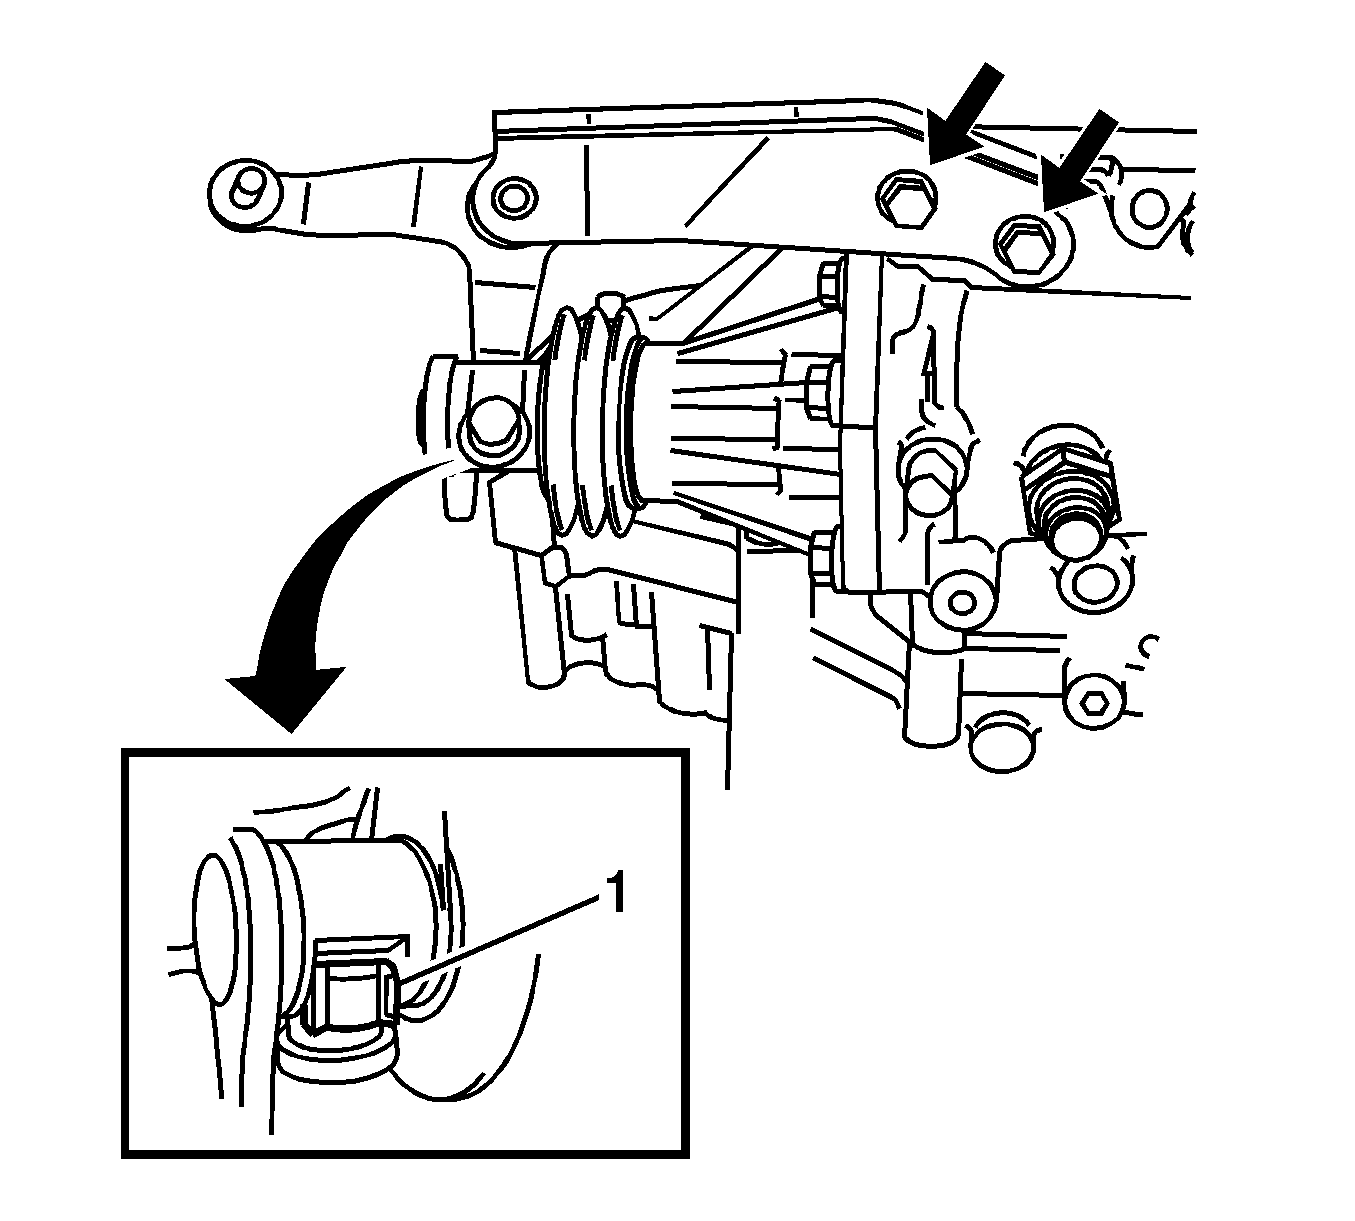
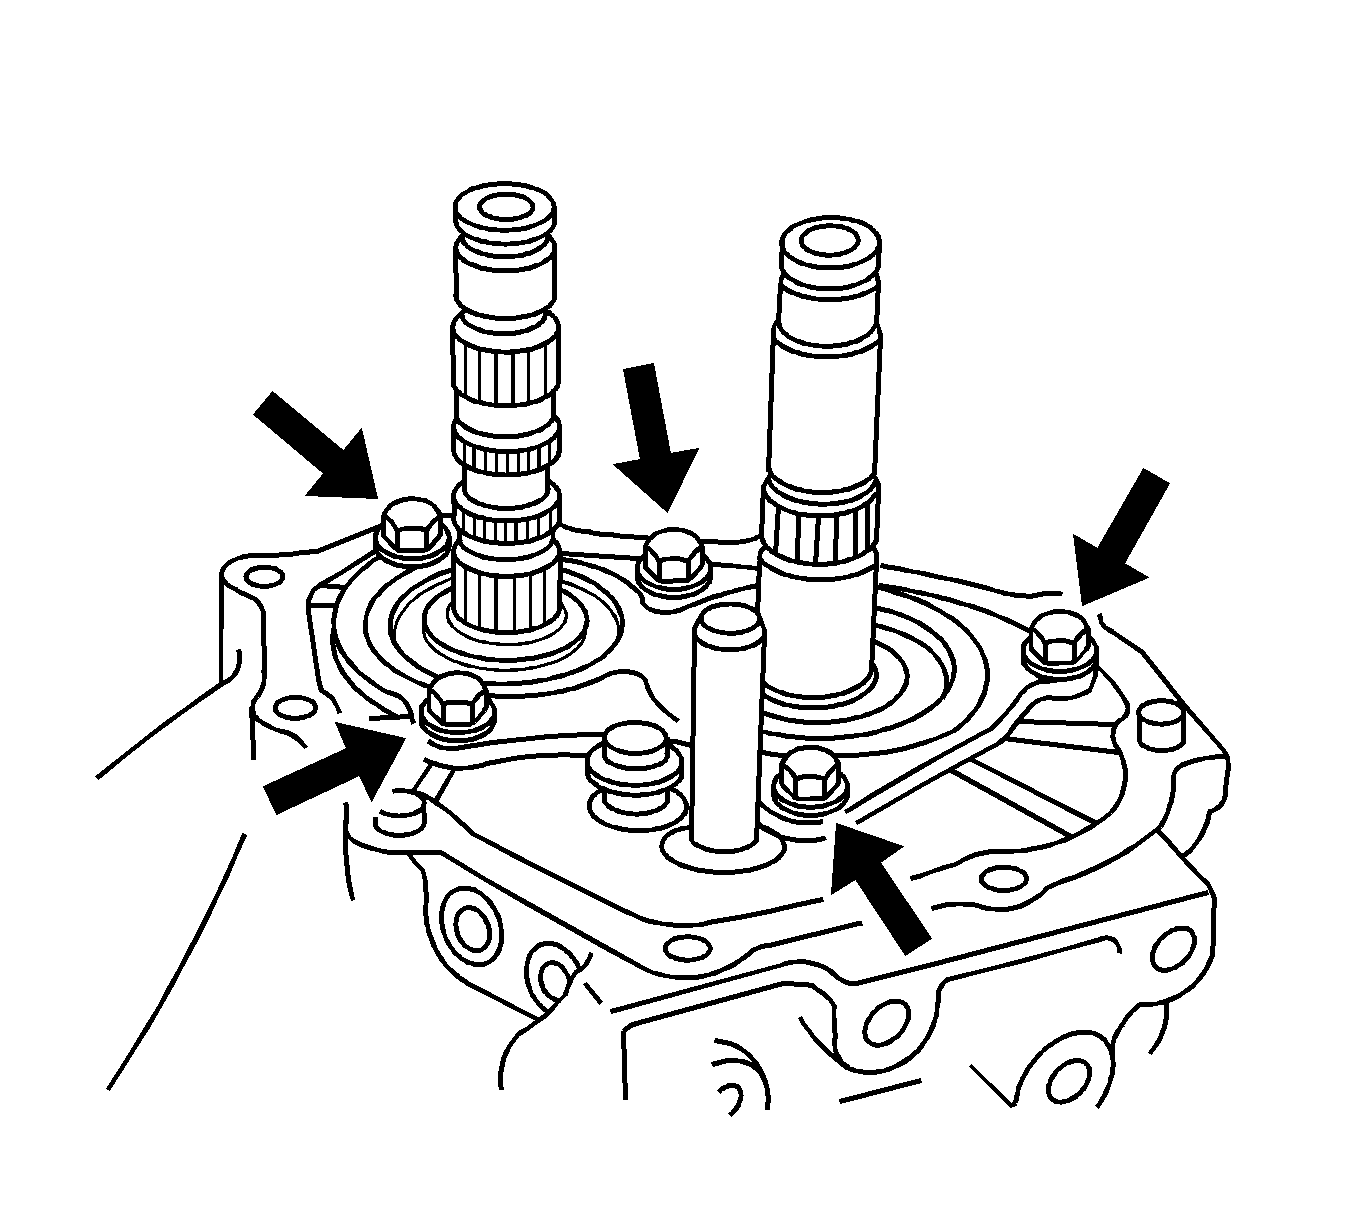
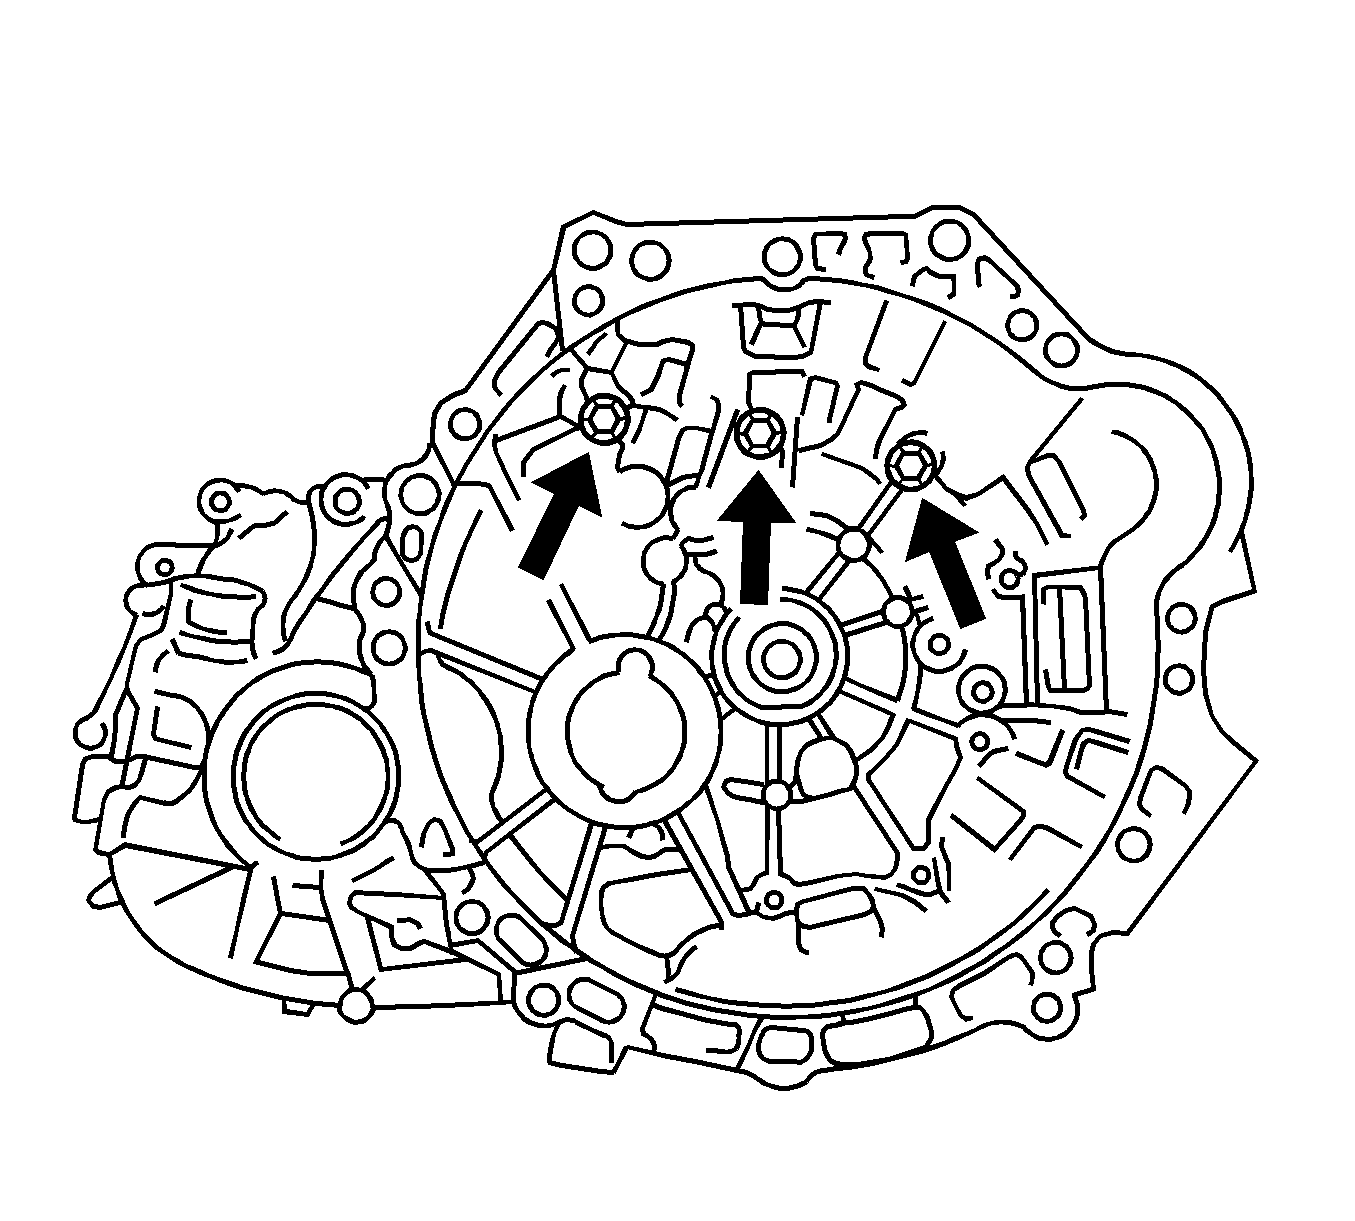
- Remove the 5 rear bearing retainer bolts.
- Remove the rear bearing retainer from the transaxle case.
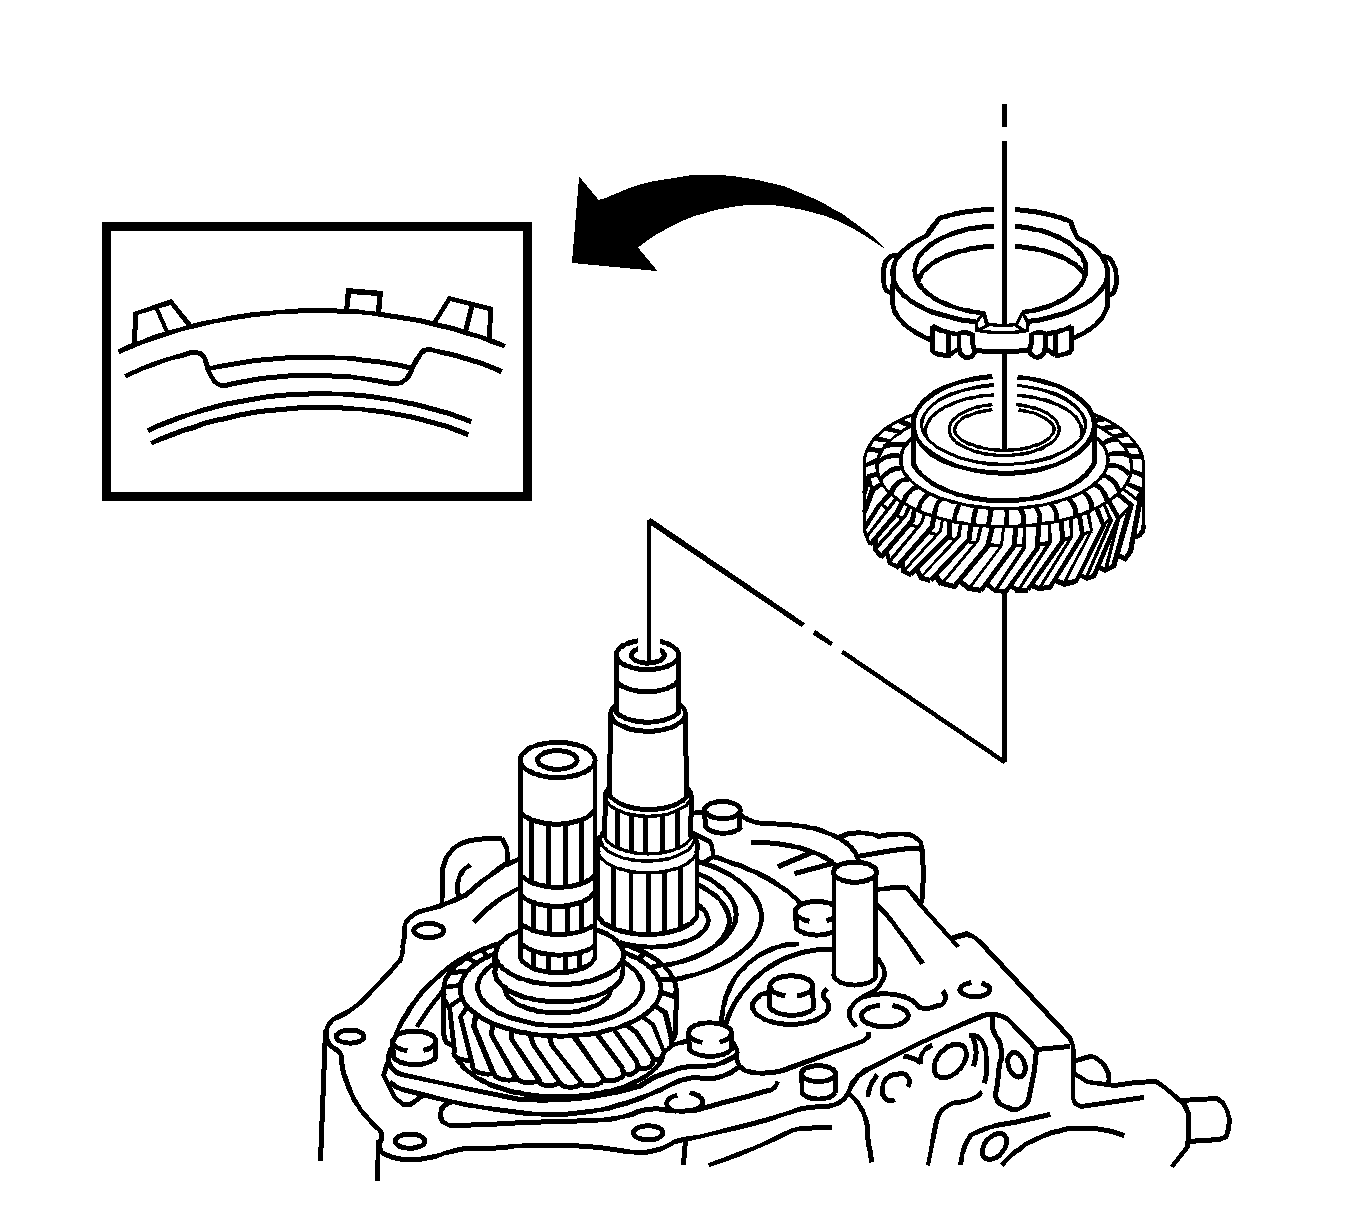
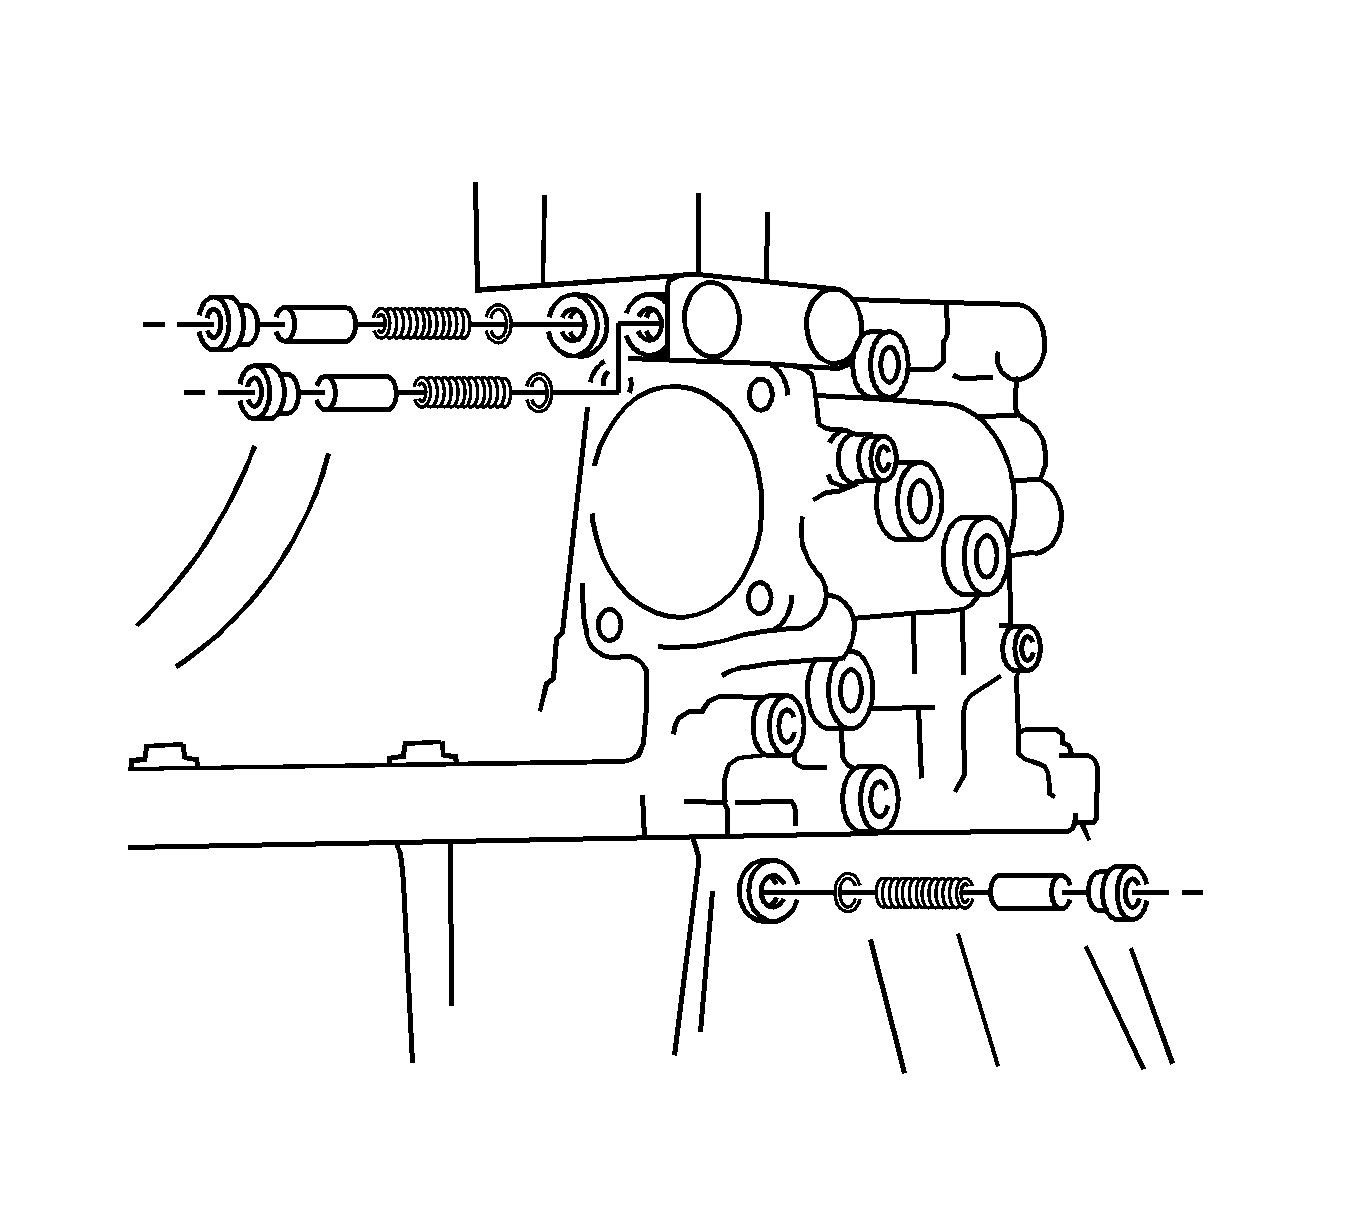
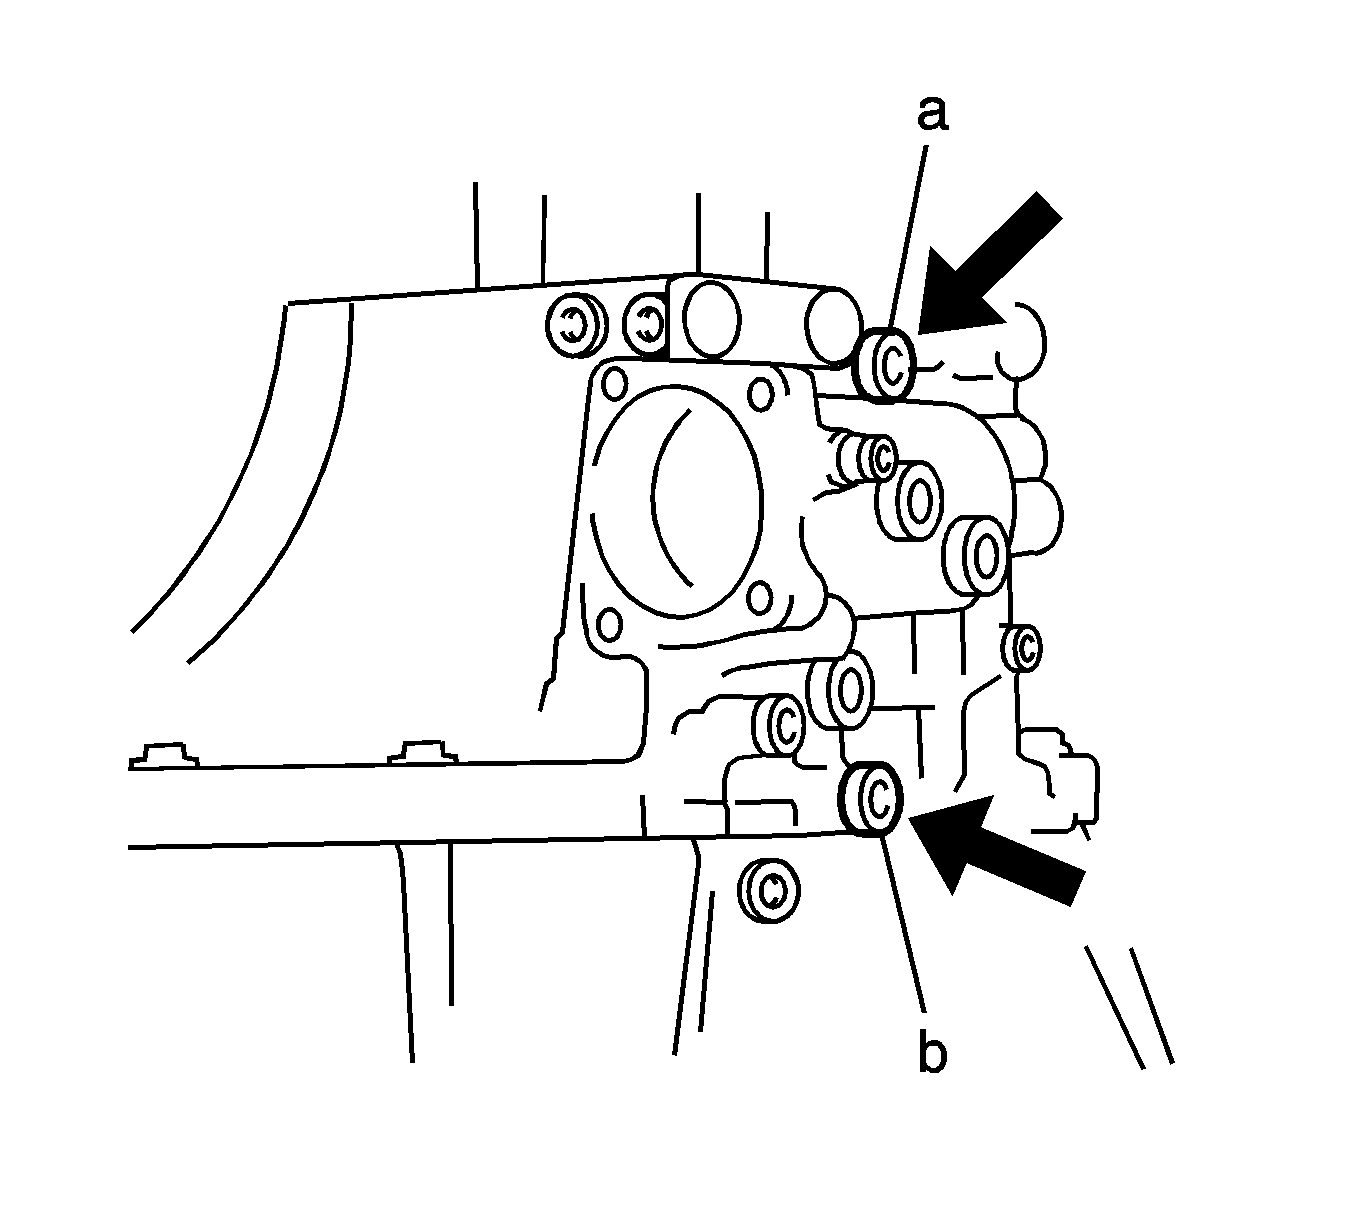
- Using snap ring pliers or equivalent, remove the 2 snap rings.
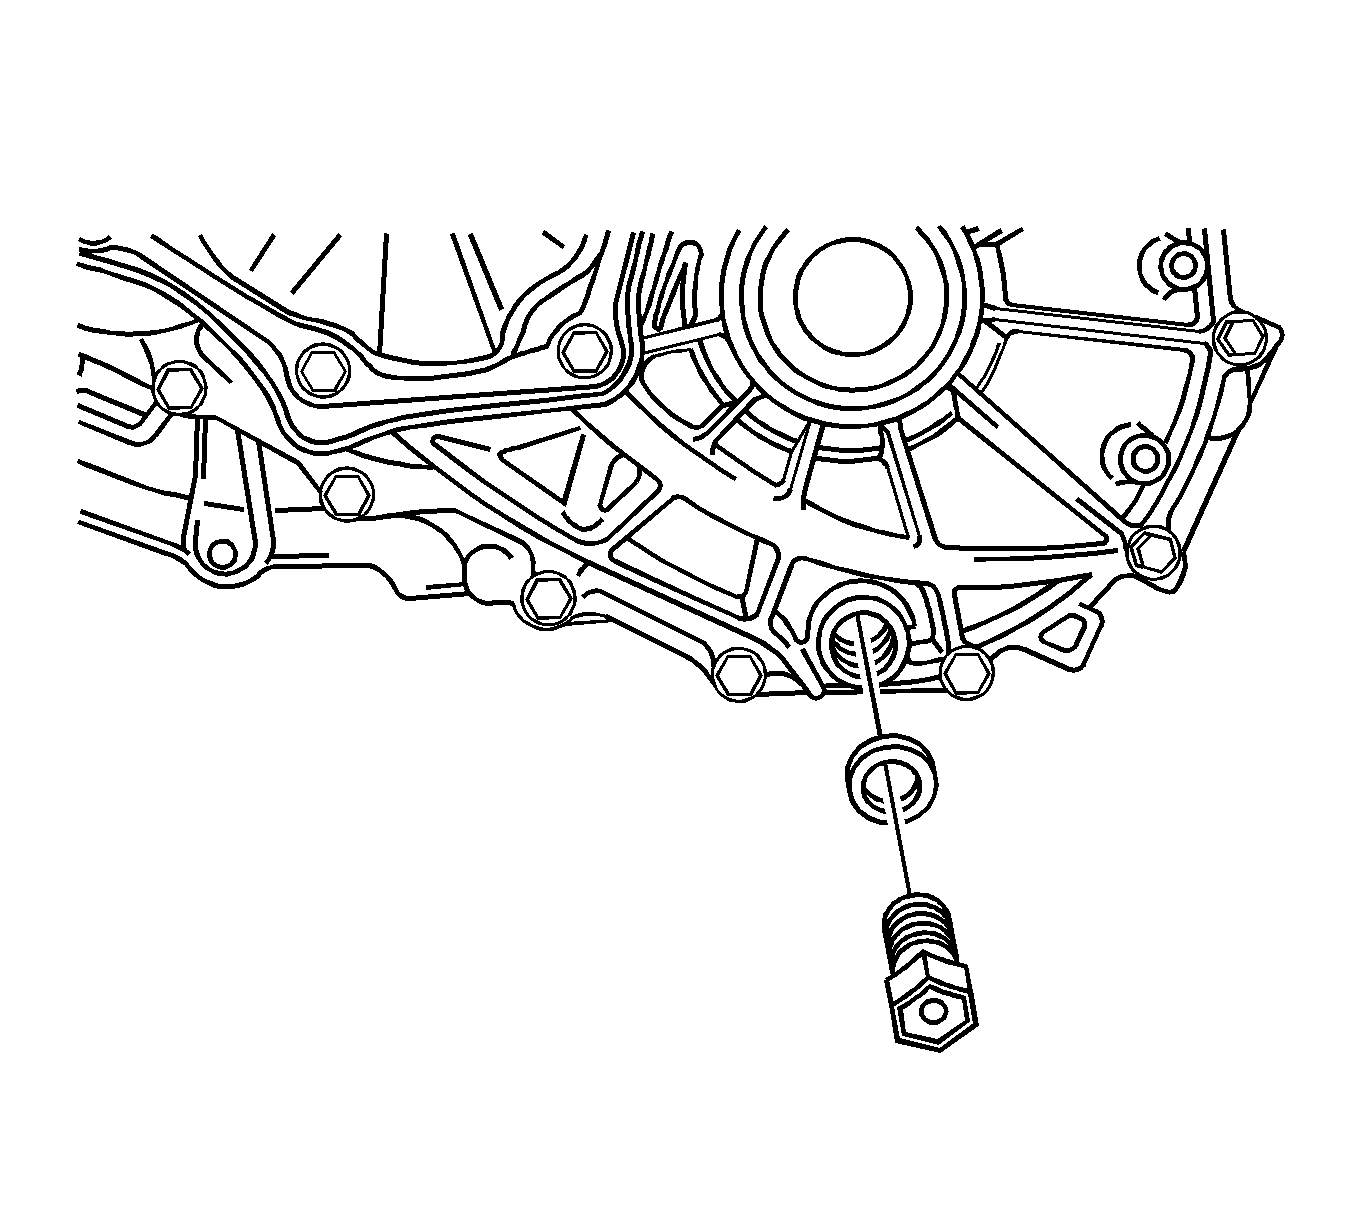
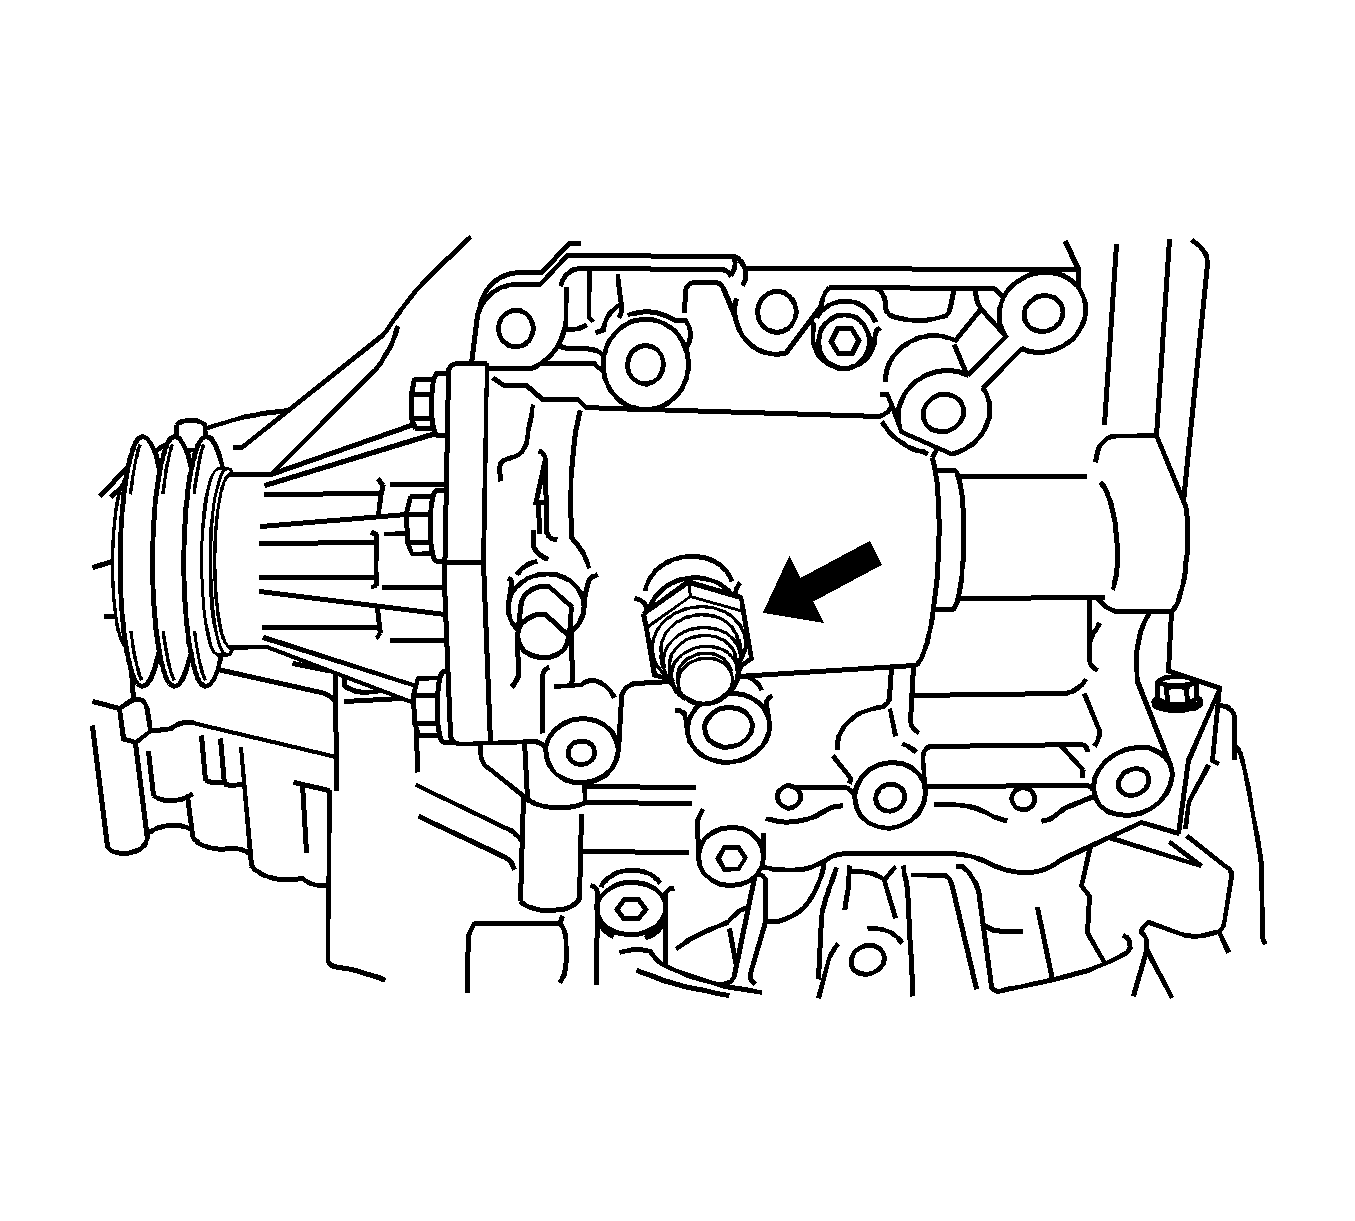
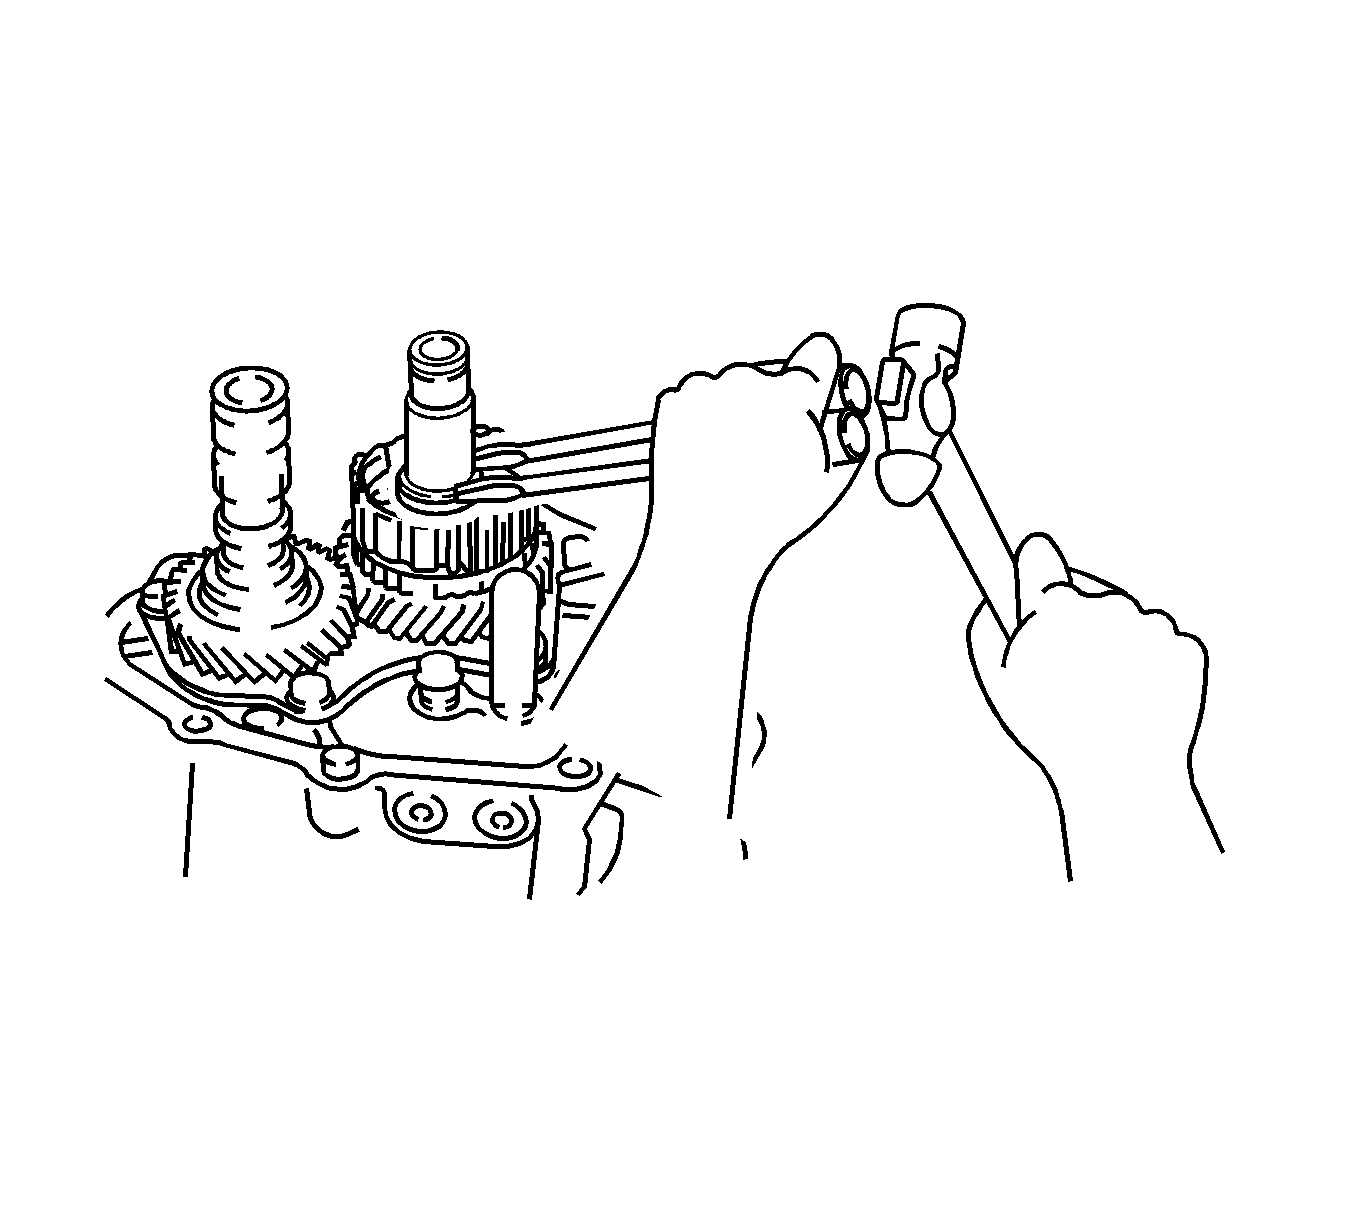
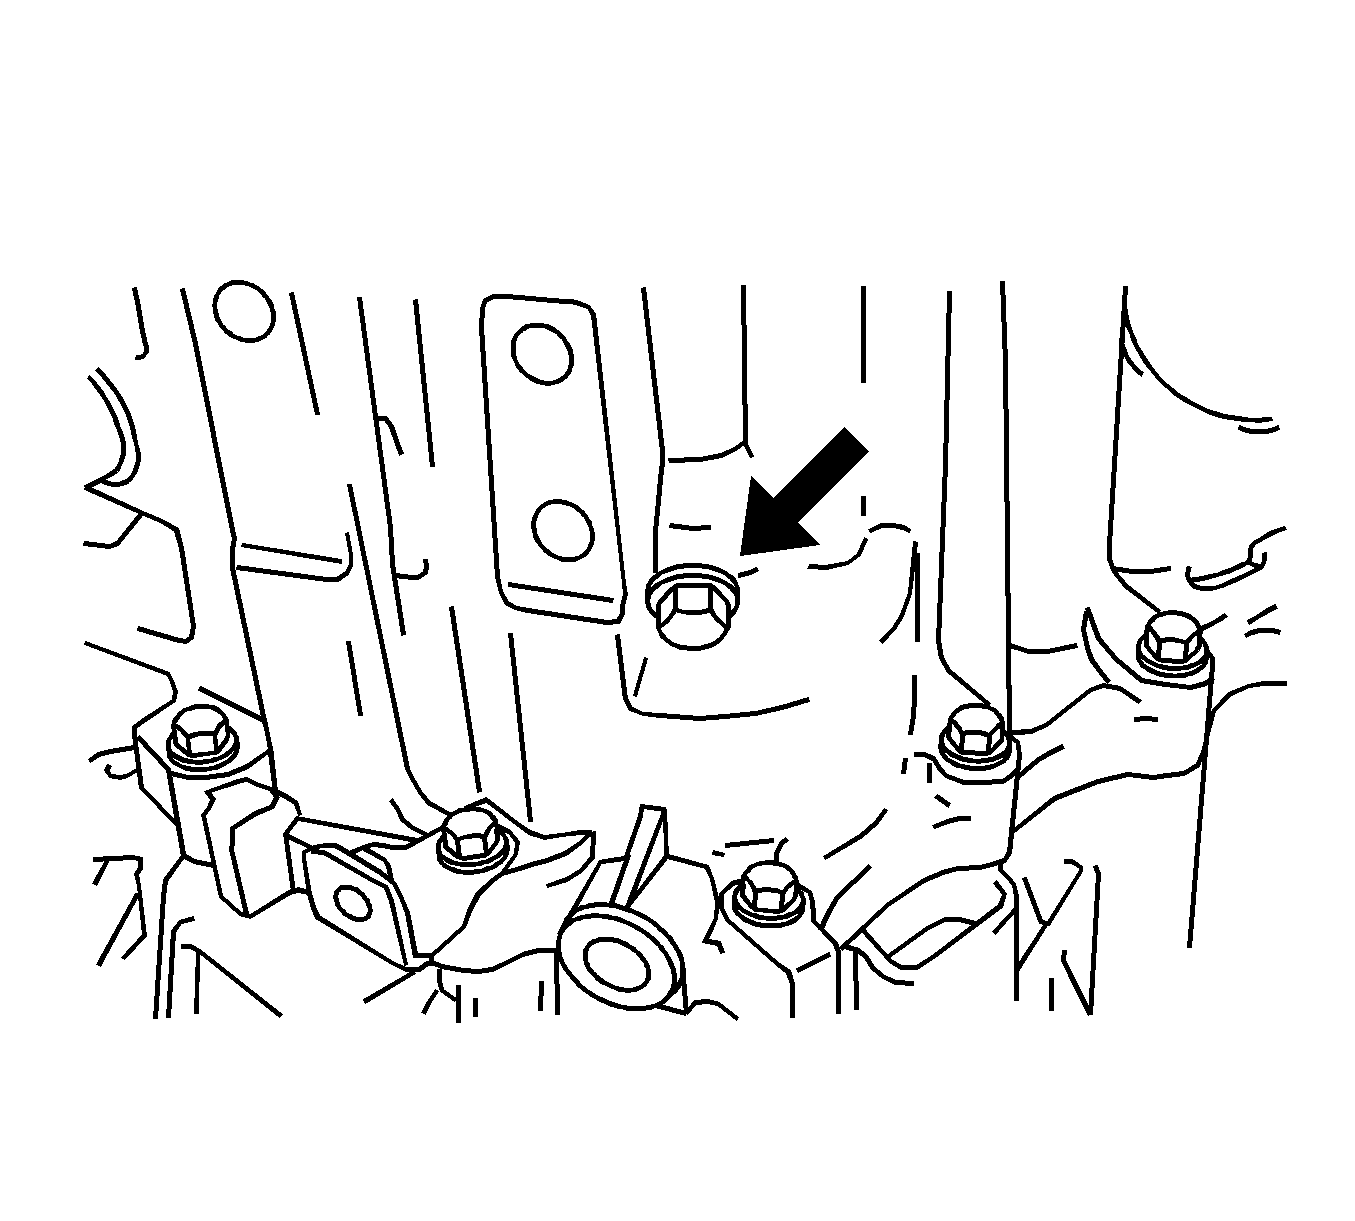
- Remove the reverse idler gear shaft lock bolt and gasket from the transaxle case.
- Remove the snap ring from the No.2 shift fork shaft.
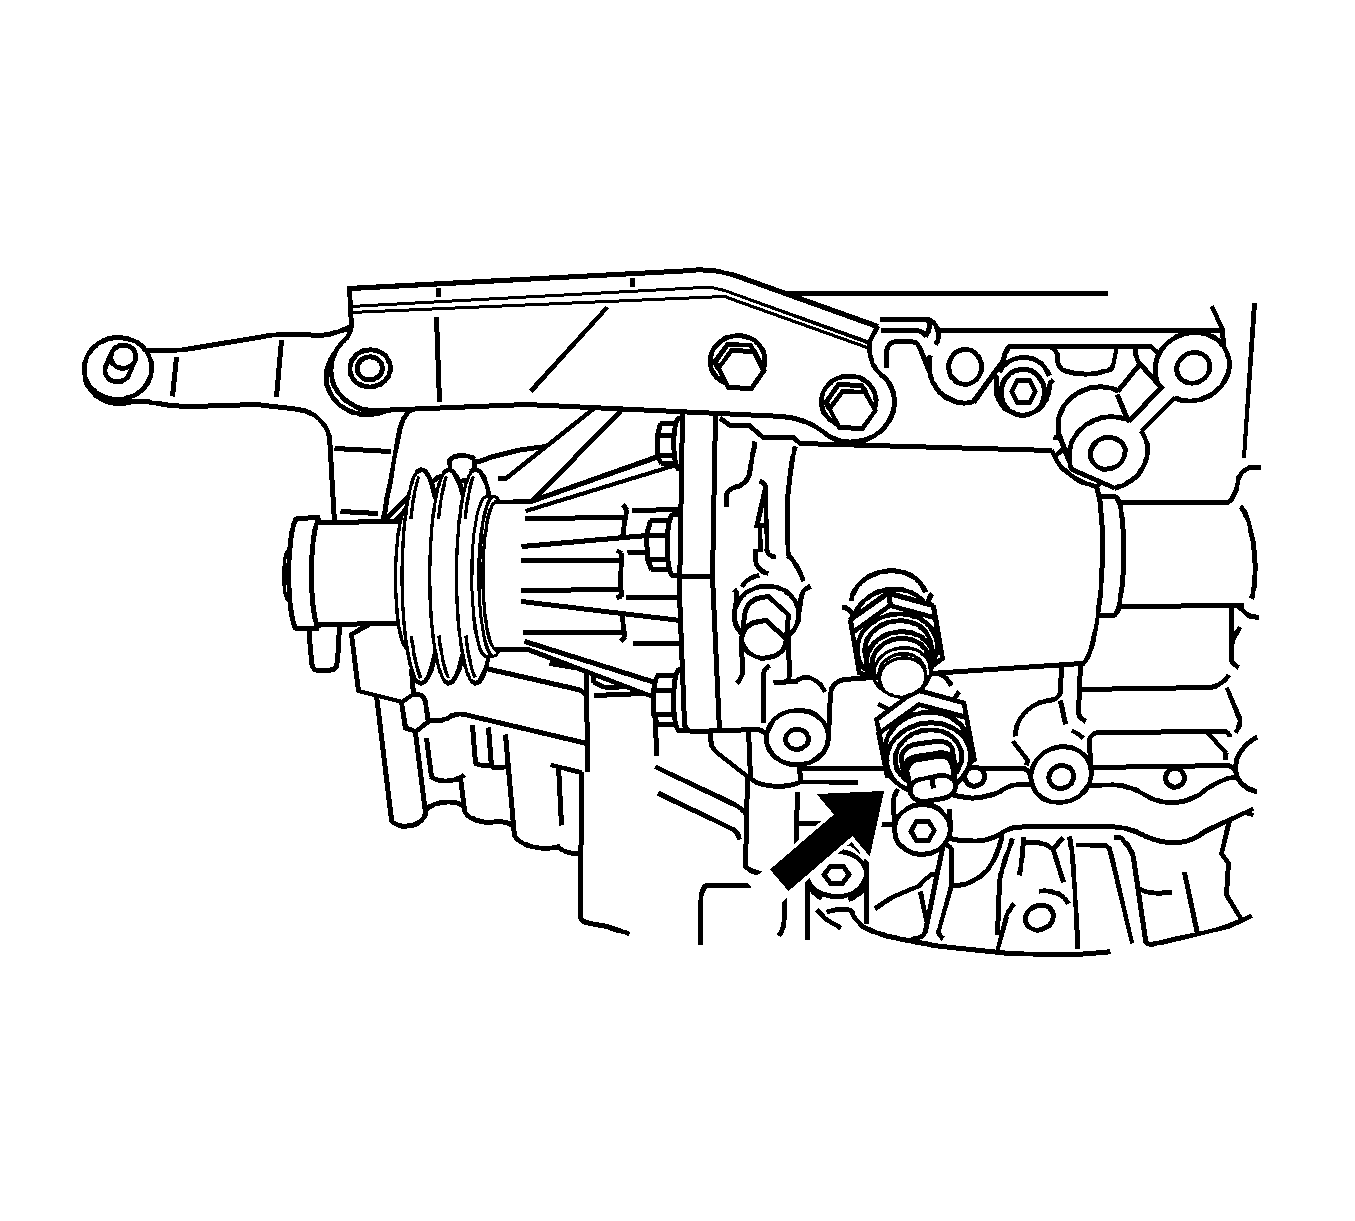
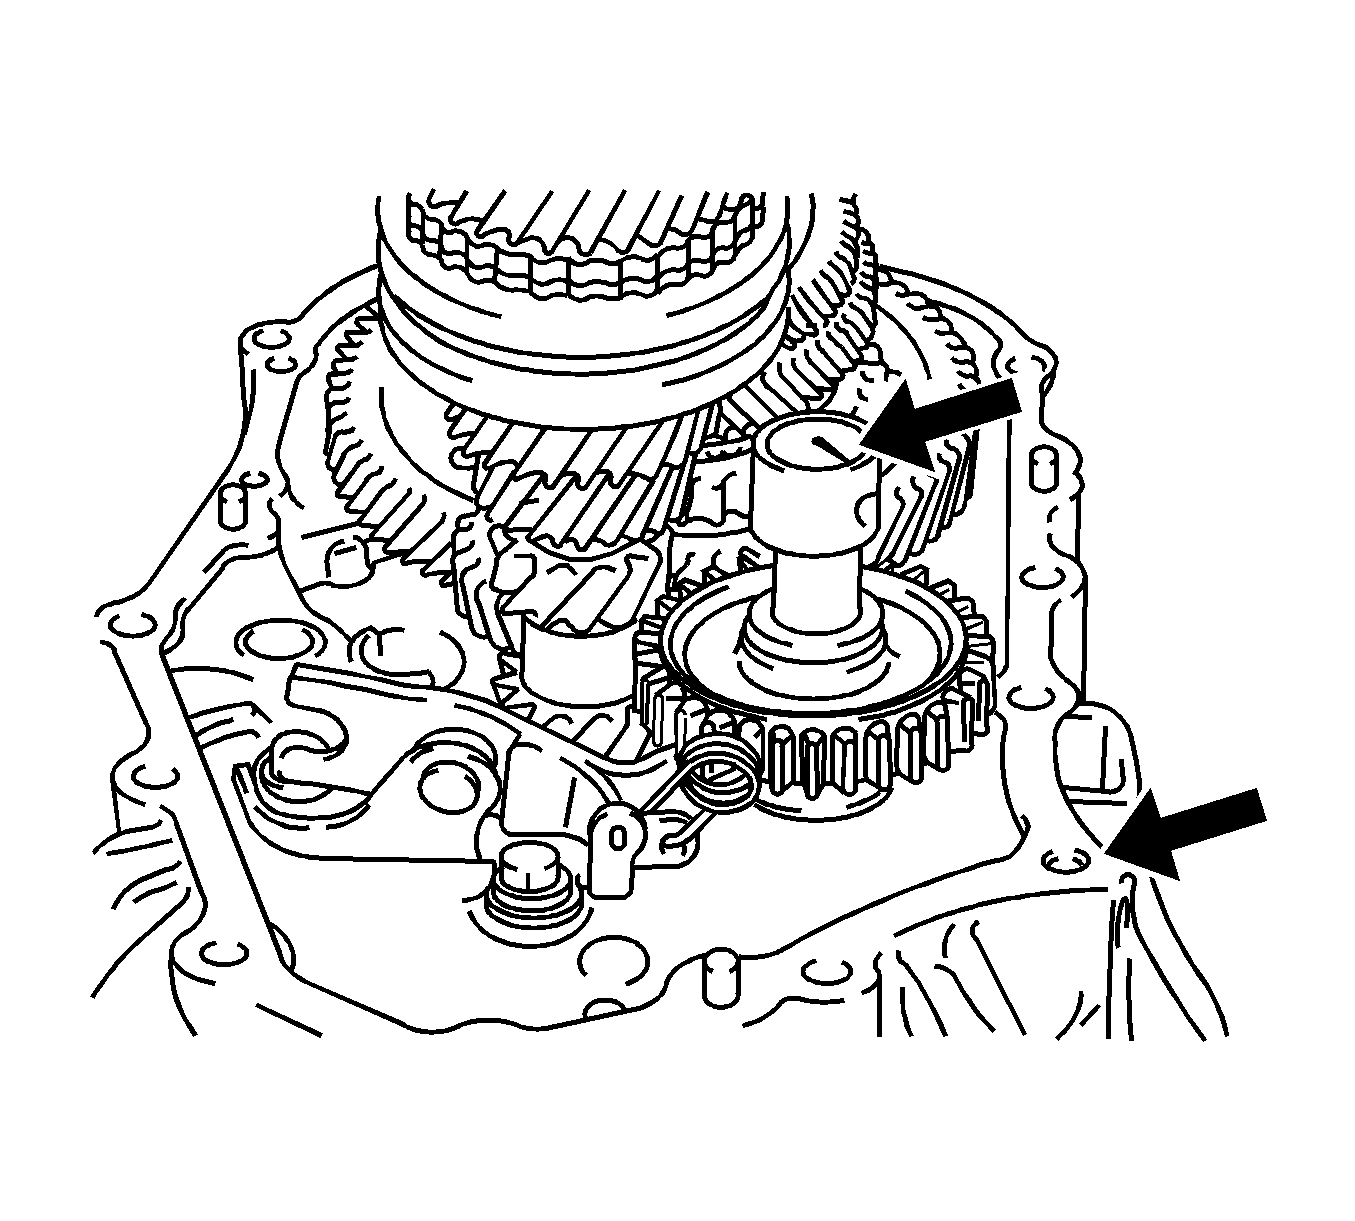
- Using a Allen wrench or equivalent, remove the 3 screw plug assemblies from the transaxle case
- Using a Allen wrench or equivalent, remove the 2 screw plugs from the transaxle case
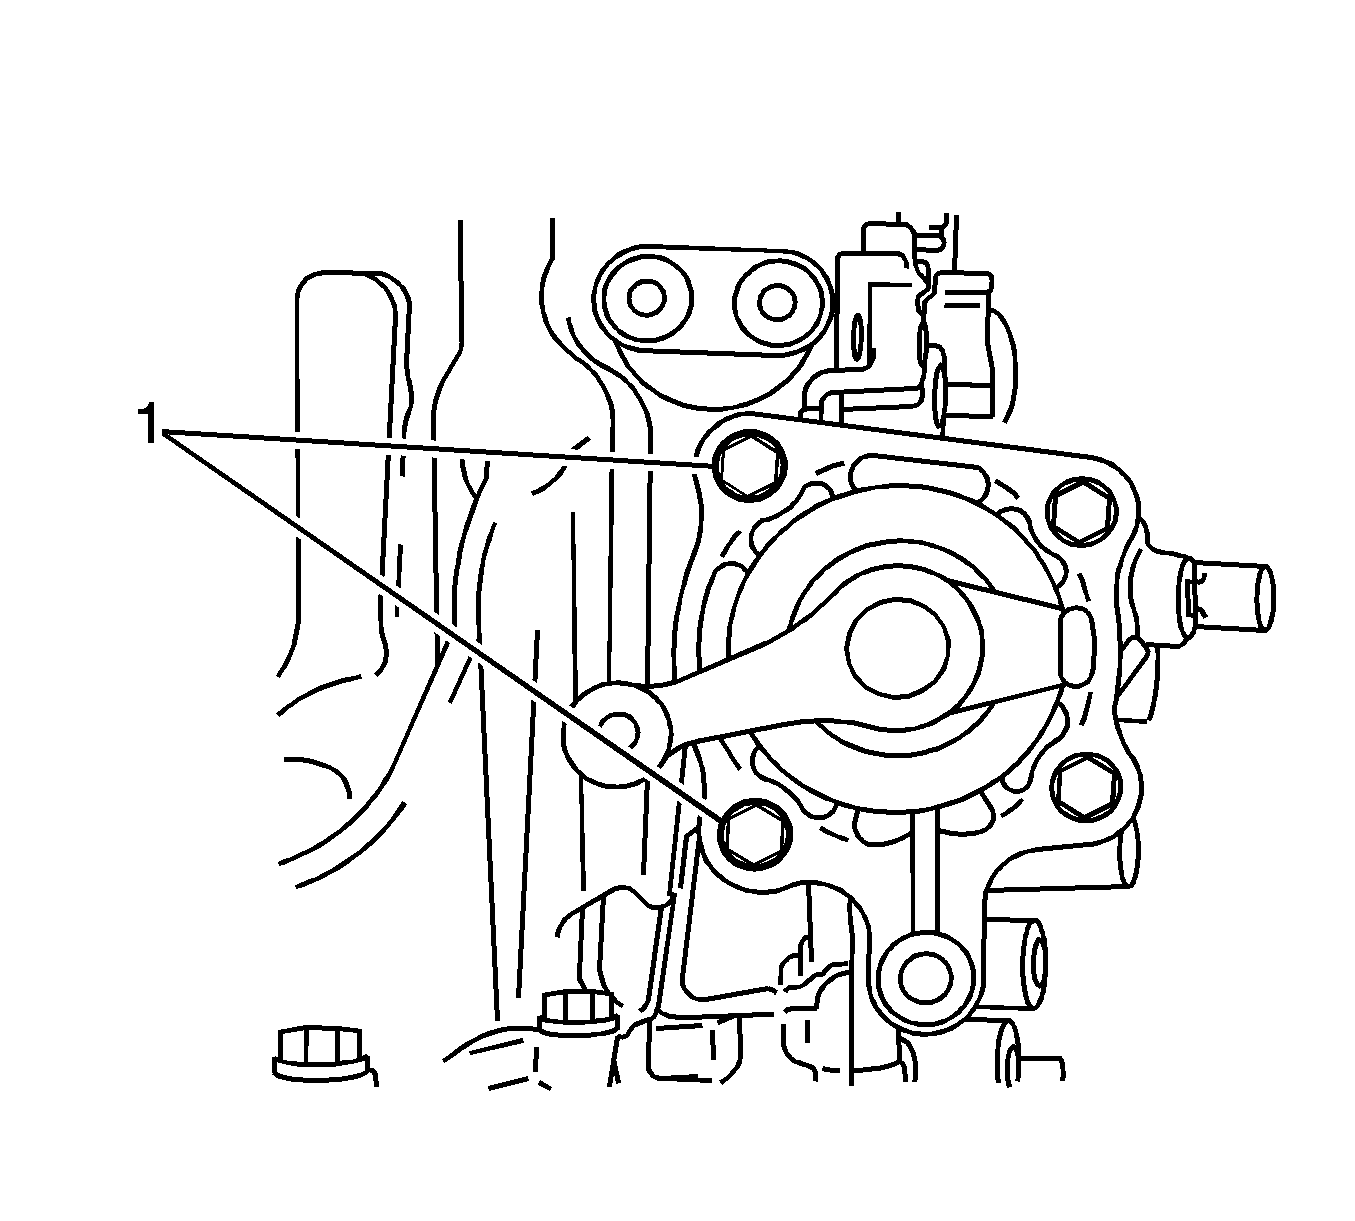
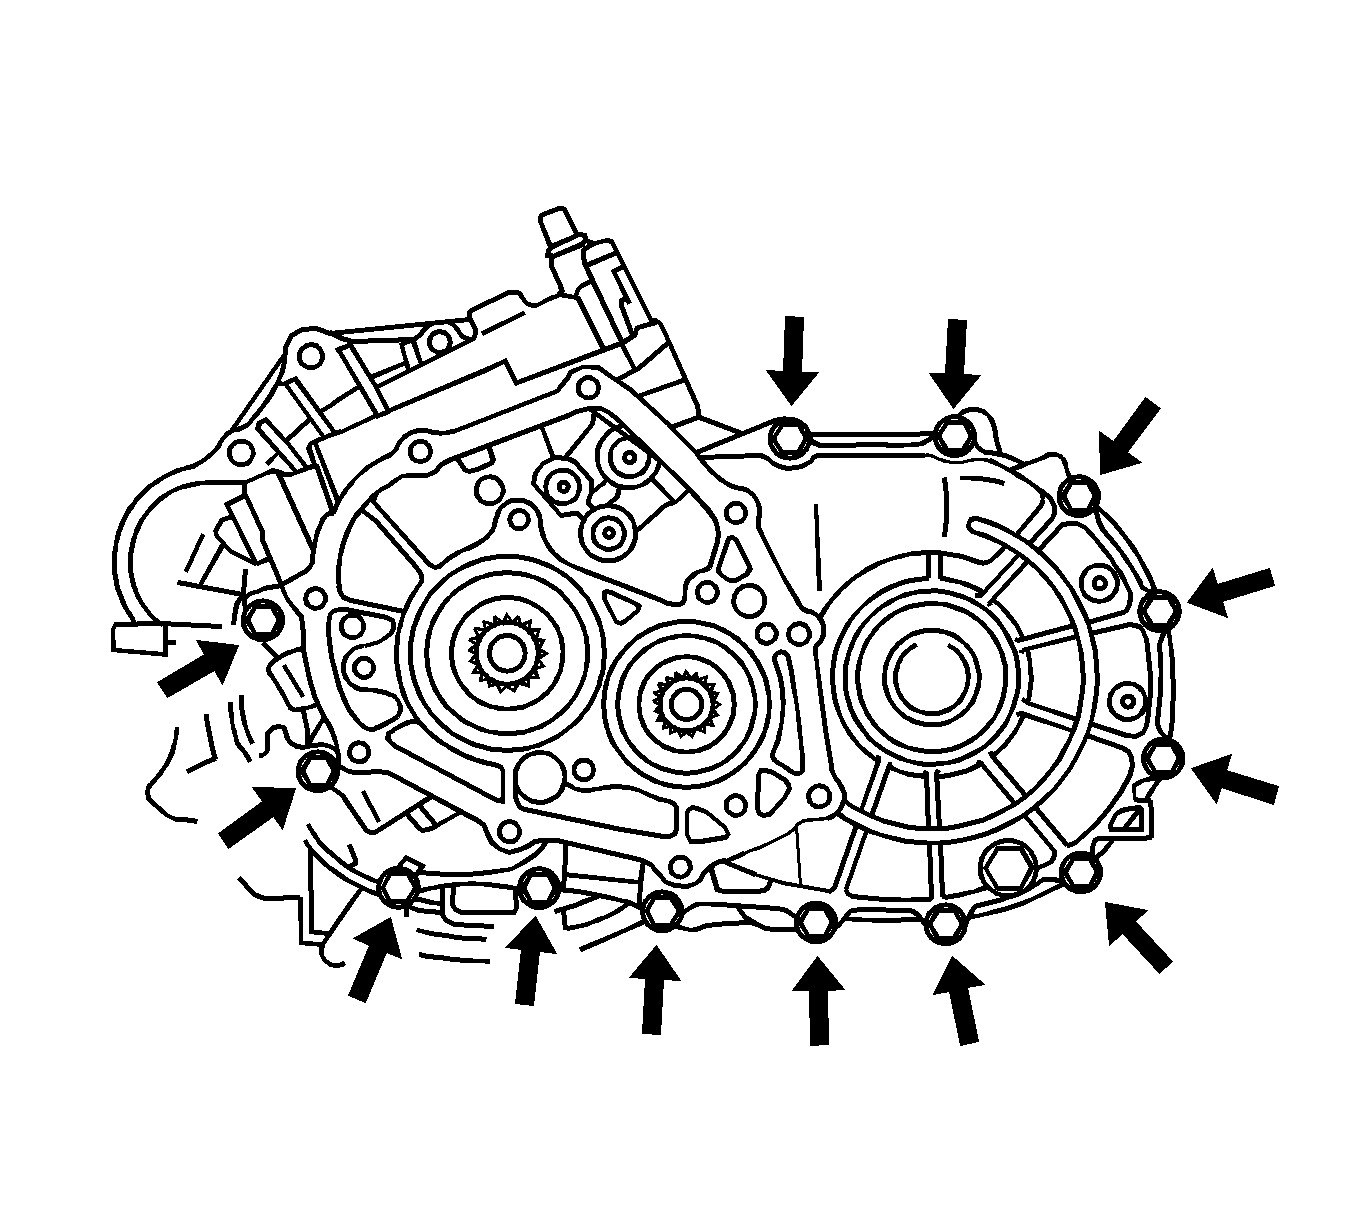
- Remove the 3 transmission case retaining bolts.
- Remove the 13 transaxle case retaining bolts.
- Using a brass bar and hammer, carefully tap the tabs on the case in order to separate the case halves.
- Remove the 2 bolts and the oil receiver pipes from the transaxle case.
- Remove the 2 reverse shift arm bracket retaining bolts, then remove the bracket.
- Remove the reverse idler gear, thrust washer and shaft.
- Remove the 2 snap rings from the No.1 and No.2 gear shift fork shafts.
- Remove the 3 gear shift fork set bolts.
- Remove the No.2 gear shift fork shaft from the No.2 gear shift fork.
- Remove the No.1 gear shift head, No.1 gear shift fork and the reverse shift fork from the transaxle case.
- Remove the No.1 gear shift fork shaft from the No.1 gear shift fork from the transaxle case.
- Remove the No.1 gear shift head from the shift shaft.
- Remove the No.1 gear shift fork from the reverse gear assembly.
- Remove the No.3 gear shift fork shaft from the reverse shift fork from the transaxle case.
- Remove the reverse shift fork.
- Remove the No.2 gear shift fork from the No.2 hub sleeve groove.
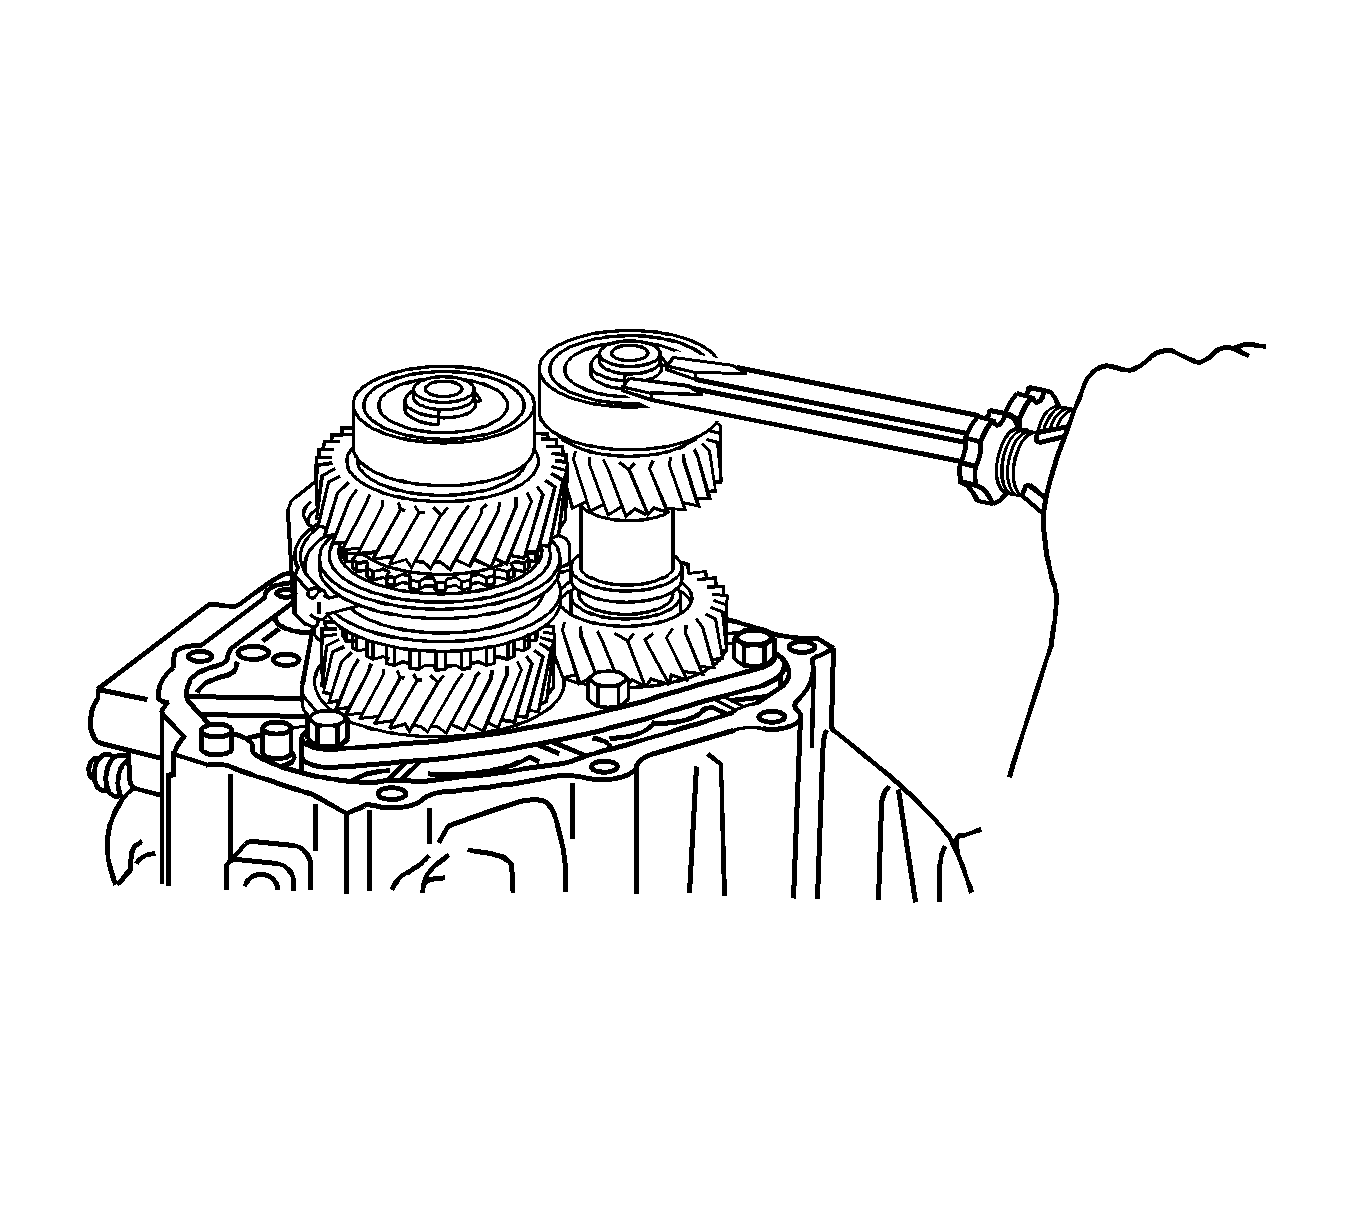
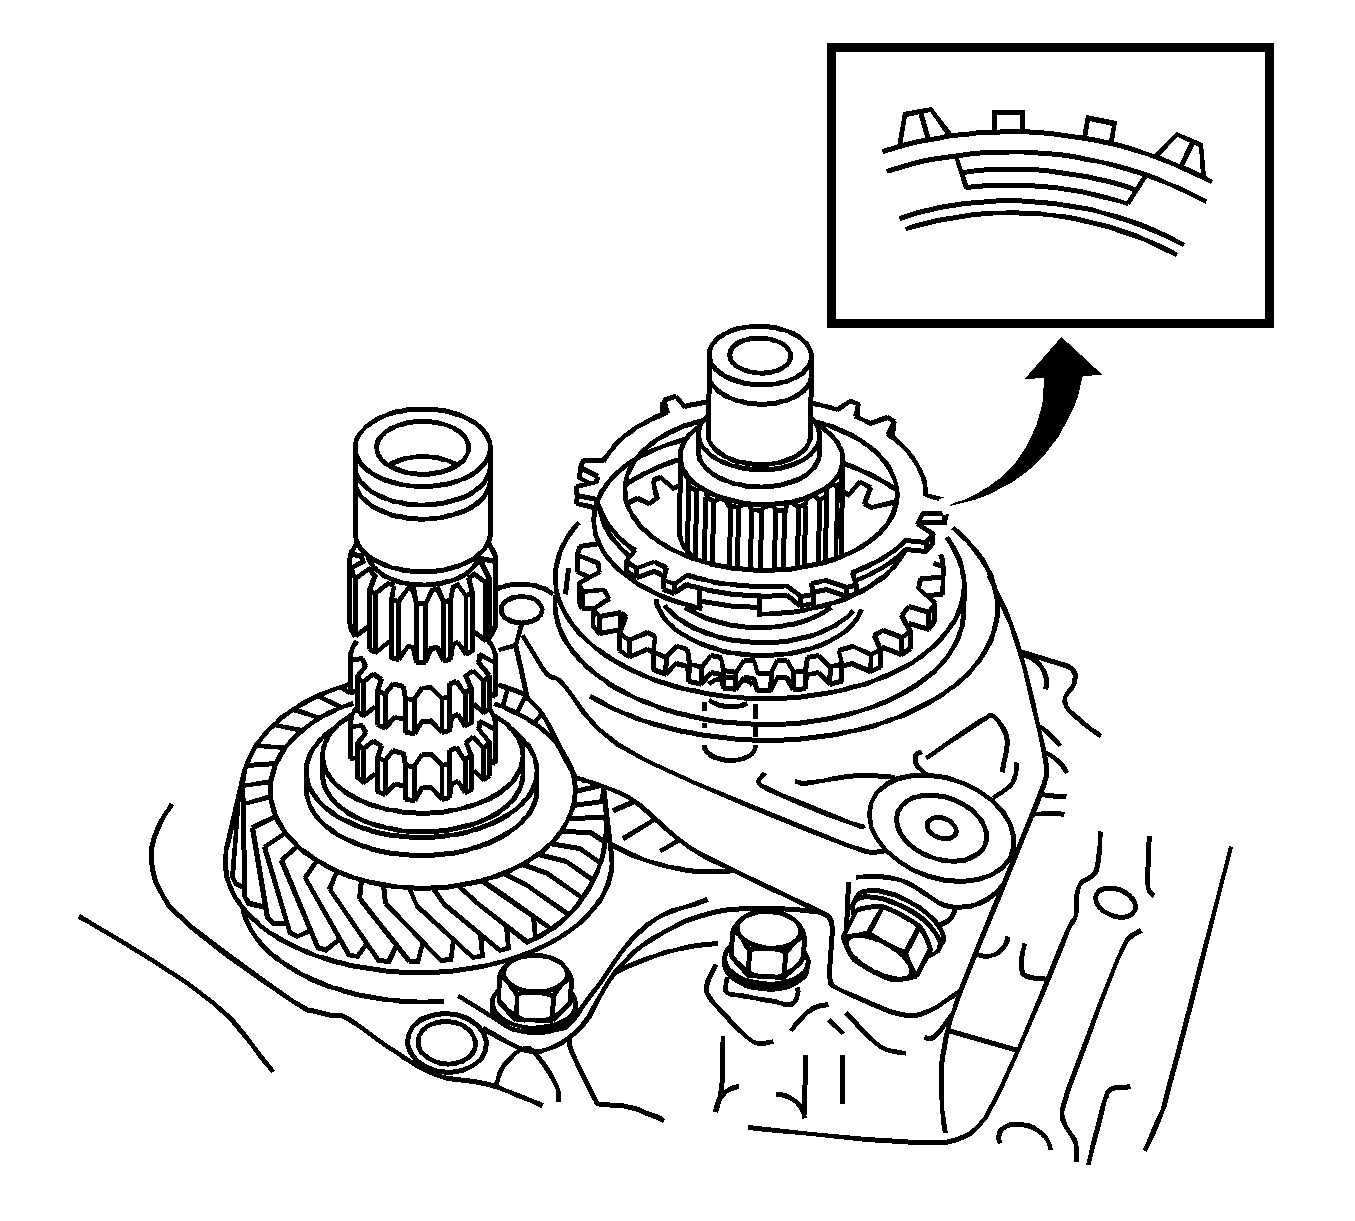
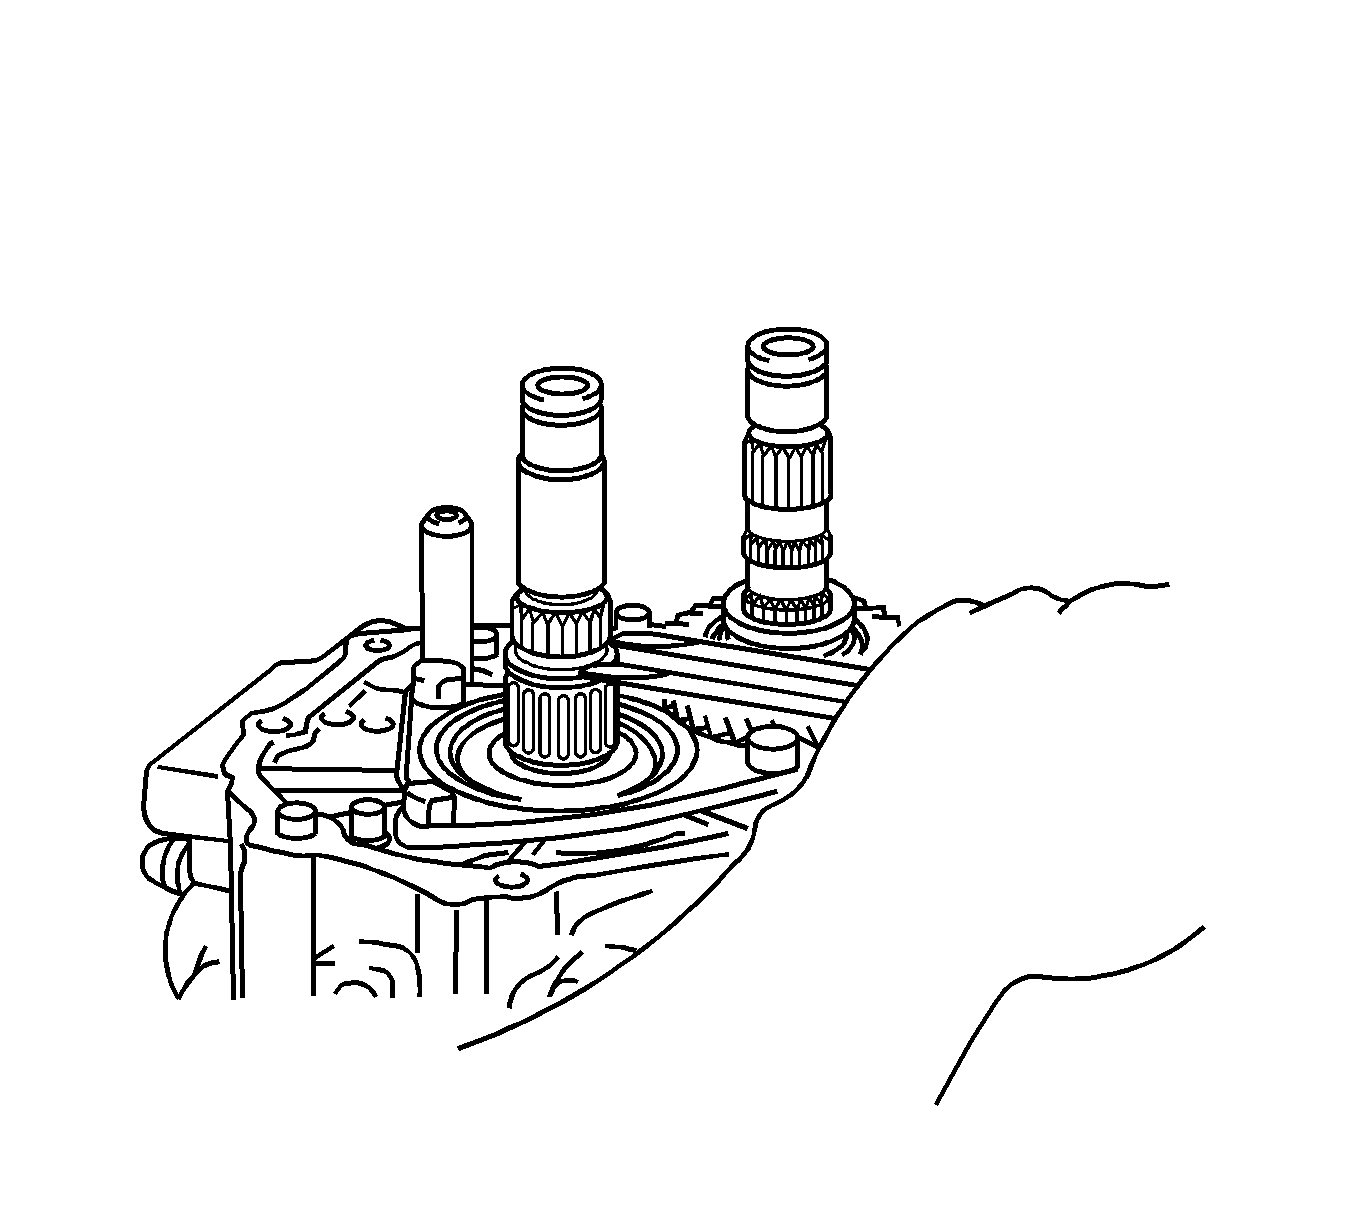
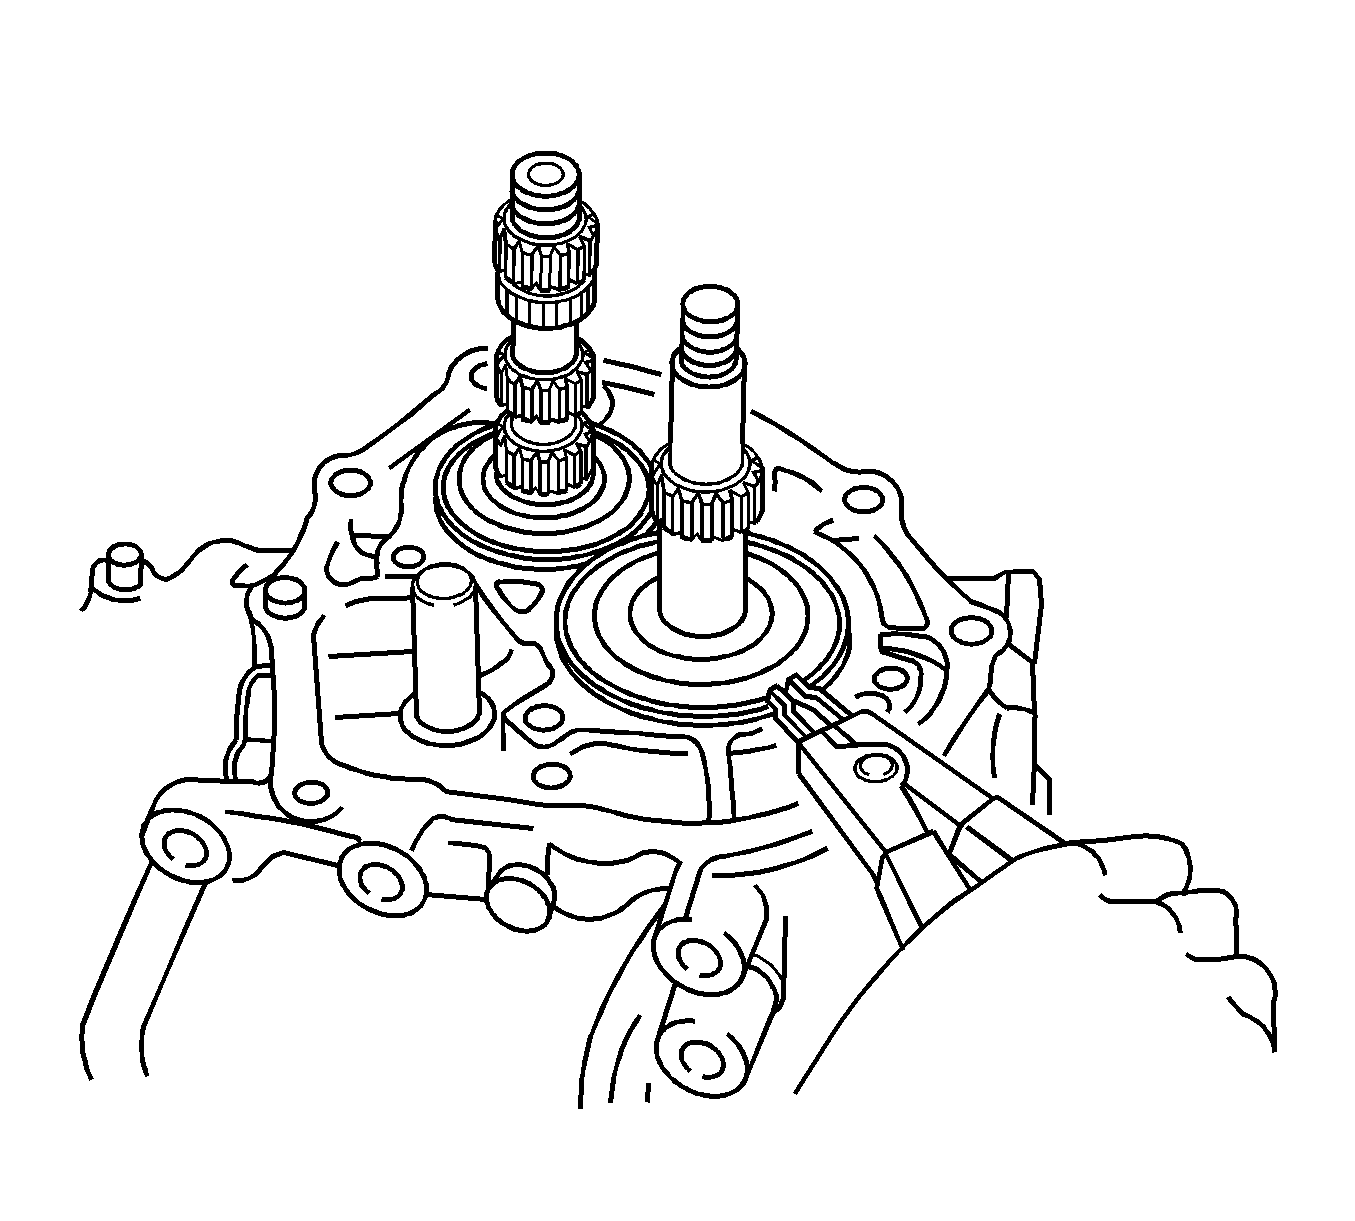
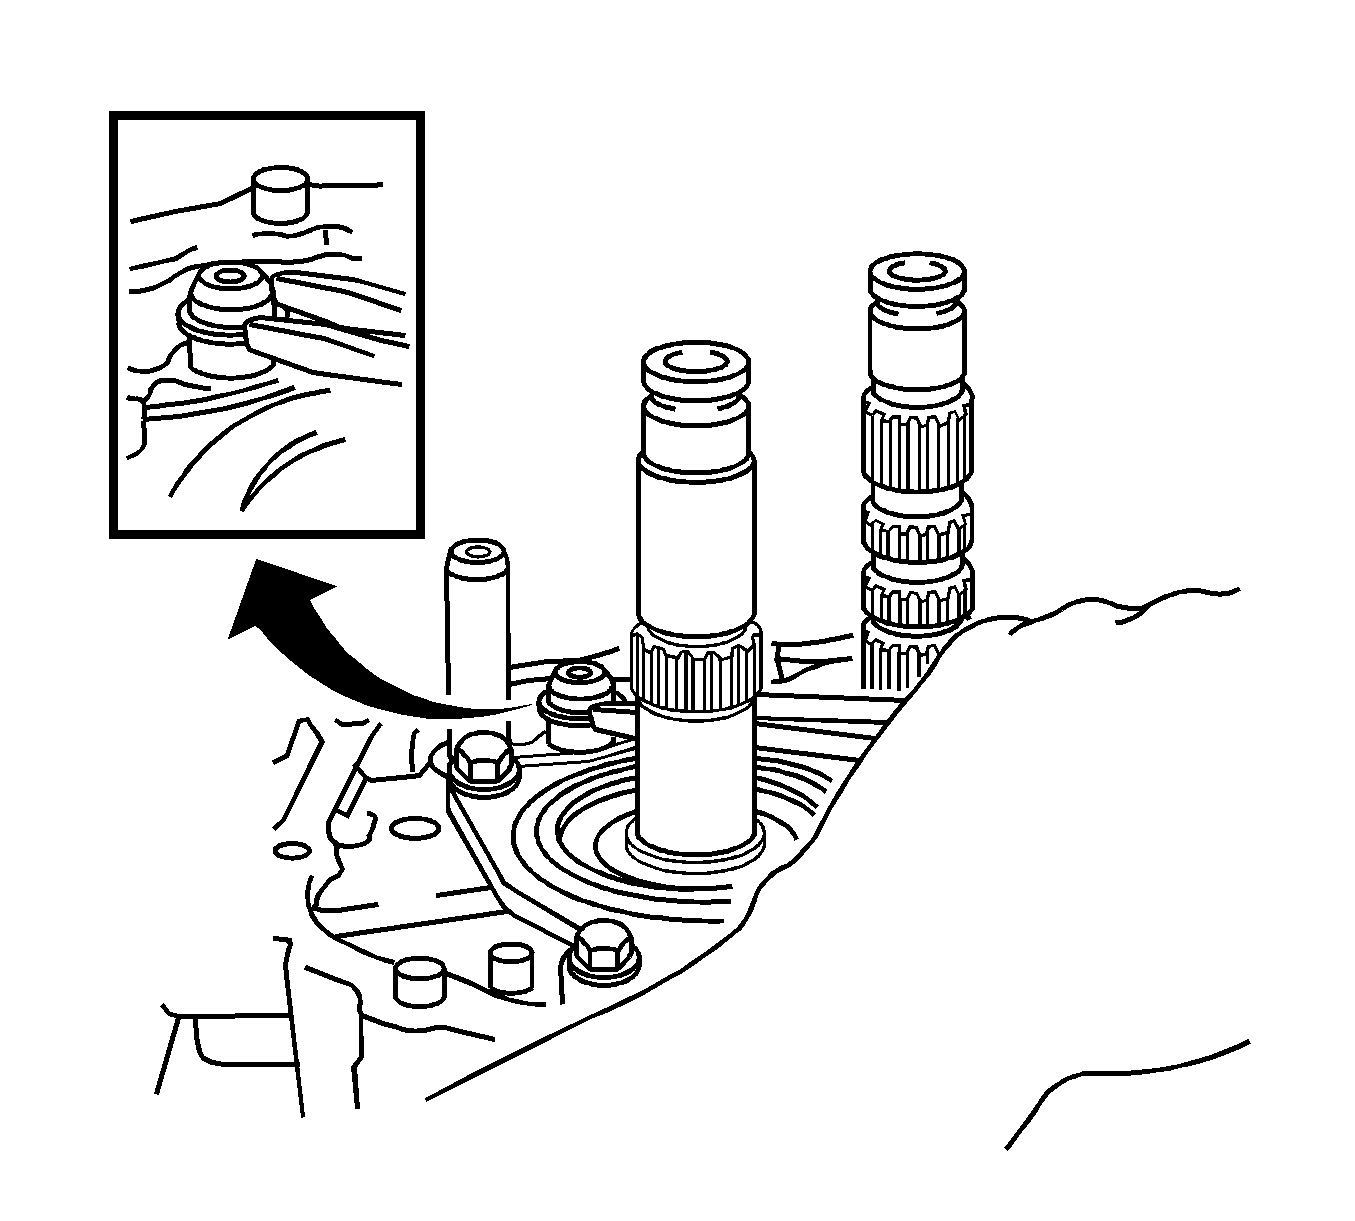
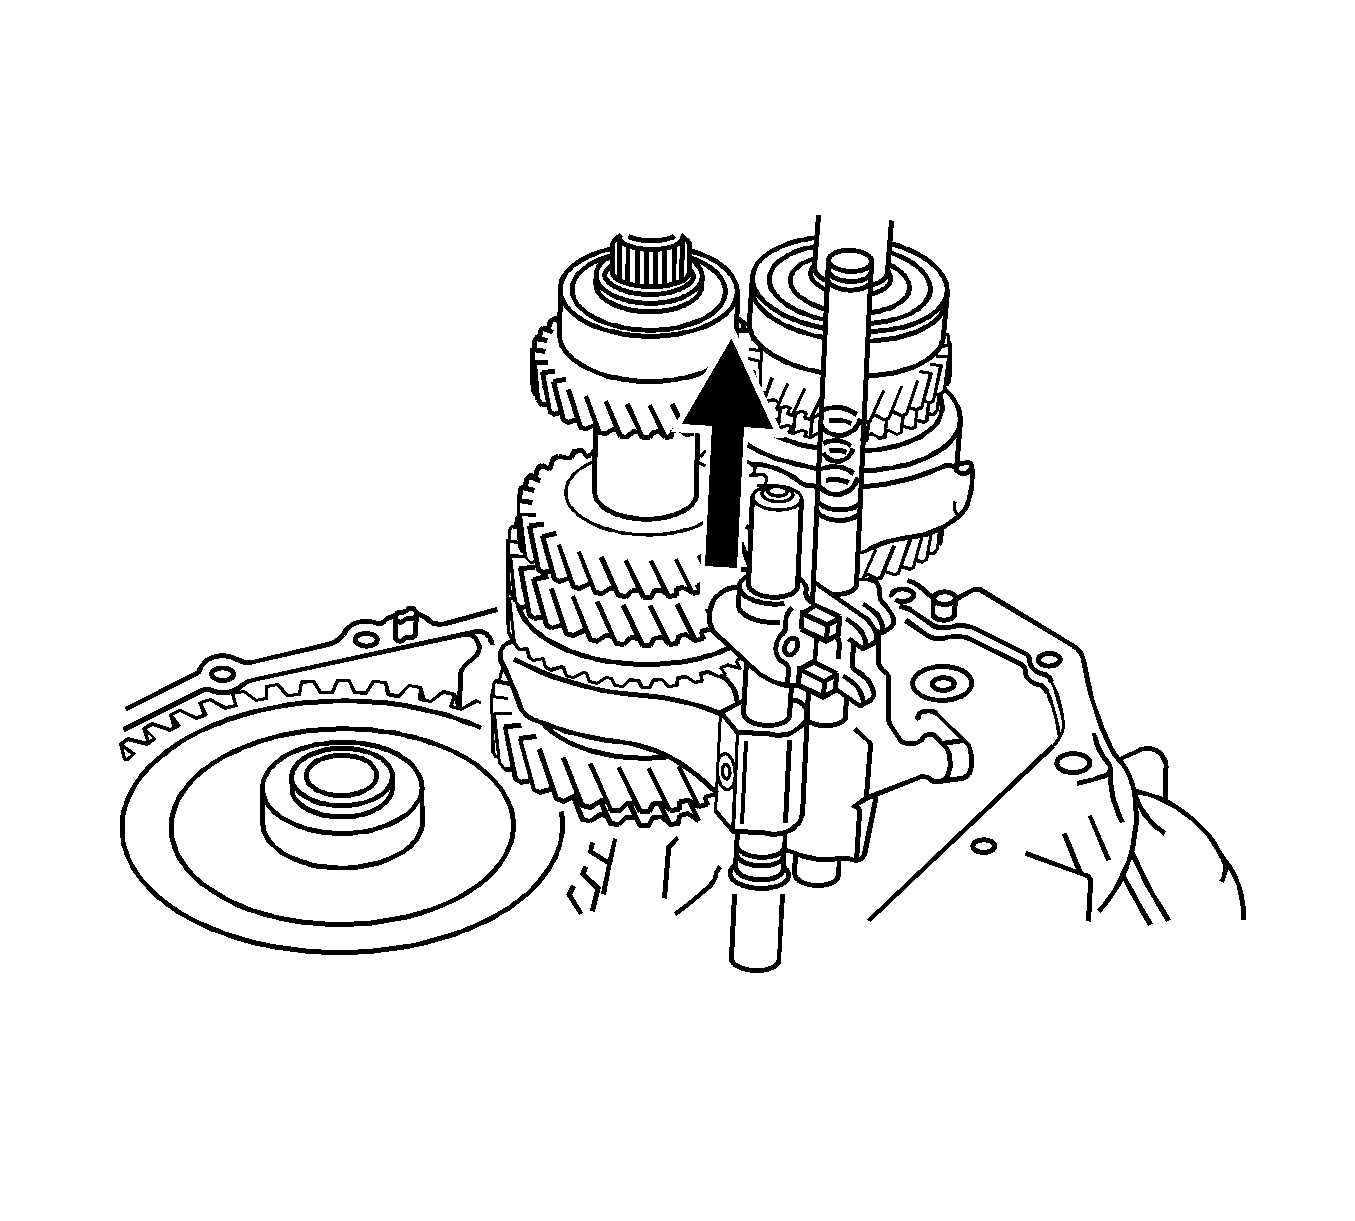
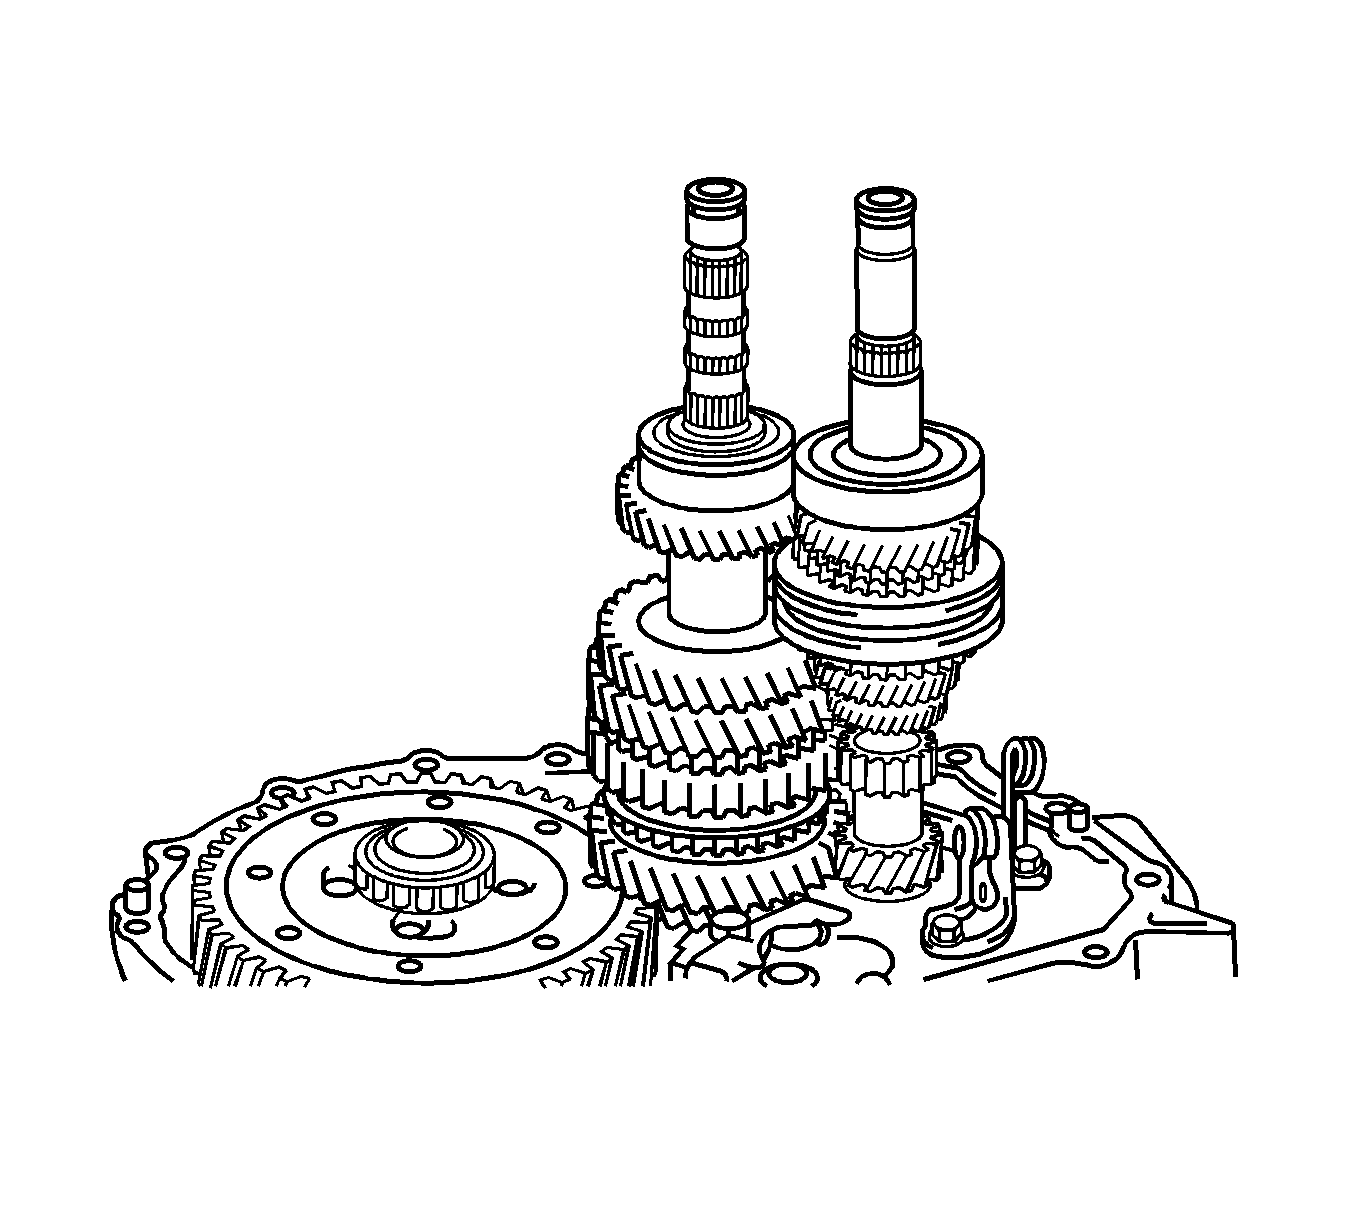
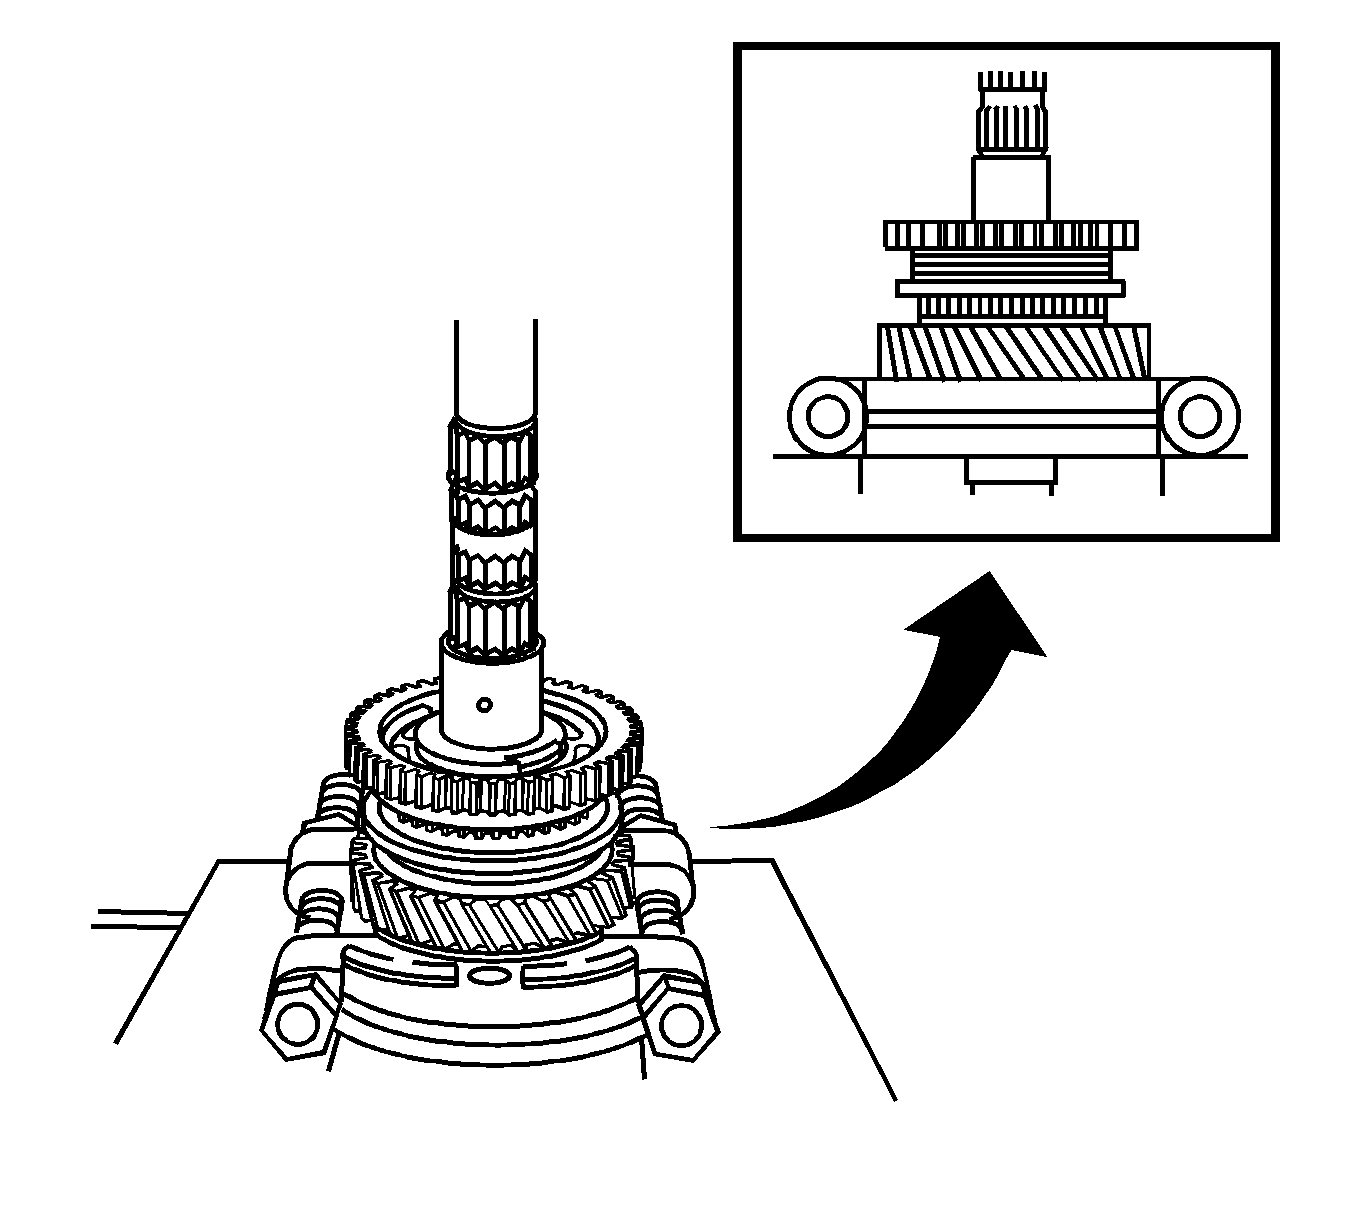
- Remove the input and output shafts together from the transaxle case.
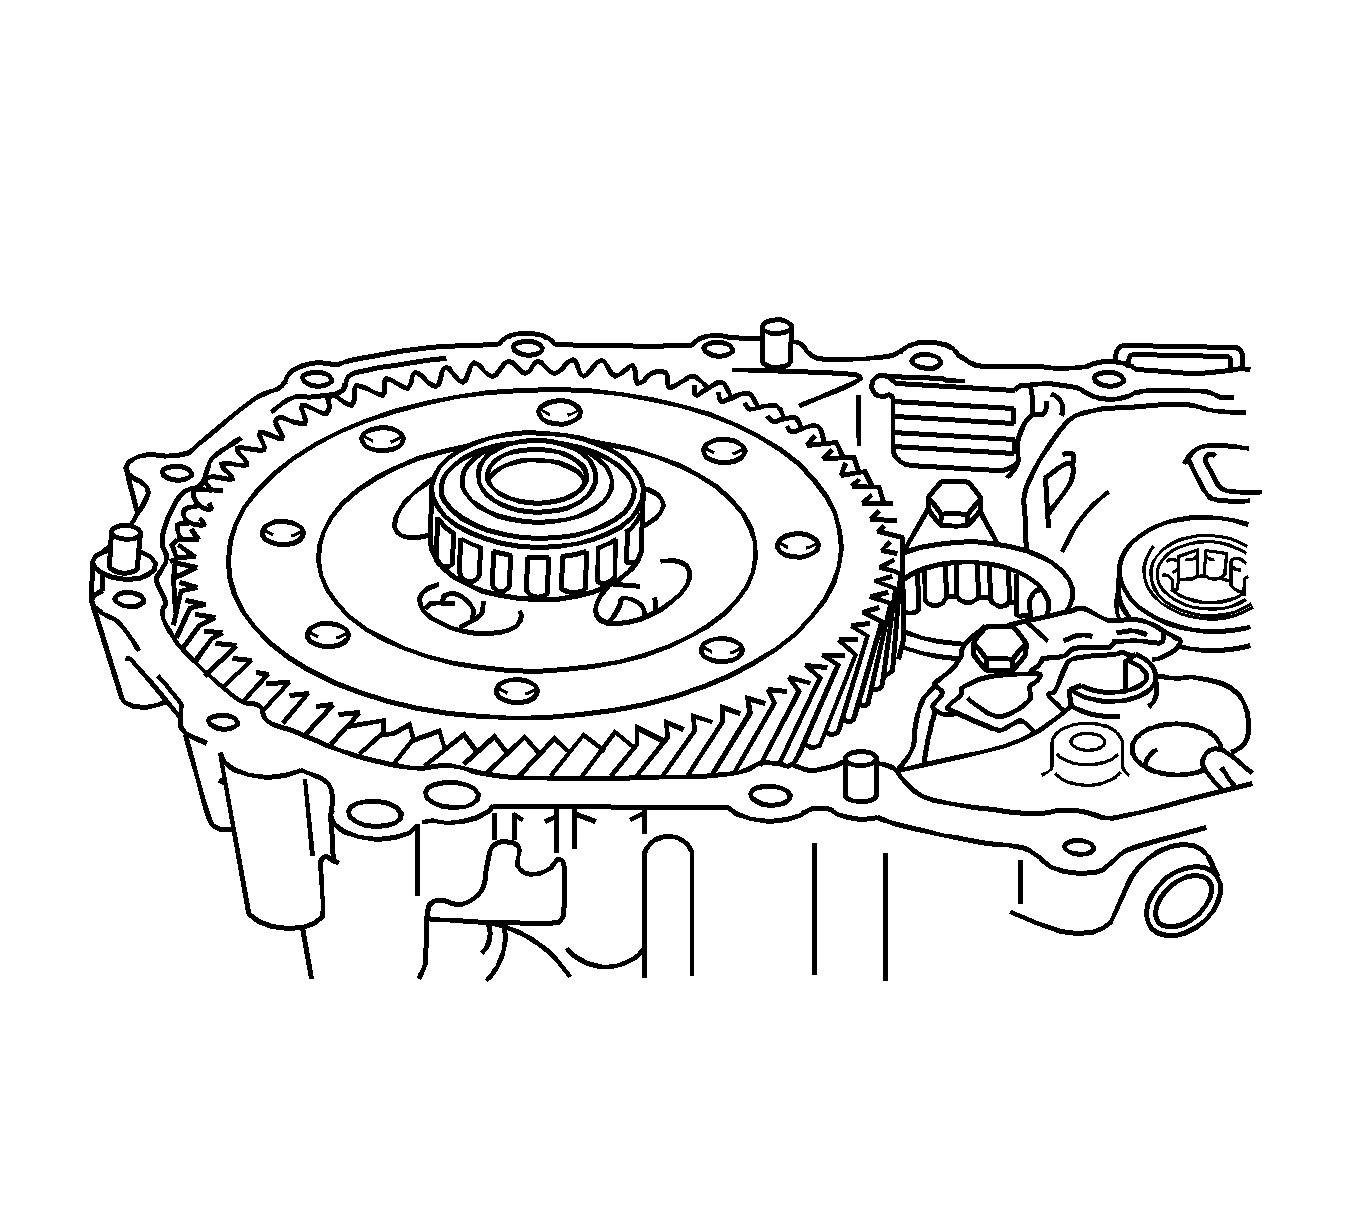
- Remove the differential case assembly from the transaxle case.
- Remove the magnet from the transaxle case.
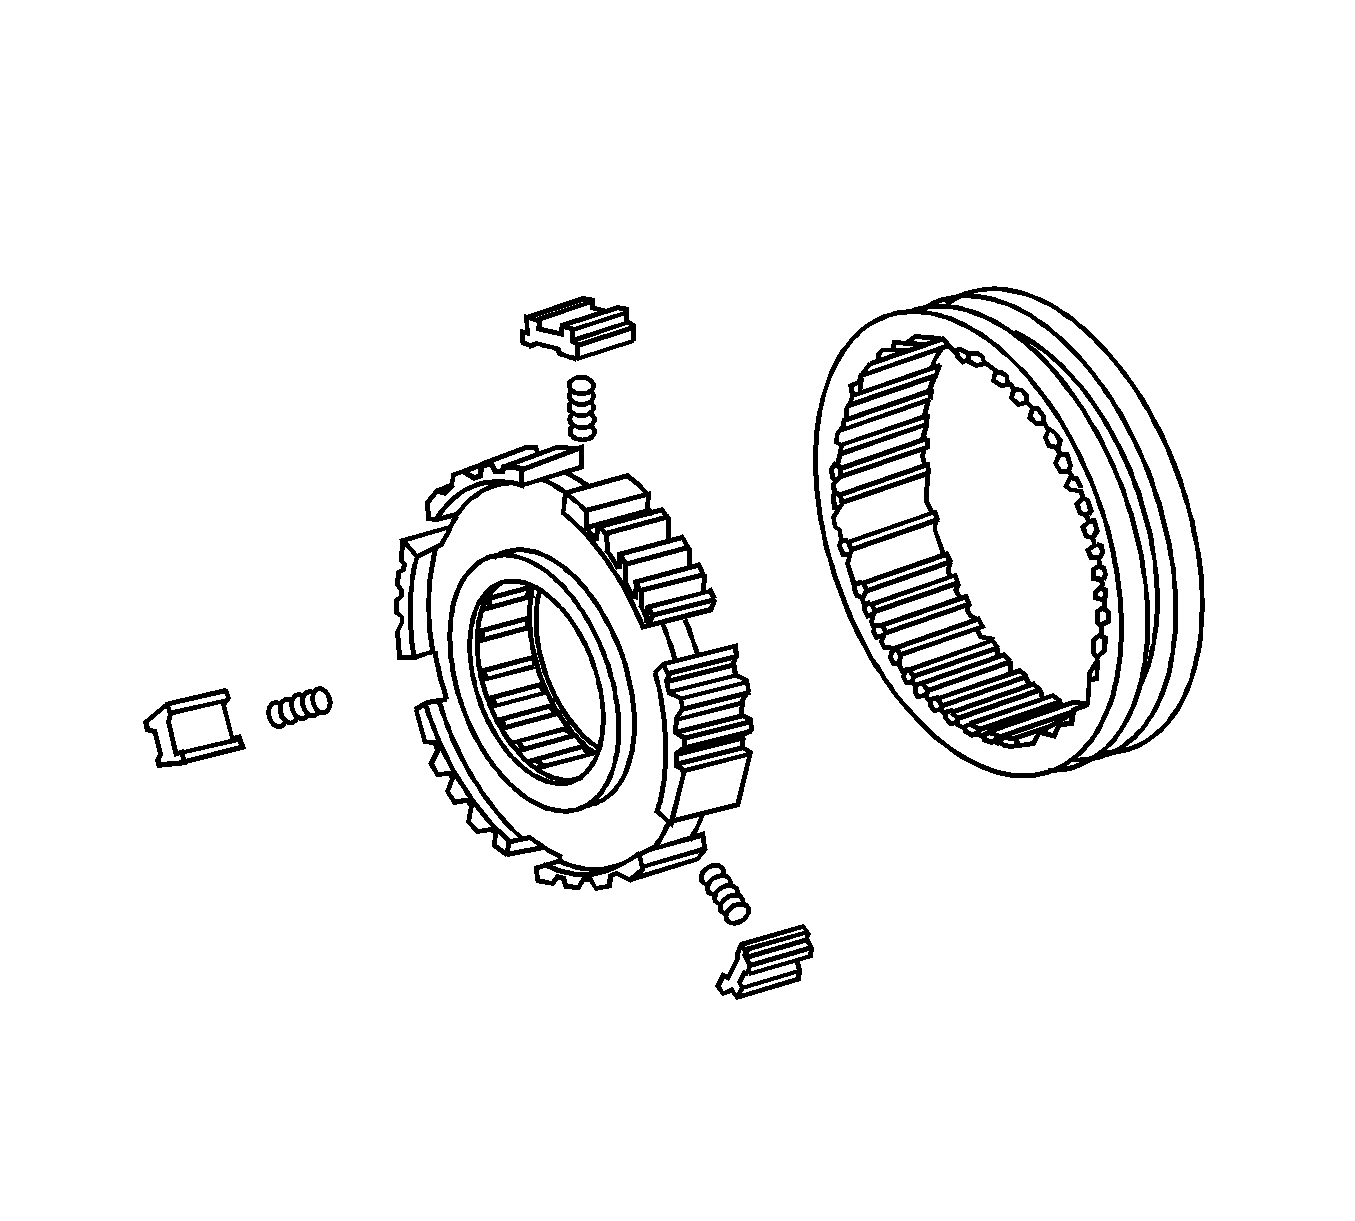
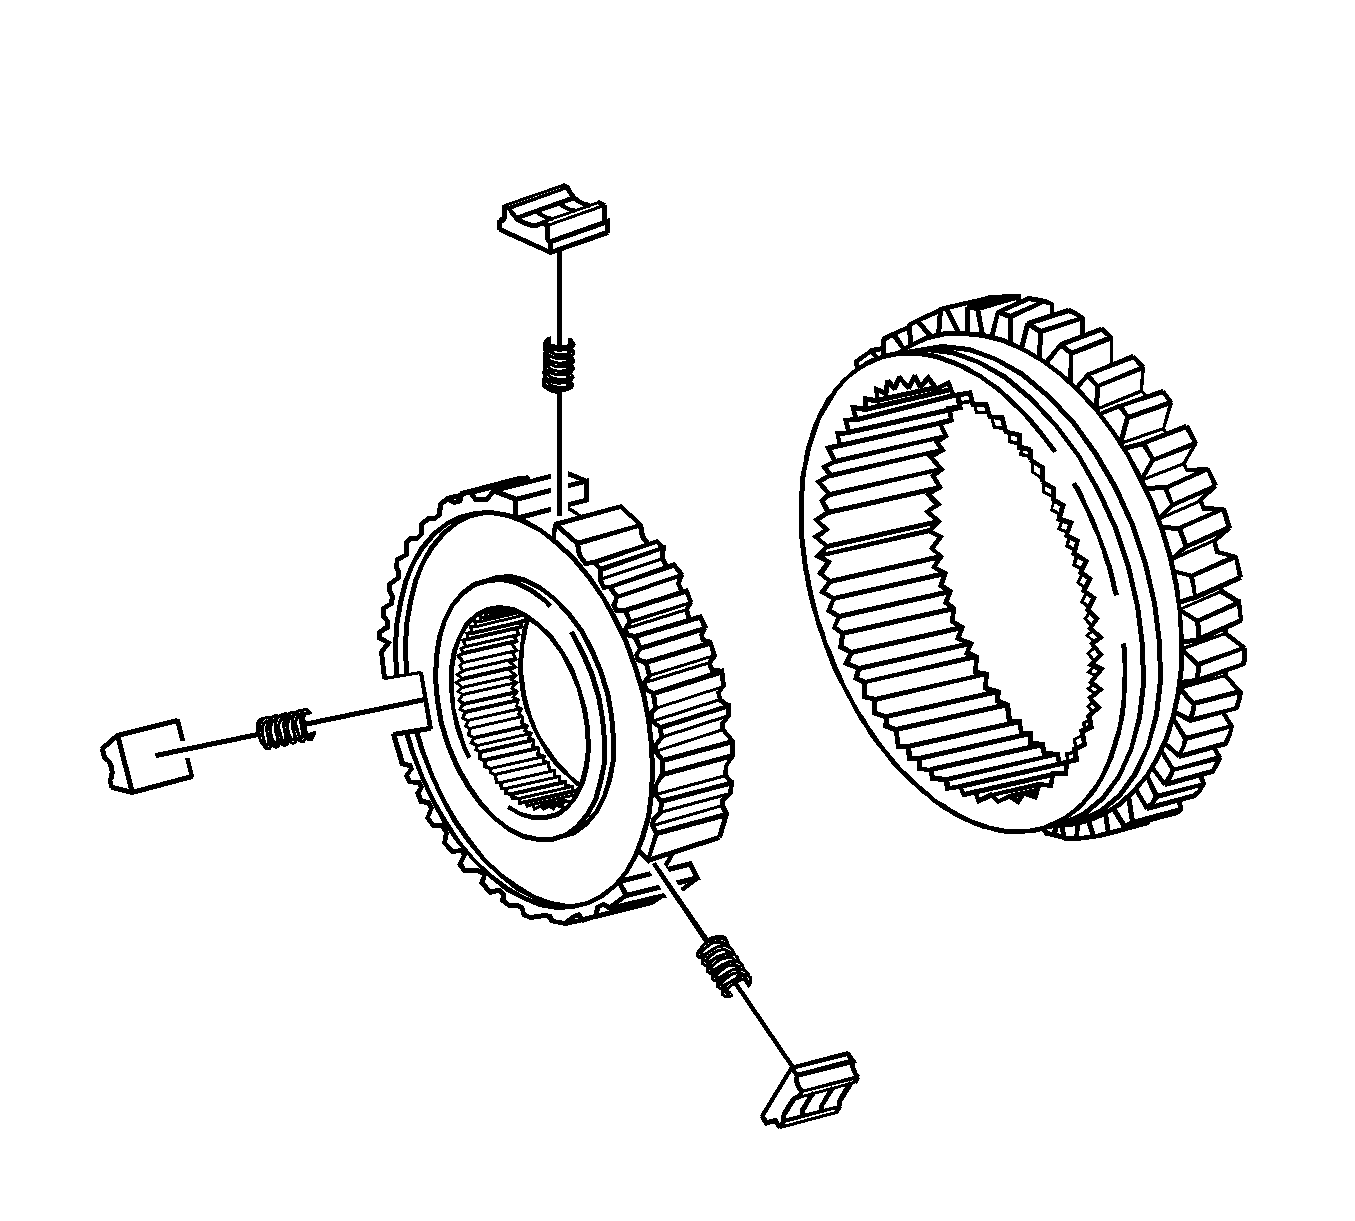
- Disassemble the No.3 clutch hub assembly.
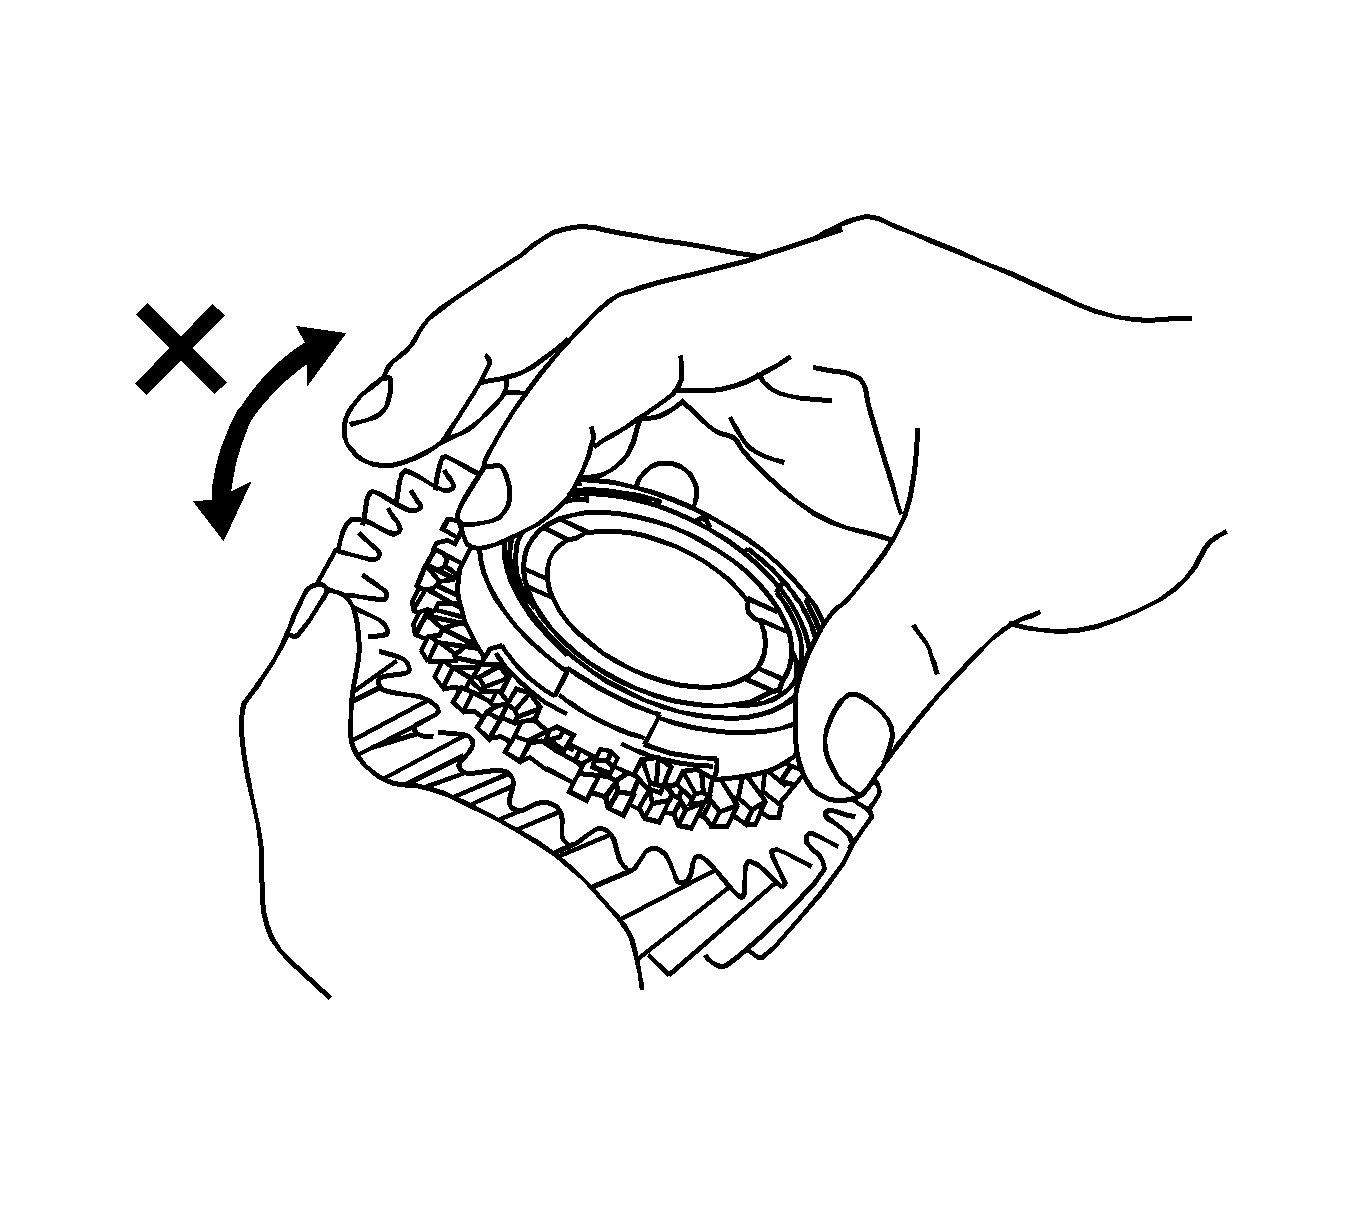
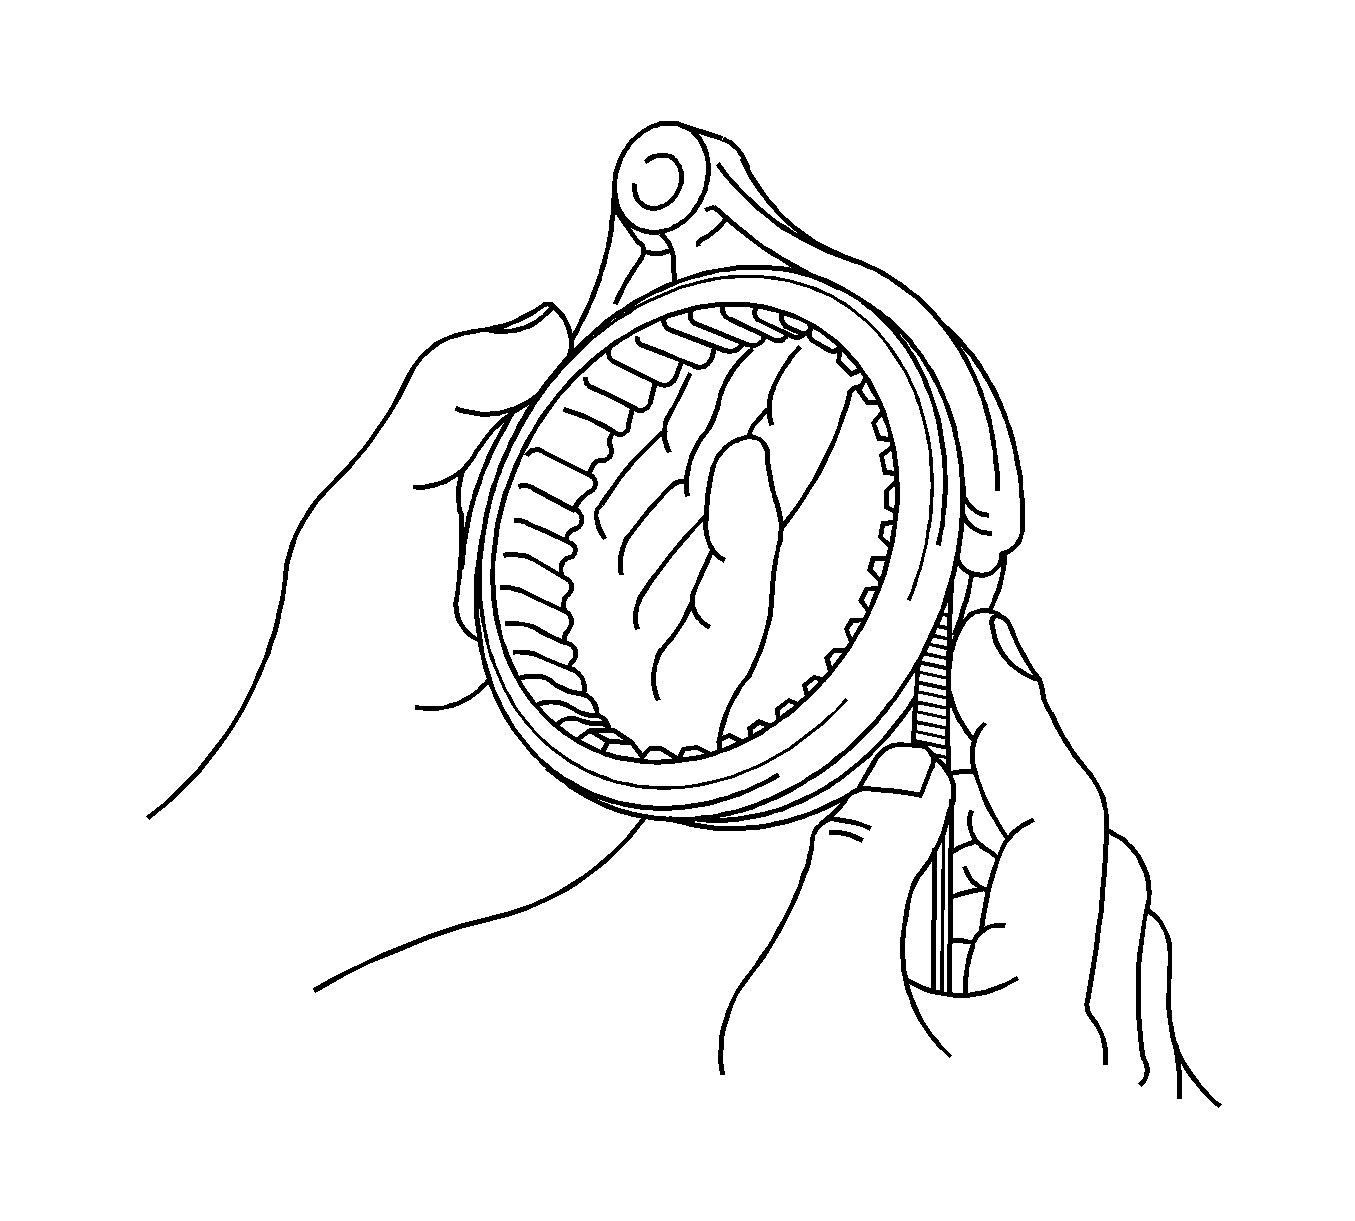
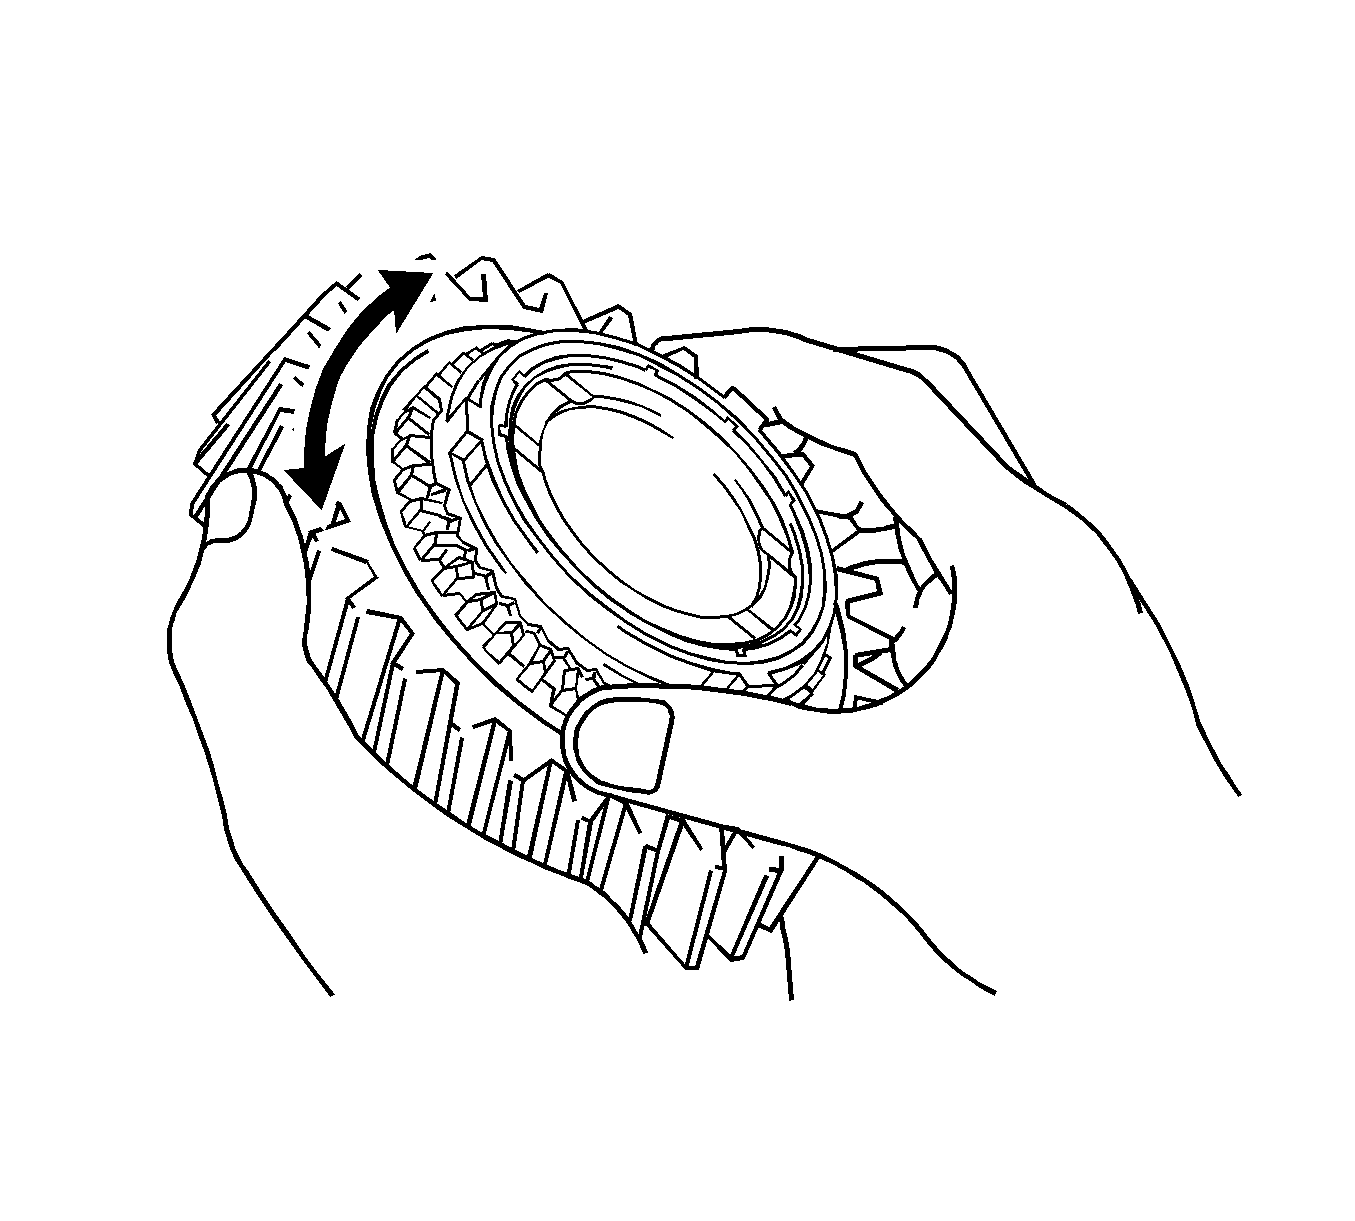
- Check the 5th and 6th gear braking action of the synchronizer ring. Turn the synchronizer ring in one direction while pushing it into the gear cone. Ensure that the ring locks. Replace the ring if necessary.
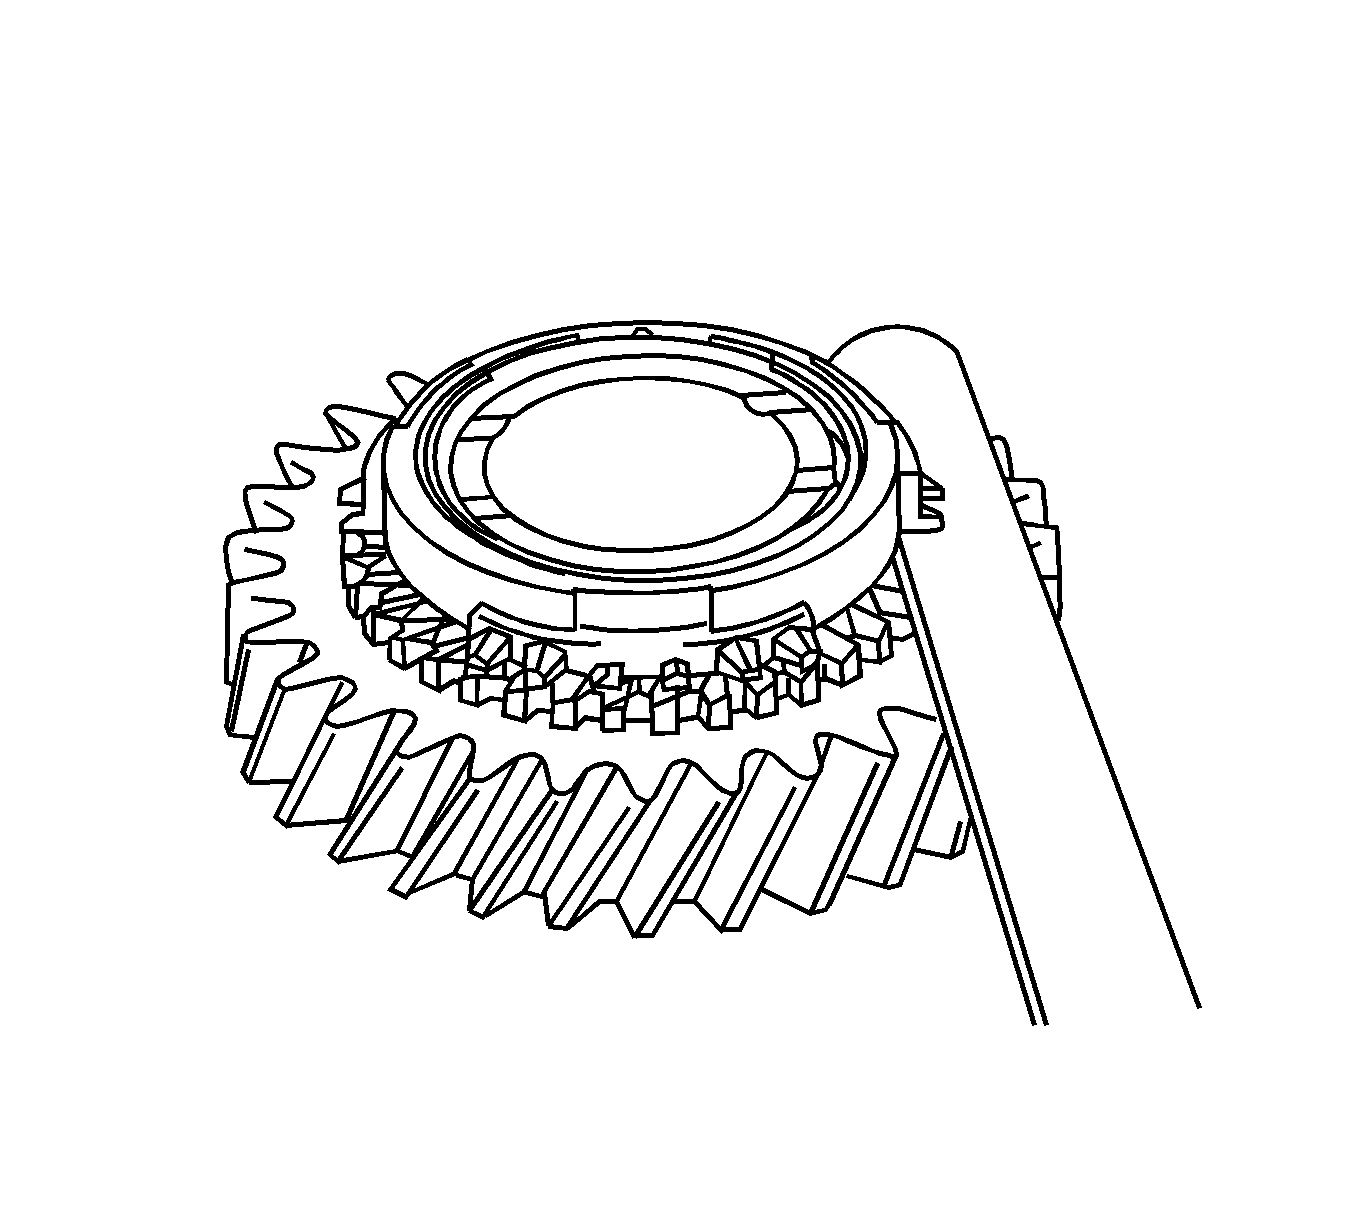
- Using a feeler gage, measure the clearance between the synchronizer ring and the gear spline end. Minimum clearance is 0.75 mm (0.0295 in). If the clearance is less than the minimum, replace the synchronizer ring.
- Using a feeler gage, measure the clearance between the hub sleeve and the gear shift fork. Maximum clearance is 0.89 mm (0.0350 in). If the clearance exceeds the maximum, replace the gear shift fork or hub sleeve.
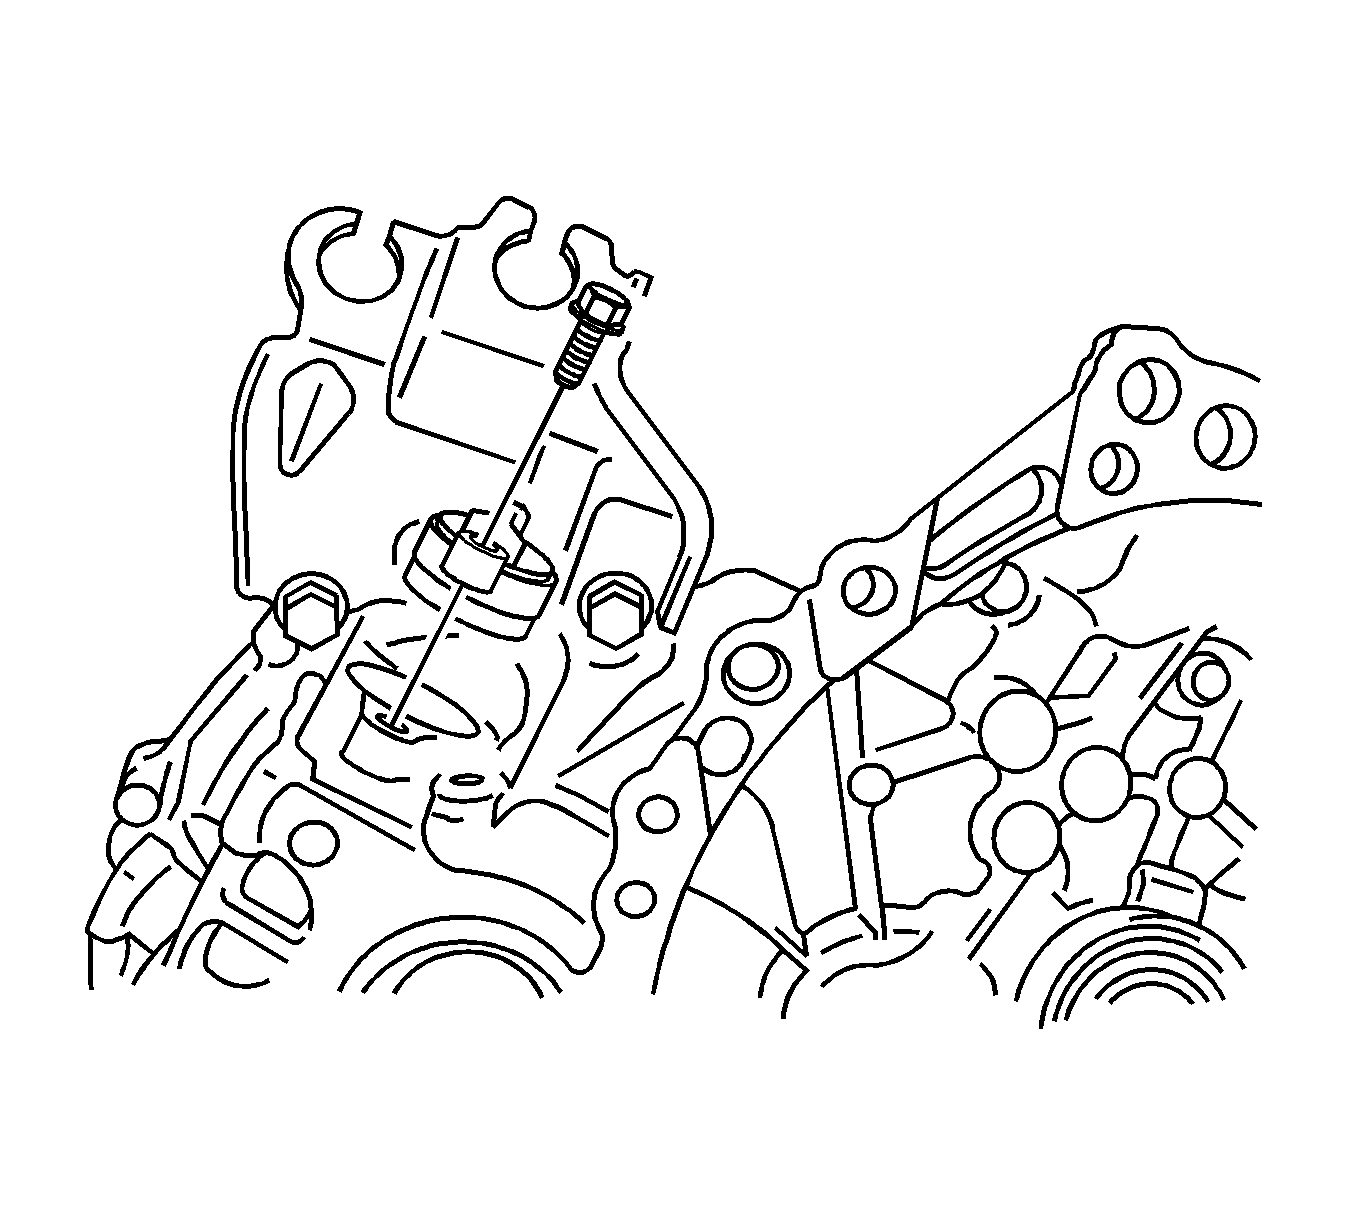
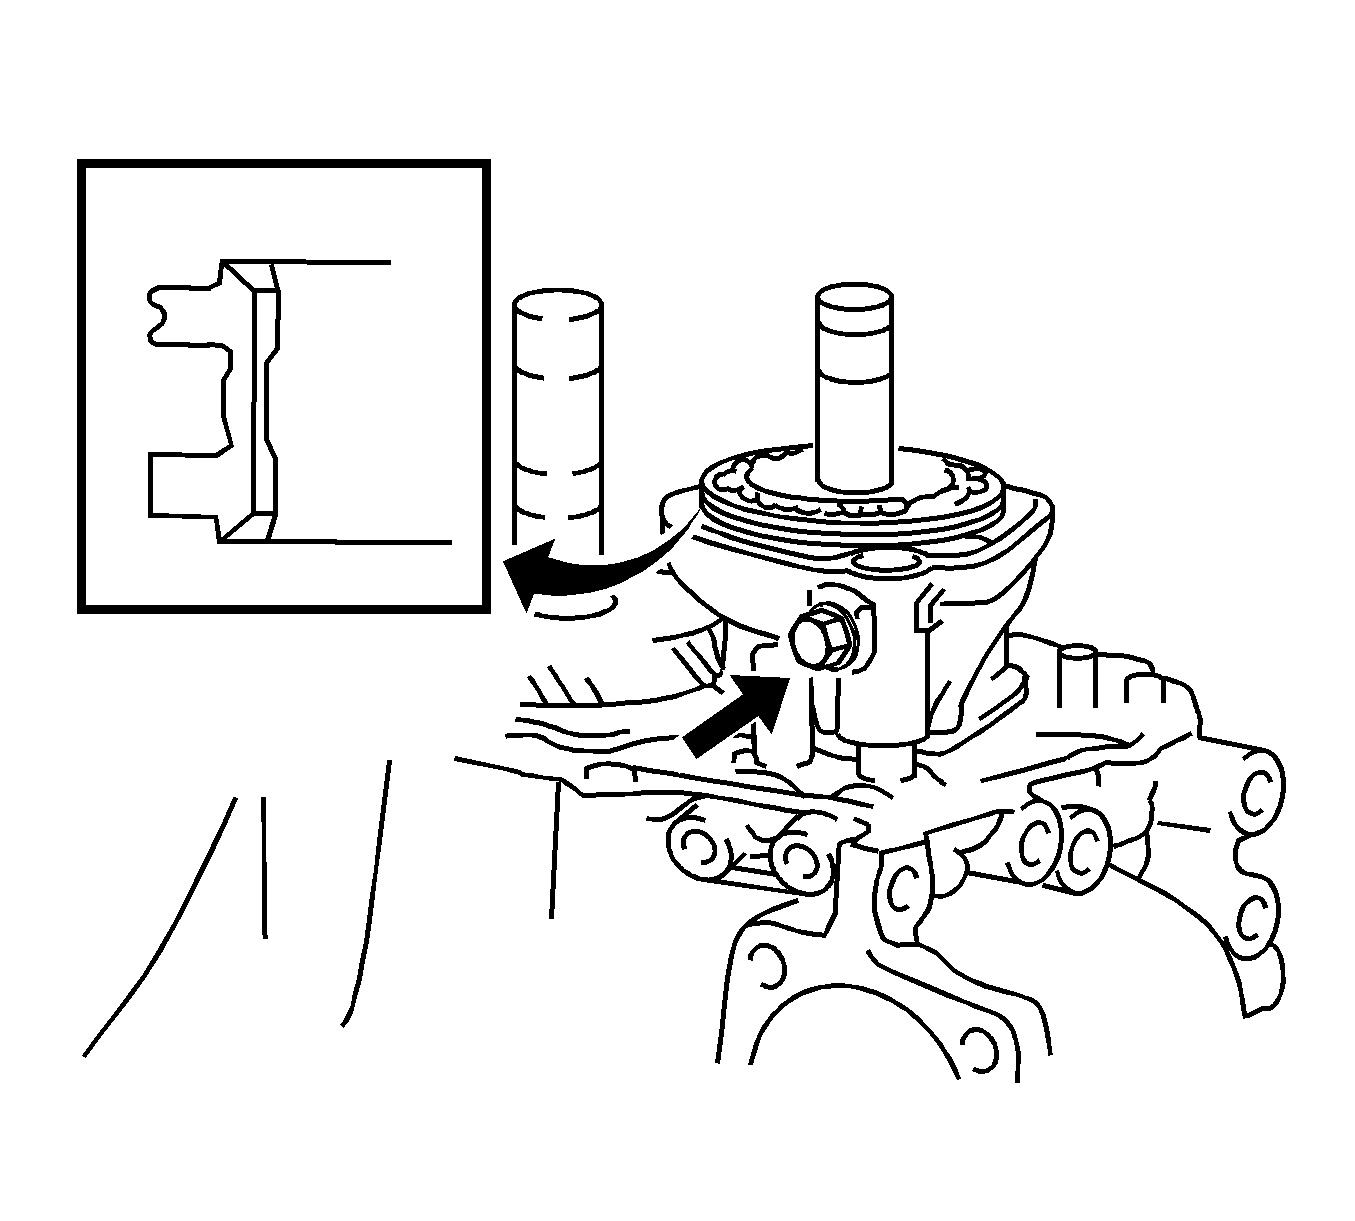
- Remove the bolt and the transaxle case receiver from the transaxle case.
- If necessary, remove the input shaft bearing.
- If the input shaft bearing has been removed, remove the oil seal.
- If the output shaft front bearing requires replacement, remove the bolt and output shaft cover.
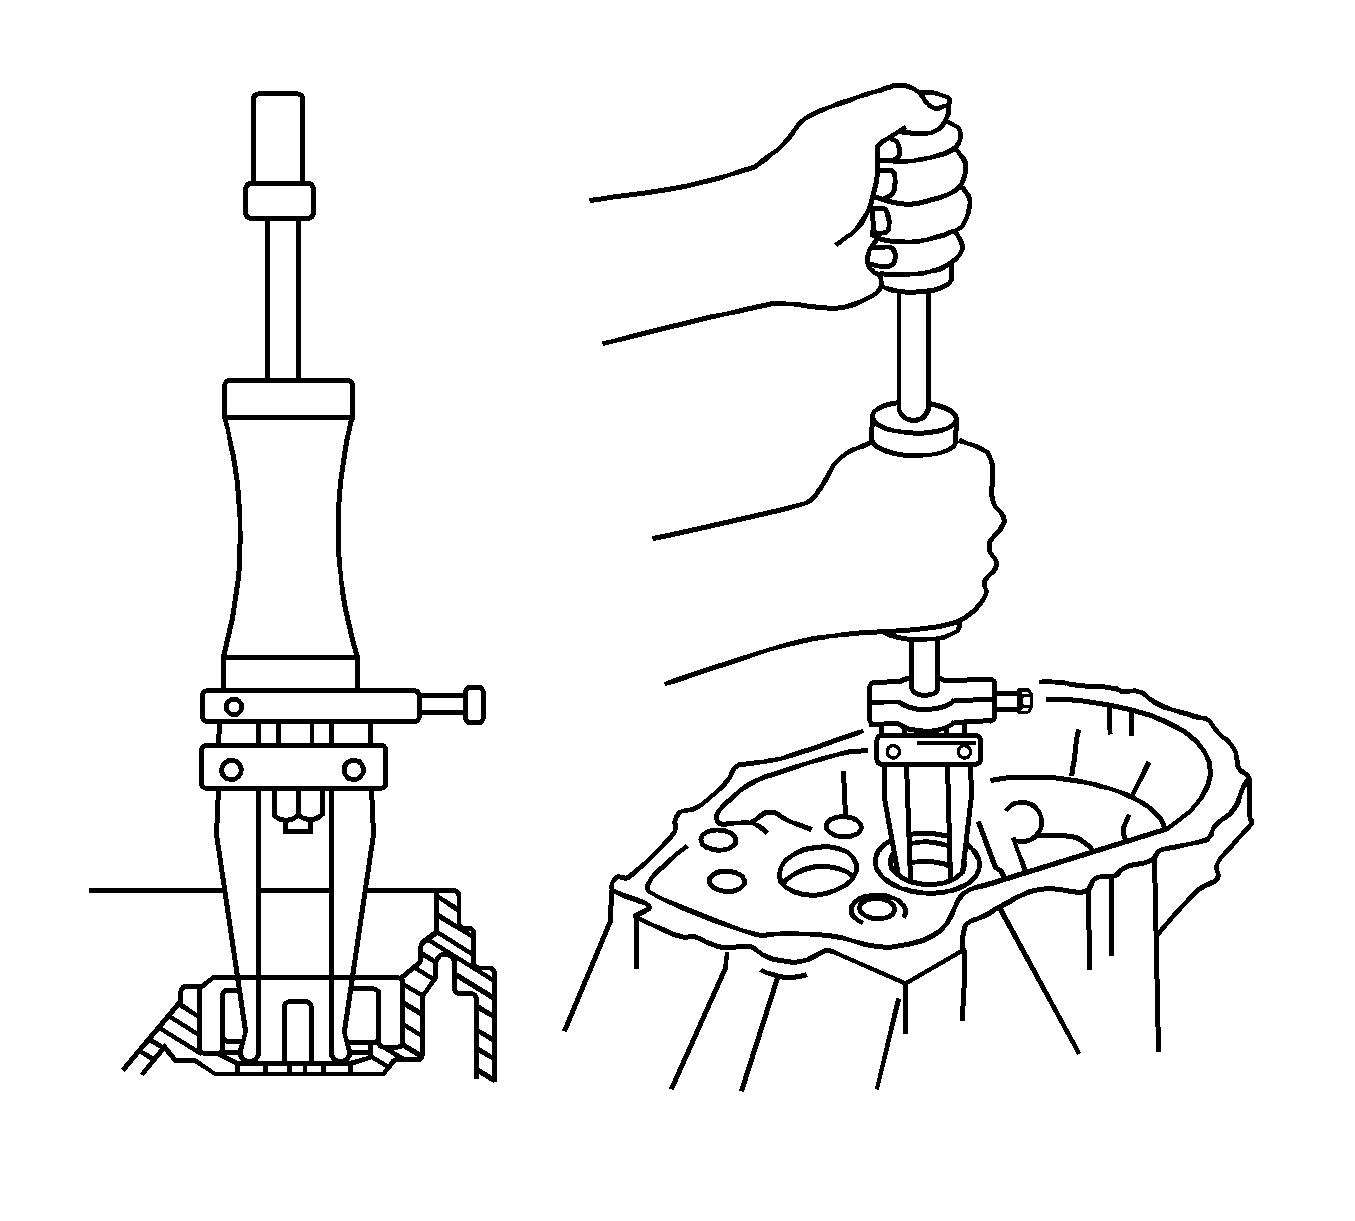
- Using a puller, remove the output shaft front bearing.
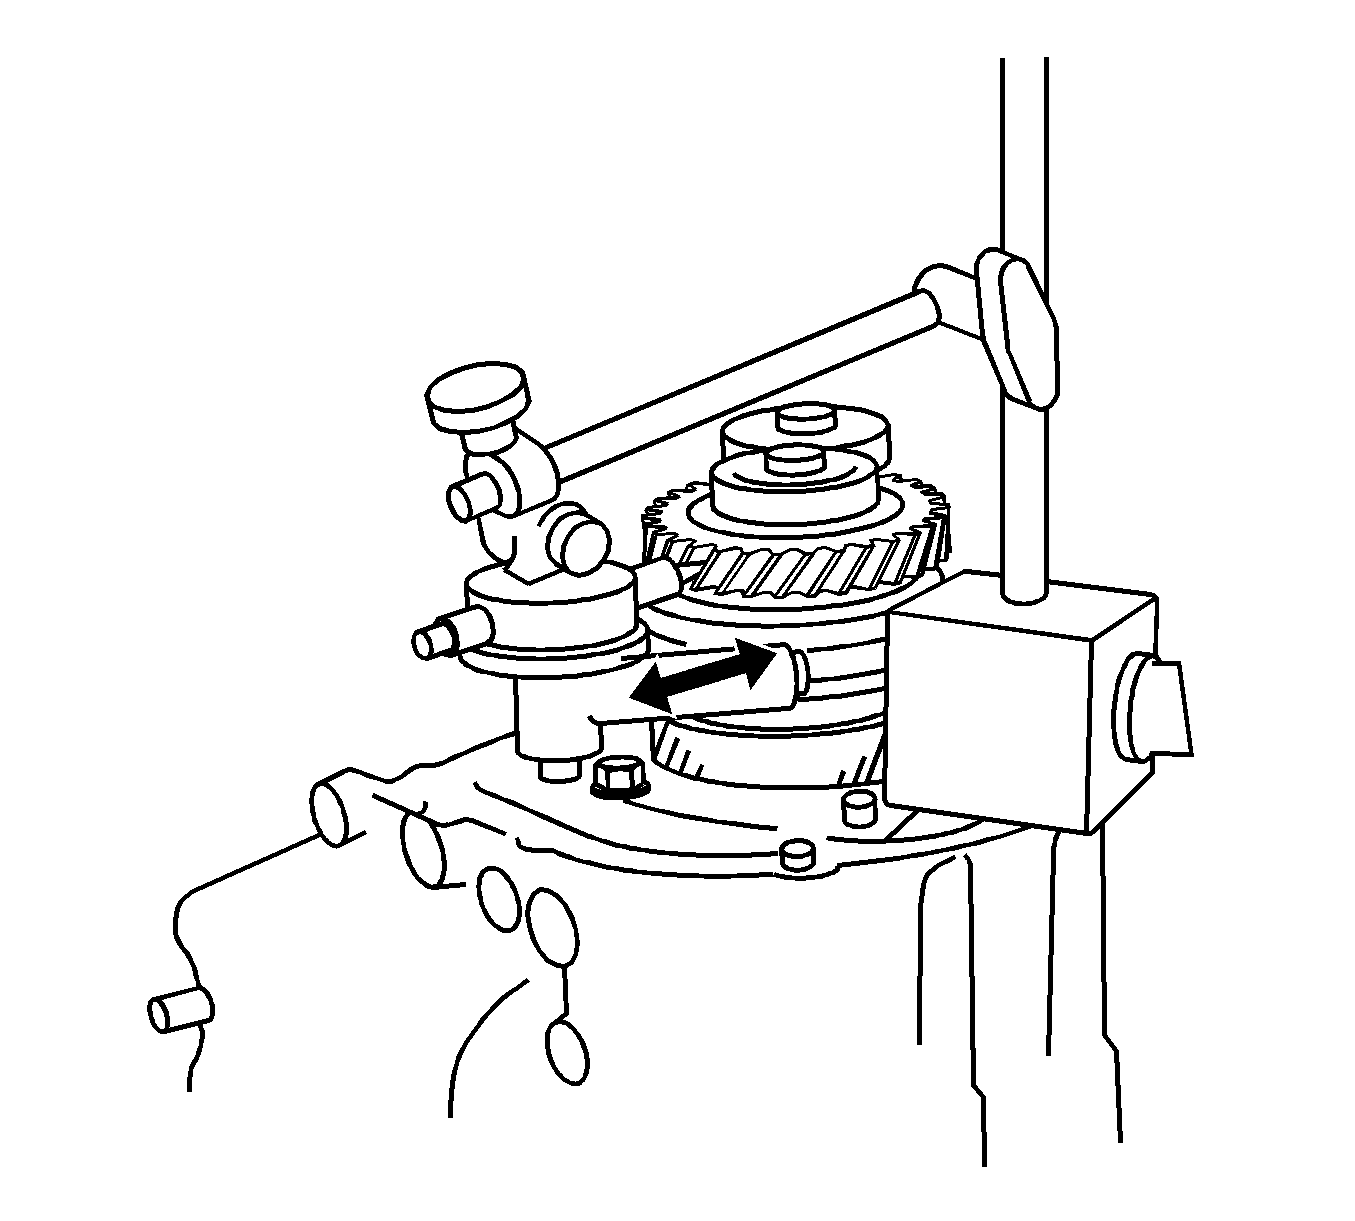
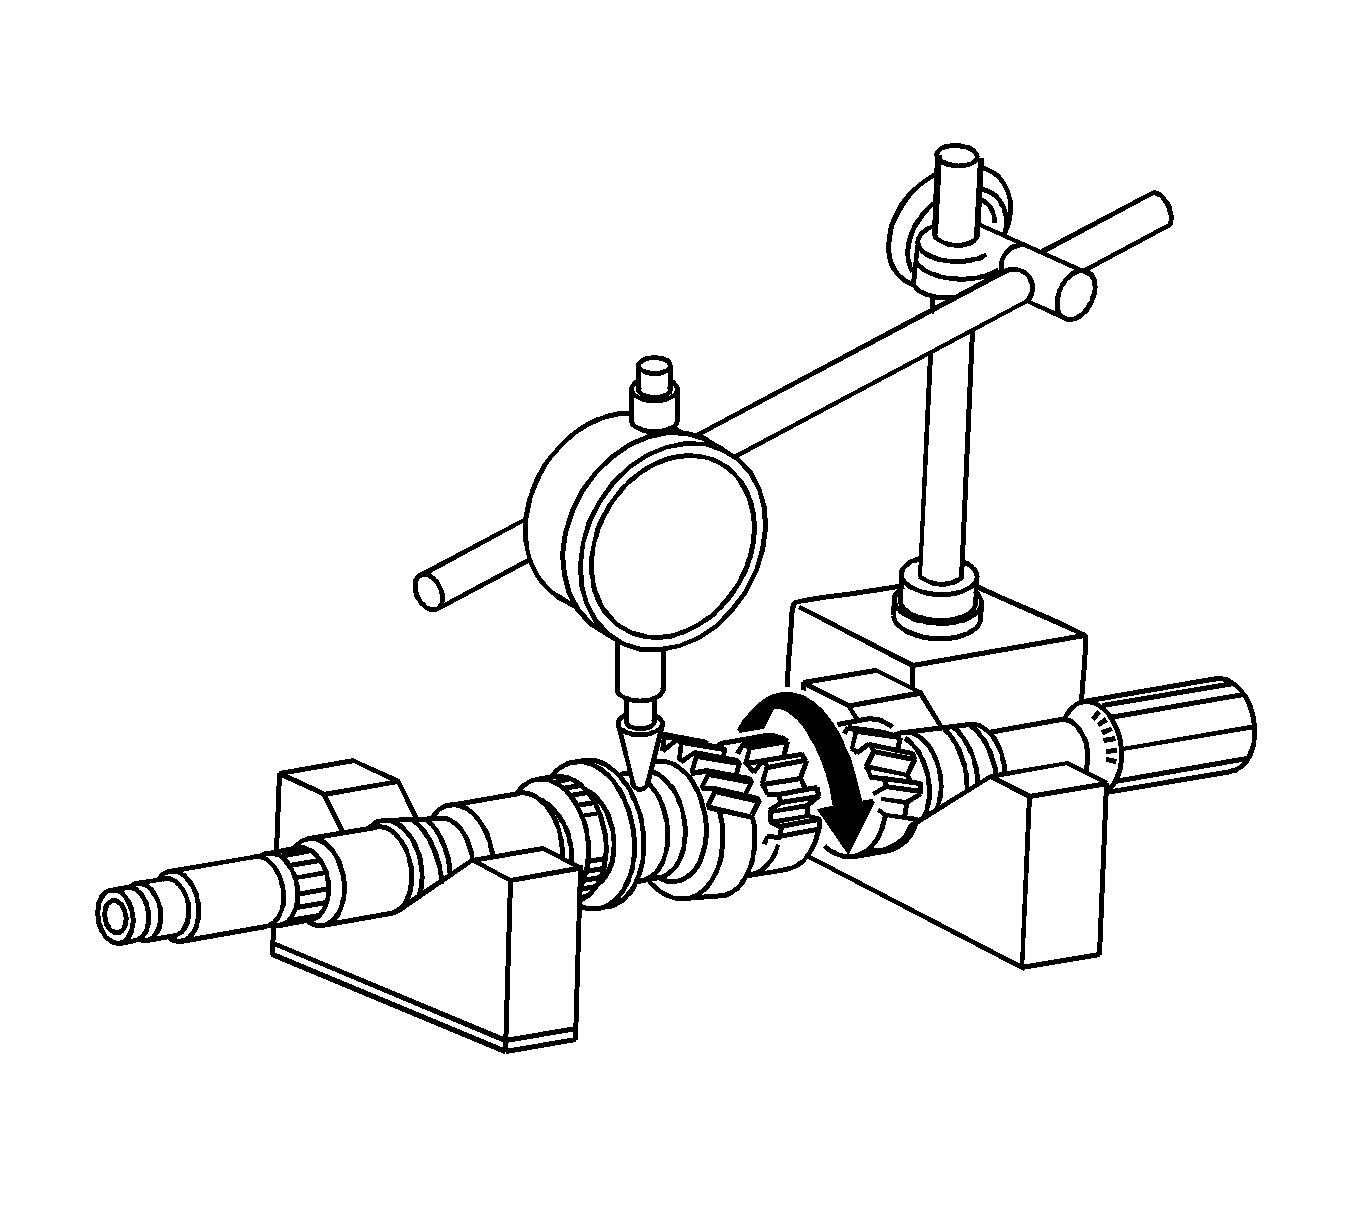
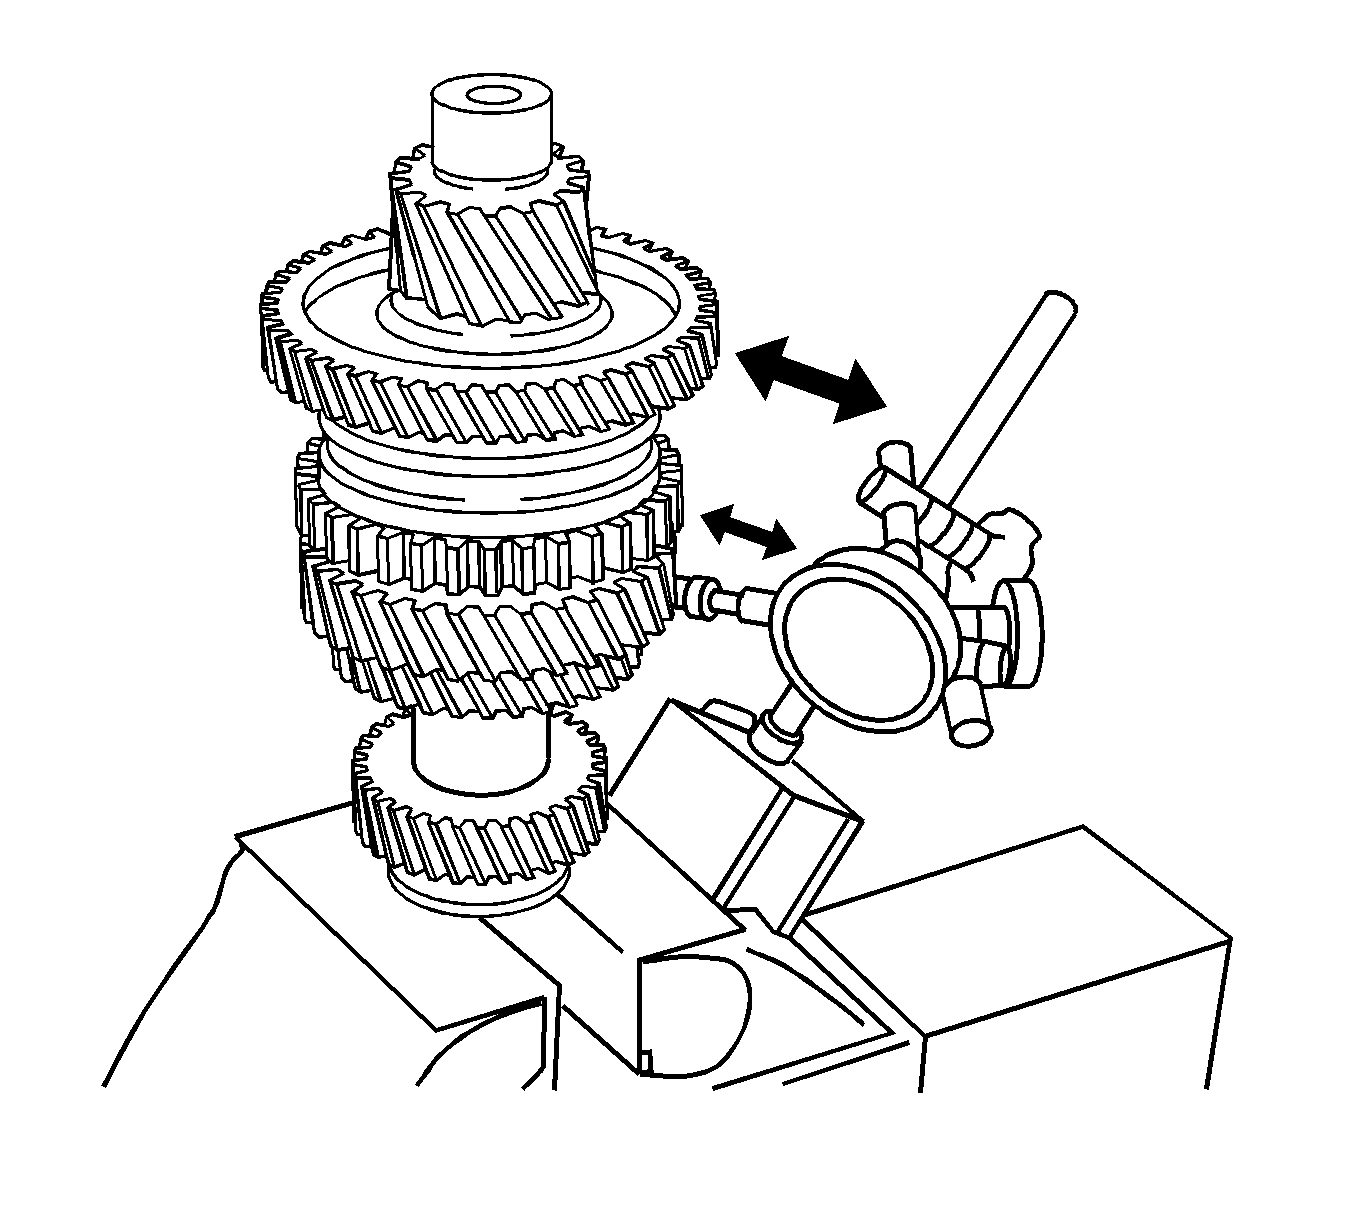
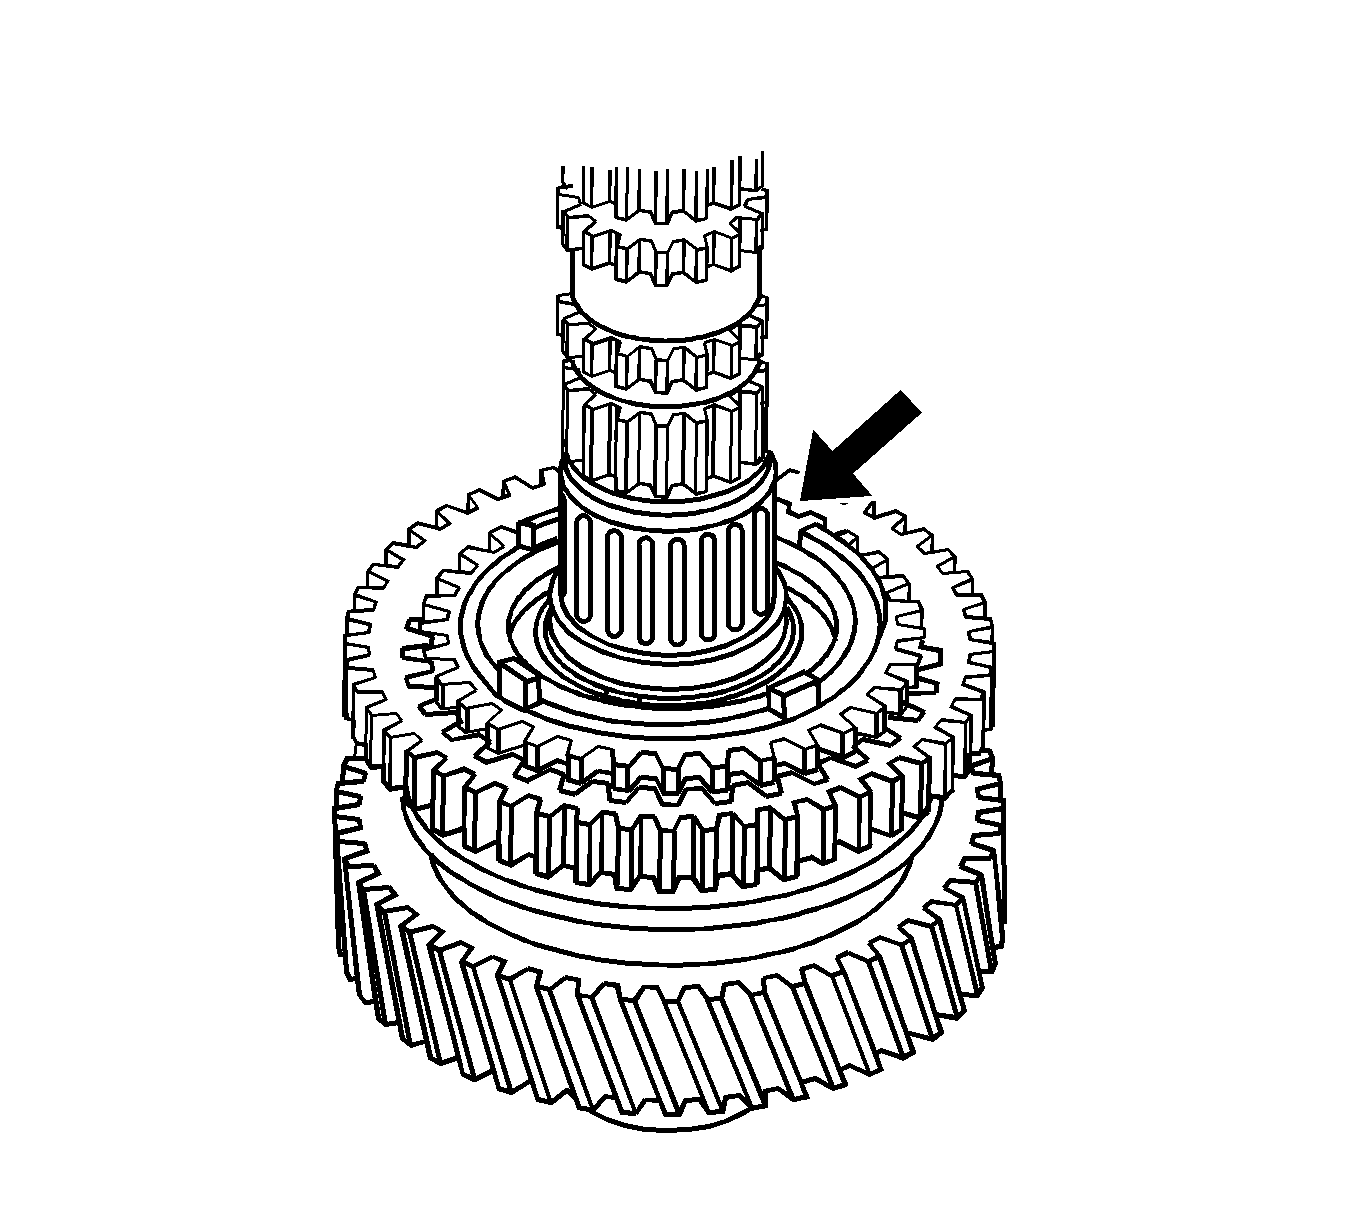
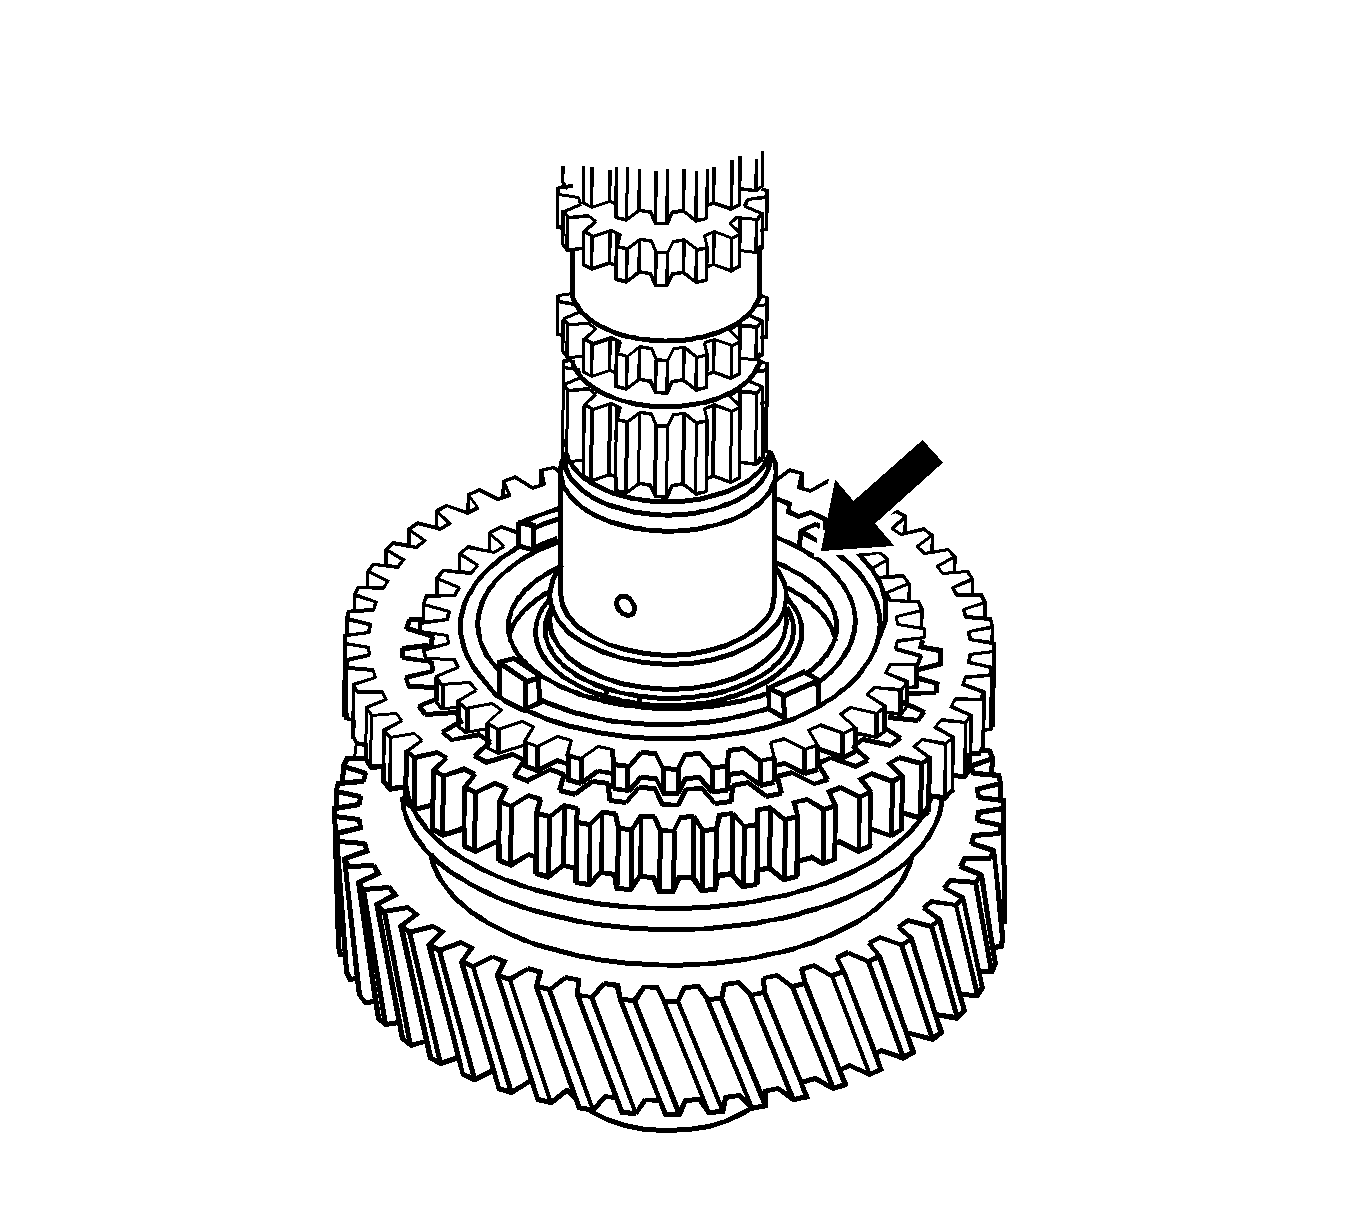
- Using a feeler gage, measure the thrust clearance for 3rd and 4th gears of the input shaft.
- Using a dial indicator, measure the radial clearance between the gears and the shaft.
- If the clearance exceeds the maximum measurement, replace the gear, roller bearing or shaft.
- Remove the input shaft snap ring.
- Using a press, remove the center ball bearing and 4th gear from the input shaft.
- Remove the roller bearing and spacer from the input shaft.
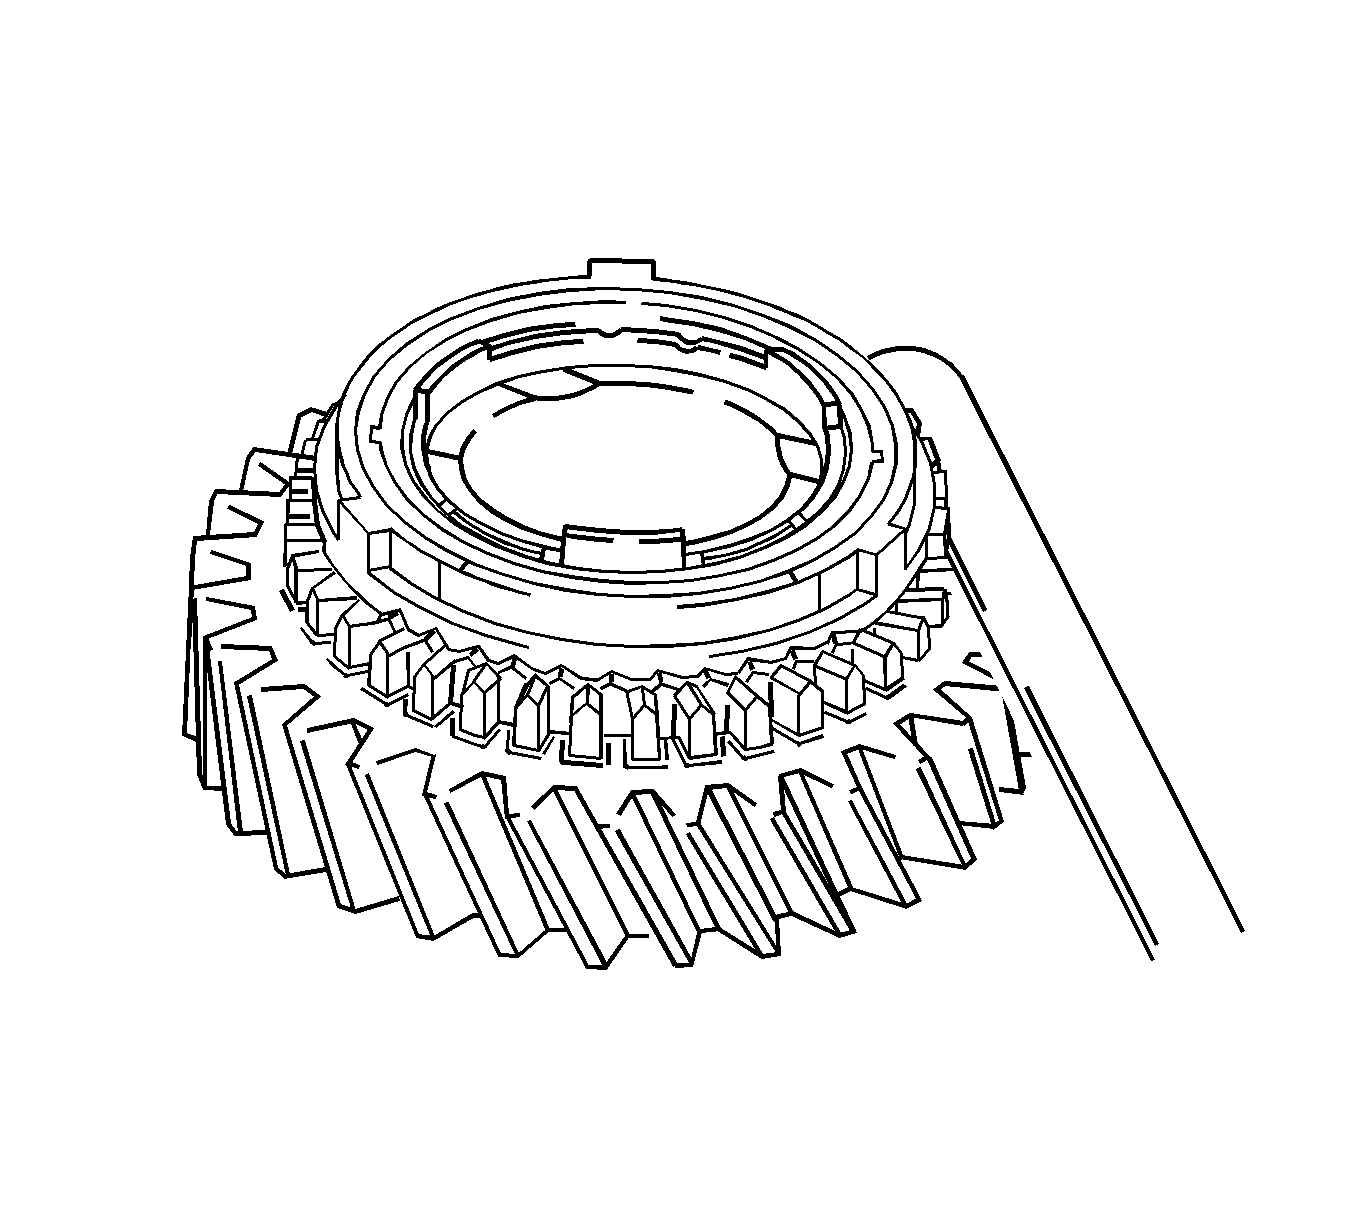
- Remove the 4th gear synchronizer ring from the input shaft.
- Remove the No.2 hub sleeve snap ring.
- Using a press, remove the No.2 hub sleeve and 3rd gear from the input shaft.
- Remove the No.2 3rd gear synchronizer ring.
- Remove the roller bearing from the input shaft.
- Disassemble the No.2 hub sleeve assembly.
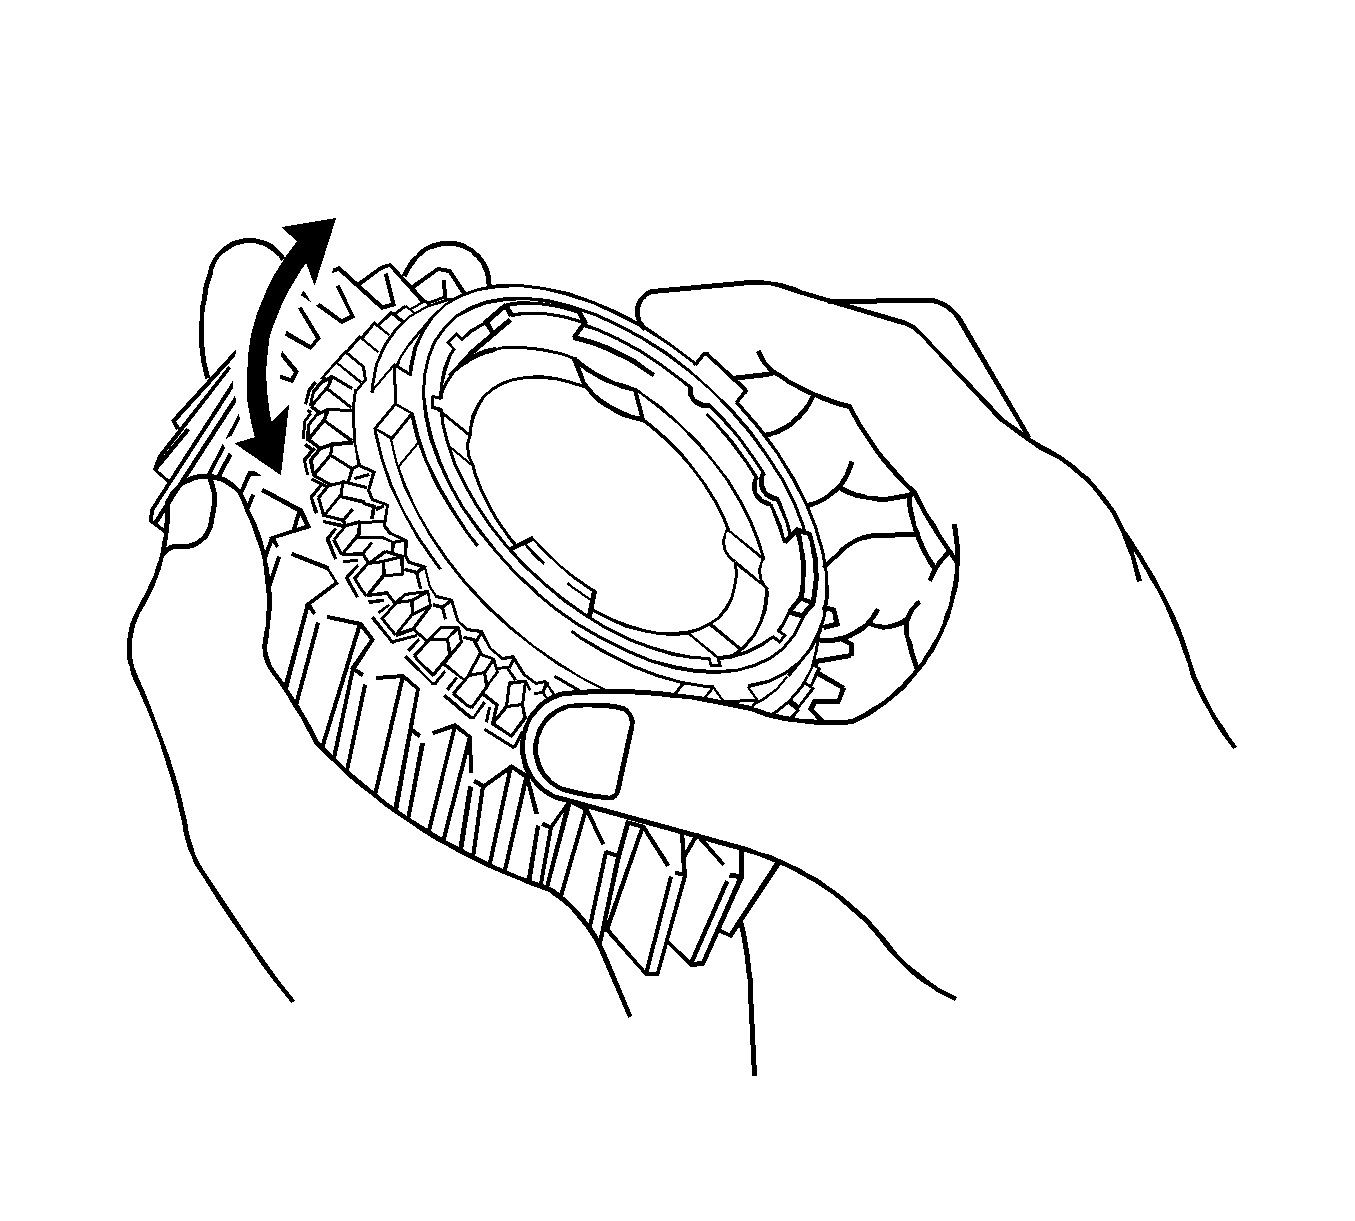
- Check the 3rd and 4th gear braking action of the synchronizer ring. Turn the synchronizer ring in one direction while pushing it into the gear cone. Ensure that the ring locks. Replace the ring if necessary.
- Using a feeler gage, measure the clearance between the synchronizer ring and the gear spline end. 3rd gear minimum clearance is 0.65 mm (0.0256 in). 4th gear minimum clearance is 0.75 mm (0.0295 in). If the clearance is less than the minimum, replace the synchronizer ring.
- Using a feeler gage, measure the clearance between the hub sleeve and the gear shift fork. Maximum clearance is 0.35 mm (0.014 in). If the clearance exceeds the maximum, replace the gear shift fork or hub sleeve.
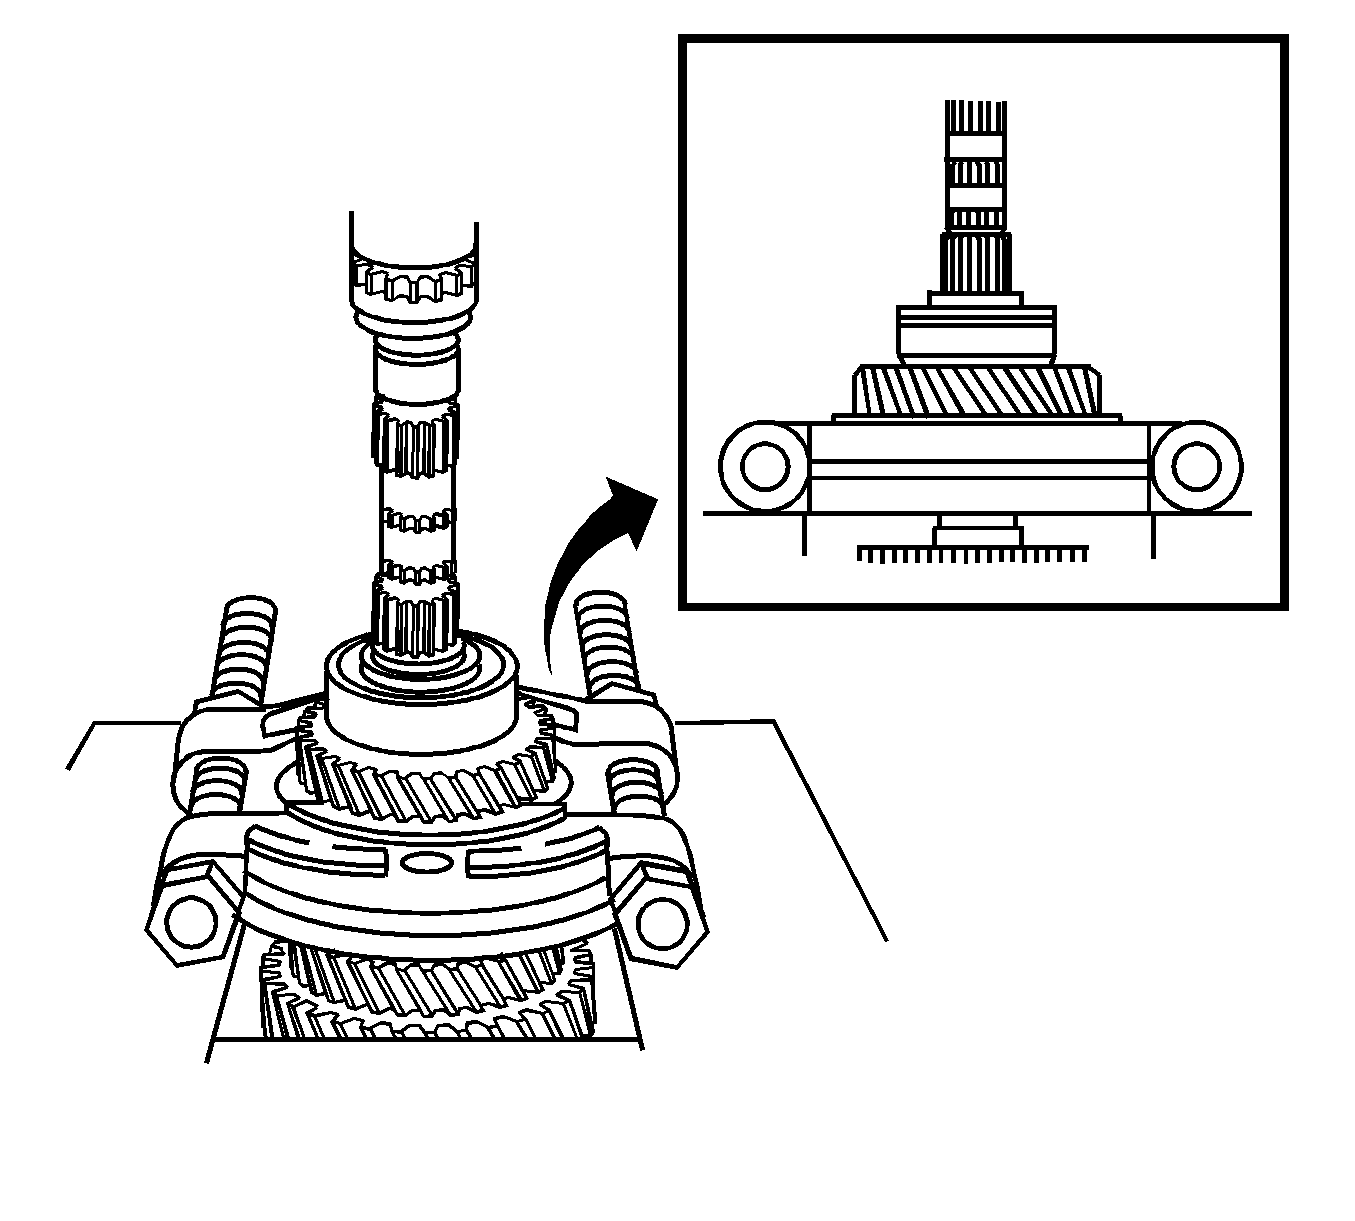
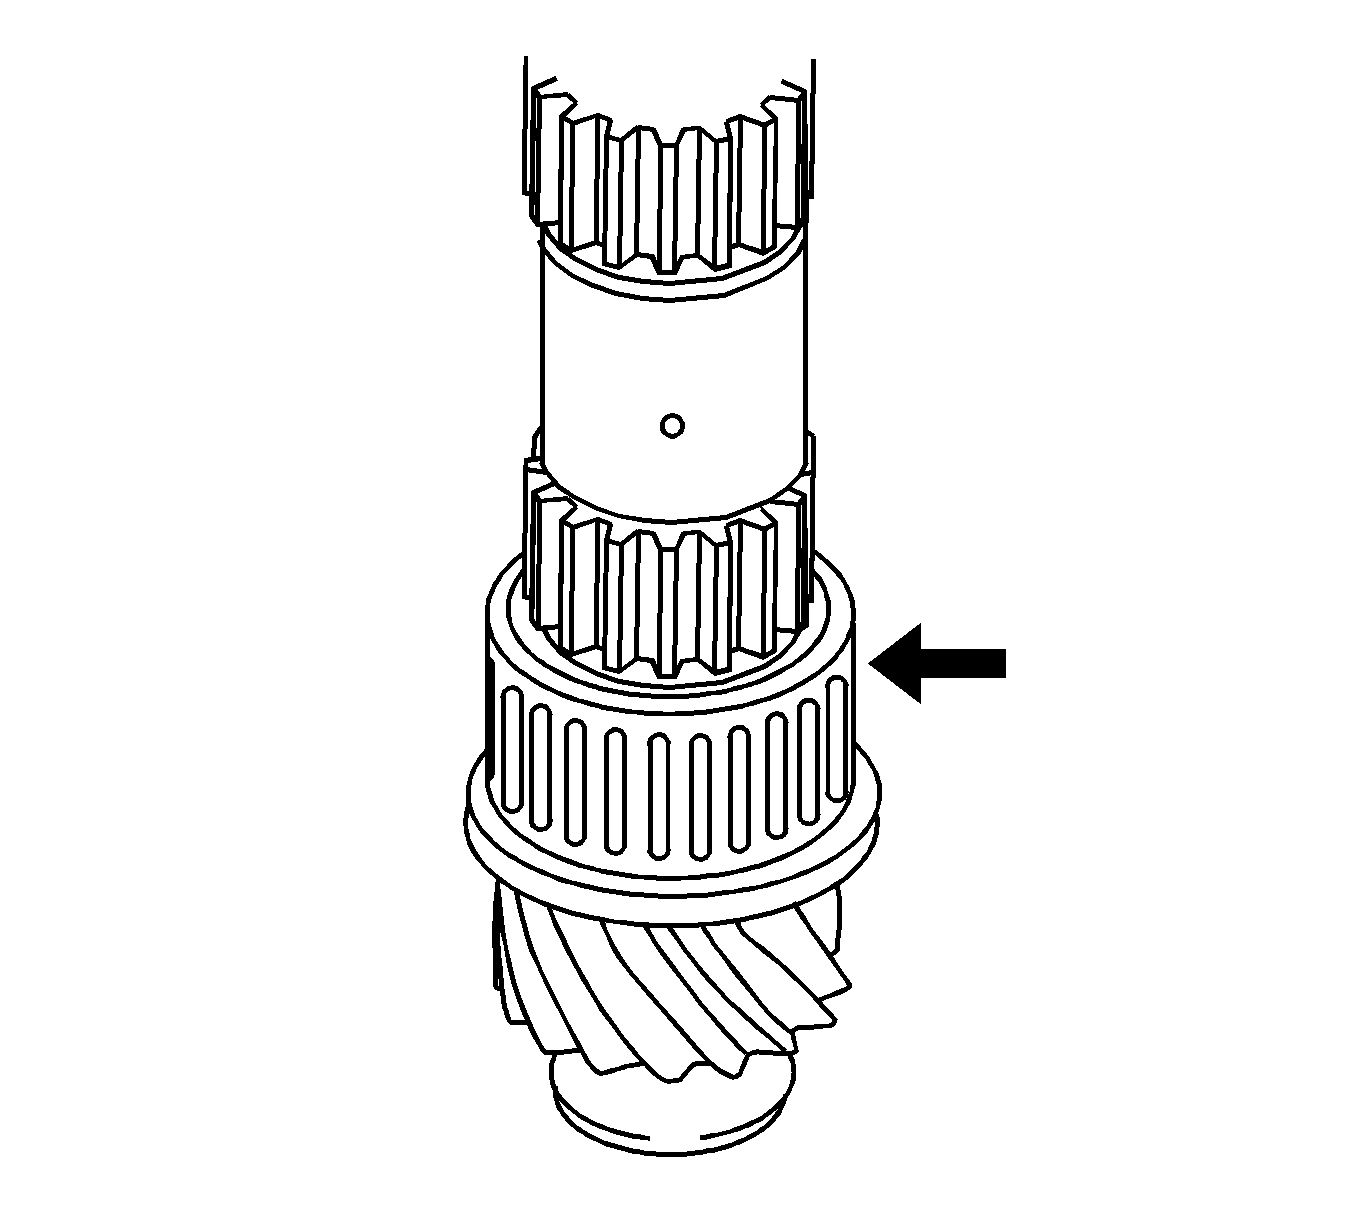
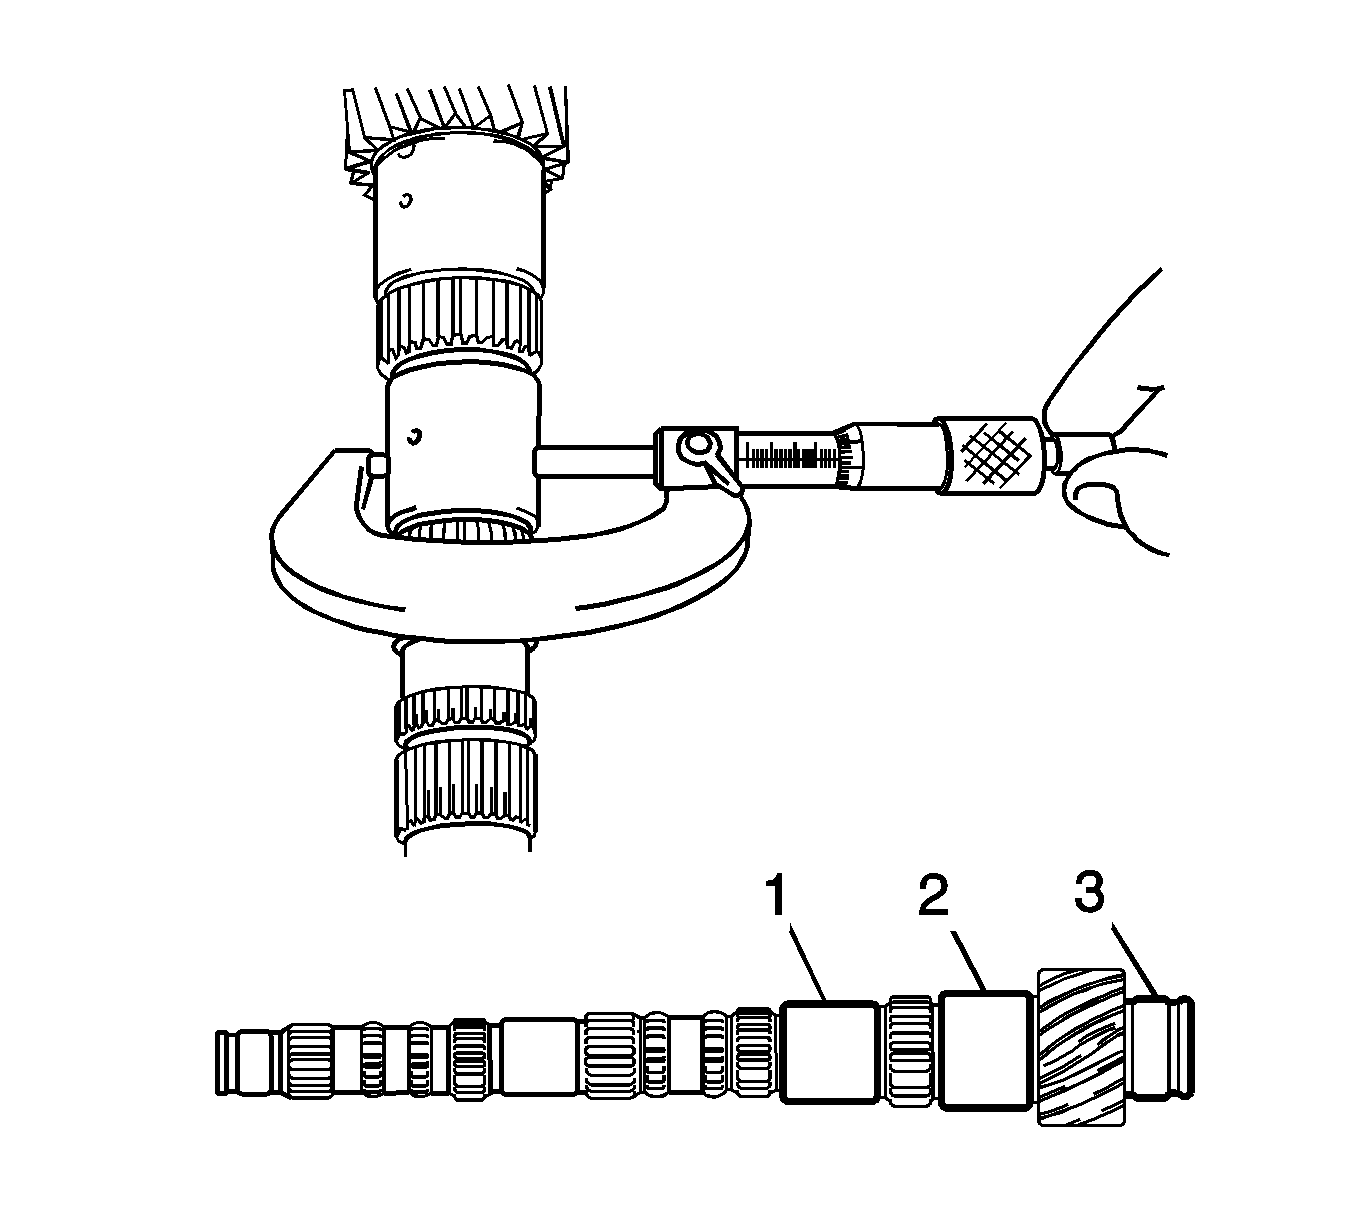
- Using a micrometer, measure the outer diameter of the input shaft journal surfaces.
- If the out diameter is less than the minimum, replace the input shaft.
- Using a dial indicator, check the output shaft journals for runout. Maximum runout is 0.03 mm (0.0012 in).
- If the runout exceeds the maximum, replace the output shaft.
- Using a feeler gage, measure the thrust clearance for 1st and 2nd gears of the output shaft.
- Using a dial indicator, measure the radial clearance between the gears and the shaft.
- If the clearance exceeds the maximum measurement, replace the gear, roller bearing or shaft.
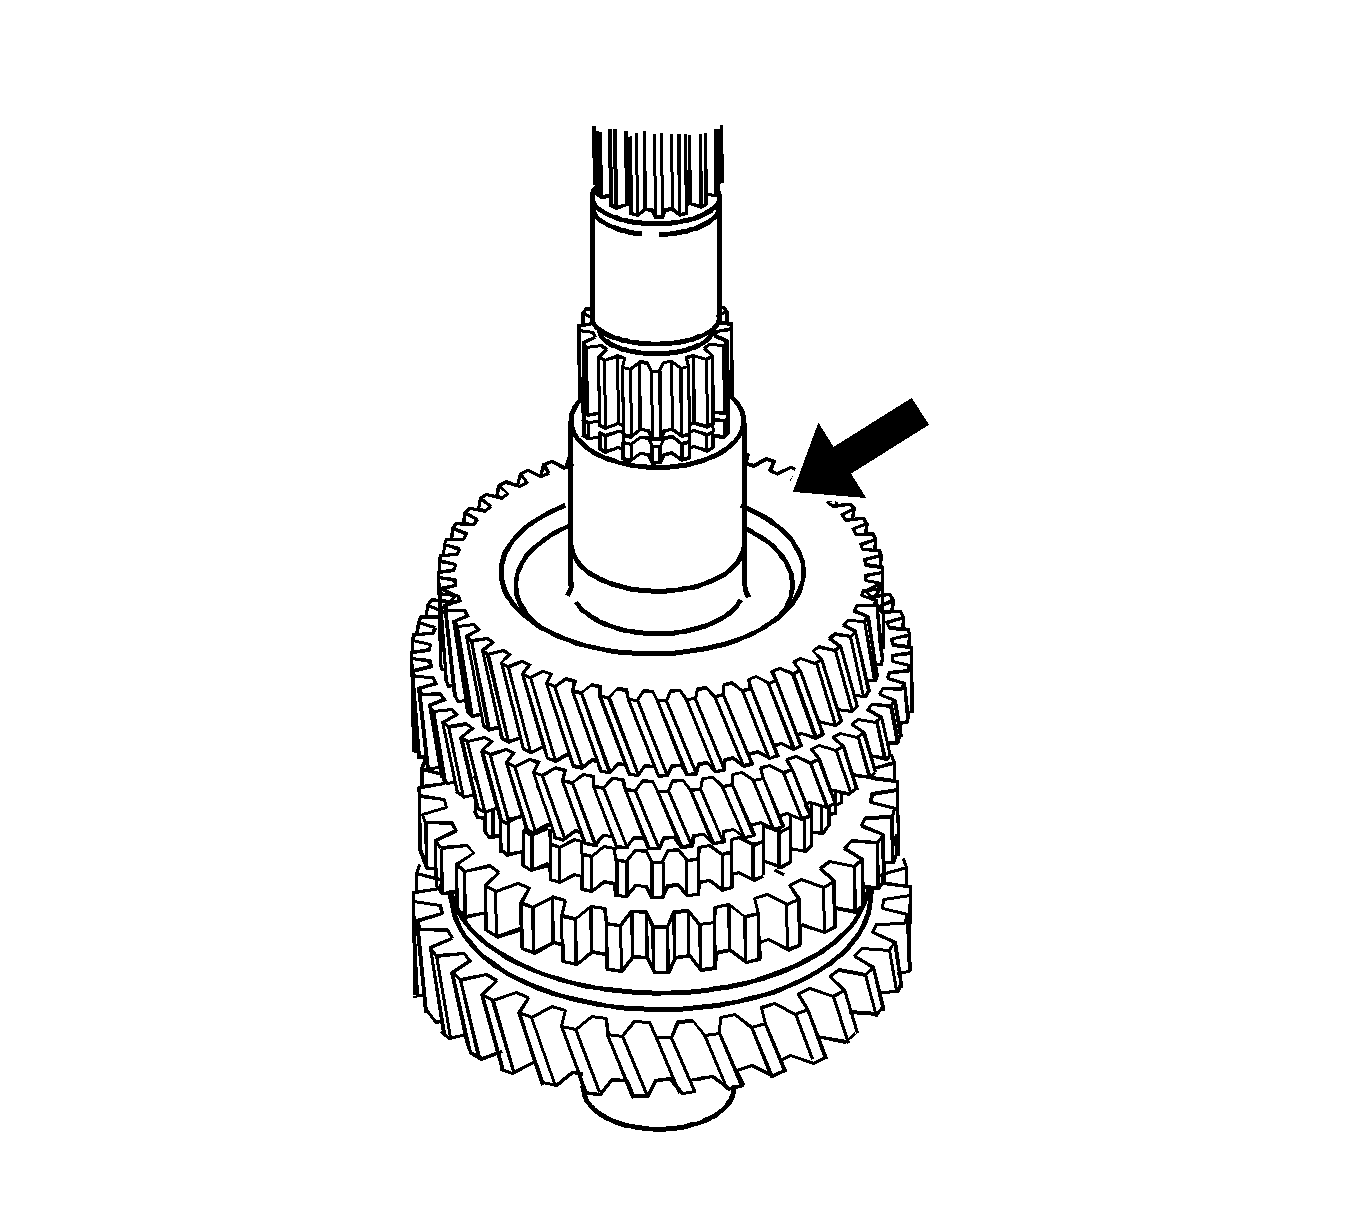
- Using a press, remove the radial ball bearing and the 4th driven gear from the output shaft.
- Remove the spacer from the output shaft.
- Shift the reverse gear into 1st gear.
- Using a press, remove the 3rd driven gear and 2nd gear from the output shaft.
- Remove the roller bearing from the output shaft
- Remove the spacer from the output shaft.
- Remove the No.2 synchronizer ring from the output shaft.
- Remove the snap ring from the output shaft.
- Using a press, remove the reverse gear assembly, 1st gear and the No.1 synchronizer from the output shaft.
- Remove the No.1 synchronizer from 1st gear.
- Remove the roller bearing from the output shaft.
- Remove the 1st gear thrust washer from the output shaft.
- Using a magnet, remove the ball from the output shaft.
- Remove the snap ring from the output shaft.
- Using a press, remove the front bearing inner race.
- Disassemble the reverse gear assembly.
- Check the 1st gear braking action of the synchronizer ring. Turn the synchronizer ring in one direction while pushing it into the gear cone. Ensure that the ring locks. Replace the ring if necessary.
- Using a feeler gage, measure the clearance between the synchronizer ring and the gear spline end. Minimum clearance is 0.75 mm (0.0295 in). If the clearance is less than the minimum, replace the synchronizer ring.
- Check the 2nd gear braking action of the synchronizer ring. Turn the synchronizer ring in one direction while pushing it into the gear cone. Ensure that the ring locks. Replace the ring if necessary.
- Using a feeler gage, measure the clearance between the synchronizer ring and the gear spline end. Minimum clearance is 0.70 mm (0.0276 in). If the clearance is less than the minimum, replace the synchronizer ring.
- Using a feeler gage, measure the clearance between the hub sleeve and the gear shift fork. Maximum clearance is 0.35 mm (0.014 in). If the clearance exceeds the maximum, replace the gear shift fork or hub sleeve.
- Using a micrometer, measure the outer diameter of the input shaft journal surfaces.
- If the out diameter is less than the minimum, replace the output shaft.
- Using a dial indicator, check the output shaft journals for runout. Maximum runout is 0.03 mm (0.0012 in).
- If the runout exceeds the maximum, replace the output shaft.

Thrust Clearance
Standard thrust clearance should be between 0.10-0.60 mm (0.0039-0.0236 in). Maximum clearance should not exceed 0.60 mm (0.0236 in).
Thrust Clearance
Standard radial runout should be between 0.009-0.50 mm (0.0003-0.0020 in). Maximum runout should not exceed 0.50 mm (0.0020 in).
Thrust Clearance
Standard thrust clearance should be between 0.10-0.62 mm (0.0039-0.0244 in). Maximum clearance should not exceed 0.62 mm (0.0244 in).
Thrust Clearance
Standard radial runout should be between 0.015-0.056 mm (0.0006-0.0022 in). Maximum runout should not exceed 0.56 mm (0.0022 in).


Standard Clearance
3rd gear: 0.10-0.35 mm (0.0039-0.0138 in). 4th gear: 0.10-0.55 mm (0.0039-0.0217 in).

Standard Clearance
3rd and 4th gear radial clearance: 0.15-0.58 mm (0.0006-0.0023 in).

Minimum Outer Diameter
| • | A: 21.991 mm (0.8658 in) |
| • | B: 24.885 mm (0.9797 in) |
| • | C: 28.985 mm (1.1411 in) |
| • | D: 30.985 mm (1.2199 in) |
| • | E: 24.985 mm (0.9837 in) |
Standard Clearance
1st gear: 0.10-0.40 mm (0.0039-0.0157 in). 2nd gear: 0.10-0.55 mm (0.0039-0.0217 in).
Standard Clearance
1st and 2nd gear radial clearance: 0.15-0.58 mm (0.0006-0.0023 in).

Minimum Outer Diameter
| • | 1: 31.985 mm (1.2592 in) |
| • | 2: 37.985 mm (1.4955 in) |
| • | 3: 32.985 mm (1.2986 in) |
