Diagnostic Instructions
Circuit/System Description
This Engine Cranks but Does Not Run diagnostic is an organized approach to identify a condition which causes the engine to crank but not start. This diagnostic directs the technician to the appropriate system diagnosis.
Diagnostic Aids
Inspect for any of the following conditions:
| • | Insufficient fuel can cause a no start condition. Thoroughly inspect the fuel delivery system for sufficient fuel volume to the fuel injectors. Inspect the fuel supply components for partial blockage or restrictions. |
| • | There may be fuel spray at the fuel injectors and the indicated fuel pressure may be correct, yet there may not be enough fuel to start the engine. If the fuel injectors and the injector circuit are OK, and fuel spray is detected, the fuel injector
ON time may be inadequate. If the engine control module (ECM) receives incorrect inputs from the various information sensors, the fuel delivered by the fuel injectors may be inadequate to start the engine. Check all the engine data parameters with a scan tool
and compare the values indicated with the expected values or the values from a known good vehicle. |
| • | Check the crankshaft position (CKP) sensor engine reference signal with a scan tool. Observe the Engine Speed parameter while cranking the engine. The scan tool should indicate a steady 200-300 RPM while cranking. If erratic values,
such as sudden spikes in the engine speed are displayed, the engine reference signal is not stable enough for the engine to start and run properly. |
| • | Inspect the engine for good secure electrical grounds. |
| • | If the engine almost starts and then stalls, check for an open in the ground circuits of the CKP sensor and the camshaft position (CMP) sensor. |
| • | Water or foreign material in the fuel can cause a no start or engine will not stay running condition. During freezing weather water can freeze inside the fuel system. The engine may start after 30 minutes in a heated repair shop. The malfunction
may not recur until parked overnight in freezing temperatures. Extreme weather conditions can cause contaminated fuel to prevent the vehicle from starting. |
| • | A vehicle that starts and runs after being brought to the repair shop for a no start condition, may have an ignition system that is susceptible to moisture. Spray water on the ignition system components and the wiring in order to check for an engine
starting or will not stay running concern. |
Reference Information
Schematic Reference
Engine Controls Schematics
Electrical Information Reference
Scan Tool Reference
Control Module References
for scan tool information
Special Tools
Circuit/System Verification
Important: This diagnostic assumes the following system voltage levels are adequate for starter motor operation.
| • | There is adequate fuel in the fuel tank. |
- Engine cranking for 15 seconds, observe the DTC information with a scan tool. Verify that DTC P0117, P0118, P0122, P0123, P0222, P0223, P0261, P0262, P0264, P0265, P0267, P0268, P0270, P0271, P0335, P0336, P0337, P0351, P0352, P0562,
P0563, P0601, P0604, P0605, P0628, P0629, P1610, P1611, P1628 or P1629 is not set.
- Ignition ON, observe the scan tool Theft Deterrent parameter. The parameter should display Disabled.
- Ignition OFF, disconnect the fuel pump relay.
- Connect a
J 26792
to the boot of a spark plug wire of a cylinder and a good ground.
Important: An erratic or weak spark is considered a no spark condition.
- Engine cranking, verify the spark tester sparks.
- Ignition OFF, install the fuel pump relay.
- Ignition ON, command the fuel pump ON with a scan tool. You should hear the fuel pump turn ON.
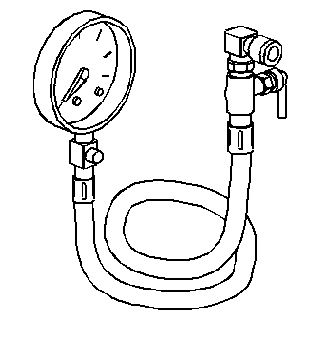
- Ignition OFF, install the
J 34730-1A
. Refer to
Fuel Pressure Gage Installation and Removal
.
Important:
| • | The fuel pump may need to be commanded ON a few times, in order to obtain the highest possible fuel pressure. |
| • | Do NOT start the engine for this test. |
- Ignition ON, command the fuel pump ON with a scan tool. The fuel pressure should be between 262-303 kPa (38-44 psi).
- Verify the following conditions do not exist:
| • | Collapsed air intake duct to the throttle body |
| • | Restricted air filter element |
| ⇒ | If you find any of the above conditions, repair as necessary. |
Repair Instructions
Perform the
Diagnostic Repair Verification
after completing the diagnostic procedure.
