For 1990-2009 cars only
Heater and Air Conditioning Control Replacement Hatchback
Removal Procedure
- Disconnect the negative battery cable.
- Remove the Instrument panel lower cover. Refer to Instrument Panel Lower Trim Panel Replacement .
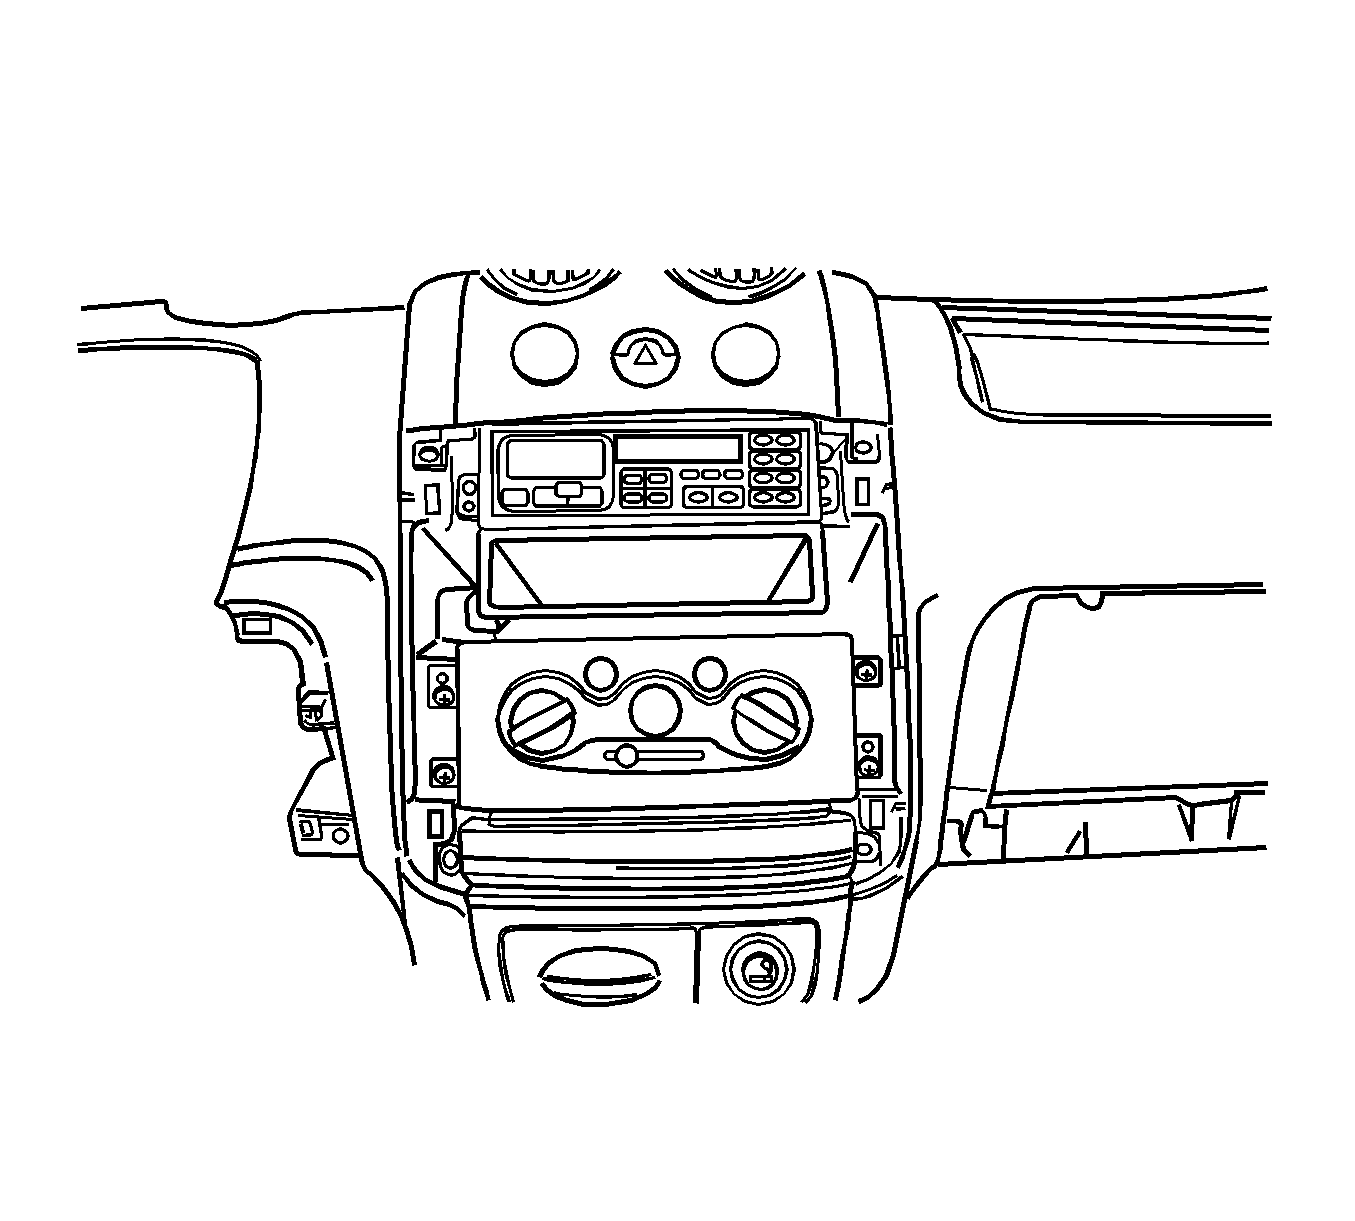
- Remove the HVAC controller retaining screws.
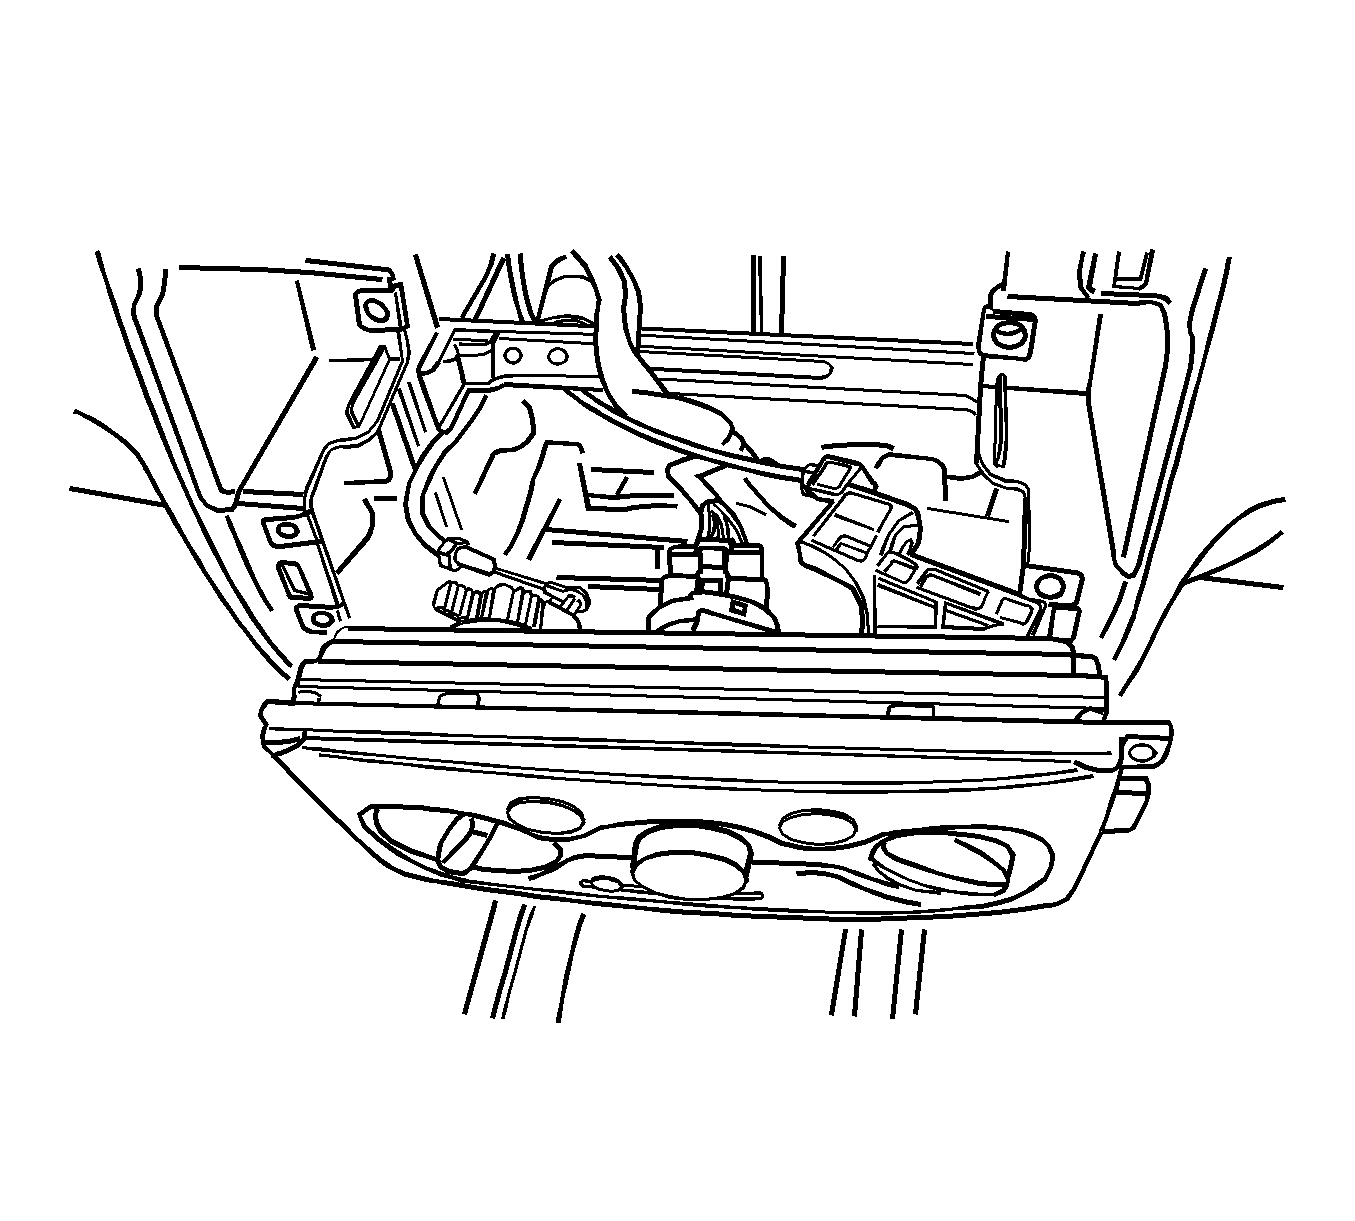
- Remove the controller by pulling it out to provide clearance for the removal of the cable.
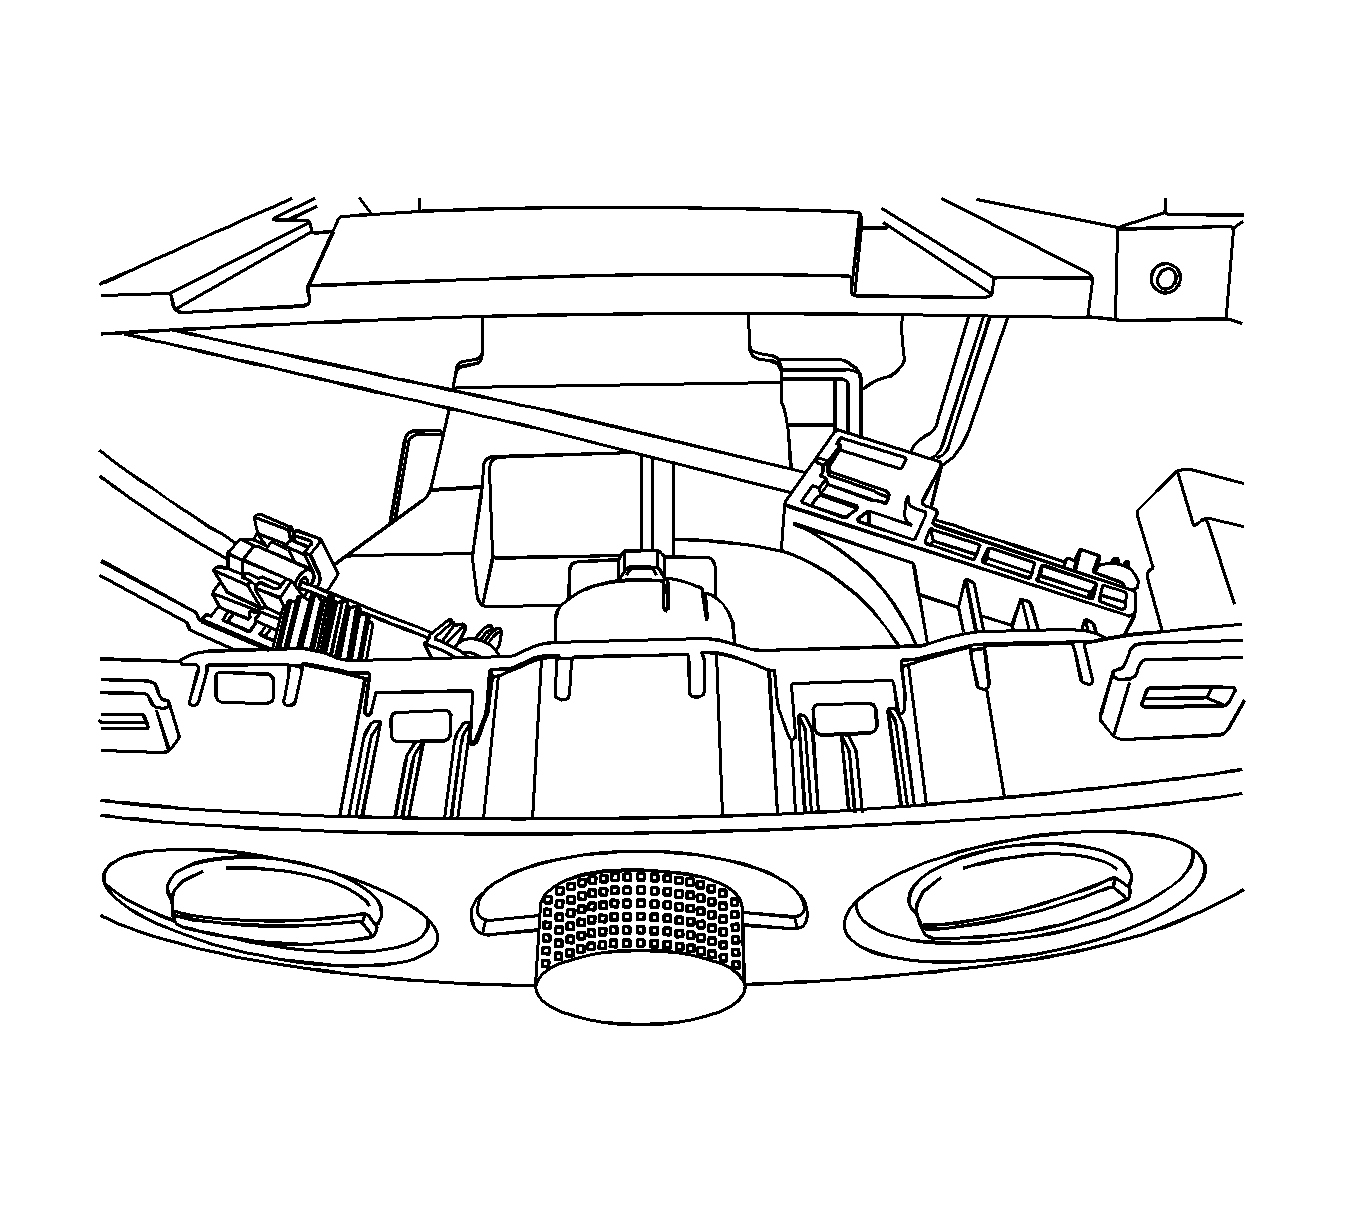
- Disconnect the mechanical control cables by gently prying off the cable eyelet and unsnapping the cable housing from the mechanical slide.
- Disconnect the electrical connectors.
Caution: Refer to Battery Disconnect Caution in the Preface section.


Important: Note the location of the cables and the housings to facilitate their reinstallation.
Installation Procedure
- Connect the electrical connectors to the proper sockets on the back of the controller.
- Install the mechanical cable housings to the proper control positions.
- Install the eyelets on the end of each cable, pressing each onto the proper post.
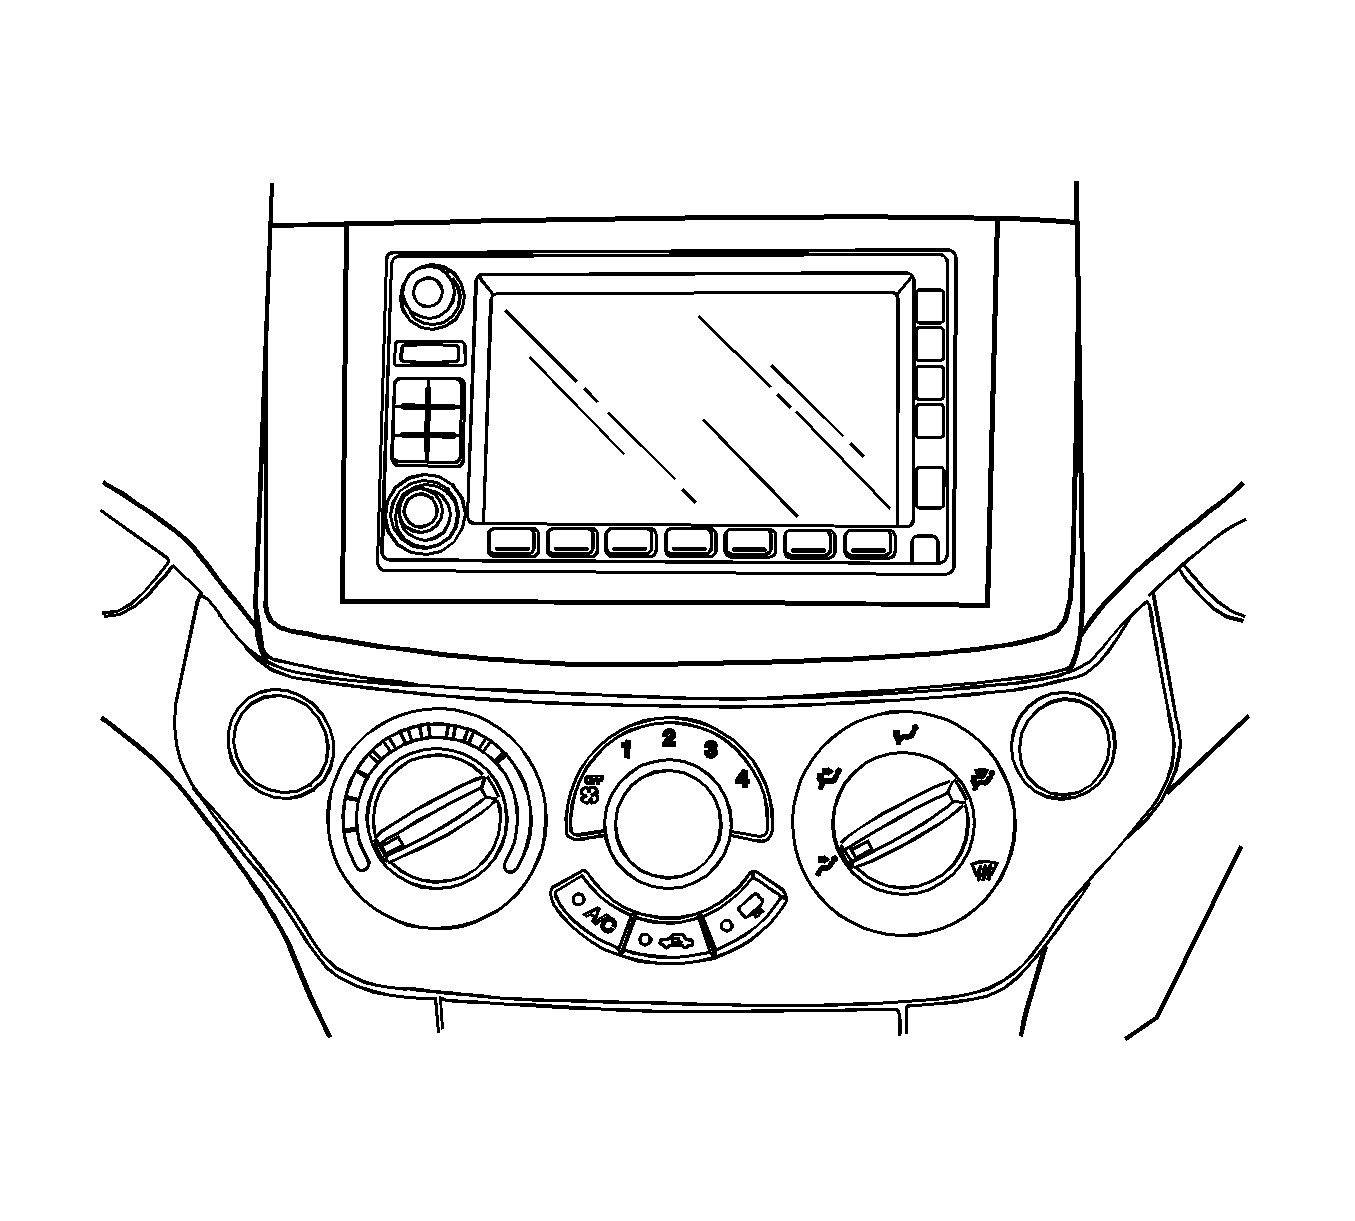
- Install the controller by gently inserting the controller into the proper position on the center console.
- Install the lower left and the lower right controller retaining screws.
- Install the instrument panel lower cover. Refer to Instrument Panel Lower Trim Panel Replacement .
- Connect the negative battery cable.
- Confirm the proper operation of the controller by moving it through all of the controller's possible functioning positions.

Notice: Refer to Fastener Notice in the Preface section.

Tighten
Tighten the HVAC controller retaining screws to 3 N·m (27 lb in).
Heater and Air Conditioning Control Replacement Notchback
Removal Procedure
- Disconnect the negative battery cable.
- Remove the audio system. Radio Replacement.
- Remove the lower left and right controller retaining screws.
- Remove the controller by pulling it out to provide clearance for the removal of the cable.
- Disconnect the mechanical control cables by gently prying off the cable eyelet and unsnapping the cable housing from the mechanical slide.
- Disconnect the electrical connectors.
Caution: Refer to Battery Disconnect Caution in the Preface section.


Important: Note the location of the cables and the housings to facilitate their reinstallation.
Installation Procedure
- Connect the electrical connectors to the proper sockets on the back of the controller.
- Install the mechanical cable housings to the proper control positions.
- Install the eyelets on the end of each cable, pressing each onto the proper post.
- Install the controller by gently inserting the controller into the proper position on the center console.
- Install the lower left and the lower right controller retaining screws.
- Install the audio system. Refer to Radio Replacement.
- Connect the negative battery cable.
- Confirm the proper operation of the controller by moving it through all of the controller's possible functioning positions.

Notice: Refer to Fastener Notice in the Preface section.

Tighten
Tighten the HVAC controller retaining screws to 3 N·m (27 lb in).
