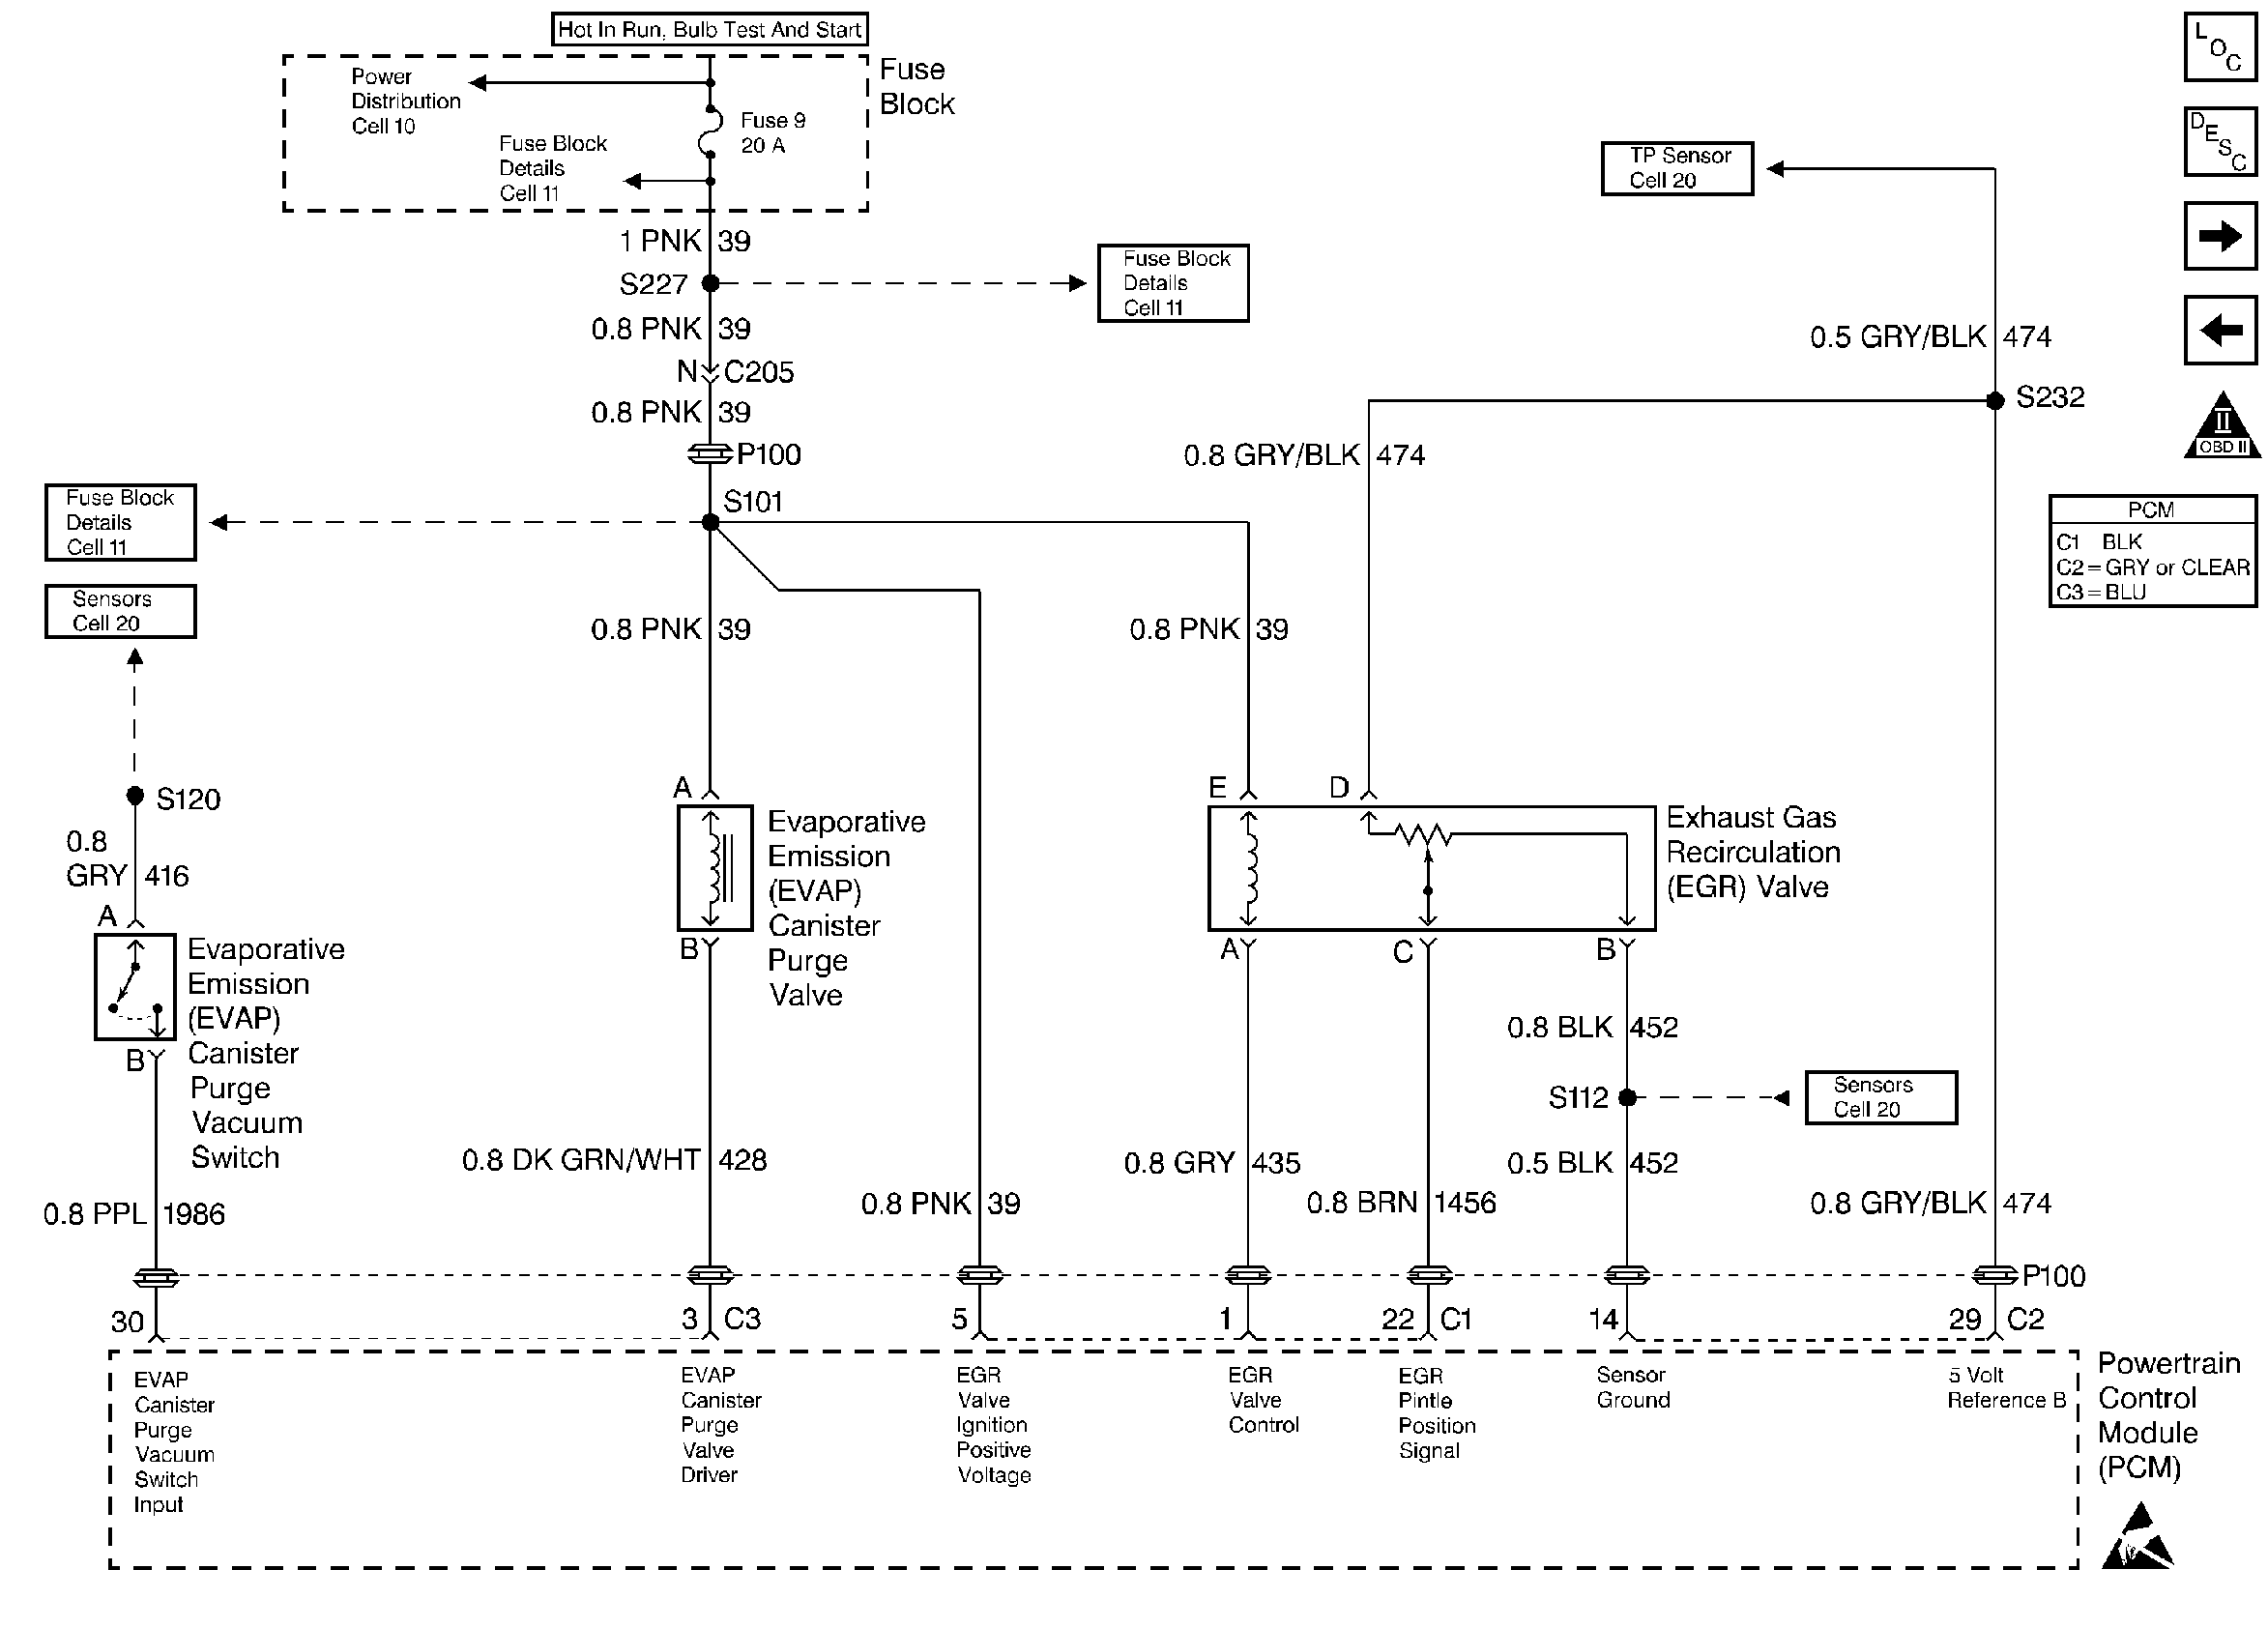
Refer to
EVAP and EGR Controls

for wiring view.
Results of Incorrect Operation
Poor idle, stalling and poor driveability can be caused by the following items:
| • | Inoperative EVAP canister purge valve. |
| • | Damaged EVAP canister. |
| • | Hoses split, cracked and, or not connected to the proper tubes. |
Evidence of fuel loss or fuel vapor odor can be caused by the following items:
| • | Liquid fuel leaking from fuel lines, or fuel pump. |
| • | Cracked or damaged EVAP canister. |
| • | Disconnected, mis-routed, kinked, deteriorated or damaged vapor hoses, or control hoses. |
If the EVAP canister purge valve is always open, the canister can purge to the intake manifold at all times. This can allow extra fuel during warm-up, which can cause a too rich operation.
If the EVAP canister purge valve is always closed, the canister can become over-loaded, resulting in fuel odor.
Diagnosis
The EVAP canister purge valve operation is covered in Evaporative Emission (EVAP) Canister Purge Valve Check and also in DTC's P0441 and P1441 . The EVAP purge vacuum switch is diagnosed by DTC's P0441 and DTC P1441.
A open or shorted circuit in the purge valve can also be diagnosed in PCM Outputs .
Visual Check of the EVAP Canister
If cracked or damaged, replace canister. Refer to EVAP Canister Replacement .
Circuit Description
Canister purge is controlled by a purge valve that allows idle purge and ported vacuum to purge the canister when energized. The Powertrain Control Module (PCM) supplies a ground to energize the valve (purge ON). The purge valve control by the PCM is pulse width modulated (turned ON and OFF several times a second). The duty cycle (pulse width) is determined by Closed Loop feed back from the Oxygen Sensor (O2S). The duty cycle will freeze if the engine has idled longer than 10 seconds and continue incrementing when throttle position rises above 1.5%. The duty cycle is calculated by the PCM and the output commanded when the following conditions have been met:
| • | Engine run time after start is more than 120 seconds if coolant temperature less than 56°C (133°F). |
| • | Engine run time after start is more than 30 seconds if coolant temperature is greater than 56°C (133°F). |
| • | Engine has not idled longer than 10 seconds. |
Diagnostic Aids
Make a visual check of vacuum hose(s). Check throttle body for possible cracked, broken, or plugged vacuum block. Check the engine for a possible mechanical problem that may cause a low vacuum condition.
The scan tool may be utilized to determine if the purge valve is operating by viewing the EVAP Vacuum Switch parameter. When purge is commanded, and the engine is off idle (approx. 1500 RPM), the EVAP Vacuum Switch should display OFF (purge present). After the engine is returned to idle (no ported vacuum) the EVAP Vacuum Switch will display ON (no purge present).
Test Description
Number(s) below refer to the step number(s) on the Diagnostic Table.
-
Checks if the purge valve is opened or closed. The purge valve is normally de-energized in this step, so it should be closed.
-
Completes functional check by commanding purge valve ON. This should normally energize the purge valve opening the valve which should allow the vacuum to drop (purge ON).
-
Checks to determine if purge valve was open due to electrical circuit problem or defective purge valve.
Step | Action | Value(s) | Yes | No |
|---|---|---|---|---|
1 | Was the Powertrain On-Board Diagnostic (OBD) System Check performed? | -- | ||
Does the EVAP canister purge valve hold vacuum? | 10 Hg (34 kPa) | |||
Does the applied vacuum drop? | -- | |||
4 |
Did the vacuum gage value read about the specified value? | 2500 RPM 10 Hg (34 kPa) | System OK | Go to Diagnostic Aids |
5 |
Does the test light illuminate when the purge valve is commanded ON? | -- | ||
Does the EVAP canister purge valve hold vacuum? | 10 Hg (34 kPa) | |||
7 | Probe each harness terminal with a test light to ground. Did the test light illuminate on one or both terminal? | -- | ||
8 | Did the test light illuminate on both terminals? | -- | ||
9 | Check for an open or short in the EVAP driver circuit and repair as necessary. Was a repair necessary? | -- | ||
10 | Replace PCM. Is action complete? | -- | -- | |
11 | Replace the EVAP canister purge valve. Is action complete? | -- | -- | |
12 | Repair short to voltage in the EVAP driver circuit. Is action complete? | -- | -- | |
13 | Repair open in the ignition feed circuit. Is action complete? | -- | -- | |
14 | Operate the vehicle under the conditions the original symptom was noted. Does the vehicle now operate normally? | -- | System OK | Refer to Diagnostic Aids |
