Air Compressor Replacement for Chevrolet Blazer - 2WD 1999
Removal Procedure
- Disconnect the battery negative cable.
- Remove the automatic level control compressor shield. Refer to Air Compressor Shield Replacement .
- Raise and suitably support the vehicle. Refer to Lifting and Jacking the Vehicle in General Information.
- Deflate the system by removing the spring clip from the air line T-fitting base.
- Remove the rear bumper extension. Refer to Rear Bumper Extension Replacement in Bumpers.
- Disconnect the automatic level control compressor electrical connections.
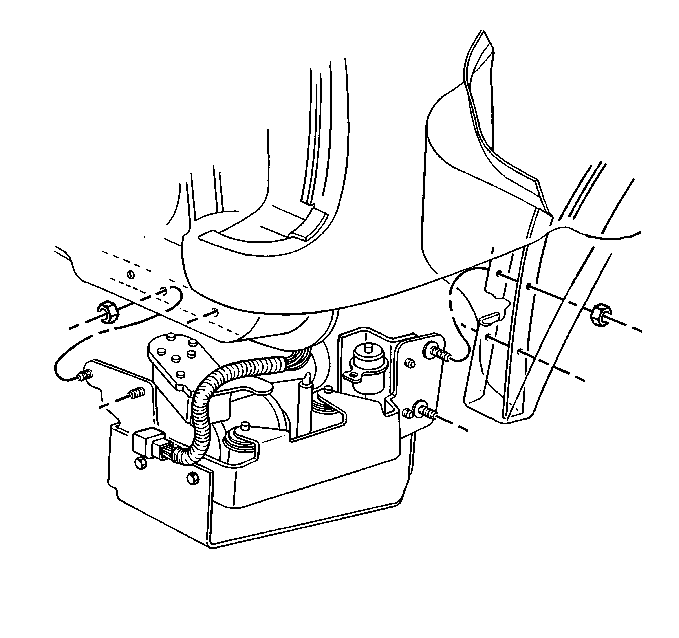
- Remove the automatic level control air compressor mounting nuts.
- Remove the compressor from the vehicle.
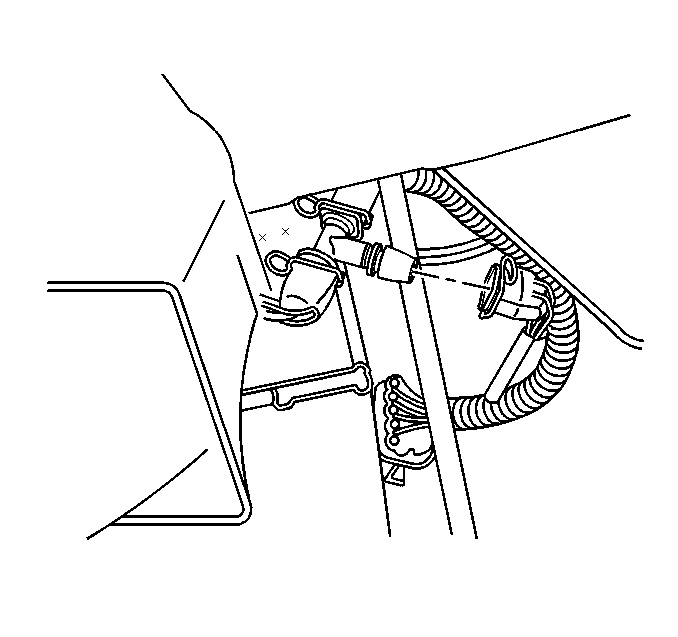
Caution: Before servicing any electrical component, the ignition and start switch must be in the OFF or LOCK position and all electrical loads must be OFF, unless instructed otherwise in these procedures. If a tool or equipment could easily come in contact with a live exposed electrical terminal, also disconnect the negative battery cable. Failure to follow these precautions may cause personal injury and/or damage to the vehicle or its components.
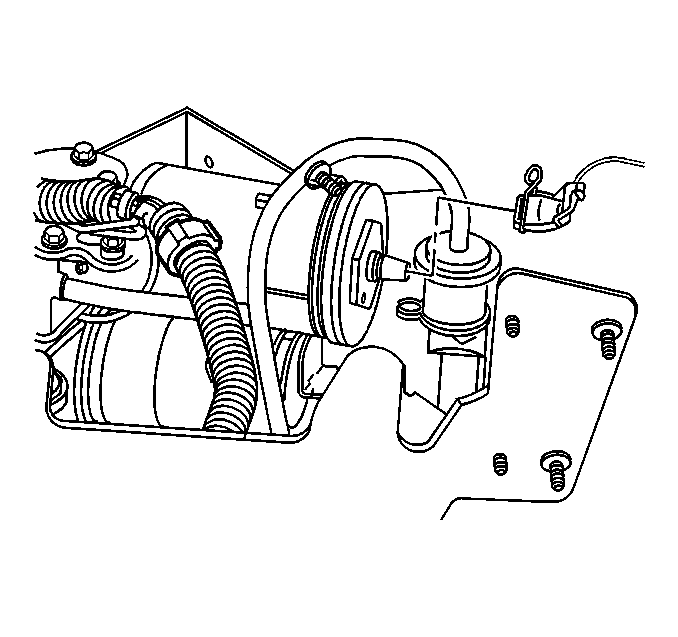
Remove the air line from the air dryer.
Installation Procedure
- Hang the automatic level control air compressor to the vehicle using the hook on the automatic level control air compressor bracket.
- Reconnect the automatic level control compressor electrical connections.
- Install the air line to the air dryer.
- Install the automatic level control compressor shield. Refer to Air Compressor Shield Replacement .
- Install the automatic level control air compressor to the underbody.
- Install the rear bumper extension. Refer to Rear Bumper Extension Replacement in Bumpers.
- Lower the vehicle.
- Connect the negative battery cable.
Notice: Use the correct fastener in the correct location. Replacement fasteners must be the correct part number for that application. Fasteners requiring replacement or fasteners requiring the use of thread locking compound or sealant are identified in the service procedure. Do not use paints, lubricants, or corrosion inhibitors on fasteners or fastener joint surfaces unless specified. These coatings affect fastener torque and joint clamping force and may damage the fastener. Use the correct tightening sequence and specifications when installing fasteners in order to avoid damage to parts and systems.
Tighten
Tighten the automatic level control air compressor nuts to 15 N·m
(11 lb ft).
