Tools Required
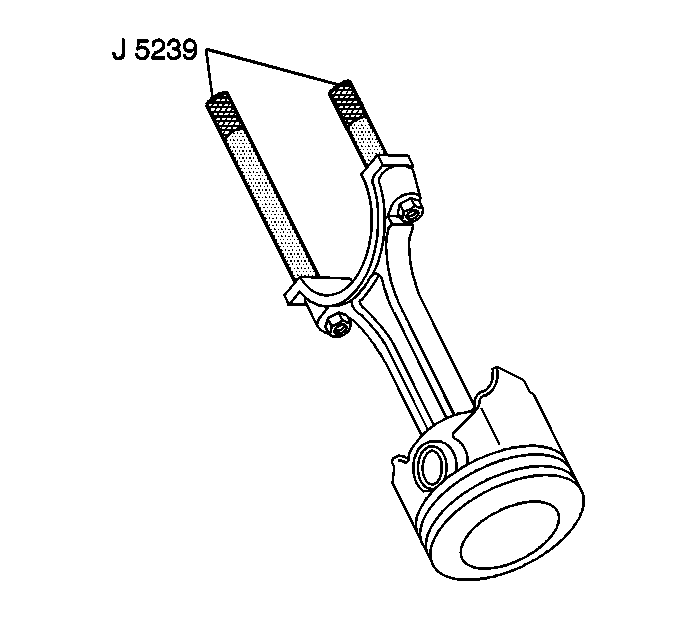
| • | J 5239 Connecting
Rod Bolt Guide Set |
Piston Selection
Important: Measurements of all components should be taken with the components at
normal room temperature.
For proper piston fit, the engine block cylinder bores should not have
excessive wear or taper.
A used piston and piston pin set may be reinstalled if, after cleaning
and inspection, the piston and piston pin are within specifications.
- Use the J 8087
in
order to measure the cylinder bore diameter. Measure at a point 64 mm
(2.5 in) from the top of the cylinder bore and 90 degrees
to the crankshaft centerline.

- Measure the J 8087
with a micrometer and record the reading.

- With a micrometer or caliper
at a right angle to the piston pin bore, measure the piston 11 mm (0.433 in)
from the bottom of the skirt.
- Subtract the piston diameter from the cylinder bore diameter in
order to determine piston-to-bore clearance. Refer to
Engine Mechanical Specifications
.
- If the proper clearance cannot be obtained, then select another
piston and measure the clearances.
If the proper fit cannot be obtained, the cylinder bore may require
honing or boring.
- When the piston-to-cylinder bore clearance is within specifications,
permanently mark the top of the piston for installation into the proper cylinder.
Installation Procedure
- Apply clean engine oil
to the following components:
- Install the J 5239
onto the connecting rod bolts.
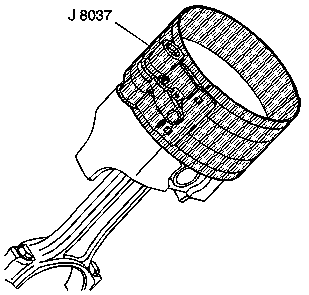
- Install the J 8037
onto the piston and compress the piston
rings.
Important: The mark on the top of the piston must face the front of the engine
block.
When assembled, the flanges on the connecting rod and connecting rod
cap should face to the front of the engine block on the left bank, and to
the rear of the engine block on the right bank.
- Install the piston and connecting rod assembly, and the J 8037
into the proper cylinder bore.
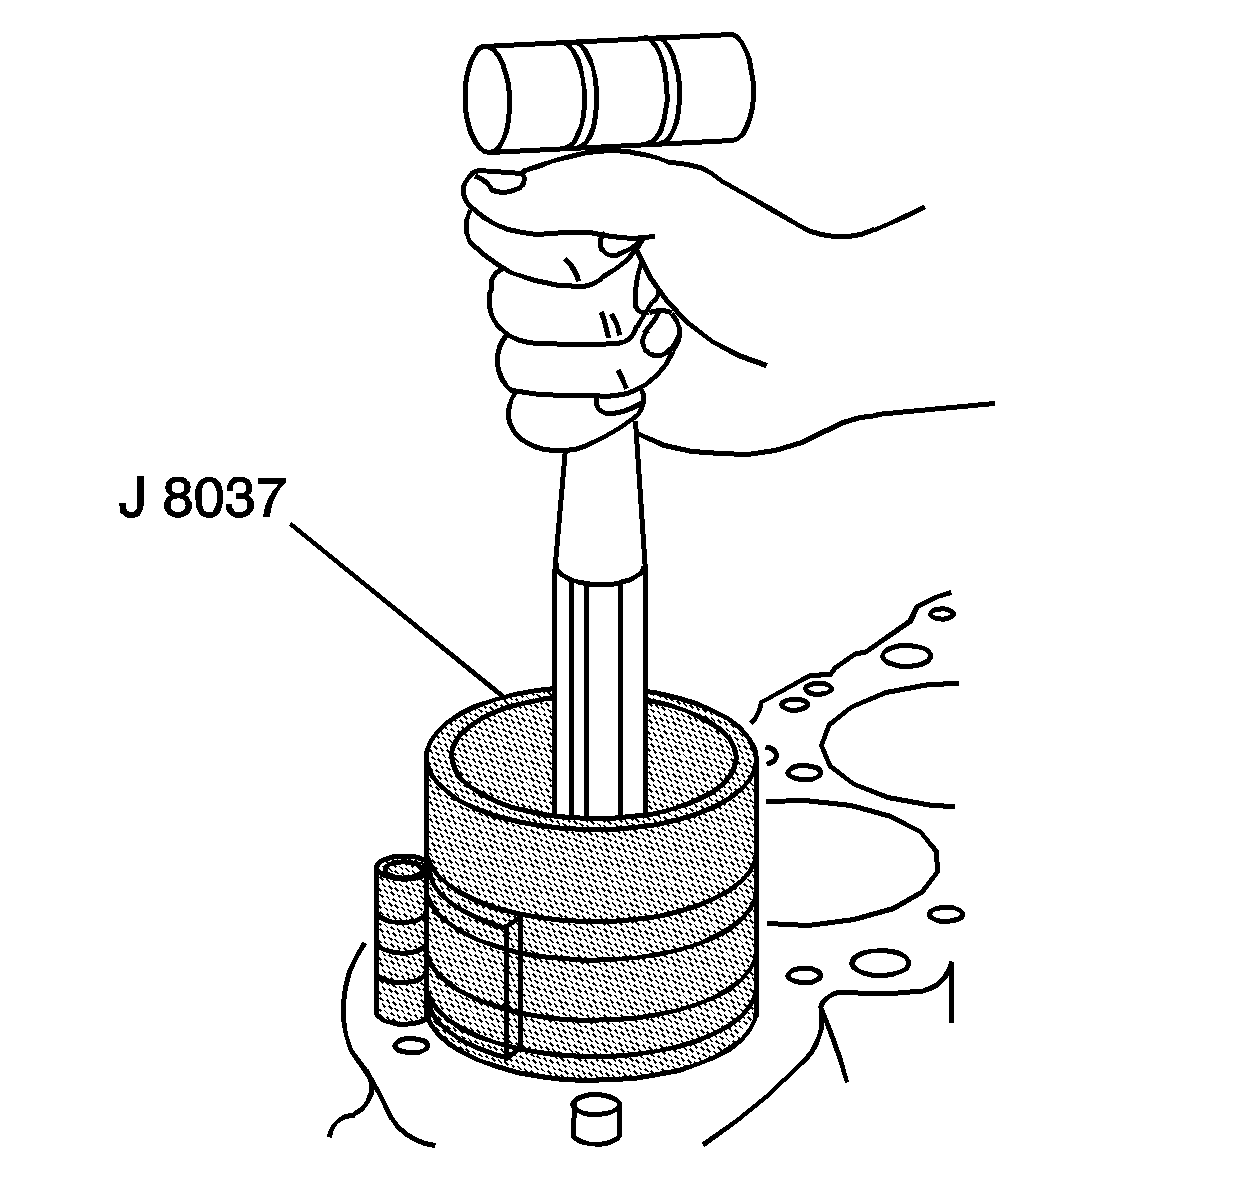
- Use the J 8037
and the J 5239
and lightly tap the top of the piston with a wooden hammer
handle.
| 5.1. | Hold the J 8037
firmly
against the engine block until all of the piston rings have entered the cylinder
bore. |
| 5.2. | Use the J 5239
in
order to guide the connecting rod onto the crankshaft journal. |
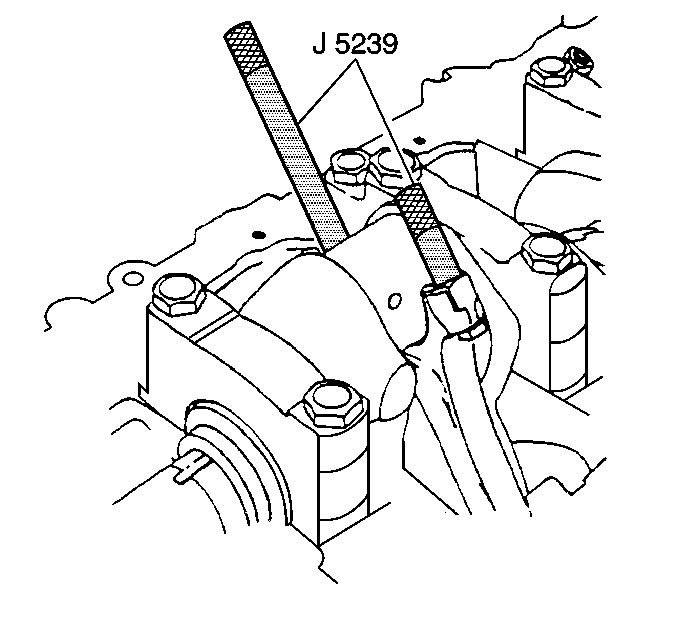
- Remove the J 5239
.
Notice: Use the correct fastener in the correct location. Replacement fasteners
must be the correct part number for that application. Fasteners requiring
replacement or fasteners requiring the use of thread locking compound or sealant
are identified in the service procedure. Do not use paints, lubricants, or
corrosion inhibitors on fasteners or fastener joint surfaces unless specified.
These coatings affect fastener torque and joint clamping force and may damage
the fastener. Use the correct tightening sequence and specifications when
installing fasteners in order to avoid damage to parts and systems.
- Install the connecting
rod caps, bearings, and nuts.
Tighten
- Tighten the nuts evenly on the first pass to 27 N·m
(20 lb ft).
- Use the J 36660-A
in
order to tighten the nuts on the final pass an additional 70 degrees.
- After the piston and connecting
rod assemblies have been installed, lightly tap each connecting rod assembly,
parallel to the crankpin, in order to ensure that the connecting
rods have side clearance.
- Use a feeler gage or a dial indicator to measure the connecting
rod side clearance between the connecting rod caps. The connecting rod side
clearance should be 0.15-0.44 mm (0.006-0.017 in).
