For 1990-2009 cars only
Tools Required
J 42371 Clutch Line Removal Tool
Removal Procedure
- Shift the transmission into the 3rd or 4th mechanical gear position.
- Remove the shift tower. Refer to Shift Tower Replacement in Manual Transmission - NV 3500.
- Raise and support the vehicle. Refer to Lifting and Jacking the Vehicle in General Information.
- Remove the rear propeller shaft. Refer to One-Piece Propeller Shaft Replacement or Two-Piece Propeller Shaft Replacement in Propeller Shaft.
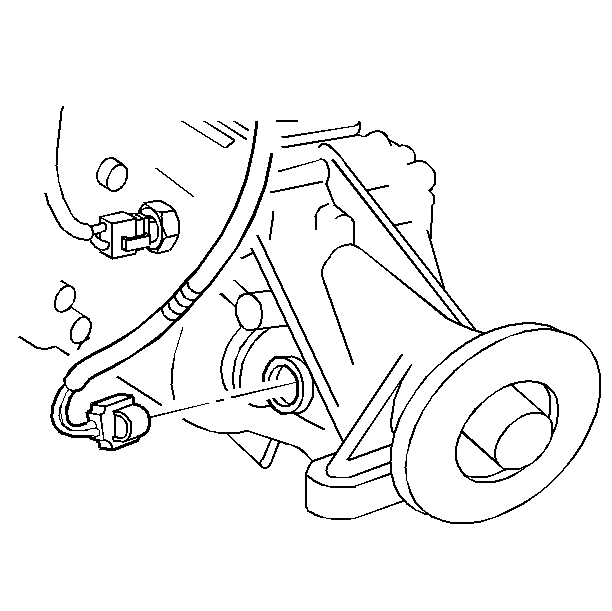
- Disconnect the vehicle speed sensor electrical connector.
- Disconnect the back up switch electrical connector.
- Remove the wiring harness retainers from the right side of the transmission.
- Remove the catalytic converter. Refer to Catalytic Converter Replacement in Engine Exhaust.
- Remove the transfer case, if equipped. Refer to Transfer Case Shield Replacement in Transfer Case.
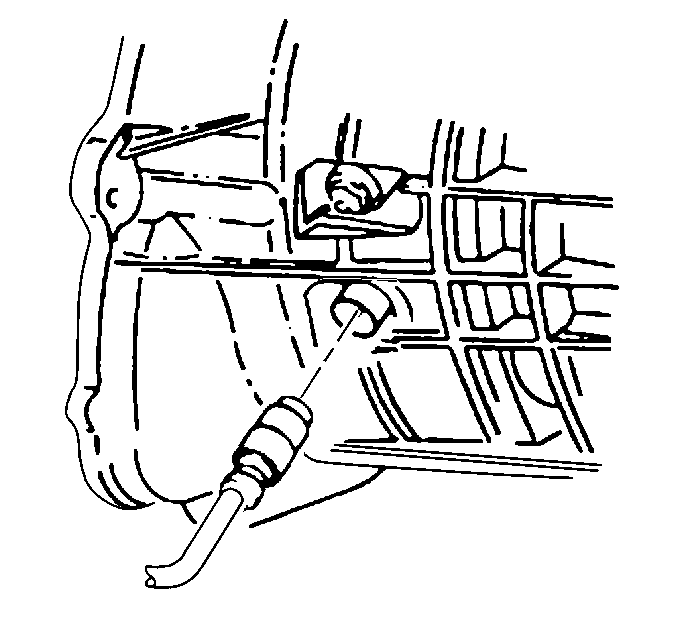
- Use the J 42371 to depress the white plastic sleeve on the quick connect and separate the clutch line from the concentric slave cylinder quick connect.
- Support the transmission with a transmission jack.
- Remove the transmission support. Refer to Transmission Support Replacement in Frame and Underbody.
- Remove the clutch housing cover bolts.
- Remove the clutch housing cover from the transmission.
- Remove the wiring harness from the front crossmember.
- Lower the transmission enough to gain access to the top of the transmission.
- Remove the fuel line retainers from the top of the transmission.
- Remove the bolt, the washer, and the nut securing the wiring harness ground wires to the engine block.
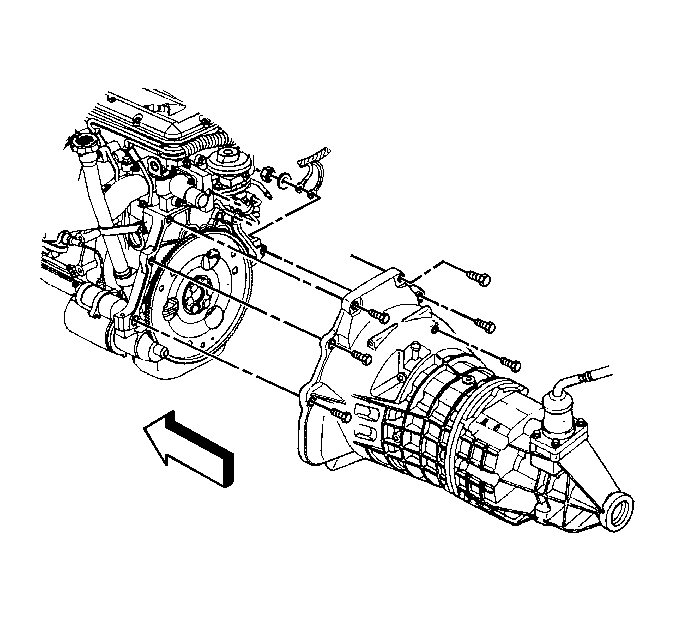
- Remove the transmission to engine bolts.
- Lower the transmission using the transmission jack.
Installation Procedure
- Raise the transmission using the transmission jack.
- Place the fuel line retainers on top of the transmission.
- Install the transmission to the engine.
- Install the transmission to engine bolts.
- Install the bolt, the washer and the nut securing the wiring harness ground wires to the engine block.
- Install the wiring harness to the front crossmember.
- Install the clutch housing cover to the transmission.
- Install the clutch housing cover bolts.
- Install the transmission support. Refer to Transmission Support Replacement in Frame and Underbody.
- Remove the transmission jack from the transmission.
- Install the hydraulic clutch line to the concentric slave cylinder quick connect.
- Install the transfer case if equipped. Refer to Transfer Case Shield Replacement in Transfer Case.
- Install the catalytic converter. Refer to Catalytic Converter Replacement in Engine Exhaust.
- Install the wiring harness retainers to the right side of the transmission.
- Connect the back up switch electrical connector.
- Connect the vehicle speed sensor electrical connector.
- Install the propeller shaft. Refer to One-Piece Propeller Shaft Replacement or Two-Piece Propeller Shaft Replacement in Propeller Shaft.
- Fill the transmission fluid. Refer to Fluid Replacement .
- Lower the vehicle.
- Install the shift tower. Refer to Shift Tower Replacement .
- Bleed the clutch system. Refer to Hydraulic Clutch Bleeding in Clutch.
Notice: Refer to Fastener Notice in the Preface section.
Tighten
Tighten the transmission to engine bolts to 47 N·m (35 lb ft).
Tighten
Tighten the ground wire nut and bolt to 47 N·m (35 lb ft).
Tighten
Tighten the clutch housing cover bolts to 10 N·m (89 lb in).
