Exhaust Muffler Replacement 2.2L
Removal Procedure
Caution: Always wear protective goggles and gloves when removing exhaust parts as falling rust and sharp edges from worn exhaust components could result in serious personal injury.
Notice: When jacking or lifting the vehicle from the frame side rails, be certain lift pads do not contact the three-way catalytic converter as damage to the converter will result.
Notice: Replacement of exhaust system parts must be OEM standard to ensure that the vehicle operates as designed.
- Raise and suitably support the vehicle. Refer to Lifting and Jacking the Vehicle in General Information.
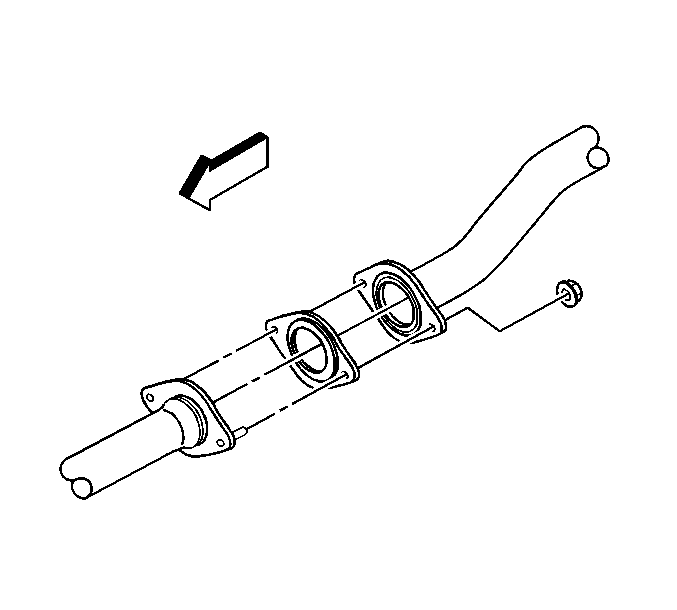
- Remove the catalytic converter to muffler flange nuts.
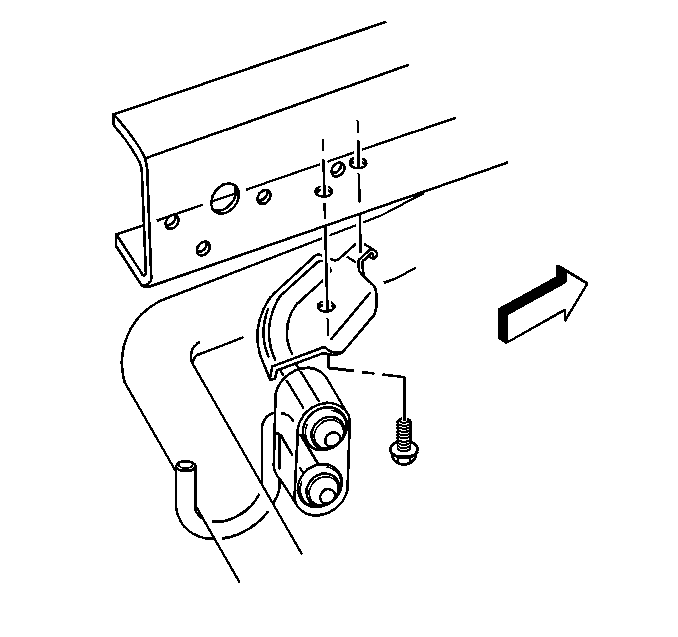
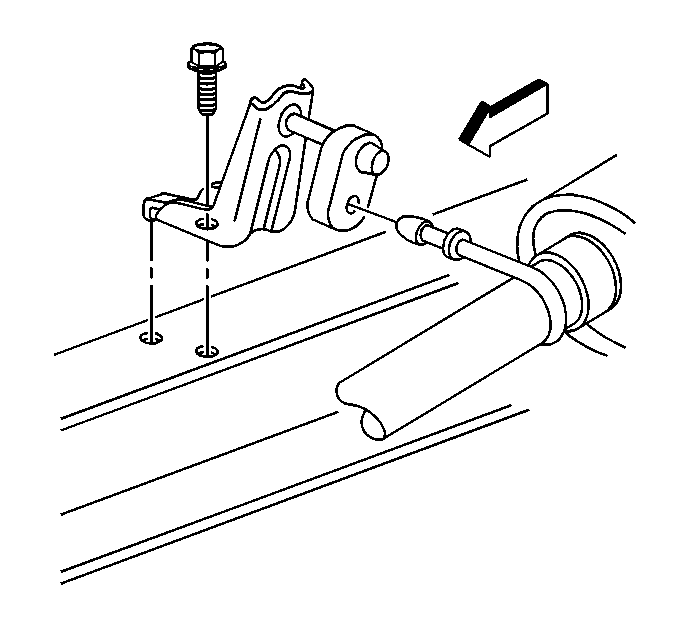
- Disconnect the insulator from the tail pipe hanger.
- Disconnect the insulator from the muffler and tail pipe hanger.
- Remove the muffler and gasket from the vehicle.
Installation Procedure
- Install the muffler and NEW gasket to the vehicle.
- Connect the insulator to the muffler and tail pipe hanger.
- Connect the insulator to the tail pipe hanger.
- Install the muffler to catalytic converter flange nuts.
- Lower the vehicle.


Notice: Use the correct fastener in the correct location. Replacement fasteners must be the correct part number for that application. Fasteners requiring replacement or fasteners requiring the use of thread locking compound or sealant are identified in the service procedure. Do not use paints, lubricants, or corrosion inhibitors on fasteners or fastener joint surfaces unless specified. These coatings affect fastener torque and joint clamping force and may damage the fastener. Use the correct tightening sequence and specifications when installing fasteners in order to avoid damage to parts and systems.
Tighten
Tighten the muffler to catalytic converter flange nuts to 40 N·m
(30 lb ft).
Exhaust Muffler Replacement Pickup 4.3L
Removal Procedure
Caution: Always wear protective goggles and gloves when removing exhaust parts as falling rust and sharp edges from worn exhaust components could result in serious personal injury.
Notice: When jacking or lifting the vehicle from the frame side rails, be certain lift pads do not contact the three-way catalytic converter as damage to the converter will result.
Notice: Replacement of exhaust system parts must be OEM standard to ensure that the vehicle operates as designed.
- Raise and suitably support the vehicle. Refer to Lifting and Jacking the Vehicle in General Information.
- Remove the catalytic converter to muffler flange nuts.
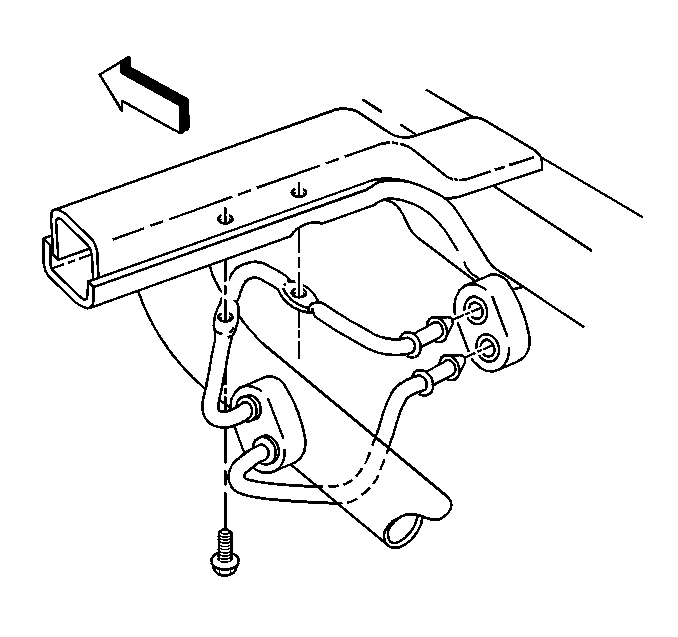
- Disconnect the insulator from the tail pipe hanger.
- Disconnect the insulator from the muffler and tail pipe hanger.
- Remove the muffler and gasket from the vehicle.


Installation Procedure
- Install the muffler and NEW gasket to the vehicle.
- Connect the insulator to the muffler and tail pipe hanger.
- Connect the insulator to the tail pipe hanger.
- Install the muffler to catalytic converter flange nuts.
- Lower the vehicle.


Notice: Use the correct fastener in the correct location. Replacement fasteners must be the correct part number for that application. Fasteners requiring replacement or fasteners requiring the use of thread locking compound or sealant are identified in the service procedure. Do not use paints, lubricants, or corrosion inhibitors on fasteners or fastener joint surfaces unless specified. These coatings affect fastener torque and joint clamping force and may damage the fastener. Use the correct tightening sequence and specifications when installing fasteners in order to avoid damage to parts and systems.
Tighten
Tighten the muffler to catalytic converter flange nuts to 40 N·m
(30 lb ft).
Exhaust Muffler Replacement Utility 4.3L
Removal Procedure
Caution: Always wear protective goggles and gloves when removing exhaust parts as falling rust and sharp edges from worn exhaust components could result in serious personal injury.
Notice: When jacking or lifting the vehicle from the frame side rails, be certain lift pads do not contact the three-way catalytic converter as damage to the converter will result.
Notice: Replacement of exhaust system parts must be OEM standard to ensure that the vehicle operates as designed.
- Raise and suitably support the vehicle. Refer to Lifting and Jacking the Vehicle in General Information.
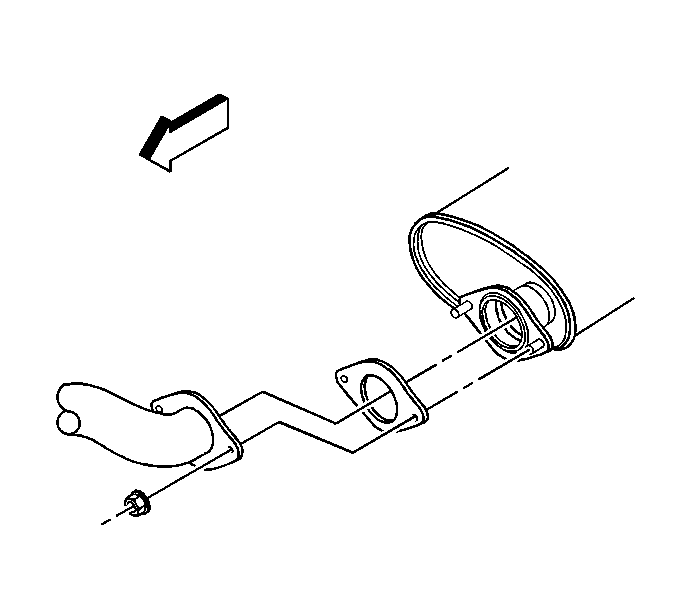
- Remove the catalytic converter to muffler flange nuts.
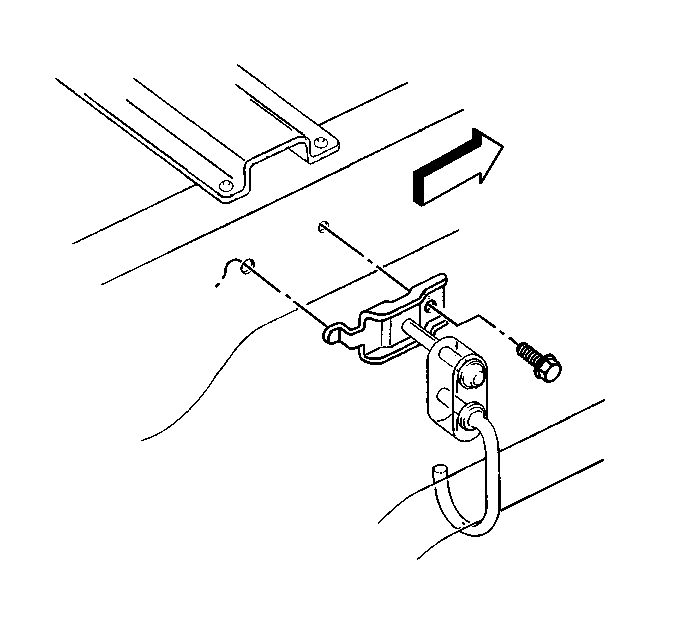
- Disconnect the insulator from the tail pipe hanger.
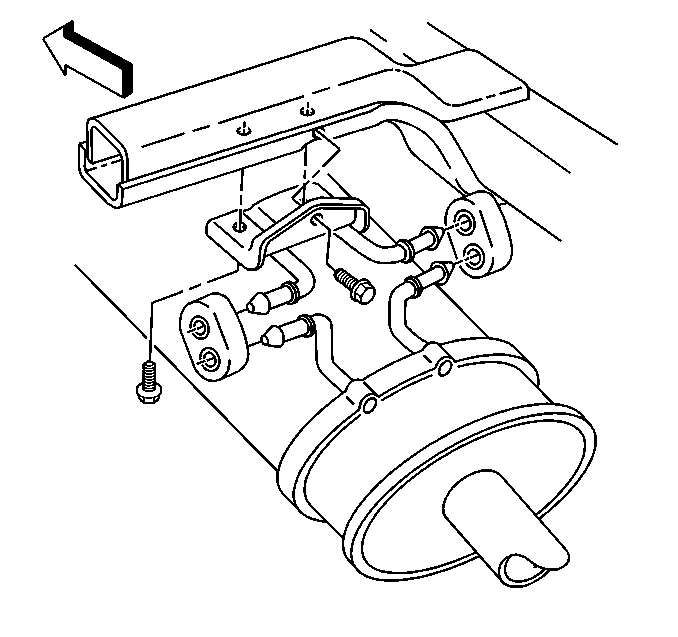
- Disconnect the insulators from the muffler hanger (4-door utilities).
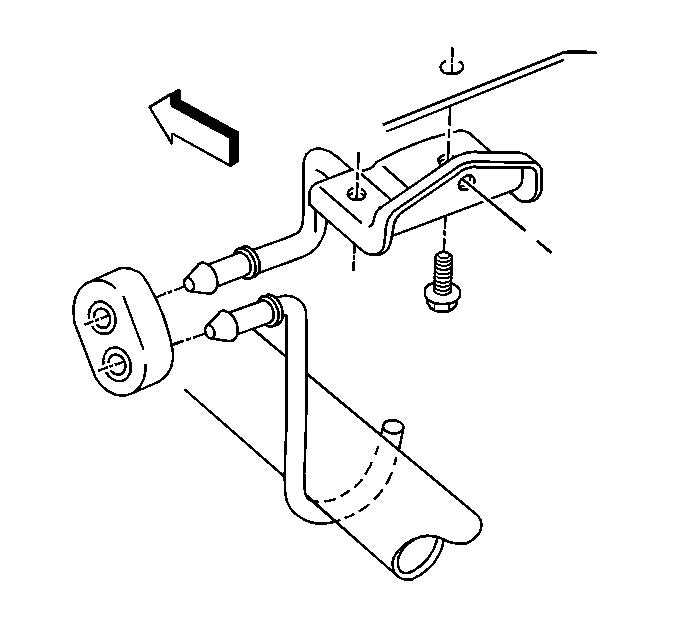
- Disconnect the insulator from the muffler and tail pipe hanger.
- Remove the muffler from the vehicle.
Installation Procedure
- Install the muffler and NEW gasket to the vehicle.
- Connect the insulator to the muffler and tail pipe hanger.
- Connect the insulators to the muffler hanger (4-door utilities).
- Connect the insulator to the tail pipe hanger.
- Install the muffler to catalytic converter flange nuts.
- Lower the vehicle.


Notice: Use the correct fastener in the correct location. Replacement fasteners must be the correct part number for that application. Fasteners requiring replacement or fasteners requiring the use of thread locking compound or sealant are identified in the service procedure. Do not use paints, lubricants, or corrosion inhibitors on fasteners or fastener joint surfaces unless specified. These coatings affect fastener torque and joint clamping force and may damage the fastener. Use the correct tightening sequence and specifications when installing fasteners in order to avoid damage to parts and systems.
Tighten
Tighten the muffler to catalytic converter flange nuts to 40 N·m
(30 lb ft).
