Tools Required
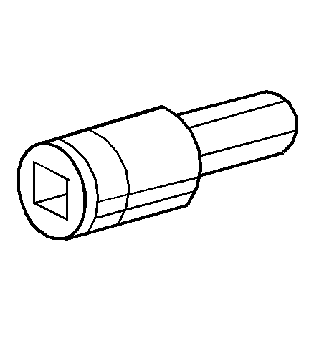
| • | J 36511 Oil Plug Hex Bit |
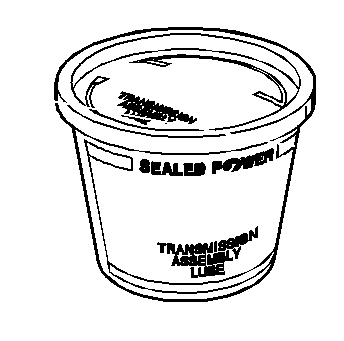
| • | J 36850 Transjel Lubricant |
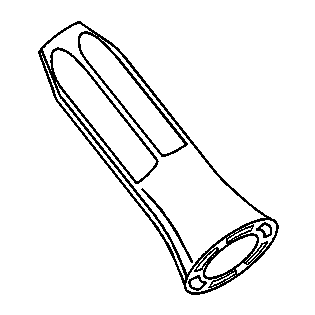
| • | J 38801 Input Shaft Seal Installer |
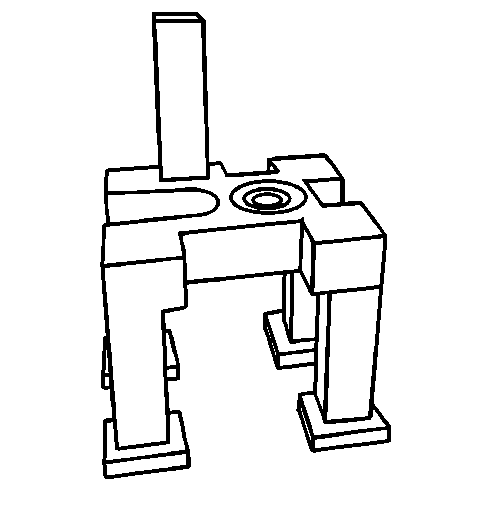
| • | J 41663 Transmission Assembly Pallet with Mainshaft Adapter |
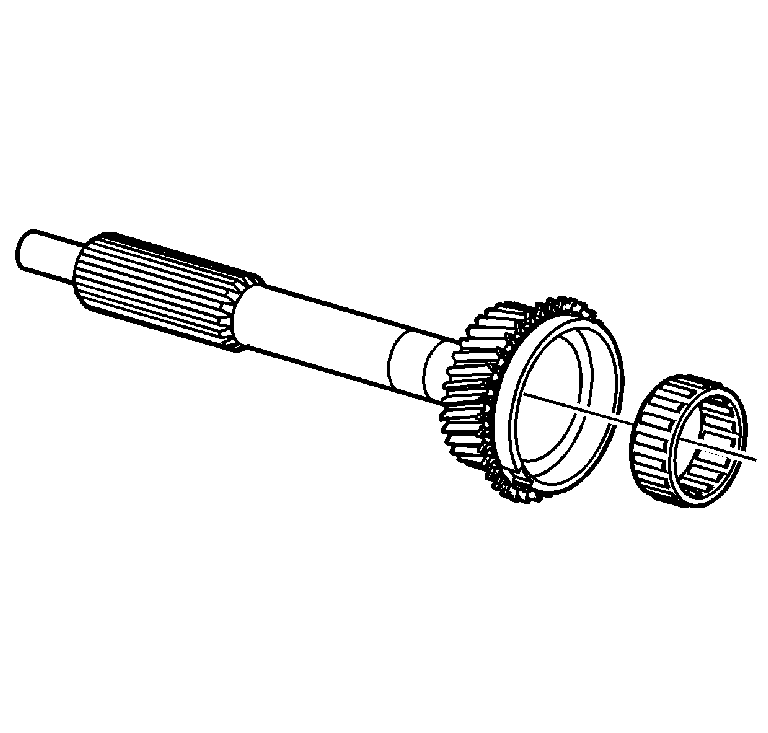
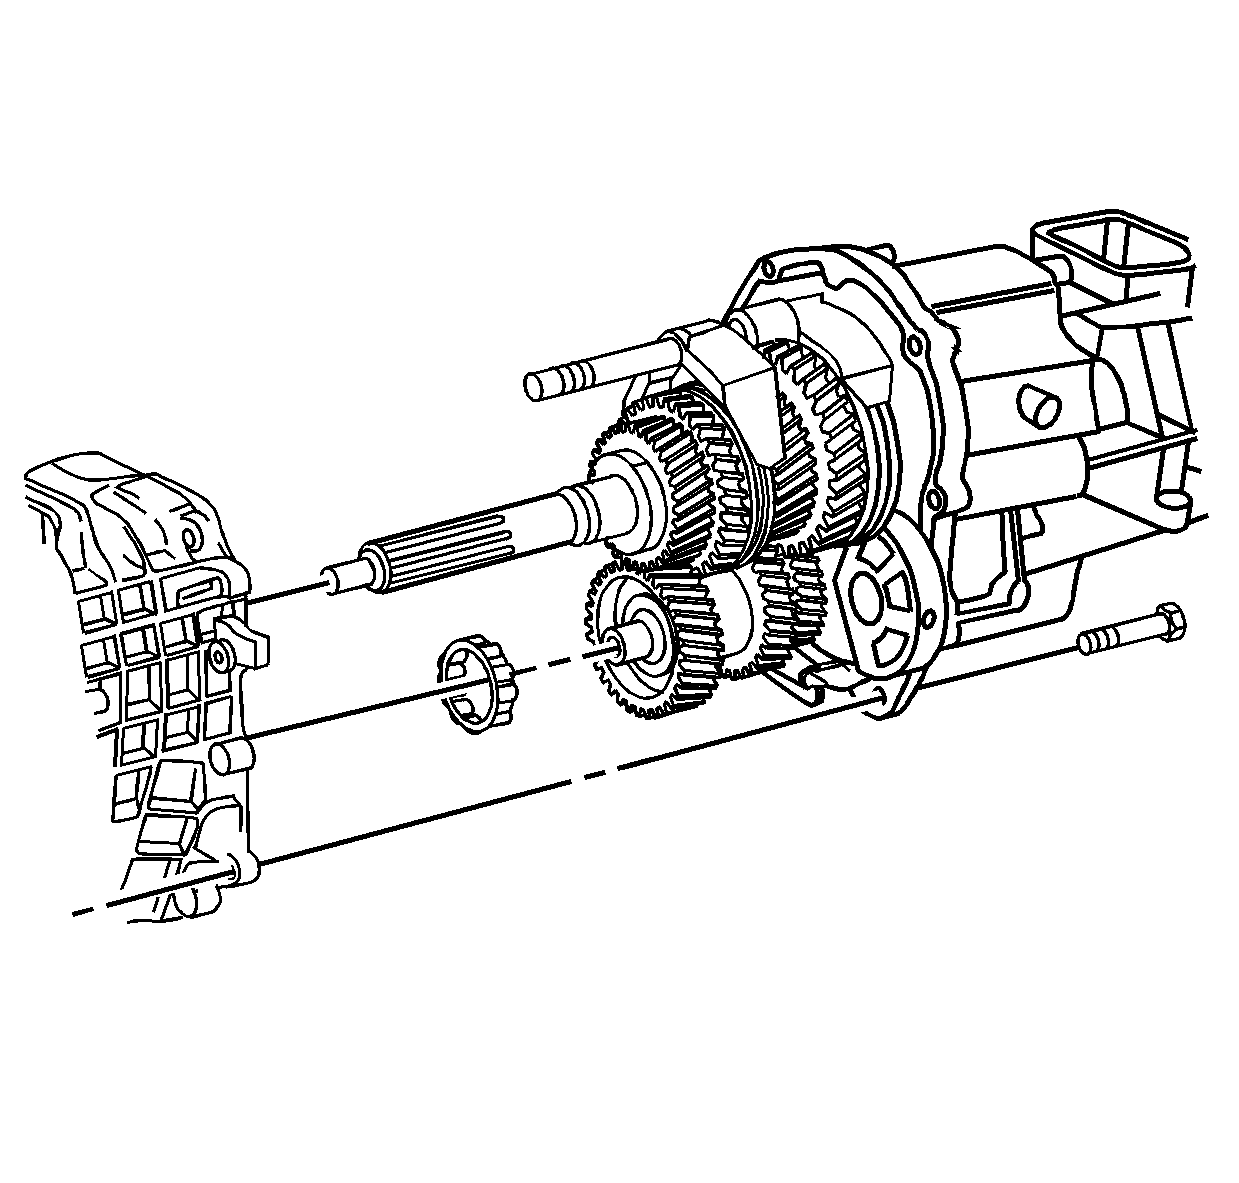
- Install the mainshaft front bearing in the input shaft.
- Pack the bearing with J 36850 .
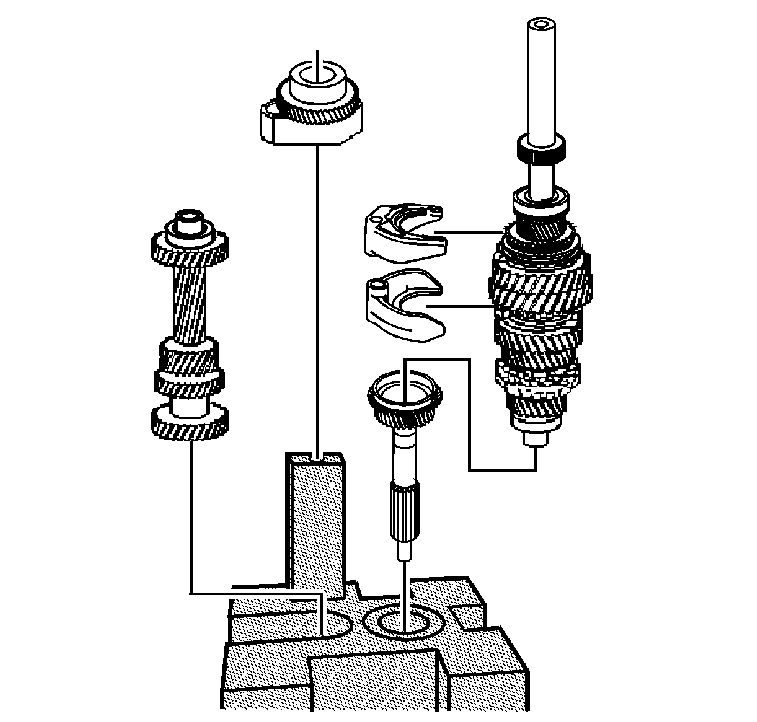
- Install the input shaft on the J 41663 .
- Install the assembled mainshaft onto the J 41663 .
- Install the countershaft onto the J 41663 .
- Install the reverse idler shaft assembly onto the J 41663 .
- Install the 5th/reverse shift fork onto the 1st/2nd shift fork.
- Install the fork assemblies onto the 1st/2nd and 5th/reverse gear sleeves.
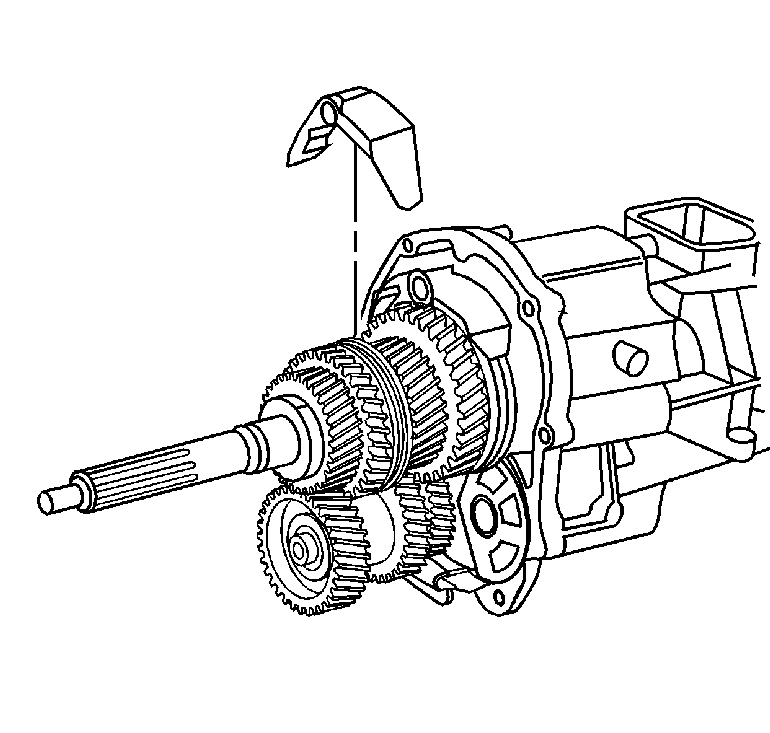
- Install the mainshaft bearing retainer onto the mainshaft and the countershaft.
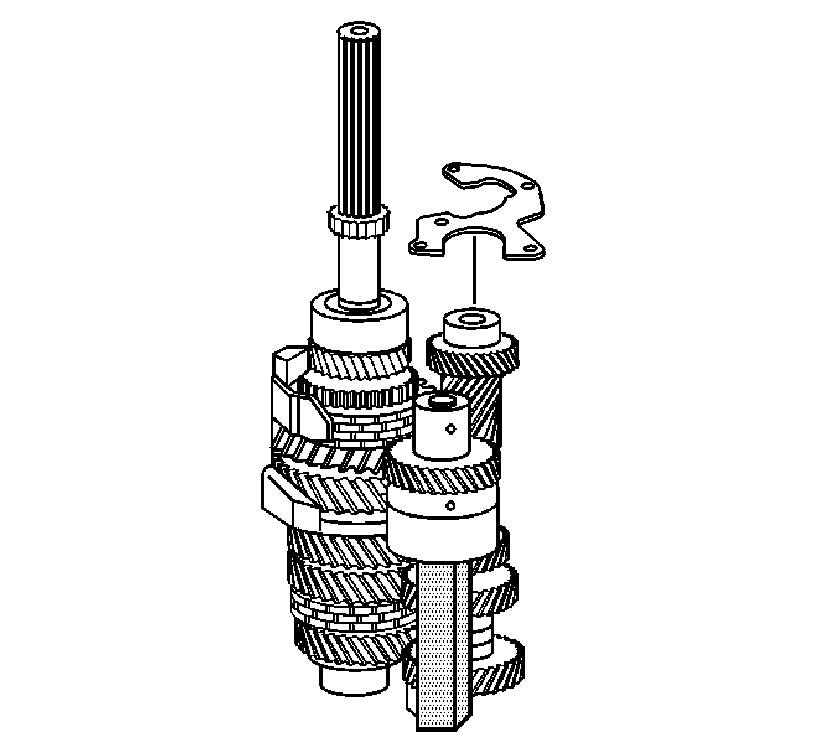
- Install the rear case over the mainshaft, countershaft and reverse idler shaft assembly.
- Install the 2 bolts that secure the reverse idler shaft assembly to the rear case.
- Finger tighten the 2 bolts. If the rear bolt will not install all the way, inspect the alignment of the idler shaft hole to the idler shaft support collar.
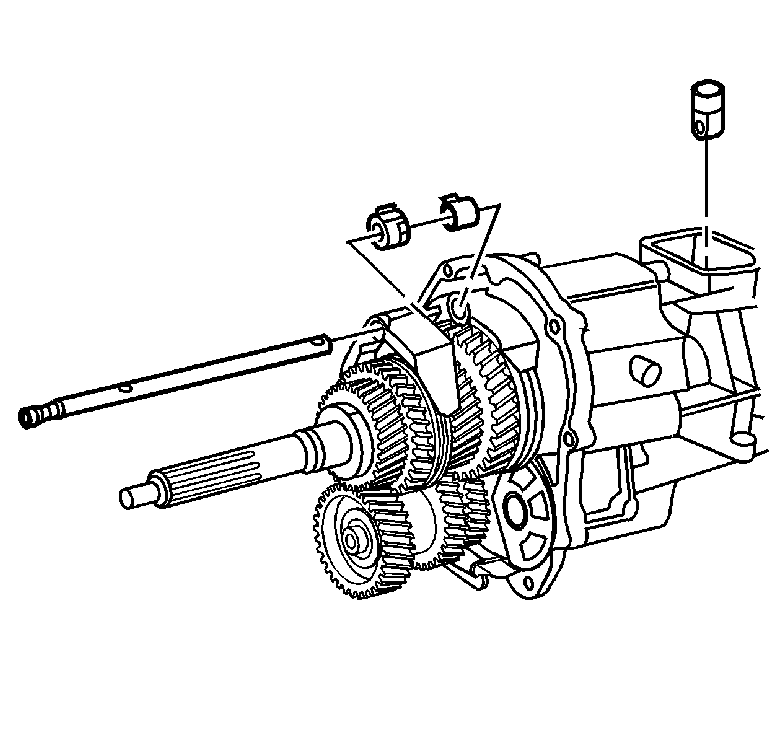
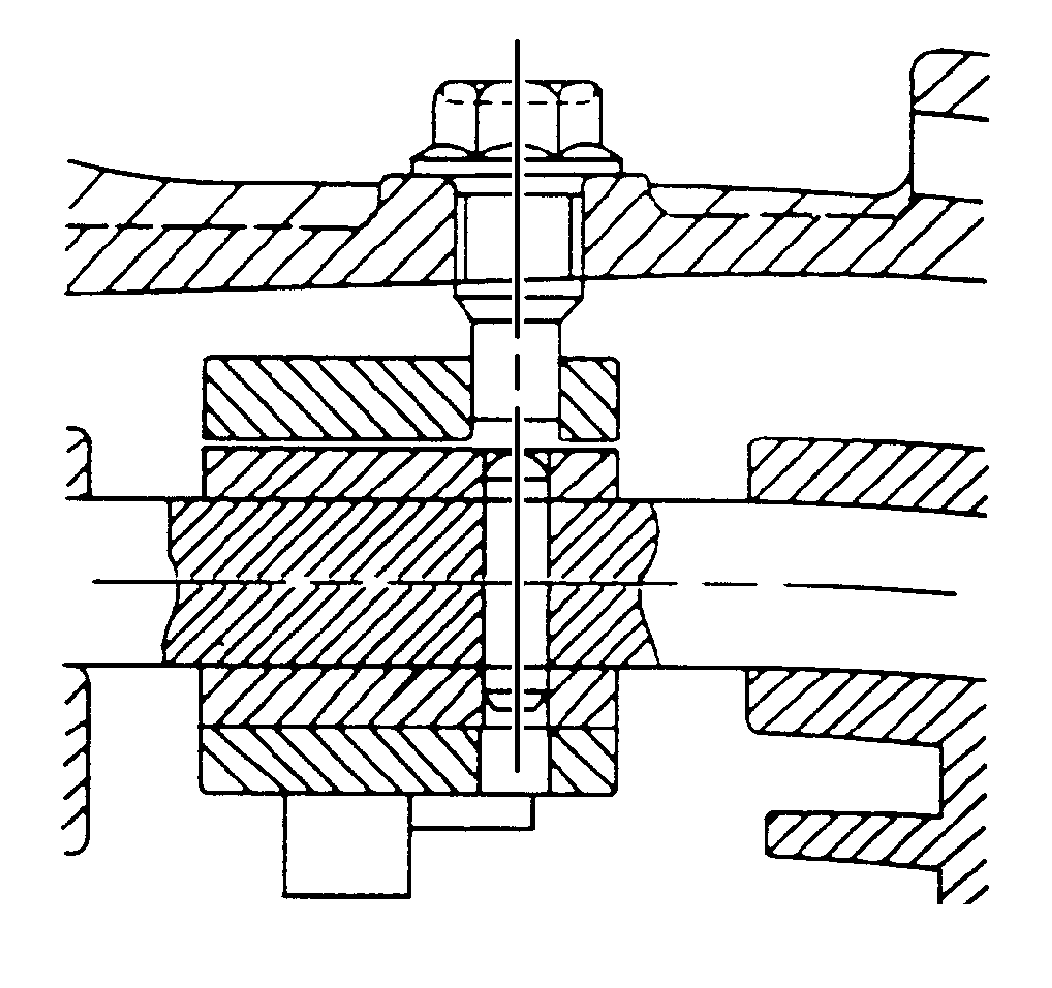
- Install the NEW O-rings on the 5 mainshaft to bearing retainer bolts.
- Install the 5 mainshaft bearing bolts using the following sequence:
- Tighten the reverse idler shaft assembly to case bolts.
- Tighten the reverse idler shaft assembly to case rear bolt to 22 N·m (16 lb ft).
- Tighten the reverse idler shaft assembly to case forward bolt to 44 N·m (33 lb ft).
- Remove the rear case assembly from the J 41663 .
- Install the 3rd/4th shift fork onto the 3rd/4th synchronizer sleeve.
- Install the shift shaft into the 3rd/4th shift fork.
- Install the shift shaft into the shift shaft lever and the shift rail bushing.
- Install the shift shaft (1) through the 1st/2nd shift fork (5) and 5th/reverse shift fork (4).
- Slide the shift shaft into the case.
- Install the shift socket (2) onto the shift shaft.
- Install the 22 mm (0.87 in) shift shaft lever roll pin into the shift shaft lever.
- Install the shift shaft socket and the 32 mm (1.26 in) roll pin onto the shift shaft.
- Install the front countershaft roller bearing onto the countershaft.
- Pack the front countershaft bearing race with J 36850 .
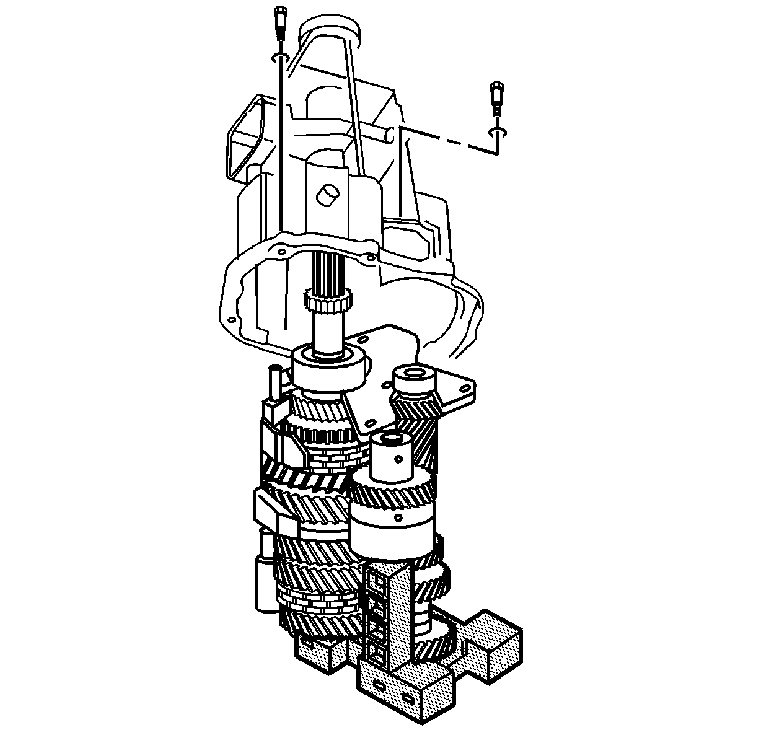
- Apply a thin layer of gasket maker GM P/N 1052943 (Canadian P/N 10953491) or equivalent, to the mating surfaces of the rear case and the clutch housing.
- Install the clutch housing onto the rear case.
- Install the 9 bolts securing the clutch housing to the rear case.
- Install the shift shaft detent pin into the top of the clutch housing.
- Install the following components:
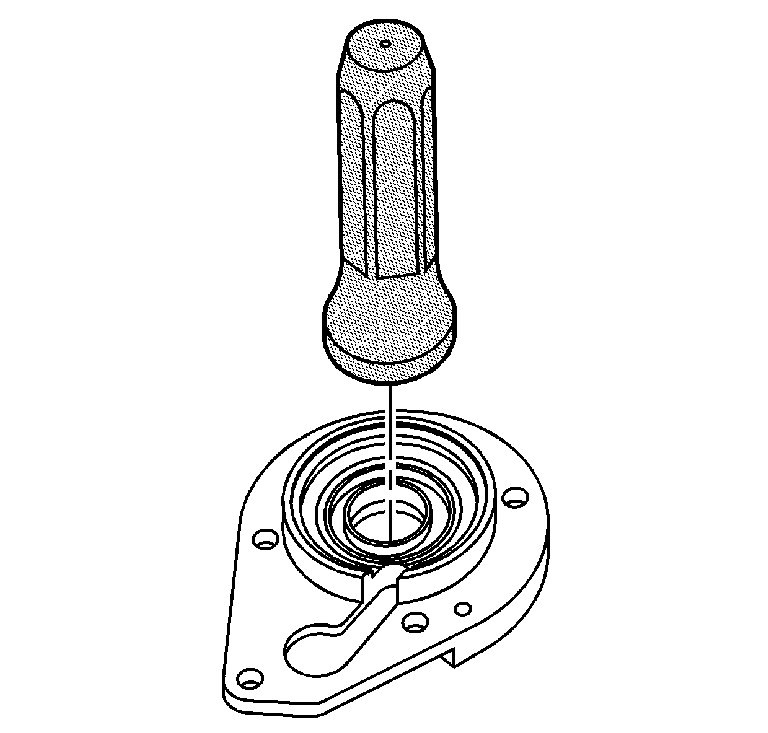
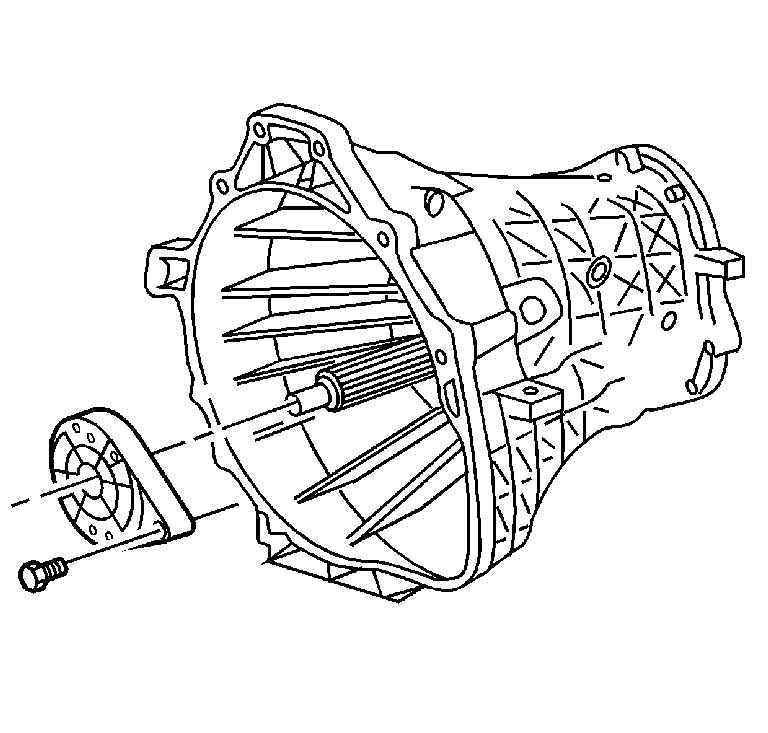
- Install the retaining ring on the input shaft bearing.
- Install the input shaft seal in the bearing retainer using the J 38801 .
- Apply a thin layer of RTV sealer GM P/N 12345739 (Canadian P/N 10953541) or equivalent, to the mating surfaces of the input shaft bearing retainer.
- Install the 5 bolts that secure the input shaft bearing retainer to the clutch housing.
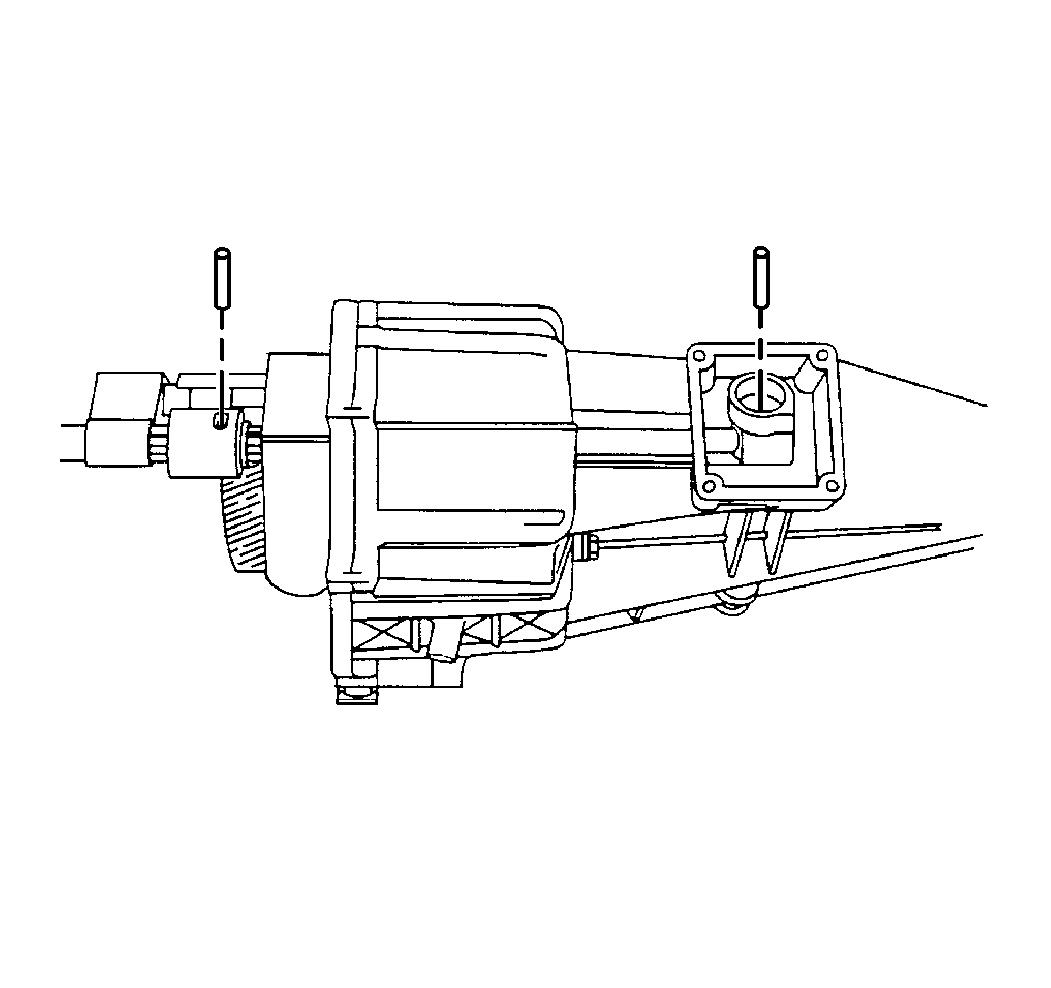
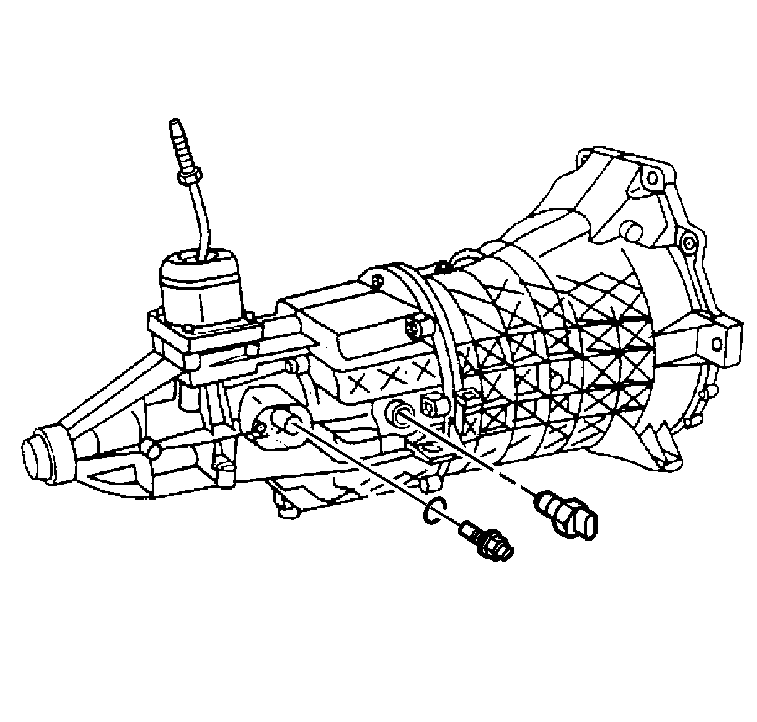
- Apply pipe sealant GM P/N 12346004 (Canadian P/N 10953480) or equivalent, to the backup lamp switch threads.
- Install the backup lamp into the rear housing.
- Install the vehicle speed sensor.
- In order to prevent spillage, fill the transmission with oil after installing. Refer to Lubrication Specifications .
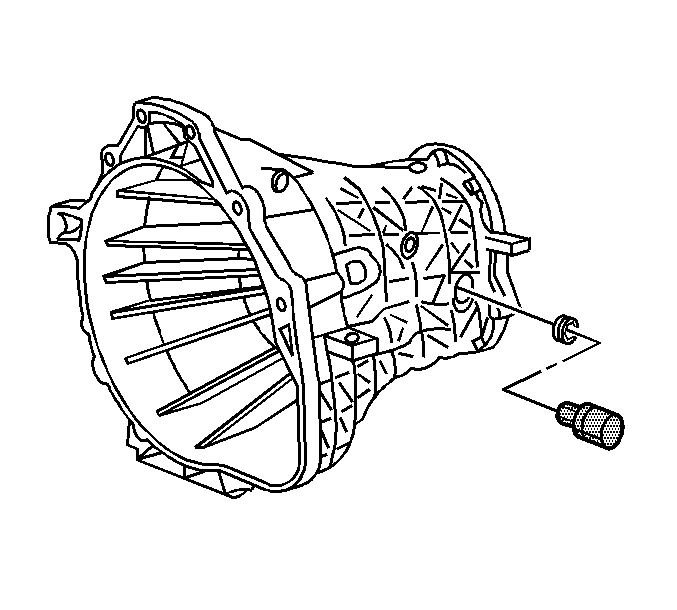
- Apply pipe sealant GM P/N 12346004 (Canadian P/N 10953480) or equivalent, to the oil fill plug threads.
- Using the J 36511 , install the oil fill plug into the rear housing.
| • | Ensure the fork end of the mainshaft bearing retainer is installed under the countershaft rear bearing. |
| • | Ensure the hook end of the mainshaft bearing retainer is installed under the mainshaft rear bearing. |
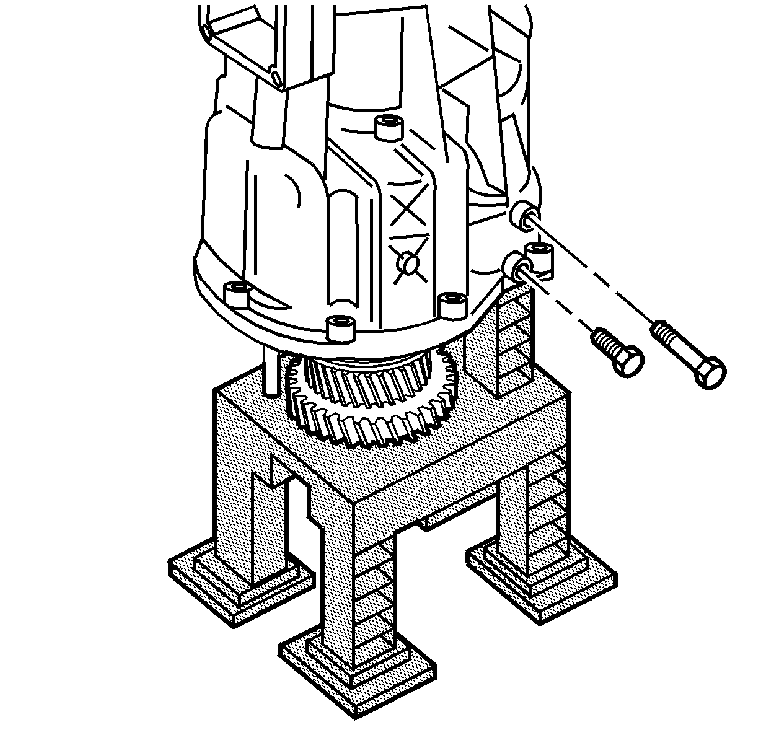
Important: Two bolts, of different length, are used to secure the reverse idler shaft retainer and collar to the rear case. The forward, or front, reverse idler shaft assembly hole houses the short bolt.

Important: Use new O-rings with the 5 mainshaft bearing retainer to case bolts.
Notice: Refer to Fastener Notice in the Preface section.
| 14.1. | Finger start the bolts (1, 2, 4). |
| 14.2. | Finger start the bolts (3, 5). |
| 14.3. | Finger tighten the bolts in the following order (1, 2, 3, 4, 5). |
| 14.4. | Tighten the mainshaft bearing retainer to housing bolts in the following order (1, 2, 3, 4, 5). |
Tighten
Tighten the bolts to 22 N·m (16 lb ft).
| 14.5. | Re-tighten the mainshaft bearing retainer to housing bolts in the following order (1, 2, 3, 4, 5). |
Tighten
Tighten the bolts to 22 N·m (16 lb ft).
Tighten
Place the rear case assembly horizontally.
Ensure the roll pin to set flush with the shift shaft lever assembly.
Ensure the shift shaft socket roll pin is flush with the shift shaft socket hole.
Ensure the small end of the countershaft bearing is toward the clutch housing.
Tighten
Tighten the case bolts to 33 N·m (24 lb ft).
Install the shift shaft detent pin by hand in order to ensure the detent pin installs into the shift shaft lever and the shift rail bushing.
Tighten
Tighten the shift shaft detent pin to 33 N·m (24 lb ft).
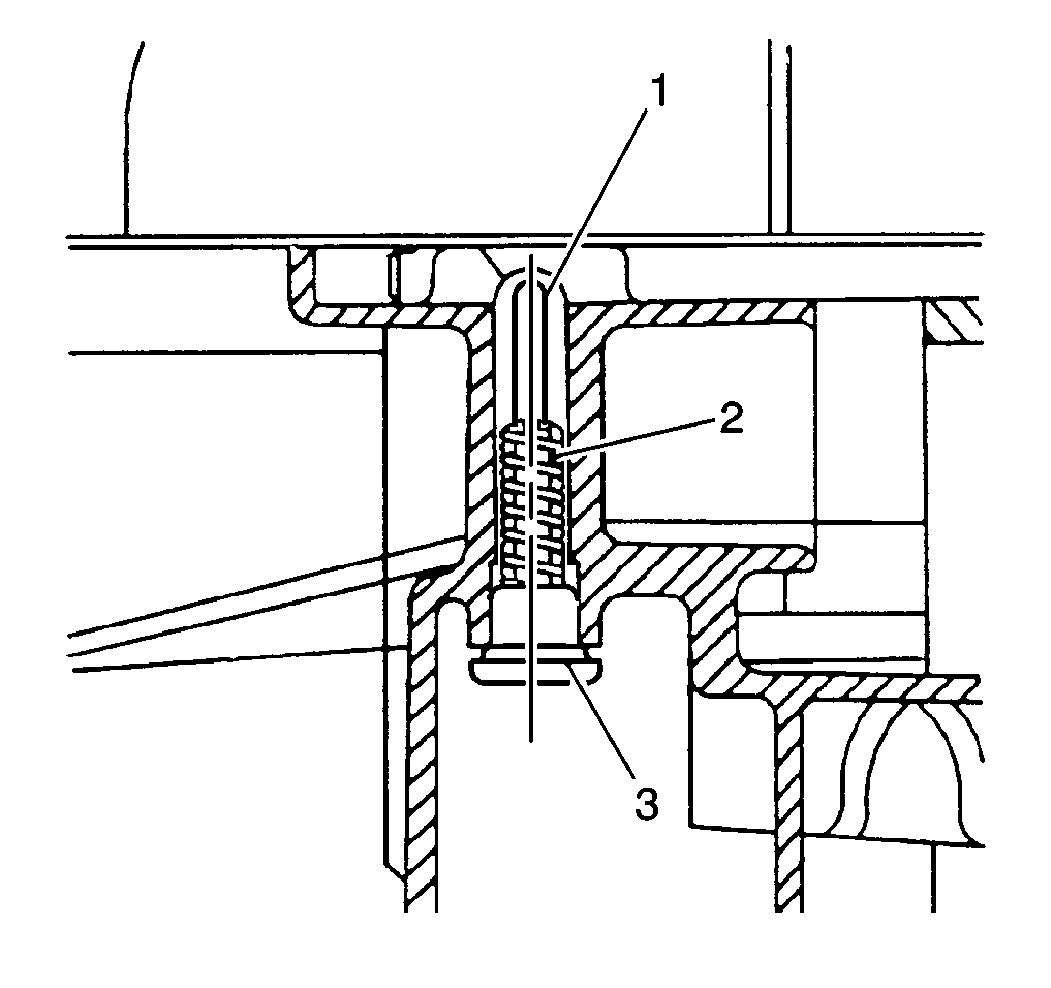
| • | The shift shaft detent plunger (1) |
| • | The spring (2) |
| • | The detent plug (3) |
Install the input shaft bearing retainer to the clutch housing.
Tighten
Tighten the input bearing retainer bolts to 29 N·m (21 lb ft).
Tighten
Tighten the backup lamp to 37 N·m (28 lb ft).
Tighten
Tighten the vehicle speed sensor to 17 N·m (12 lb ft).
Tighten
Tighten the oil fill plug to 30 N·m (22 lb ft).
