For 1990-2009 cars only
Evaporative Emission Canister Vent Solenoid Valve Replacement 2-Door Utility
Removal Procedure
- Raise the vehicle. Refer to Lifting and Jacking the Vehicle in General Information.
- Lower the spare tire, underbody mounted spare tire only.
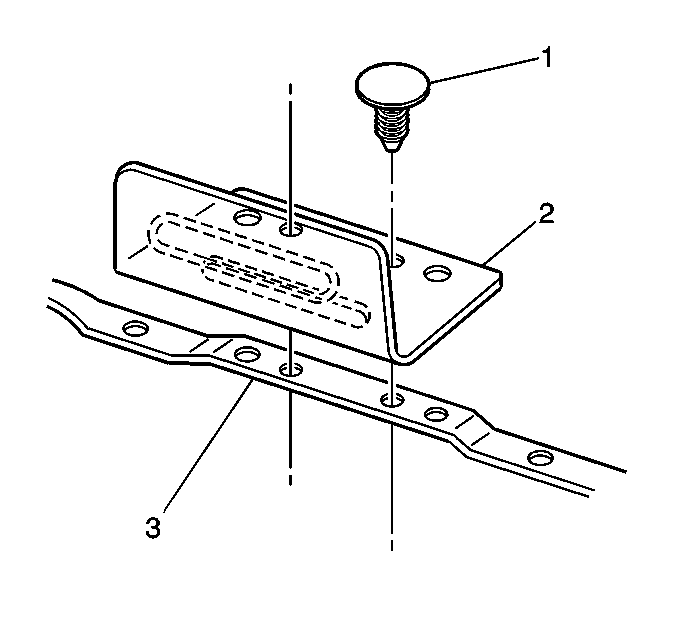
- Remove the shield (2) from the fuel tank shield (3).
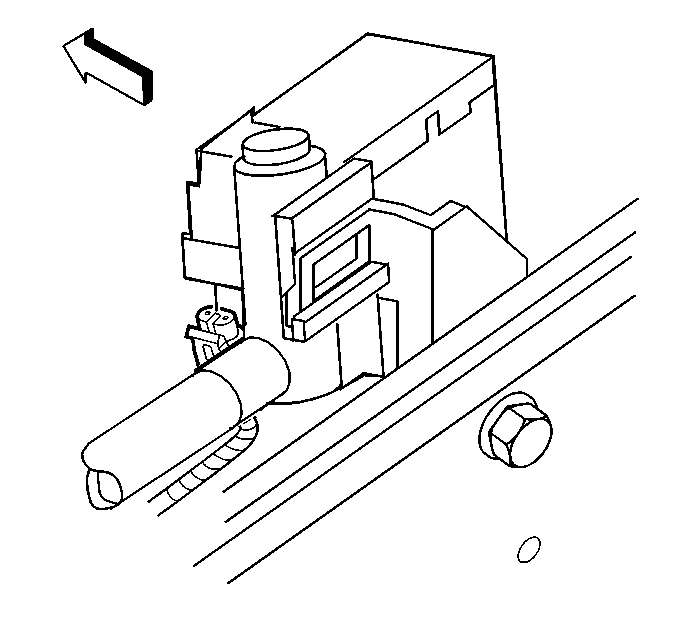
- Disconnect the vent valve electrical connector.
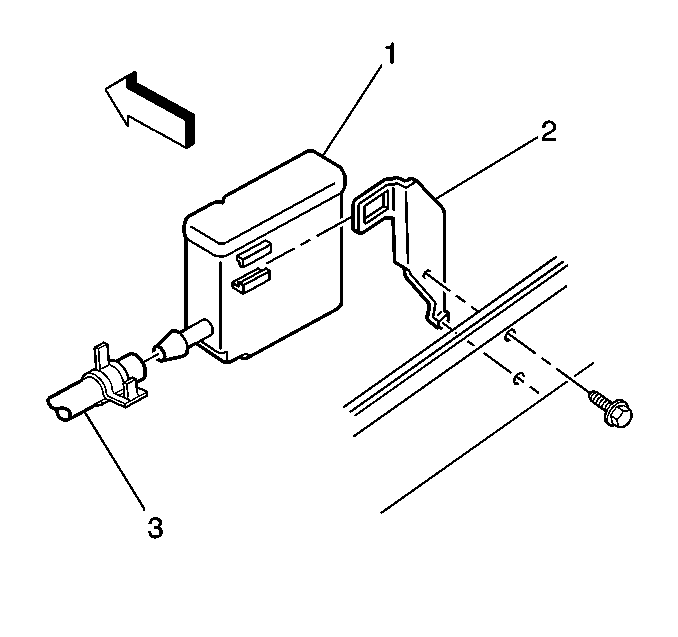
- Disconnect the vent hose (3).
- Bend back the tang on the bracket.
- Remove the vent valve (1) from the bracket (2).


Installation Procedure
- Slide the vent valve (1) onto the bracket (2).
- Connect the vent hose (3).
- Connect the vent valve electrical connector.
- Install the shield (2) to the fuel tank shield (3) with the retainers (1).
- Raise the spare tire, underbody mounted spare tire only.
- Lower the vehicle.


Evaporative Emission Canister Vent Solenoid Valve Replacement 4-Door Utility
Removal Procedure
- Turn OFF the ignition.
- Raise the vehicle. Refer to Lifting and Jacking the Vehicle in General Information.
- Remove the spare tire, underbody mounted spare tire only.
- Disconnect the evaporative emission (EVAP) canister vent valve harness connector.
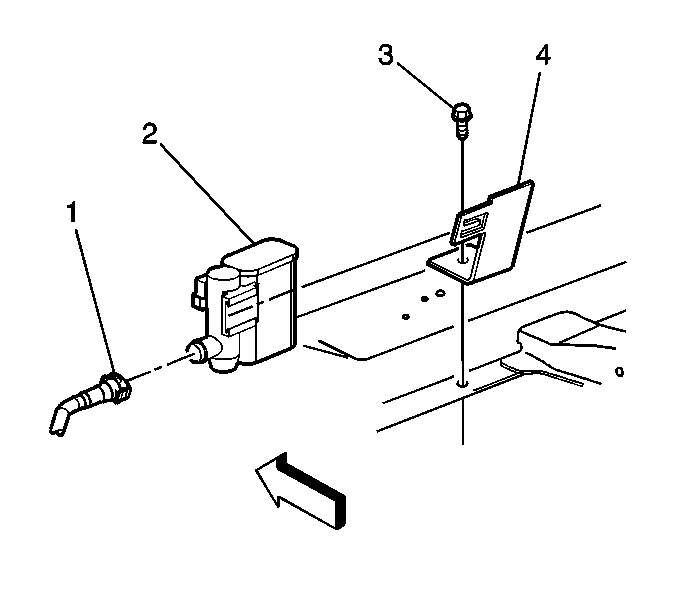
- Disconnect the vent hose (1) from the EVAP canister vent valve (2).
- Release the tang on the vent bracket (4).
- Remove the vent valve (2) from the bracket (4).

Installation Procedure
- Slide the vent valve (2) onto the bracket (4).
- Test the EVAP canister vent valve retention to the vent bracket (4).
- Connect the EVAP vent hose (1) to the EVAP canister vent valve (2).
- Connect the EVAP canister vent valve harness connector.
- Raise the spare tire, underbody mounted spare tire only.
- Lower the vehicle.

