For 1990-2009 cars only
Assist Step Replacement ZR5
Removal Procedure
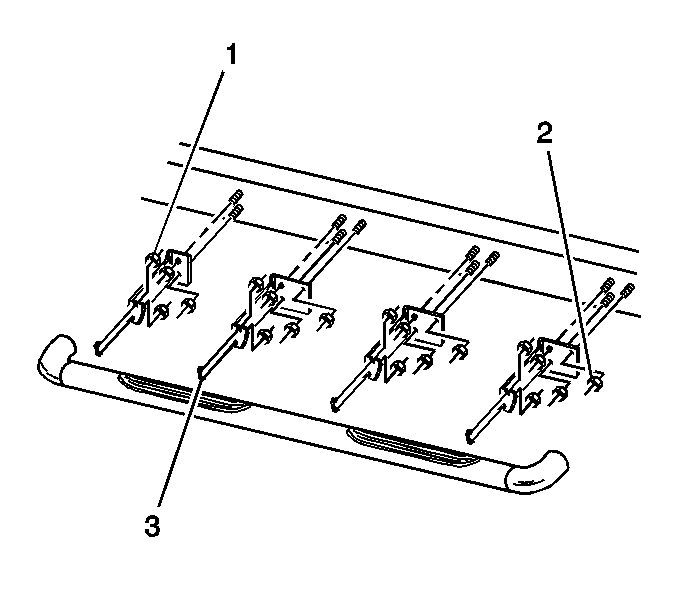
- Remove 8 nuts (1) and 4 U-bolts (3) securing the assist step assembly to the mounting brackets.
- Remove the 11 nuts (2) and 4 brackets.
- Remove the plastic end caps from the assist step assembly, if required.
- Remove the plastic step pads, if required, by breaking the plastic pad from the assist step assembly.

| 3.1. | Remove the 3 screws from the assist step assembly. |
| 3.2. | Remove the plastic end cap by pulling the cap straight out of the step assembly. |
Installation Procedure
- Install new plastic step pads to the assist step assembly by pressing the new pads into place.
- Install the plastic end cap to the assist step assembly.
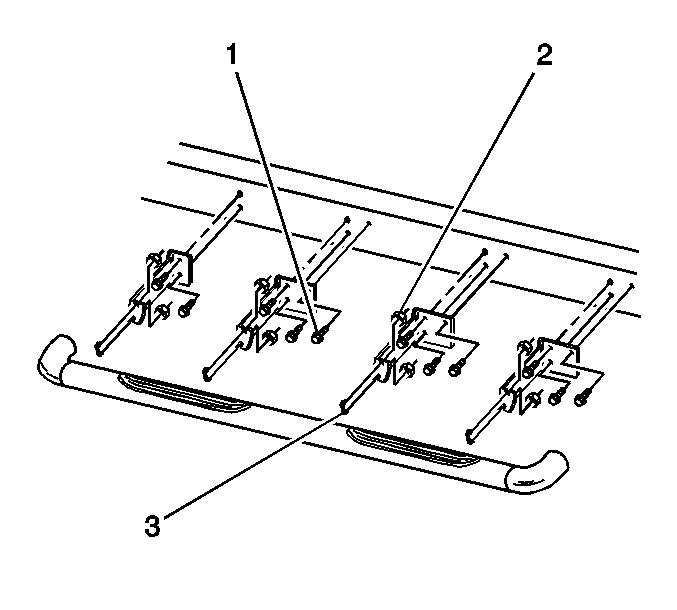
- Install the 4 brackets and 11 nuts (2).
- Install the assist step assembly to the mounting brackets with 4 U-bolts (3) and 8 nuts (1).
- If the studs are bent or missing, use a center punch at the center of the missing location. Using a 12.7 mm (0.5 in) drill, drill a hole.
- Install a rivnut into the frame.
- Install bolt (1) in rivnuts.

| 2.1. | Install the plastic end cap by pressing the cap straight into the assist step assembly. |
| 2.2. | Install 3 screws into the step assembly. |
Notice: Refer to Fastener Notice in the Preface section.
Tighten
Tighten to 35 N·m (26 lb ft).
Tighten
Tighten the step assembly nuts to 20 N·m
(15 lb ft).

Tighten
Tighten to 35 N·m (26 lb ft).
Assist Step Replacement ZR2
Removal Procedure
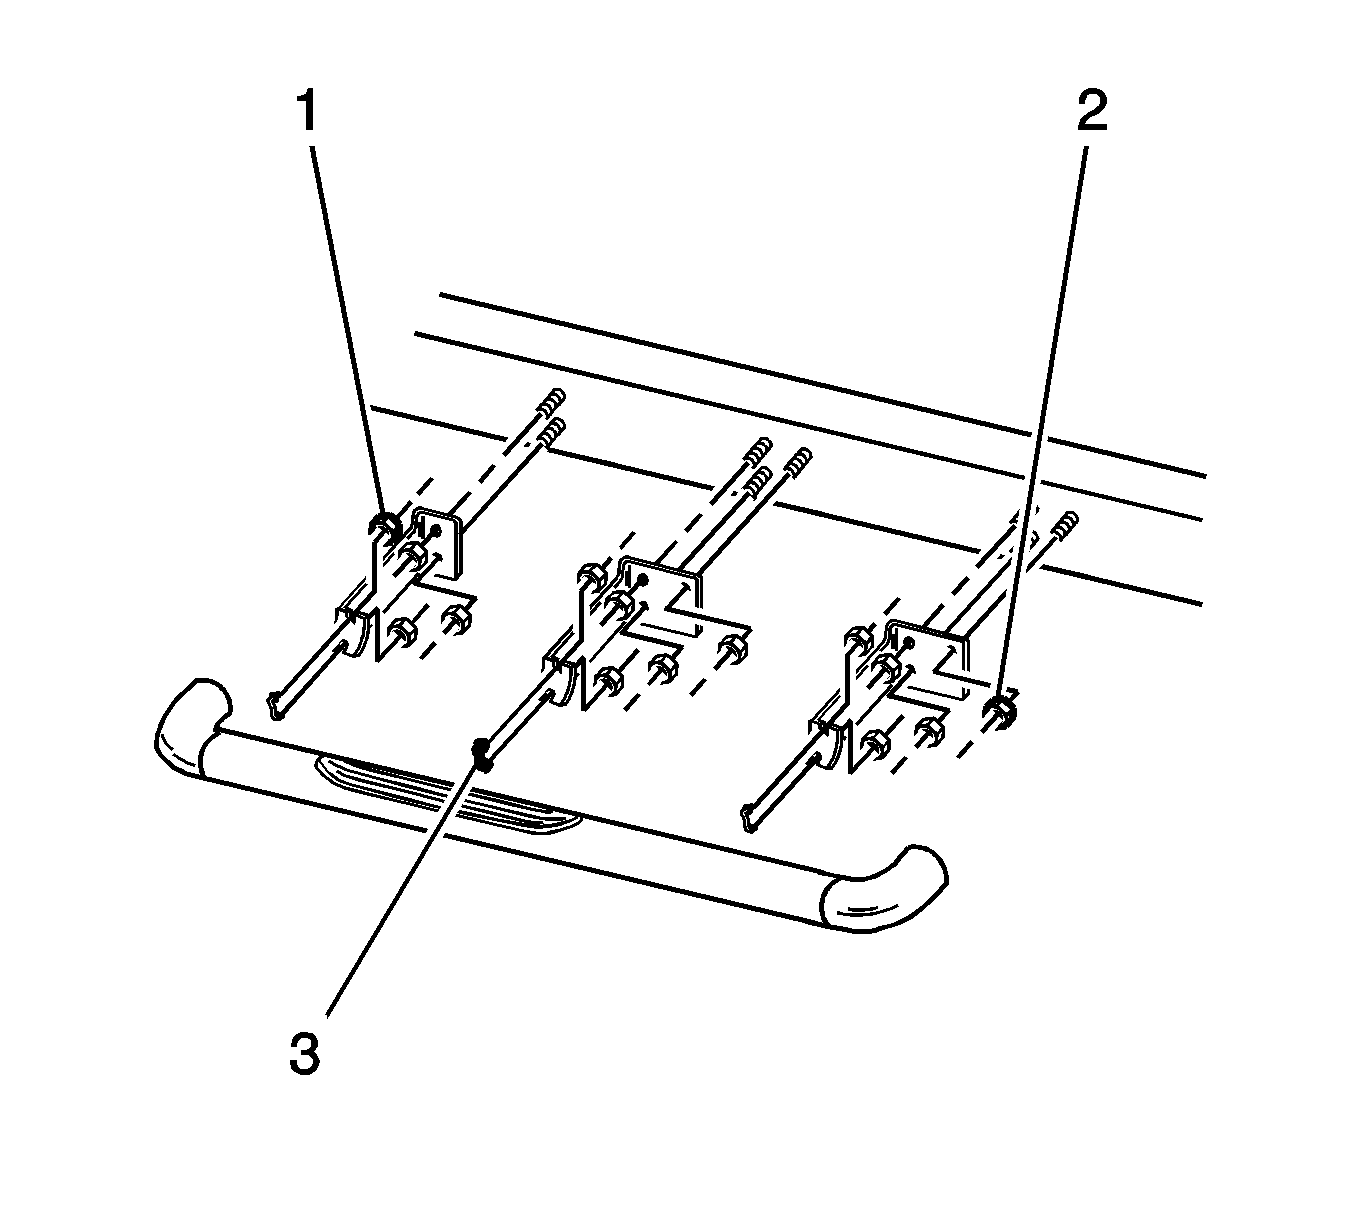
- Remove 6 nuts (1) and 3 U-bolts (3) securing the assist step assembly to the mounting brackets.
- Remove the 8 nuts (2) and 3 brackets.
- Remove the plastic end caps from the assist step assembly, if required.
- Remove the plastic step pads, if required, by breaking the plastic pad from the assist step assembly.

| 3.1. | Remove the 3 screws from the assist step assembly. |
| 3.2. | Remove the plastic end cap by pulling the cap straight out of the step assembly. |
Installation Procedure
- Install new plastic step pads to the assist step assembly by pressing the new pads into place.
- Install the plastic end cap to the assist step assembly.
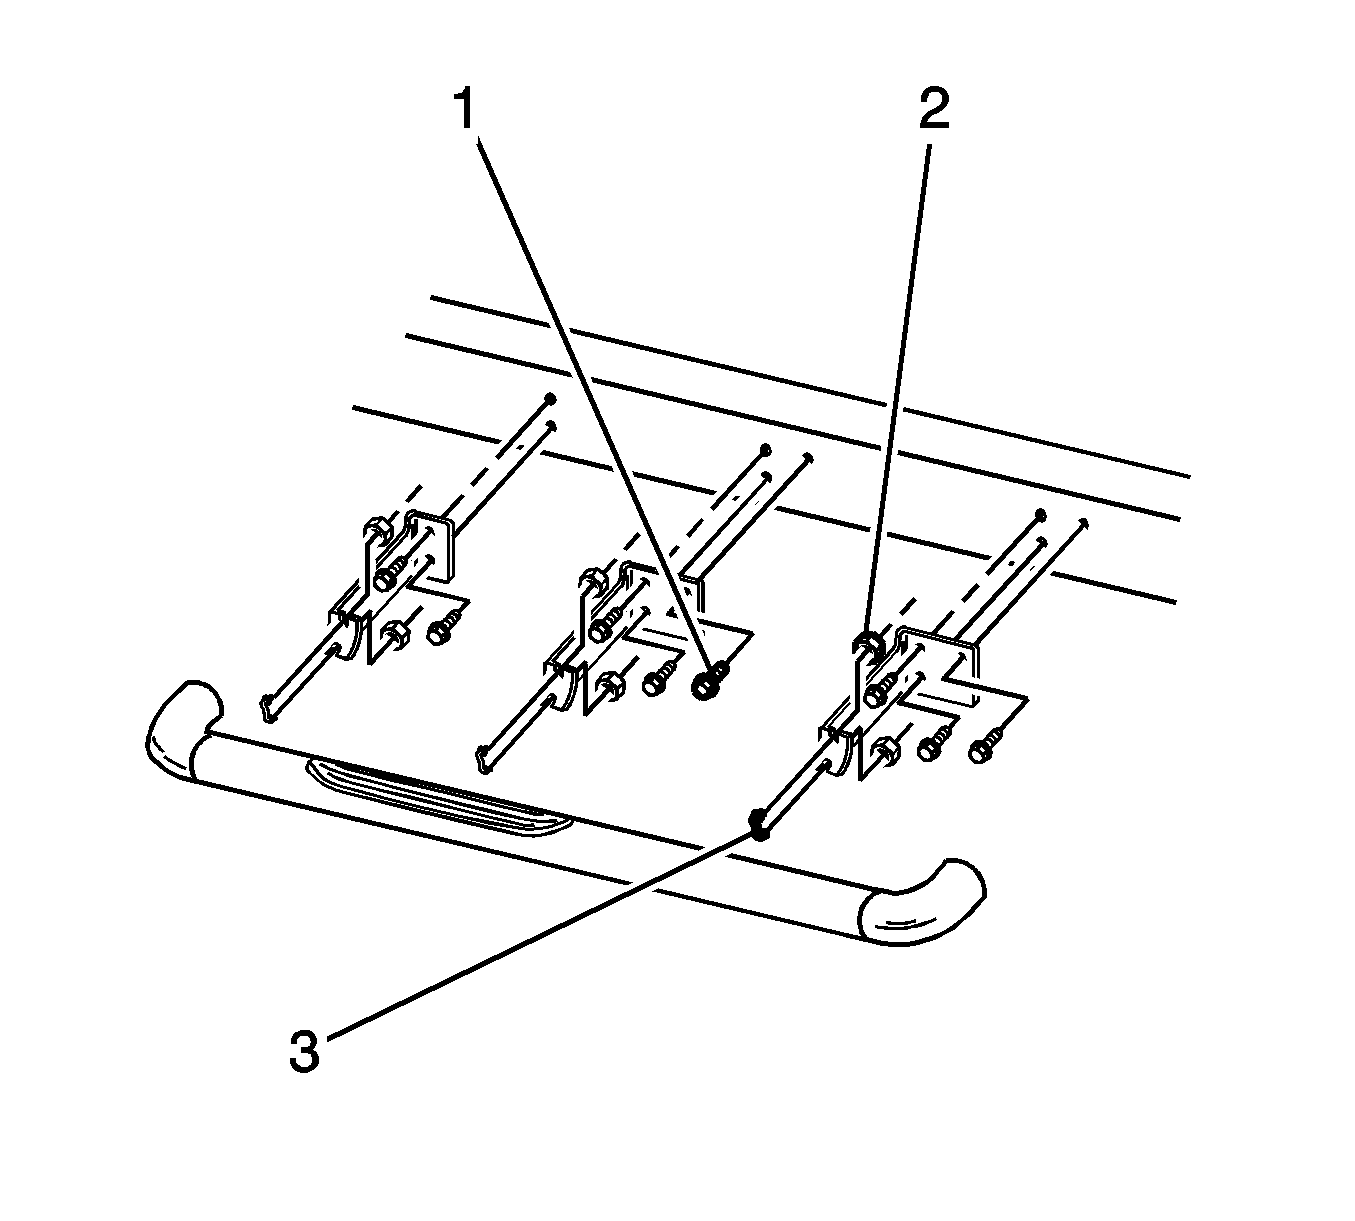
- Install the 3 brackets and 8 nuts (2).
- Install the assist step assembly to the mounting brackets with 3 U-bolts (3) and 6 nuts (1).
- If the studs are bent or missing, use a center punch at the center of the missing location. Using a 12.7 mm (0.5 in) drill, drill a hole.
- Install a rivnut into the frame.
- Install bolt (1) in rivnuts.

| 2.1. | Install the plastic end cap by pressing the cap straight into the assist step assembly. |
| 2.2. | Install 3 screws into the step assembly. |
Notice: Refer to Fastener Notice in the Preface section.
Tighten
Tighten to 35 N·m (26 lb ft).
Tighten
Tighten the step assembly nuts to 20 N·m
(15 lb ft).

Tighten
Tighten to 35 N·m (26 lb ft).
