Removal Procedure
- On vehicles equipped with a manual transmission, remove the shift lever. Refer to Shift Tower Replacement in Manual Transmission - NV 3500.
- On vehicles equipped with an automatic transmission, perform the following steps:
- Disconnect the battery negative cable.
- Disable the passenger side SIR system. Refer to SIR Disabling and Enabling and SIR Disabling and Enabling in SIR.
- Remove the left sound insulator. Refer to Instrument Panel Insulator Panel Replacement - Left Side .
- Remove the right instrument panel sound insulator. Refer to Instrument Panel Insulator Panel Replacement - Right Side .
- If the vehicle is equipped with a multiple CD changer located in the center console, remove the center console. Refer to Front Floor Console Replacement .
- Remove the lower sound insulator. Refer to Instrument Panel Insulator Panel Replacement .
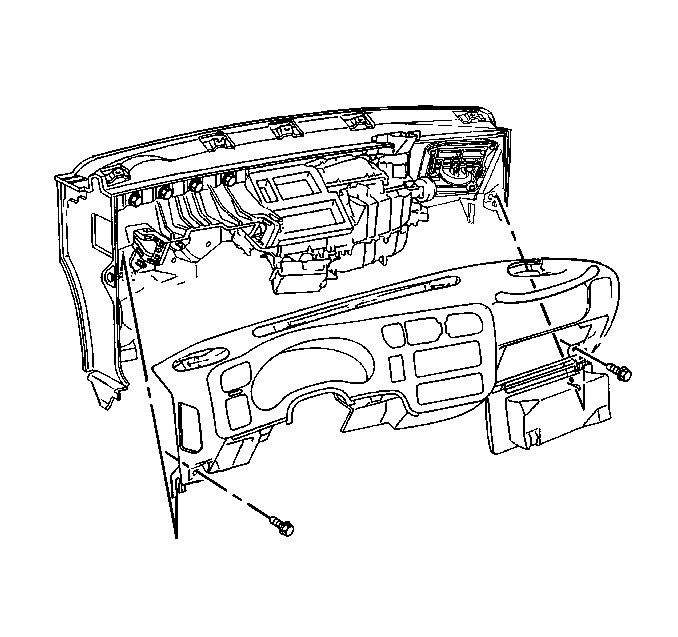
- Remove the lower left instrument panel mounting bolt.
- Remove and retain the instrument panel storage compartment. Refer to Instrument Panel Compartment Door Replacement .
- Remove the lower right instrument panel mounting bolt.
- Remove and retain the left and right speakers and the speaker grilles. Refer to Radio Front Speaker Replacement in Entertainment.
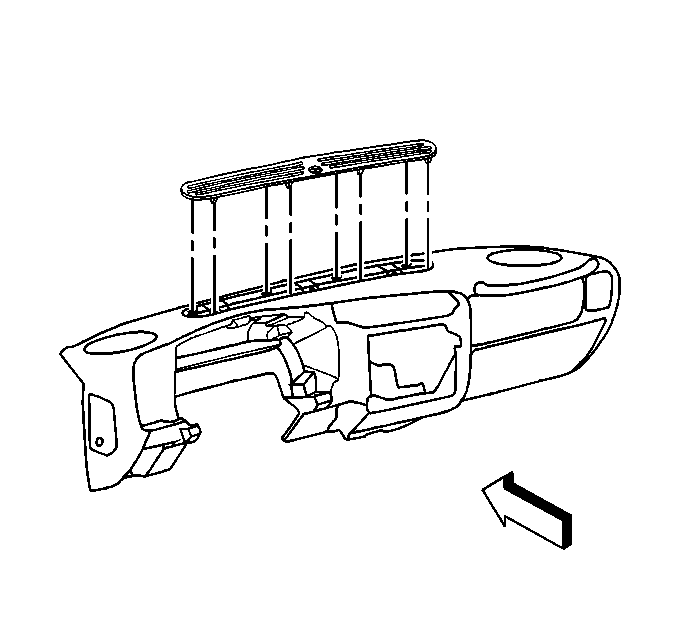
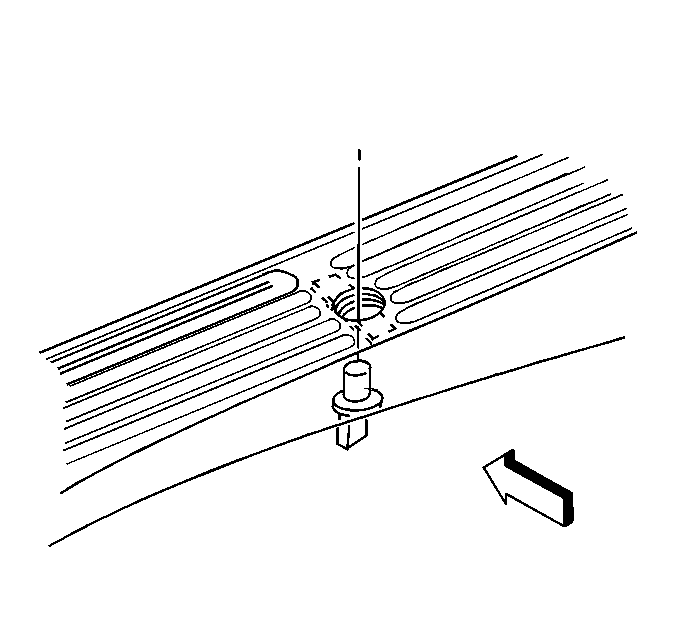
- Use a flat-bladed tool to remove the windshield defroster grille. Retain the windshield defroster grille for use on the replacement I/P carrier.
- If the vehicle is equipped with a sunload sensor, twist the sunload sensor 1/4 turn counterclockwise in order to detach it from the windshield defroster grille. Retain the sunload sensor for use on the replacement I/P carrier.
- Disconnect the brown electrical connector from the BCM.
- Disconnect the purple electrical connector from the BCM.
- Remove the knee bolster. Refer to Knee Bolster Replacement .
- Remove and retain the instrument panel cluster. Refer to Instrument Cluster Replacement .
- Remove and retain the radio. Refer to Radio Replacement in Entertainment.
- Remove and retain the HVAC control assembly. Refer to Heater and Air Conditioning Control Replacement in HVAC Systems - Manual.
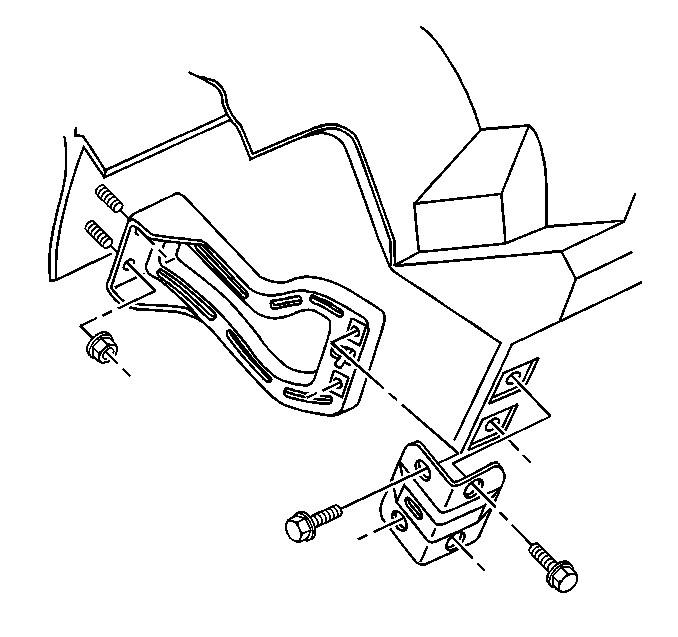
- Remove the left and right instrument panel driver knee bolster brackets.
- Lower the steering column for clearance. Refer to Steering Column Replacement in Steering Wheel and Column.
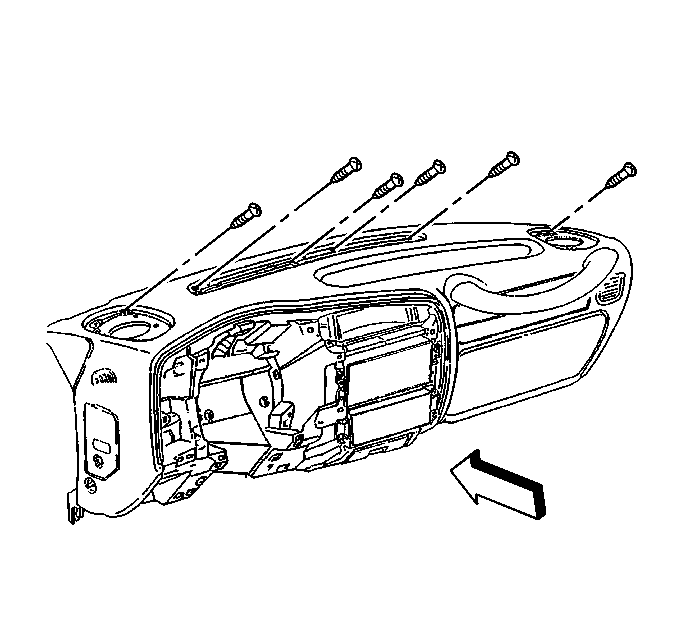
- Remove the top instrument panel screws.
- Roll the instrument panel down.
- Disconnect the electrical connections, as needed.
- Remove the fastener that retains the radio antenna cable to the instrument panel.
- Remove the instrument panel from the vehicle.
- If replacing the instrument panel carrier, retain parts for assembly onto the new instrument panel carrier.
| 2.1. | Apply the park brake. |
| 2.2. | Insert the ignition key and turn the ignition switch to the RUN position. |
| 2.3. | Depress the brake pedal and shift the transmission to the 1 position. |
| 2.4. | Turn the ignition switch to the OFF position. |
Caution: Refer to Battery Disconnect Caution in the Preface section.
Caution: Refer to SIR Caution in the Preface section.
Important: Always disconnect the brown electrical connector from the body control module (BCM) before disconnecting the purple electrical connector from the BCM.
Important: Label all of the connections in order to avoid improper installation.
Installation Procedure
- Install retained parts from the original instrument panel.
- Install the instrument panel to the vehicle.
- Install the fastener that retains the radio antenna cable to the instrument panel.
- Connect the electrical connectors, as needed.
- Roll the instrument panel up.
- Install the top instrument panel screws.
- Raise the steering column into position. Refer to Steering Column Replacement in Steering Wheel and Column.
- Install the left and right instrument panel driver knee bolster brackets.
- Enable the passenger side SIR system. Refer to SIR Disabling and Enabling and SIR Disabling and Enabling in SIR.
- Install the HVAC control assembly to the instrument panel. Refer to Heater and Air Conditioning Control Replacement in HVAC Systems - Manual.
- Install the radio. Refer to Radio Replacement in Entertainment.
- Install the instrument cluster. Refer to Instrument Cluster Replacement .
- Install the knee bolster. Refer to Knee Bolster Replacement .
- Connect the purple electrical connector to the BCM.
- Connect the brown electrical connector to the BCM.
- If the vehicle is equipped with a sunload sensor, install the sensor to the defroster grille by twisting the sensor ¼ turn clockwise.
- Install the windshield defroster grille by carefully pressing the grille into place.
- Install the left and right speakers and the speaker grilles. Refer to Radio Front Speaker Replacement in Entertainment.
- Install the lower right instrument panel mounting bolt.
- Install the instrument panel storage compartment. Refer to Instrument Panel Compartment Door Replacement .
- Install the lower left instrument panel bolt.
- Install the lower sound insulator. Refer to Instrument Panel Insulator Panel Replacement .
- Install the right sound insulator. Refer to Instrument Panel Insulator Panel Replacement - Right Side .
- Install the center console to the vehicle, if removed. Refer to Front Floor Console Replacement .
- Install the left sound insulator. Refer to Instrument Panel Insulator Panel Replacement - Left Side .
- Connect the battery negative cable.
- On vehicles equipped with an automatic transmission, perform the following steps:
- On vehicles equipped with a manual transmission, install the shift lever. Refer to Shift Tower Replacement in Manual Transmission - NV 3500.

Notice: Refer to Fastener Notice in the Preface section.
Tighten
Tighten the fastener to 1.9 N·m (17 lb in).
Tighten
Tighten the screws to 1.9 N·m (17 lb in).

Tighten
Tighten the screws/bolts to 6.3 N·m (56 lb in).

Important: Always connect the purple electrical connector to the body control module (BCM) before connecting the brown electrical connector to the BCM.


Tighten
Tighten the bolt to 11.5 N·m (102 lb in).
Tighten
Tighten the bolt to 11.5 N·m (102 lb in).
| 26.1. | Turn the ignition switch to the RUN position. |
| 26.2. | Depress the brake pedal and shift the transmission to the PARK position. |
| 26.3. | Release the park brake. |
