SPARE TIRE CARRIER RATTLE CARRIER LATCH/BUMPER ADJ.

Subject: SPARE TIRE CARRIER RATTLE
Model and Year: 1990-91 S/T TRUCKS
FOR ADDITIONAL INFORMATION ON SPARE TIRE CARRIER AND ENDGATE RATTLES, PLEASE REFERENCE DEALER SERVICE BULLETIN NO. 90-33O-3E, DATED AUGUST, 1990 AND CHEVROLET DCS MESSAGE NO. 01-330, DATED NOVEMBER 16,1990.1990.
Some owners of 1990-91 S/T utility vehicles equipped with factory installed RPO P16 may experience a rattle condition from the spare tire carrier assembly, while driving. This condition can occur if the spare tire carrier second (primary) latch position is not engaged and/or the rubber bumper assembly is improperly adjusted.
VEHICLES INVOLVED
NOTE: All 1991 Chevrolet vehicles were equipped with factory installed rubber bumper assemblies.
1990 model vehicles built prior to the following VIN's were not factory equipped with a rubber bumper assembly:
Shreveport: 1GNCS18ZXM8104025
PontiacWest: 1GNCT18Z0M0101419
Moraine: 1GNDT13Z6M2115163
(Current design carrier assembly arms with rubber bumpers may have been installed by dealers per Dealer Service Bulletin No.90-330-3E, dated dated August 1990.
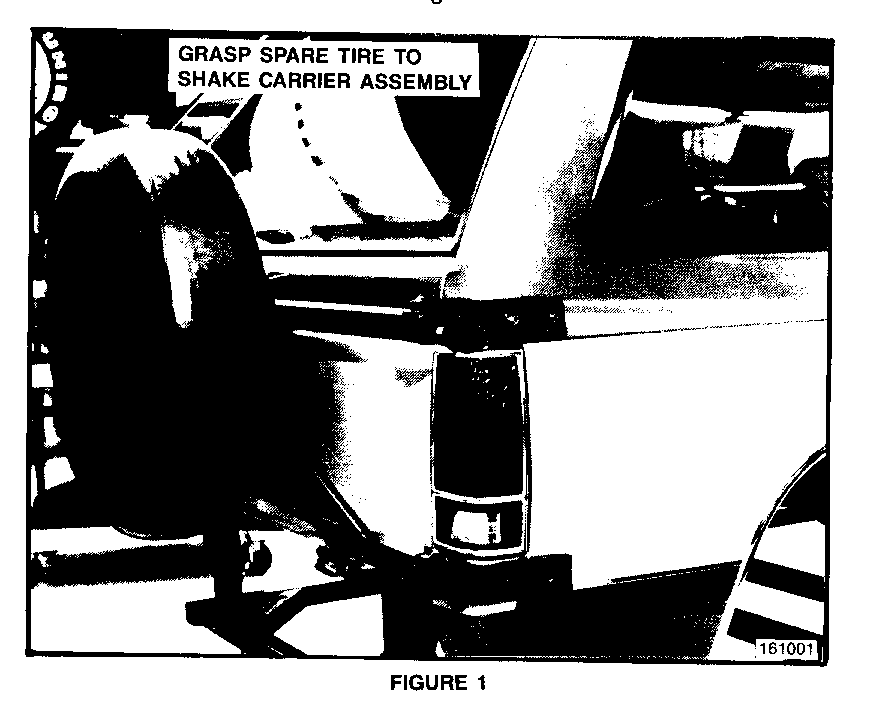
To correct, it is necessary to insure owners are familiar with the double position latch mechanism and that the carrier is fully closed engaging the second latch position (Figure 1).
SERVICE PROCEDURE (Figures 1-4):
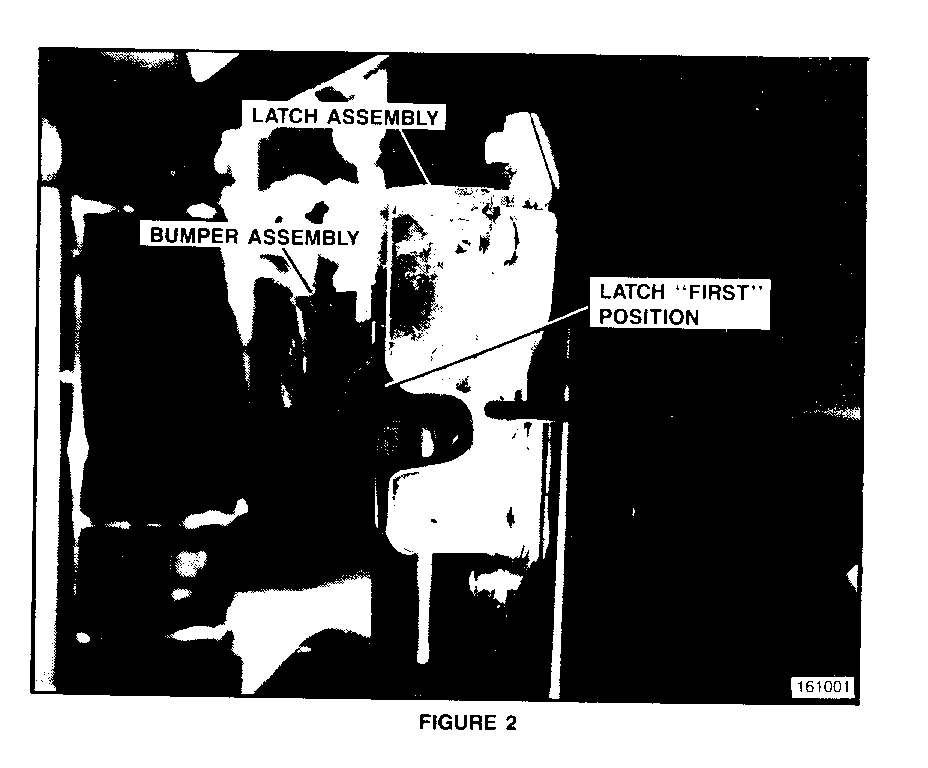
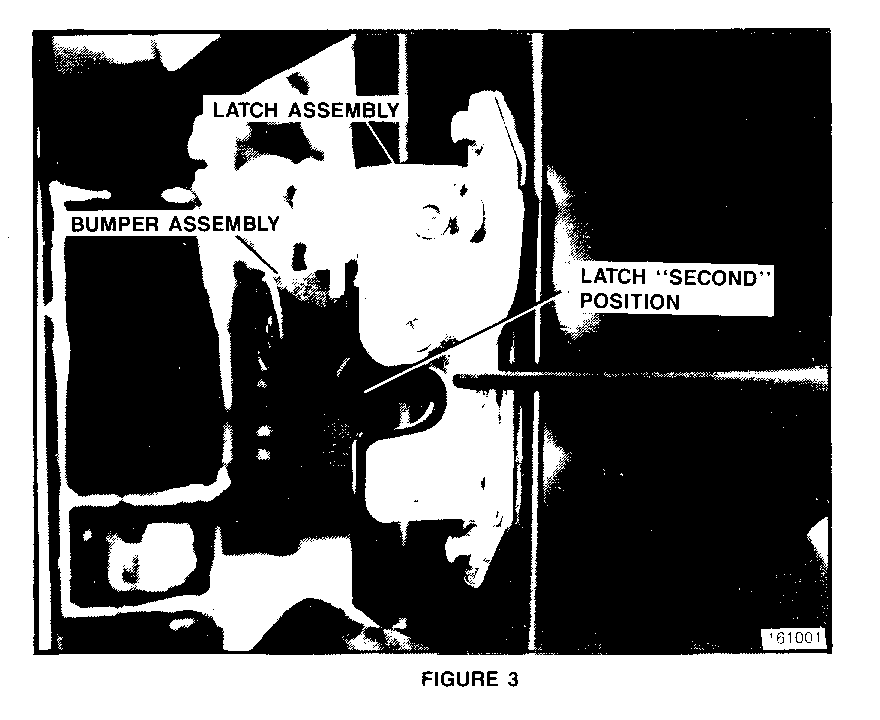
1. Grasp the spare tire and shake the carrier assembly (Figure 1) to determine if the second latch position is engaged. If the second latch position is NOT engaged, the spare tire carrier assembly will be loose and rattle. If the second latch position IS engaged, the spare tire carrier should not move (Figures 2-3).
2. If the carrier is improperly shut, open and close engaging the second latch position. Recheck by grasping the spare tire and shaking the carrier assembly to insure the carrier is properly closed.
DRIVER/OWNER MAY NOT BE AWARE OF SECOND LATCH POSITION AND SHOULD BE INFORMED OF PROPER CLOSING INSTRUCTIONS.
3. If a rattle condition still exists, the bumper may be misadjusted. Test drive the vehicle to determine if the rattle has been eliminated.
NOTE: If rattle has been eliminated with proper closing, it is NOT necessary to perform Step 4.
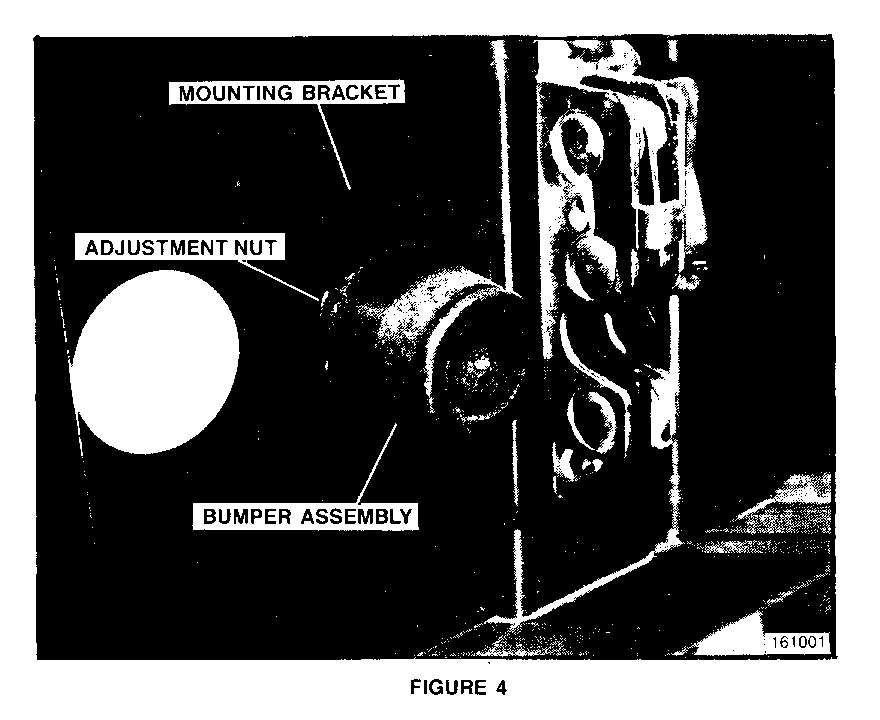
4. If a rattle still exists with second latch position engaged, open the spare tire carrier and loosen the adjustment nut located on the bumper assembly (Figure 4).
Close the carrier assembly, engaging the second latch position, and adjust the rubber bumper until it contacts the striker plate surface on the tailgate. To complete the adjustment, open the carrier and rotate the bumper counterclockwise an additional one and one-half (1-1/2) turns preloading the bumper against the striker plate surface.
Tighten the adjustment nut against the face of the mounting bracket. Torque the adjustment nut to 25-35 N.m (1 8-26 lbs. ft.).
WARRANTY INFORMATION
For vehicles under warranty use: Labor Operation: T7026 Labor Time: 0.5 hr. Trouble Code: 92
NOTE: Labor Operation is coded to base vehicle coverage in the warranty system.


General Motors bulletins are intended for use by professional technicians, not a "do-it-yourselfer". They are written to inform those technicians of conditions that may occur on some vehicles, or to provide information that could assist in the proper service of a vehicle. Properly trained technicians have the equipment, tools, safety instructions and know-how to do a job properly and safely. If a condition is described, do not assume that the bulletin applies to your vehicle, or that your vehicle will have that condition. See a General Motors dealer servicing your brand of General Motors vehicle for information on whether your vehicle may benefit from the information.
