Removal Procedure
Notice: If the engine is damaged internally and a new engine assembly is installed
in the vehicle, ensure that all foreign material is flushed out of the cooling
system. You must also flush out the oil cooler system. Failure to rid the
oil cooler system of debris can result in engine damage.
Tool Required
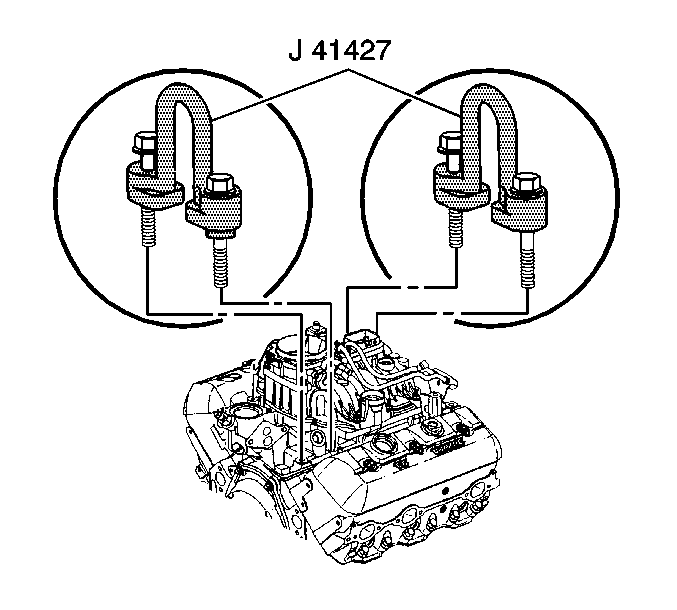
J 41427 Universal
Lift Bracket
- Raise the vehicle.
- Remove the underbody shield. Refer to Steering Linkage.
- Remove the braces from the engine to the transmission.
- Disconnect the exhaust pipe from the exhaust manifolds. Refer
to Engine Exhaust.
- Disconnect the slave cylinder or hydraulic line if the cylinder
is mounted inside the bellhousing. Refer to Section 7.
- Disconnect the fuel line clamp at the bellhousing.
- Remove the starter. Refer to Engine Electrical.
- Disconnect the torque convertor bolts from the flywheel. Refer
to
Transmission Replacement
.
- Disconnect the front propeller shaft (4WD only). Refer to Propeller
Shaft.
- Remove the oil filter.
- Remove the transmission to engine bolts.
| • | Remove all the transmission to engine bolts except for the upper
left bolt. |

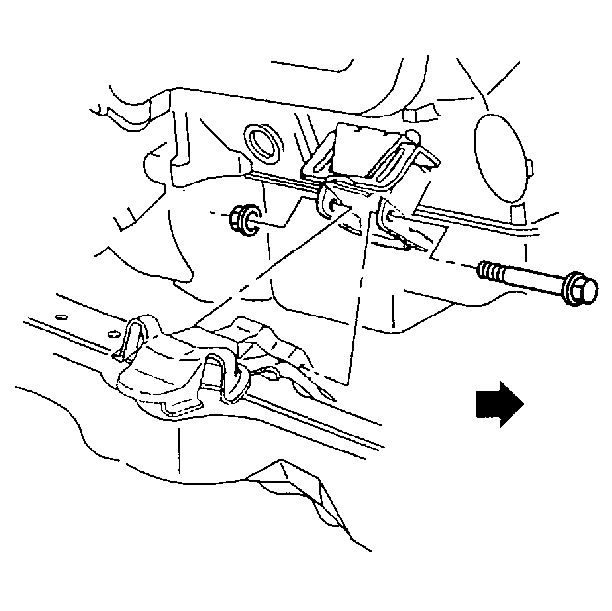
- Remove the front engine mount through bolts.

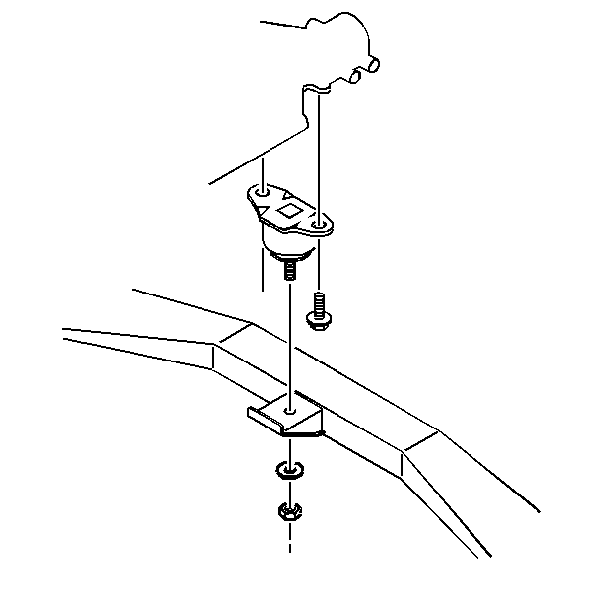
- Remove the rear engine mount crossbar nut and washer.
- Lower the vehicle.
- Remove the battery ground cable at the engine. Refer to Engine
Electrical.
- Remove the water pump pulley.
- Remove the air conditioning compressor and bracket. Refer to Heating,
Ventilation and Air Conditioning.
- Remove the radiator. Refer to
Radiator Replacement
in Engine Cooling.
- Disconnect the power steering hoses from the power steering gear
and cap them. Refer to Power Steering Gear and Pump.
- Disconnect the heater hoses from the engine. Refer to Heater and
Ventilation.
- Disconnect the following items:
- Remove the distributor. Refer to Engine Electrical.
- Support the transmission with a jack and remove the final transmission
to engine bolt.
- Install J 41427 to the right rear and the left front of
the intake manifold.

Tighten
Retaining bolts to 15 N·m(11 lb. ft.)
- Use an engine lifting device and remove the engine from the vehicle.
Installation Procedure
Notice: If the engine is damaged internally and a new engine assembly is installed
in the vehicle, ensure that all foreign material is flushed out of the cooling
system. You must also flush out the oil cooler system. Failure to rid the
oil cooler system of debris can result in engine damage.
Tool Required
J 41427 Universal
Lift Bracket
- Install the engine into the vehicle.
- Install the left upper transmission to engine bolt.

- Install the front engine mount through bolts and nuts.
Tighten
| • | Tighten the bolts to 66 N·m (49 lb ft). |
| • | Tighten the nuts to 56 N·m (41 lb ft). |
- Remove the universal lift brackets and install the intake manifold
bolts.
- Install the distributor. Refer to Engine Electrical.
- Install the following items:
- Connect the heater hoses to the engine. Refer to Heater and Ventilation.
- Install the power steering hoses. Refer to Power Steering Gear
and Pump.
- Install the radiator. Refer to
Radiator Replacement
in Engine Cooling.
- Install the air conditioning compressor and bracket. Refer to
Heater and Ventilation.
- Install the water pump pulley.
- Raise the vehicle.
- Install the battery ground cable at the engine.
- Install the remaining transmission to engine bolts.

- Install the rear engine mount crossbar nut and washer.
Tighten
Tighten the nut to 45 N·m (33 lb ft).
- Install the oil filter.
- Connect the torque convertor bolts to the flywheel. Refer to
Transmission Replacement
.
- Install the front propeller shaft (4WD only). Refer to Propeller
Shaft.
- Install the starter. Refer to Engine Electrical.
- Connect the fuel line clamp at the bellhousing.
- Connect the slave cylinder or hydraulic line if the cylinder is
mounted inside the bellhousing. Refer to
Transmission Replacement
.
- Connect the exhaust pipe to the exhaust manifolds. Refer to Engine
Exhaust.
- Install the braces from the engine to the transmission.
- Install the underbody shield. Refer to Steering Linkage.
- Lower the vehicle
- Fill the crankcase with oil.
- Connect the negative battery cable.


